The Easiest Pocket Pack Tissue Holder Ever
/How to make the easiest pocket tissue holder ever!
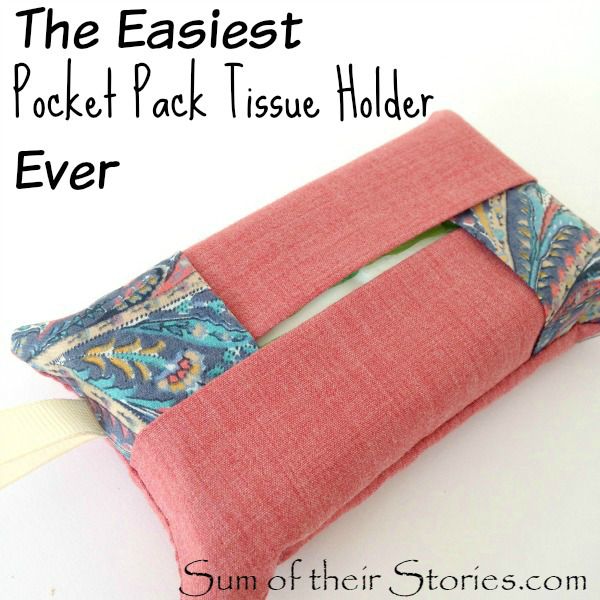

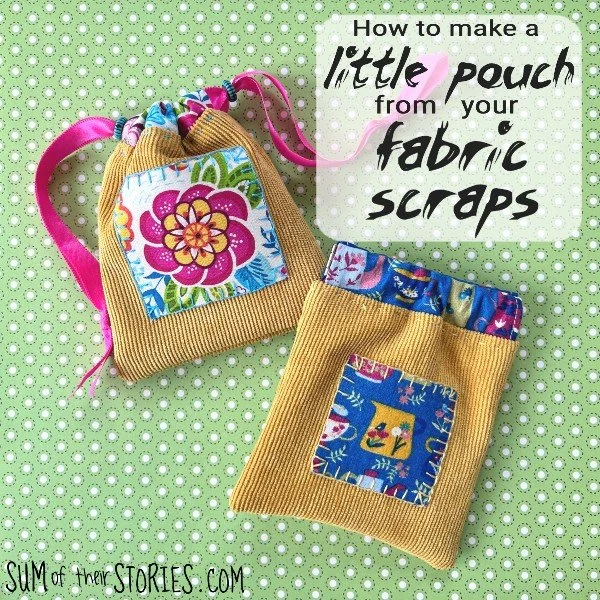
These little pouches to keep a pocket pack of tissues (or kleenex) in are so quick and easy to make and they are a fabulous fabric scrap busting project. Once you’ve made one, you’ll want to make a whole bunch for all your friends and family!
A few weeks ago I finally got round to sorting out my fabric stash. I tend to keep it all - big bits, little bits, teeny tiny left overs from all the sewing I've ever done, charity shop bargains that I think I might make into something else one day. Plus I inherited quite a bit from my mum and my nan who both sewed a lot.
I got it all out, thinking I would be ruthless, get rid of all the bits too small to actually do anything with.
It looked like this:
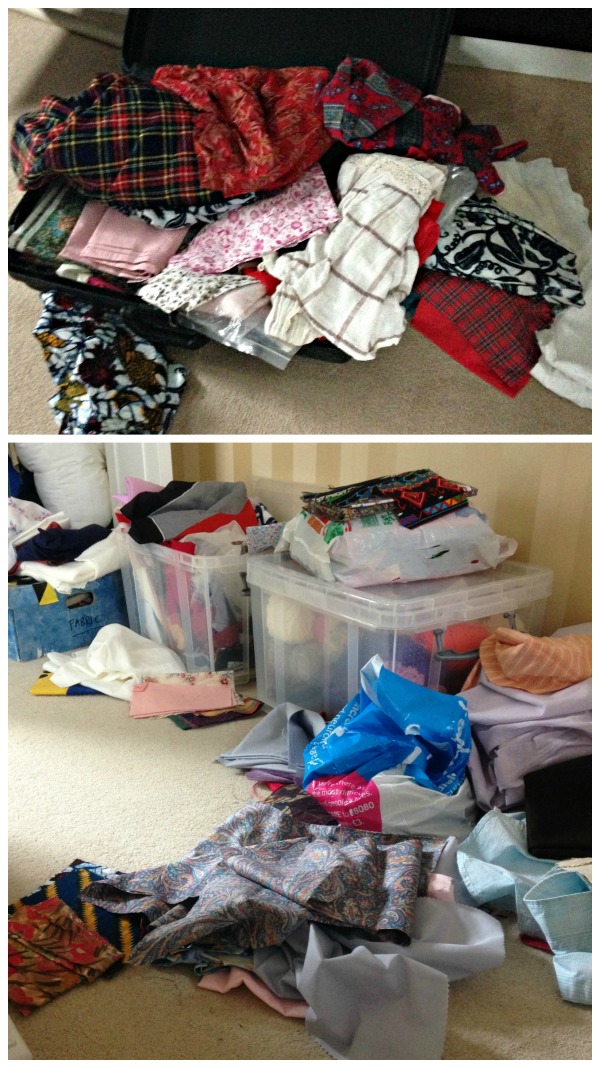
Oh dear, oh dear, oh dear! Can you tell where I was sitting as I got it all out around me!
The trouble with fabric is that even tiny bits COULD be made into something. To throw it away just seems so wrong. So instead I decided I'm going to "Sew my Stash" and started looking on Pinterest for quick ideas to use these tiny bits. I found a cute folded coaster idea and from there a folded fabric tissue pouch. All I could find at the time was one of those long pins with simple step by step but it didn't lead anywhere, so I played about a bit and took some photos as I went to show you how, just in case this is something you've not seen before either.
I made LOADS, I'm not kidding, if you know me in real life there is a good chance you will get one of these as part of your next birthday present! The first one (photographed for the tutorial) I added a length of elastic on the back for a little bottle of hand sanitiser, that is completely optional, just miss it out if you don't want that.
How to sew the easiest pocket pack tissue holder
To sew an easy Pocket Pack Tissue Pouch you will need:

Fabric:
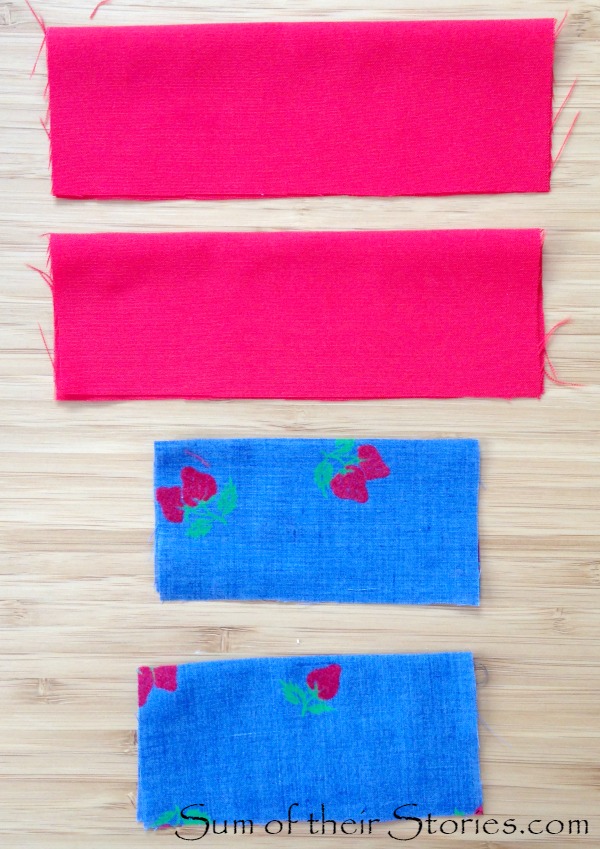
3 pieces 6" x 4"
2 pieces 4" x 4"
Optional A length of ribbon, approx 5" ish
Optional A length of elastic, this only has to be 4". Mine in the photo is way longer, I ended up trimming it off.
The ribbon is to make the hanging loop. The elastic is so you can add a travel sized bottle of hand sanitiser to the back if you’d like to. Both are completely optional, just miss them out if you don’t want them.
Prepare the fabric pieces
Fold 2 of the 6” x 4” pieces in half. Fold both of the 4"x4" pieces in half also. Press them all with the iron.
Assemble the pocket pack tissue holder
Now you just layer the pieces up.
Lay the remaining unfolded 6"x4" pieces on the table RIGHT SIDE UP, this is the back of the tissue pouch.
1) If using them, place the elastic and the ribbon (folded in half) onto the back
2) to 5) lay the folded fabric pieces on as shown in the photos below, making sure the folded edge is always to the middle
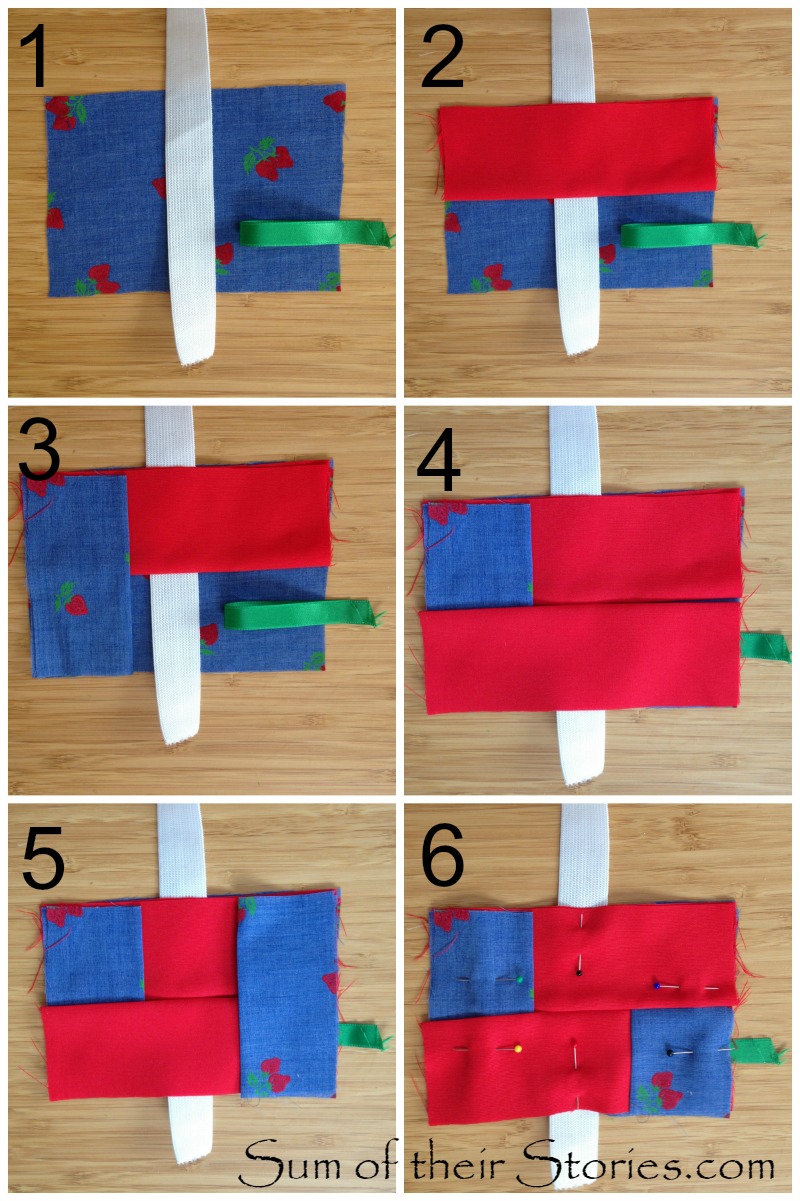
6) lift the corner of the first piece and tuck the last piece under (that's in the top right corner of these photos) then pin to hold everything in place
Sew the pouch
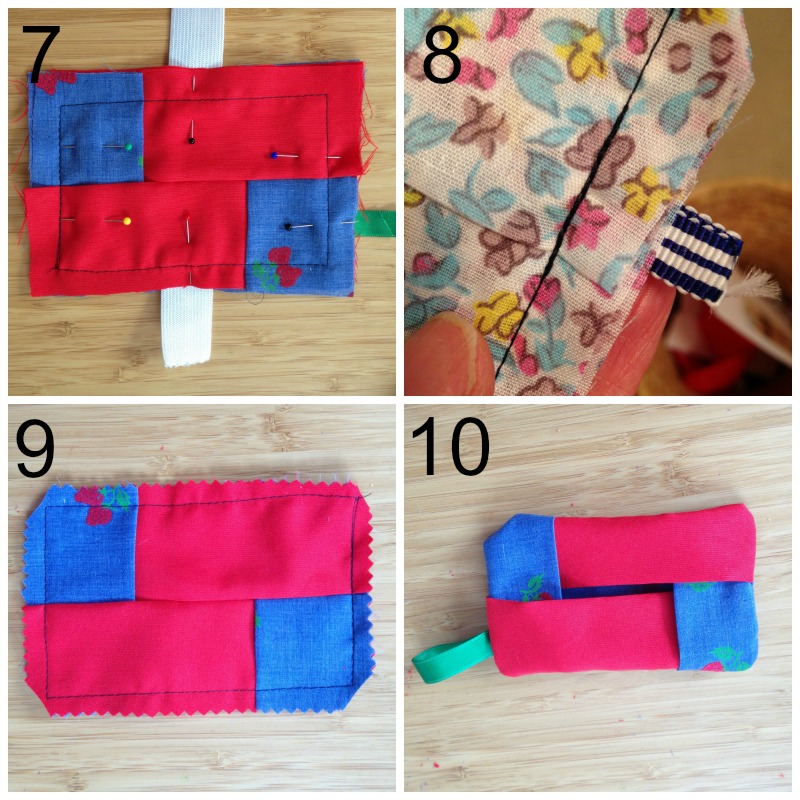
7) stitch all the way round leaving a 1/2" seam allowance -
you will want to stitch a little straighter than I did!
8) if you are adding a ribbon tag, when you get to it just reverse back over where the ribbon is just to reinforce it, then carry on
9) trim the corners as shown and the seam allowance. You can neaten the raw edge however you like, I used my pinking shears as you can see
10) turn the pouch out through the gap in the middle
Use something pointy to poke the corners into shape, a chop stick or pen with the lid on. DO NOT jam your fabric scissors into the corner too hard or your might do this:

Ops! I make these mistakes so you don’t have to!
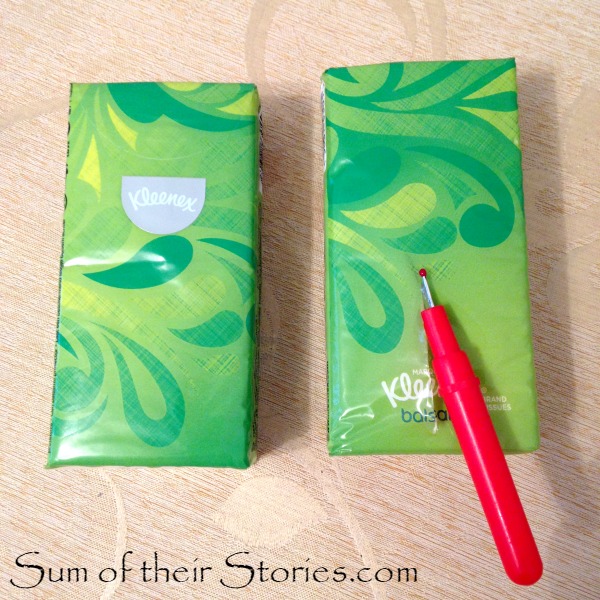
Whilst making these tissue pack holders I discovered that some tissue packs open at the end now, rather than in the middle as they used to. My seam ripper turned out to be perfect for making a middle opening to make the tissues work with the pouches I had just made.
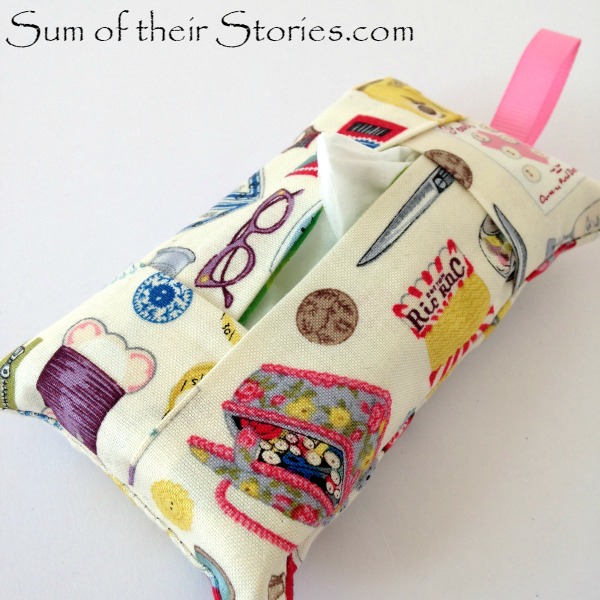
All that’s left is to squeeze the tissues into the pouch and that's it - done! The tissues will be a snug fit but that’s what we want, you don’t want the pack sliding around and falling out as the tissues get used.
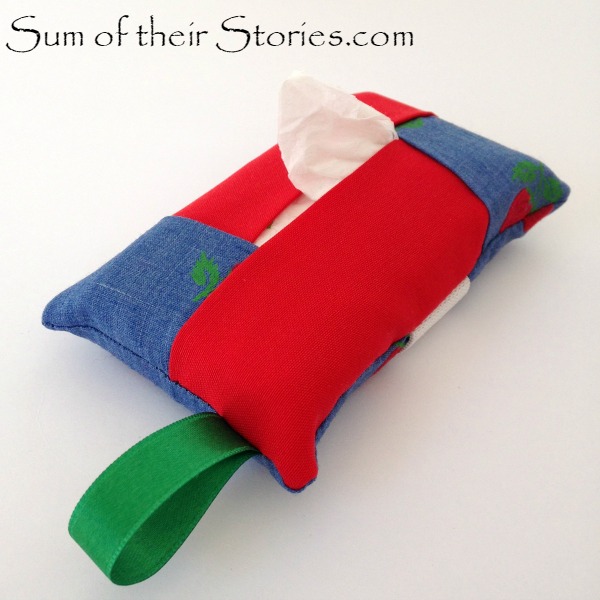
I am a little disappointed that I wasn't more careful thinking about the placement of the strawberries on this tissue holder, they are all rather hidden on the front. Just something you might want to bear in mind when making your tissue pouches if you are using a cute print.
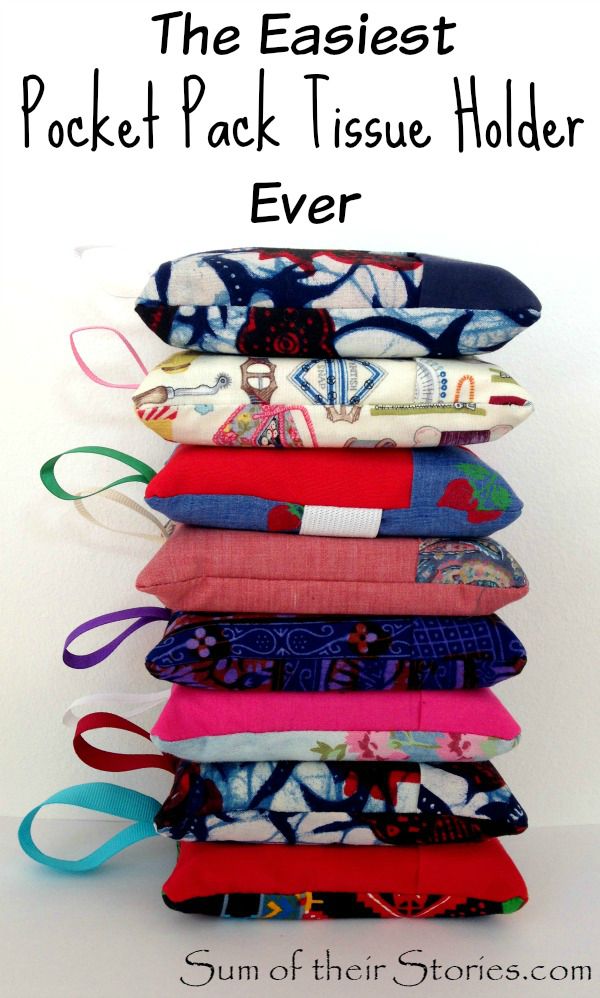
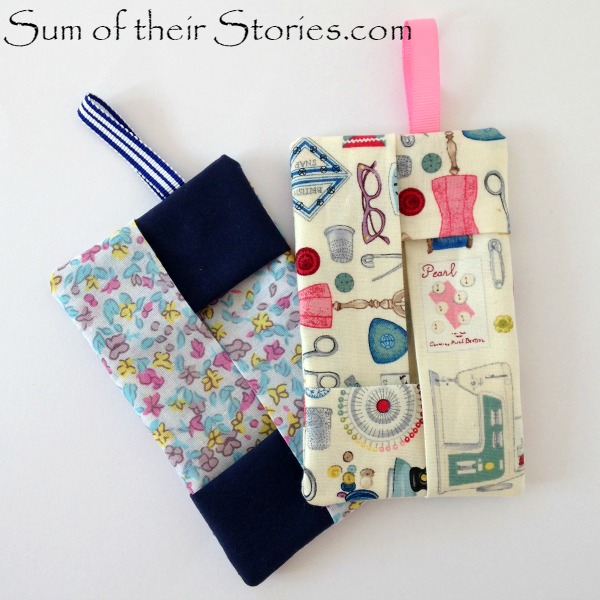
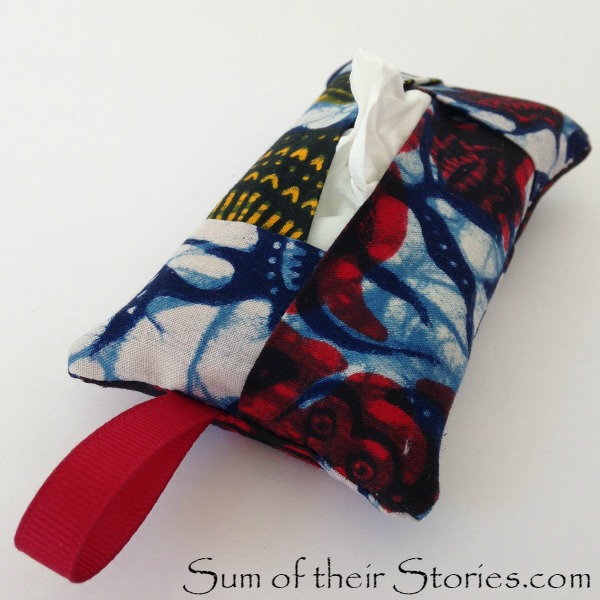
This is just a small selection of the ones I made, the really are very addictive to make! You can see I didn't measure the ribbon loops so the length varies. I only added the elastic on the first pouch I made, I am keeping my eyes open for prettier elastic for the next batch. I think a colourful or lace elastic would work really well.
You can use 5 different fabrics to make your tissue pack holders, just 2 or 3 complementary ones or have all the pieces from the same fabric, whatever you have that needs using up.
These little pocket pack tissue holders are so quick and easy to make you can whip up a whole load in no time at all. They make perfect little gifts, stocking fillers, teacher gifts etc and always sell well at craft fairs if you need a simple fundraiser idea.
I've made tissue pack holders before, using the more traditional method.

I made this one for my mum many, many years ago, she always had it with her in her handbag. I can't bring myself to use it so I keep it in a little box of her things.
I love this easy folded method so much more. It’s much quicker and the raw edges inside are less visible as they are tucked in further.

I hope you enjoy making these little tissue pouches as much as I have.
These pocket pack tissue holders are a perfect sewing project for beginners. If you are just thinking about taking up sewing as a hobby then you might find the article I put together on “What you need to get started sewing” helpful. I list all the equipment that you’ll need, the essentials that you can’t really manage without.
I have lots more sewing ideas, some of which are great for scrap busting - you can find them here
Julie
I'll be linking up at these link parties
You might also like to check out some more of my easy sewing projects: