Makerly Craft Subscription Box Review - Punch Needle Craft
/
Sponsored post - Makerly Crafts have provided me with a subscription box in return for an honest review.
Craft subscription boxes are such a fun way to try a new craft. I was offered the chance to review one of the monthly craft boxes from Makerly Crafts this July. The boxes are different each month giving you a chance to try all sorts of crafts, each one contains everything you need to complete a couple of projects.
Opening it is like opening a present, there is even some cute tissue paper confetti.
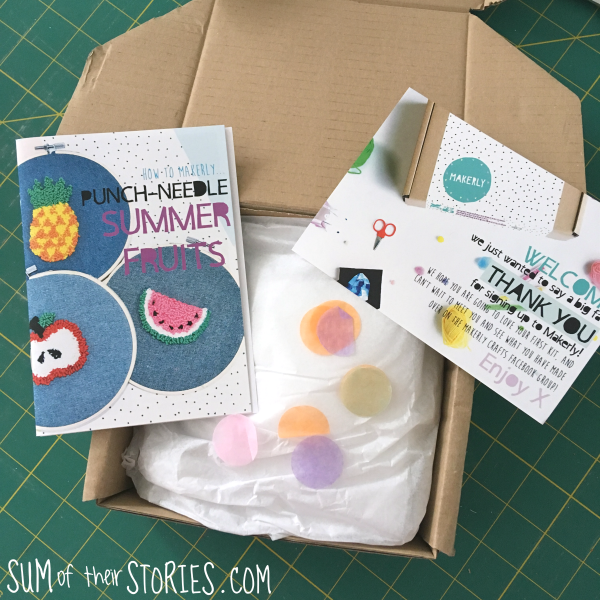
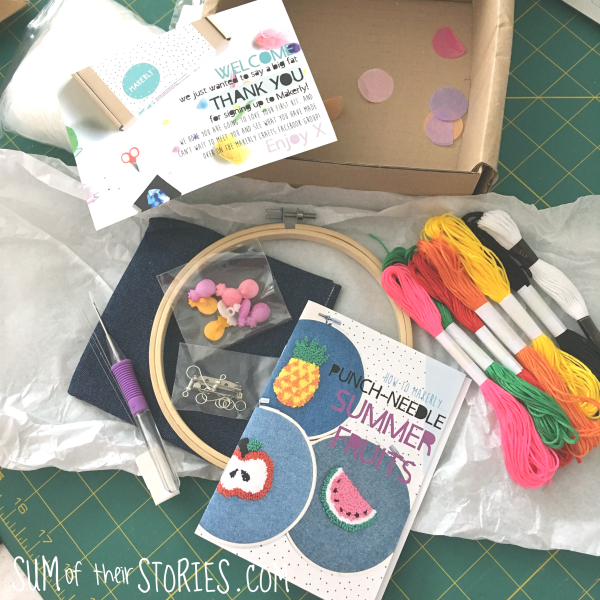
In this kit there was:
Fabric
An embroidery hoop
A punch needle
7 skeins of embroidery thread
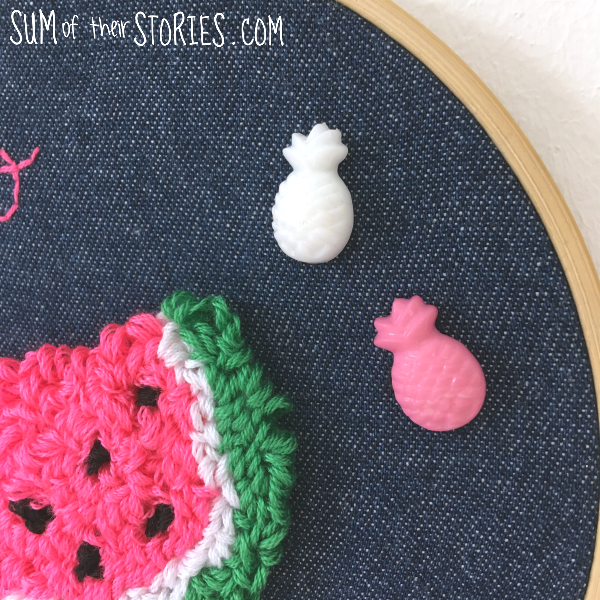
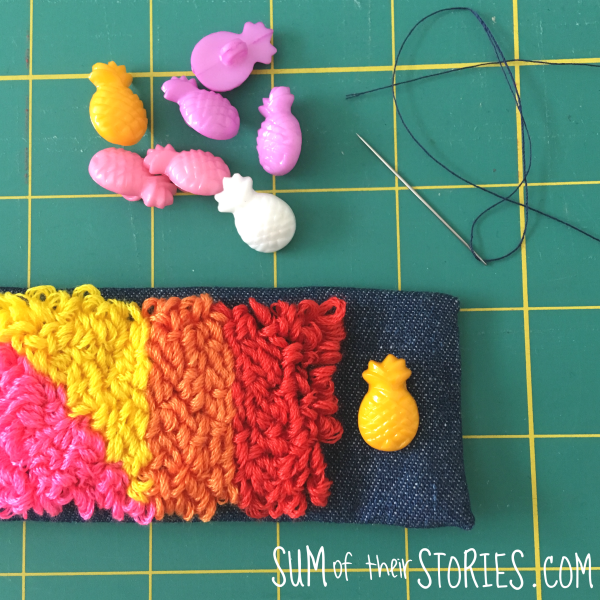
A packet of pineapple buttons
Brooch and earring finding
Instruction Booklet
A design sheet
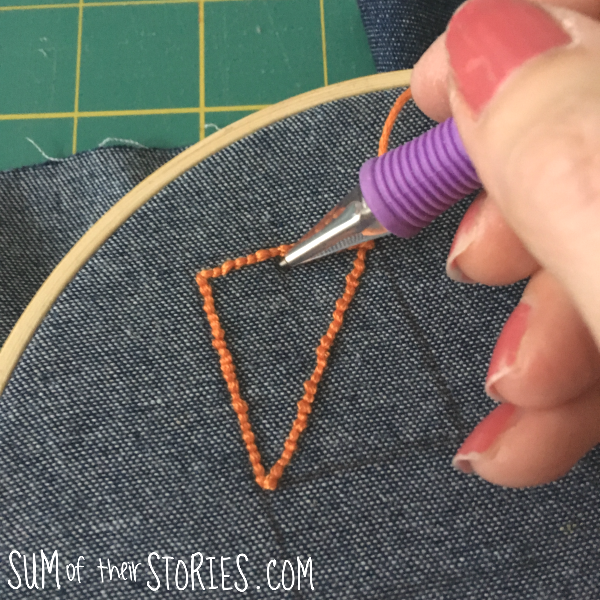
Punch needle embroidery is not something I've ever tried before so I was excited to get started.
The instructions were clear, the needle was pretty easy to thread once you read what to do properly.
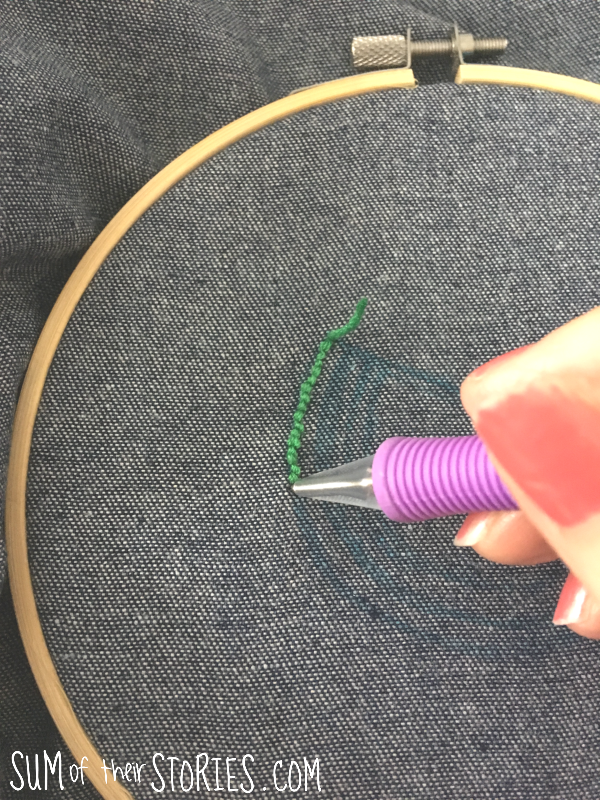
I started with one of the ideas from the design sheet, a summery slice of watermelon. You work the design from the back, so when you turn it over you have all these gorgeous loops.
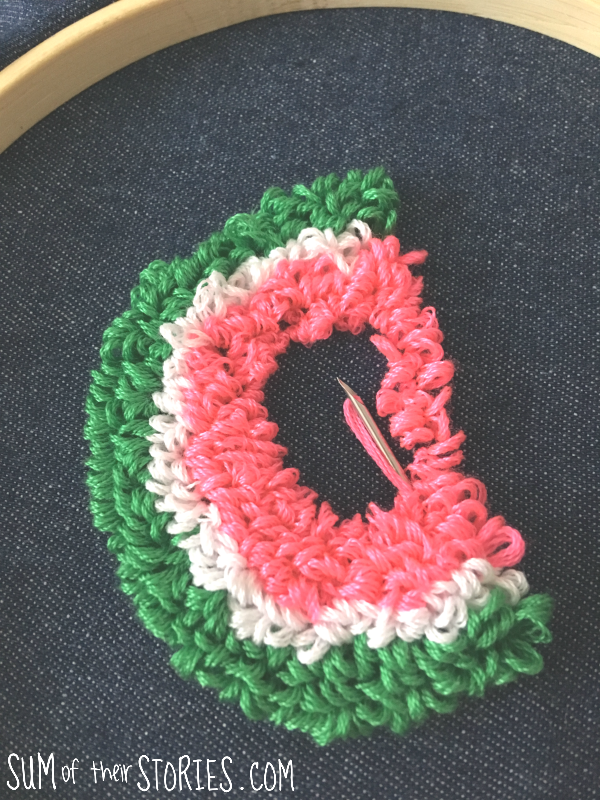
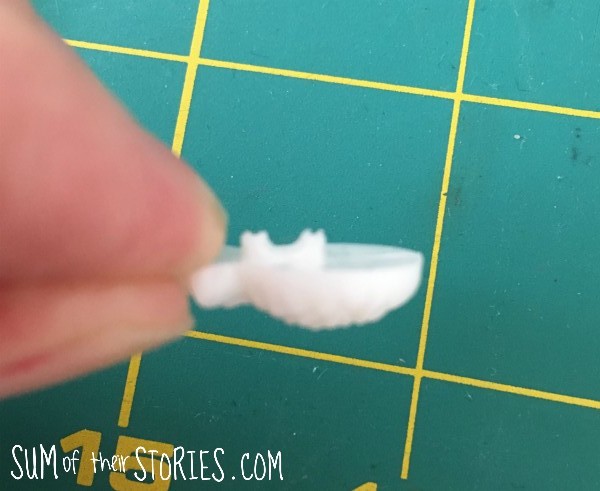
When I'd finished the watermelon, I decided to keep it simple and just frame it in the embroidery hoop provided. I added some simple backstitch words with a little of the pink thread using only 2 strands. Then I thought I'd pop on a couple of the cute little pineapple buttons that came in the box too. They have quite large shank on them which would mean they don't sit flat on the fabric so I snipped the shank off with sharp pliers. Sorry this photo is not very in focus, but you can see what I mean.
I just glued the buttons on with pva. Ta dah!
It's not perfect by any means but it's cute and I love it!

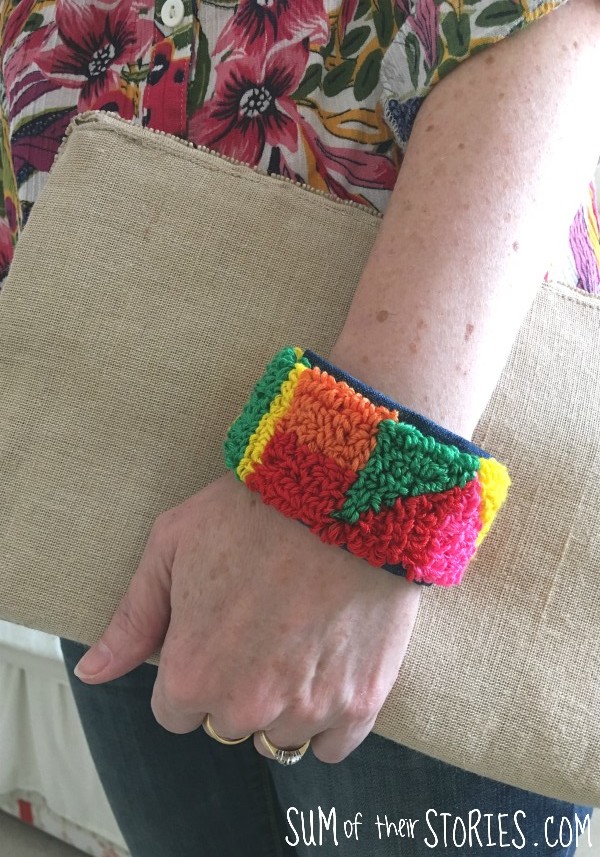
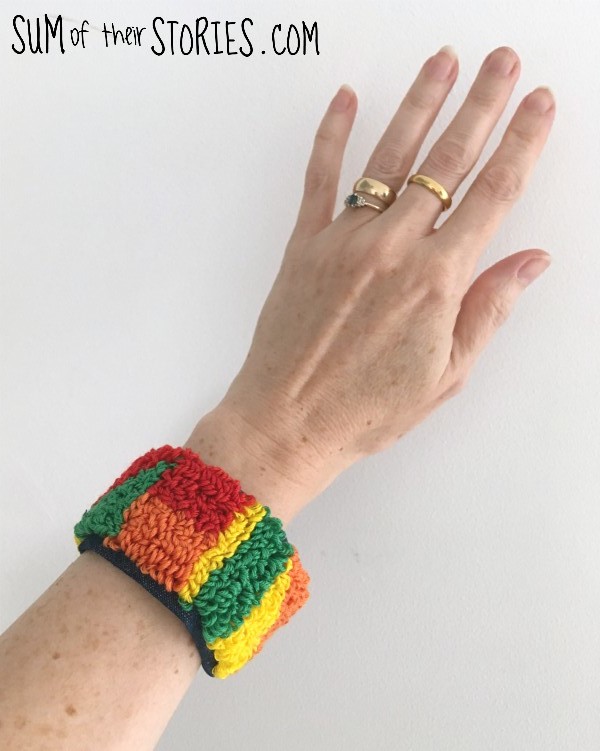
In the subscription box you have enough materials to make several projects. One of the ideas in the booklet was geometric earrings which set me thinking. So on a jewellery theme, I decided to make a geometric cuff bracelet next.
I measured my wrist then added 2 inches and then drew a rectangle on the back of the fabric that length x 1.5". I drew my simple design on the rectangle and got punching.
When I was finished the back looked like this:
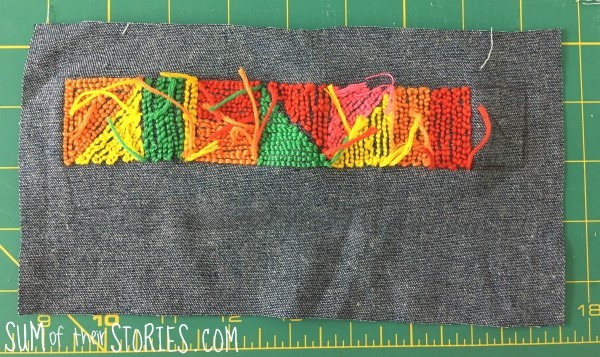
The front was a mass of loopy loveliness:

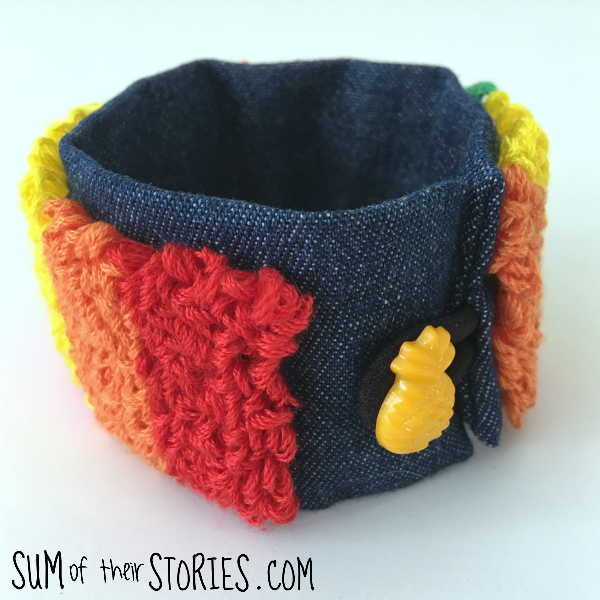
To turn it into a cuff bracelet I trimmed the fabric to allow a 1" border around 3 sides and 2.5" on one long side. As in the photo above.
I turned a narrow hem all round the edge.
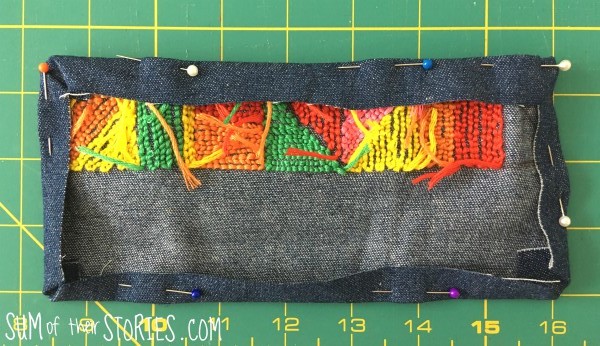
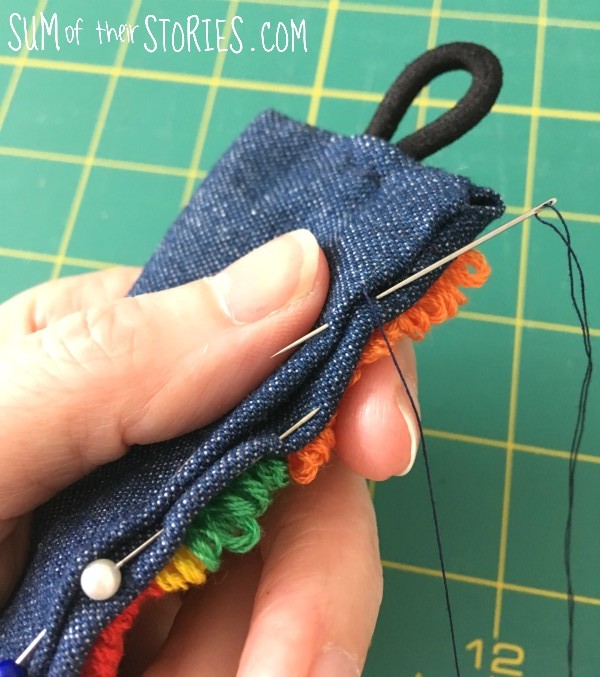
I folded the cuff in half and then took an elastic hair bobble and popped it between the layers on the short end.
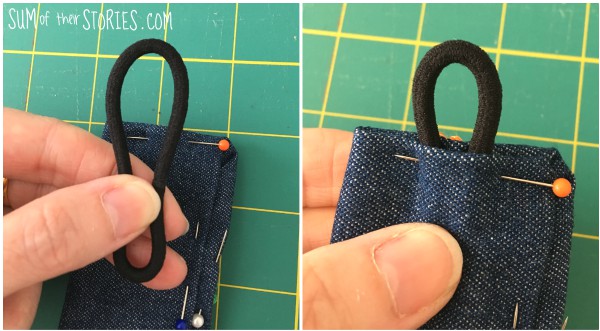
Then I just hand stitched round the cuff using a simple stitch. Where the hair elastic is I did a while load of extra stitches to secure it. Hair elastics are quite tricky to stitch through! I used a thimble to protect my poor finger.
Another one of the cute little pineapple buttons finished it off.
Next on my list is to make some earrings to match, I have enough materials left from the box.
If you are interested in a Makerly Craft box then check out their website for prices and options, you can purchase a one off single box or sign up for 3 or 6 months which works out a little cheaper per box. I think they'd make such a good gift for a craft loving friend.