Make it Yours Clutch Bag Competition Entry
/
One of my favourite things about blogging is connecting with other craft bloggers. I've found the whole craftybloggy community to be a very friendly place, full of like minded people all over the world. Visiting other craft blogs is something I try to do every day if I can.
One blog I love is So Sew Easy where the very talented Deby shares her amazing sewing talent, tips and patterns. She is running a competition which ends on 30th May 2014 to make a clutch bag using her pattern and 'Make it Yours' with embellishments etc. The pattern is free so even if the 30th May has passed when you read this I highly recommend checking it out.
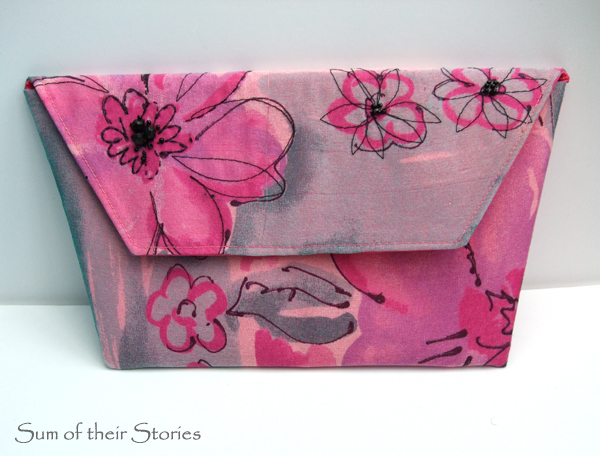
I am very happy with my lovely new clutch bag.
First I downloaded Deby's lovely pattern. You can get it from here. It comes with full instructions and I definitely needed them, I've never made a bag like this before!
I used an old scarf that I inherited from my Mum as my starting point.

My Mum had loads of scarves, some I wear, some I've Charity shopped and some are waiting for inspiration to strike.
The scarf was sort of chiffonish, very flimsy and see through so I also used some plain bright pink cotton. I had a big piece that I bought about 5 or 6 years ago to use as a table cloth for my daughter's "Legally Blonde" birthday party (everyone dressed in pink, ate pink food, watched the films etc)
I cut the pattern twice from the pink (lining and outside) and once from the scarf (outside 2nd layer)

I cut the scarf a bit bigger than the pattern, it was so slippery I thought I would allow in case it slid about a bit.
I also cut the pattern twice from iron on interfacing which I just ironed onto the pink cotton as per Deby's instructions.
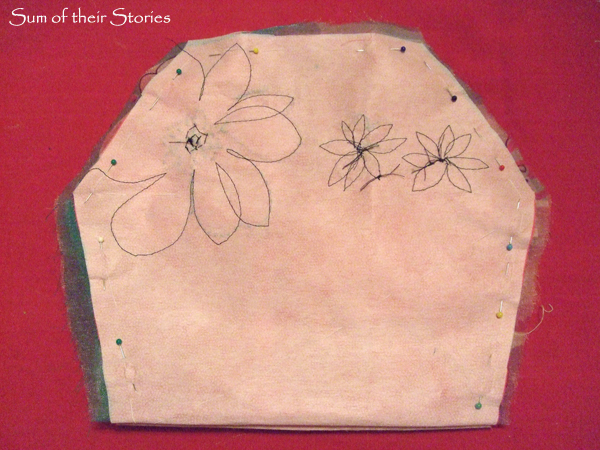
Just working on the outer layer for a bit I tacked the cotton/interfacing to the scarf all over to make it secure.

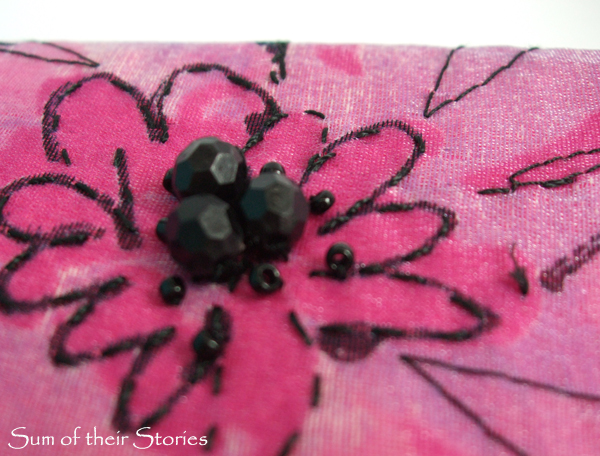
Next I added a little bit of machine embroidery, just over the flowers on the scarf material. I'm not very good at machine embroidery so I kept it very basic!

I added a few beads by hand too.
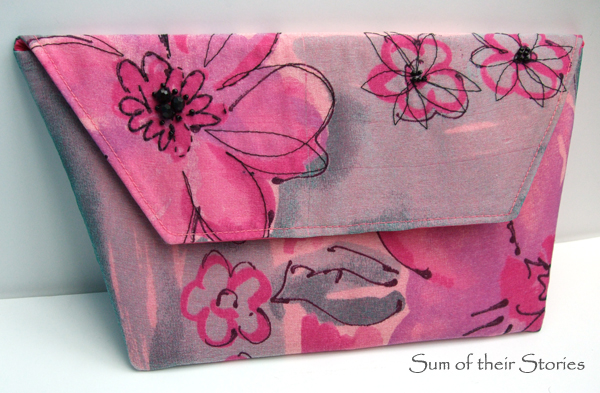
Then I just made the bag up following the instructions. (you can see the reverse of my embroidery here on the interfacing side)
I loved this method, it really is just like magic. I couldn't for the life of me see how it was going to work, I just did as I was told and then suddenly I turned it out and Ta dah! A fully lined bag - very cool!
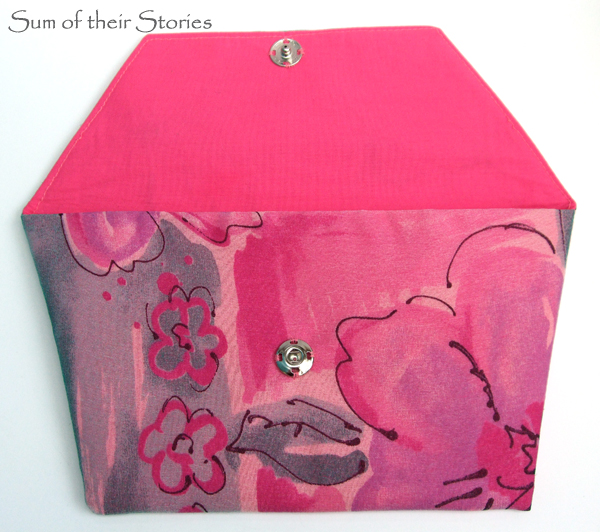
To hold the flap in place I used big poppers, rather than the magnetic fasteners that Deby recommends, only because that's what I already had. When I make this again (and I will be for sure, probably as presents for my lucky friends!) I will invest in proper fasteners.
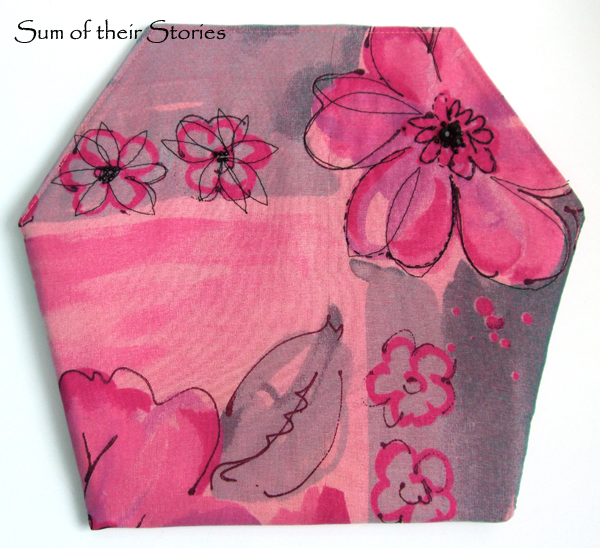
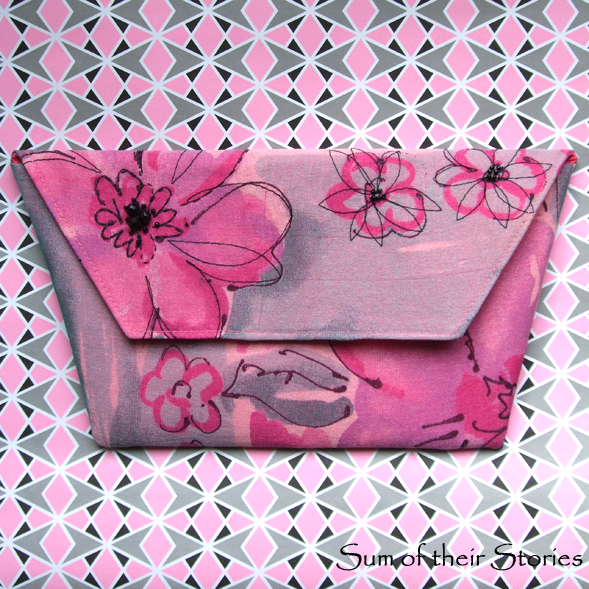
The green on the scarf looks grey here against the pink cotton, in real life it catches the light and is a bit shimmery. Perfect for a going out bag!
When I make this again I will add a little inside pocket of some sort too (the instructions tell you when to do this if you want to) I think that will make it even nicer.
Now I'm looking forward to seeing all the other entries on SoSewEasy.com, I think it will be very inspiring to see how others have made this pattern theirs.
Julie
I'll be linking up to all these great link parties