How to Make Block Printed Shrink Plastic Earrings
/

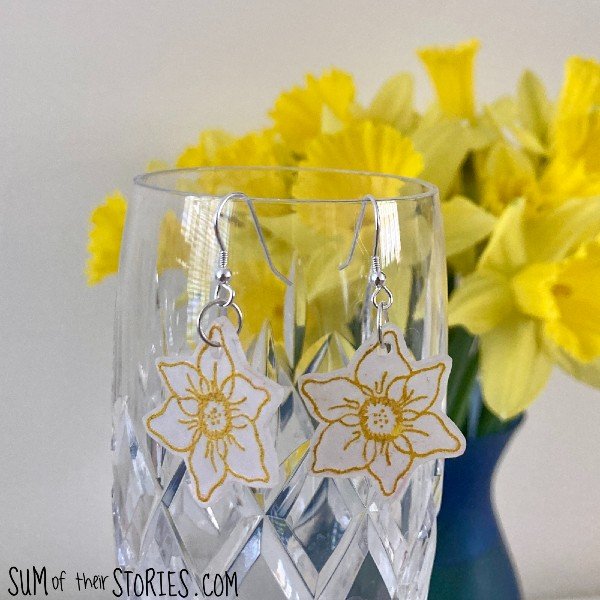
How to make your own unique earrings with shrink plastic and wooden printing blocks
Are you looking for a fun and creative way to make your own unique jewellery? Shrink plastic is so versatile and lightweight making it ideal for earrings. You can wear these comfortably all day long.
With these easy-to-follow instructions, it really doesn’t take long to make your own shrink plastic earrings at home. It's a fun activity for crafters of all levels, from beginners to experienced DIY enthusiasts.
I absolutely love wooden printing blocks, I have quite a few now in my stash. I’ve gradually collected them over the last few years by treating myself to one from The Indian Block Print Company each time I’ve visited the Creative Craft Show. When I visited the show last month I brought 2 really beautiful blocks that were brand new, just launched at the show! They are designed by the very talented Paula - the Crafty Lass. Aren’t they lovely? Paula has designed several floral blocks and I chose the daffodil ones, an outline and a more solid version.


It was when I was messing about, playing with these lovely new printing blocks that I got to wondering if they could be used on shrink plastic and turned into jewellery. Turns out you can! Whoop Whoop! I’ll show you what to do to make your own block printed shrink plastic earrings and then share some more details of my experiments, what I thought worked best etc at the end.
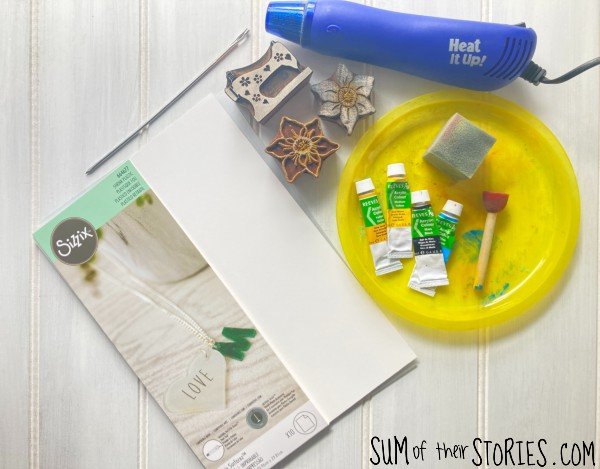
What you need to make block printed shrink plastic earrings
Shrink Plastic - you can get different types. Mine is frosted, printable shrink plastic sheets from Sizzix
A Wooden Printing Block - mine are from The Indian Block Print Co.
A paint tray or paper plate
A foam mat for printing
A sponge applicator for the paint
Scissors
A hole punch
A oven and baking tray or a craft heat gun - the kind you use for embossing
A heat proof surface, I used the back of my old chopping board
Something long, thin and pointy! I use an old trussing needle, a metal skewer would work well too
Clear Sealant - I used Glossy Highlights from Spectrum Noir because that is what I had on hand
Start by printing onto the shrink plastic with acrylic paint using the wooden block.

Tips for getting a good result when printing with wooden blocks
Start by getting all your printing equipment ready before you start. A clean cloth or rag will be handy to have to hand.
You need to use a thick firm foam sheet underneath when using wooden blocks no matter what kind of surface you are printing on. If your surface is too hard the print will not come out well and if it’s too squishy you could damage or crease whatever you are printing on, the paint could squidge too much or the block could move and make an unclear print.
Squeeze a little acrylic paint onto your paint tray or paper plate and then dab it with your sponge paint applicator to get the paint onto the sponge. You might need to water your paint down a little if it’s very thick but don’t make it too runny. Get a nice even layer of paint on the sponge before you start transferring it to the wooden block.
Apply the paint to the wooden block in a tapping motion so it is evenly covered then press down onto the surface you are printing on firmly. You can rock it back and forth just a little too but do be careful that the block doesn’t slip.
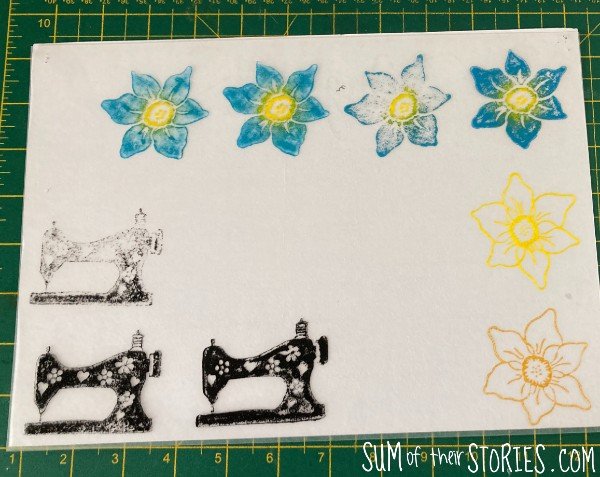
Here I’ve included a sheet of prints I did in my experimenting just so you can see that not every print worked perfectly as I played around, varying how much paint I applied and how much I had watered it down.
Special things to consider when printing onto shrink plastic
Make sure your shrink plastic sheet is on the foam so the rough side is up ready for printing. If you print onto the shiny smooth side of the shrink plastic it will just slide off.

The acrylic paint darkens during the shrinking process
Colours always darken during the heating/shrinking process when using shrink plastic so do bear this in mind. Expect to have to experiment a little to get the look you want.
For earrings you will need 2 prints, I actually printed several of each so I had spares. You can always make a matching pendant or extra earrings for your friends if all your prints turn out well.
Leave your prints to dry completely. Mine took less than an hour but I wasn’t really keeping a close watch.
Turning your prints into earrings

Use regular scissors to cut around your prints, the shrink plastic is pretty easy to cut.
Punch a hole somewhere where you will be attaching the jewellery fastenings later. It is essential that you punch the hole at this stage, you will not be able to do this later once it’s been shrunk.
You now want to shrink your shrink plastic. Follow the instructions on the packet if they differ from these here but most shrink plastic can be shrunk using 1 of 2 methods. Either:
a) lay the pieces on a clean baking tray (you might want to line it with foil) and put them in a hot oven for a few minutes or
b) place your cut out shrink plastic shape onto a heat proof surface, I use the back of my old wooden chopping board and heat it with a craft hot gun. Use something long and pointy to hold the shrink plastic in place while you heat it as it will blow around otherwise. I have an old trussing needle that I use for this sort of thing (having never trussed a chicken in my life!) Poke it through the hole you punched to avoid making a mark on the plastic. Keep the hot gun moving the whole time and don’t panic when the shrink plastic starts to twist - that’s quite normal and it will be ok. Just trust the process.

Once it’s completely shrunk leave your shape to cool. If it’s slightly wiggly just give it a light tap with something smooth and flat before it cools to flatten it completely.
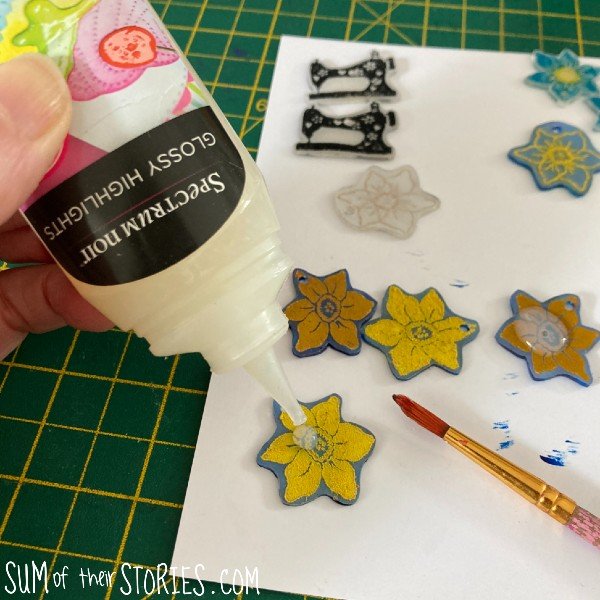
To make the jewellery hard wearing and durable give it a coat of sealant. I used Glossy Highlights because that’s what I happened to have but a spray sealant would work well too.
Finally add a jump ring and earring wires to complete your unique handmade earrings.
What I learnt printing on shrink plastic
As I said at the beginning, this started very much as an experiment to see if printing on shrink plastic with wooden printing block was even possible. In the past I’ve printed on fabric and paper with my blocks, both of which work brilliantly. I’ve used both fabric paint and acrylics with them.
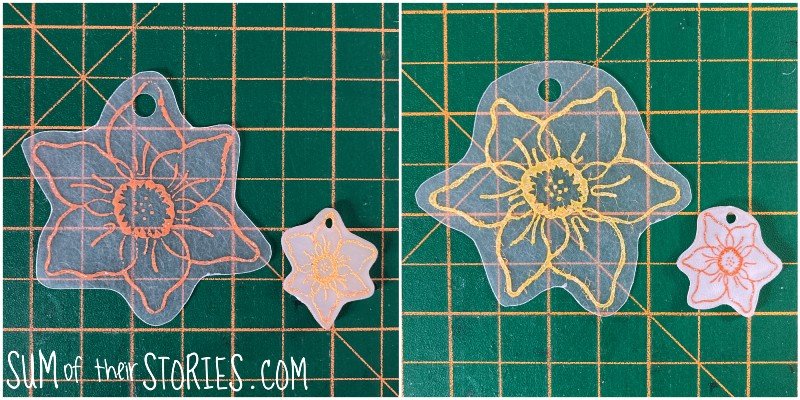
Here you can see how much the plastic shrinks when it’s heated.
Some shrink plastic shrinks more in one direction than the other. This might make your shapes slightly lopsided and might influence what block designs work best. I’ve definitely found that in the past, especially with packs of shrink plastic designed for children The shrink plastic I had this time is Sizzix printable and I didn’t notice much if any distortion. I’d recommend a test with the brand you have before you print lots.
The shrink plastic I was using is frosted/translucent. Some of the prints I did seemed to look much better on a dark background, here I’ve put the pairs on different background to show you what I mean:
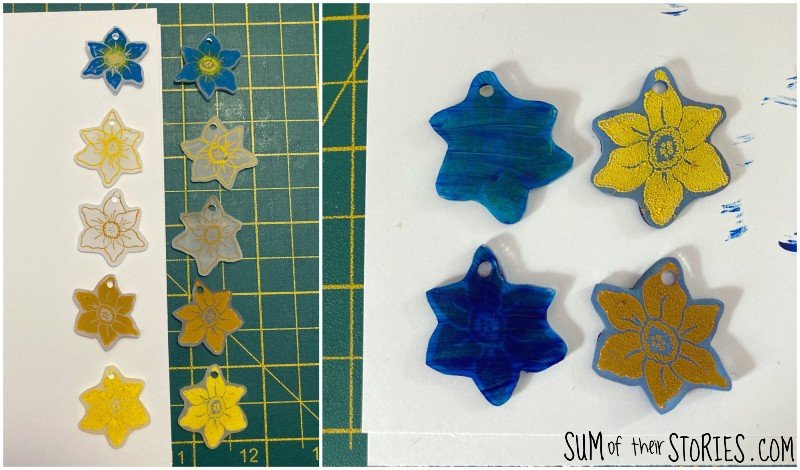
I tried painting the backs of some of my earring shapes in a dark blue acrylic paint, just to see if that made the designs show up better. If you decide to paint the backs, do that before you seal them of course. You can buy white and black shrink plastic too as well as some that is completely clear, it might be fun to experiment with different colours and see what you like best.

I experimented a little on where I punched the hole in the earring shapes too. My experience was that it was hard to tell what would work best when the prints were in their large, un-shrunken format. It was only once I had shrunk them that I decided I prefered the flowers with the hole in the petal.


As well as making several pairs of daffodil earrings in different shades of yellow I tried some in blue with yellow centres, I was going for a bit of a forget-me-not vibes, what do you think?
The last pair of earrings I made with shrink plastic are these vintage sewing machines. I absolutely love these, they are very “me”!

What do you think? How likely are you to get completely obsessed with making earrings from shrink plastic using wooden printing blocks like I have?
These shrink plastic earrings are a lot of fun to make, they are SO lightweight and therefore SO comfy to wear and once you’ve bought the pack of shrink plastic to be perfectly honest I think it would be rather wasteful and rude not to make loads! Wear a different pair every day or make them for all your friends. Get creative with different colors, shapes and designs to make a personalised earrings that reflects your style and that match every outfit.

Julie
I’ll be sharing this idea at some of these link ups