How to make a Personalised Geometric Pyrography Chopping Board
/

I think wood burning, or pyrography to use its proper name, is an art that takes a minute to learn and a lifetime to master! I was given a lovely little pyrography tool for my birthday last year and straight away I was able to use it to decorate a few wooden items. You can see how I got on here.
I’m quite sure it takes a long time and A LOT of practice to get to the amazing artwork standard but you can have fun and make perfectly acceptable things almost straight away as long as you keep it simple.
Some friends had moved house a little while ago so I made them a house warming gift of personalised chopping boards with a simple geometric hexagon design.
The design is very simple so no mad artistic skills are required.
I bought a pack of 2 chopping boards from IKEA, but any wooden chopping boards would work.
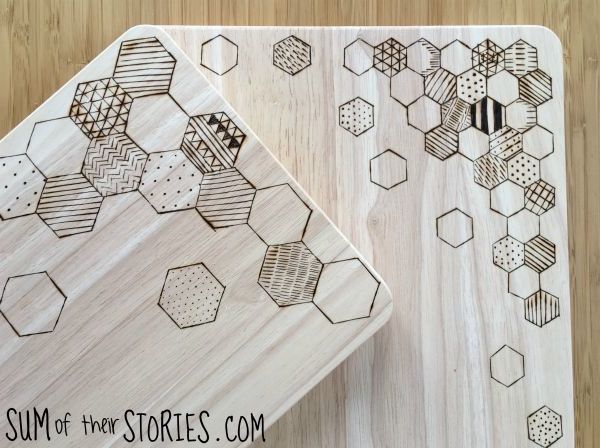
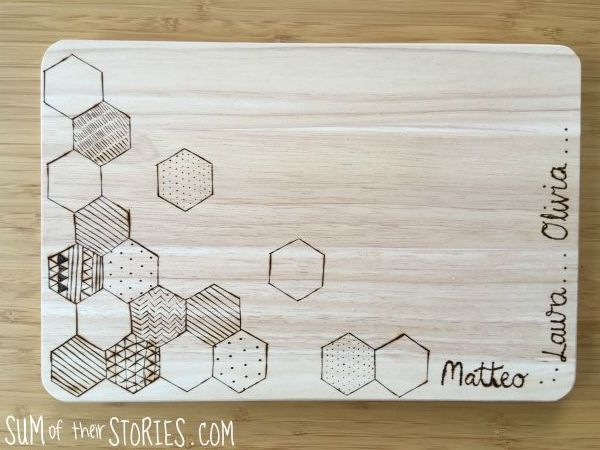
I made a few different sized hexagon templates on the computer (just insert a shape in a word document and size it from the corner so you don’t distort it) and printed, then cut them out. I played around with the different sizes and settled on 1” diameter hexagons for the first, larger chopping board. I used the template to mark the basic design by drawing round it lightly with a soft pencil.
For some reason I didn’t take a photo of this stage, sorry. You can see the design in this finished photo though and get the idea. I drew round the hexagon template over and over, mostly in the bottom left corner of the chopping board.
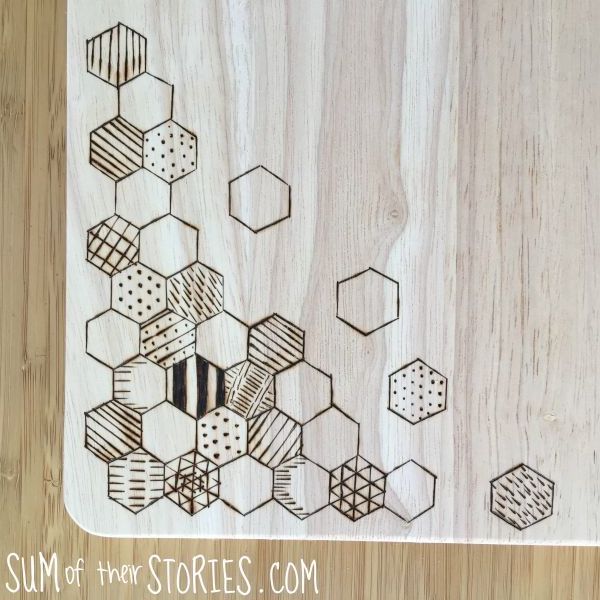
Once the basic design is drawn on, start going over the hexagon outlines with the pyrography tool. I used the chisel type nib for the lines, it seemed the simplest to use for straight lines. I found it easiest to go over all the lines in one direction, then switch and do all the lines in another direction.
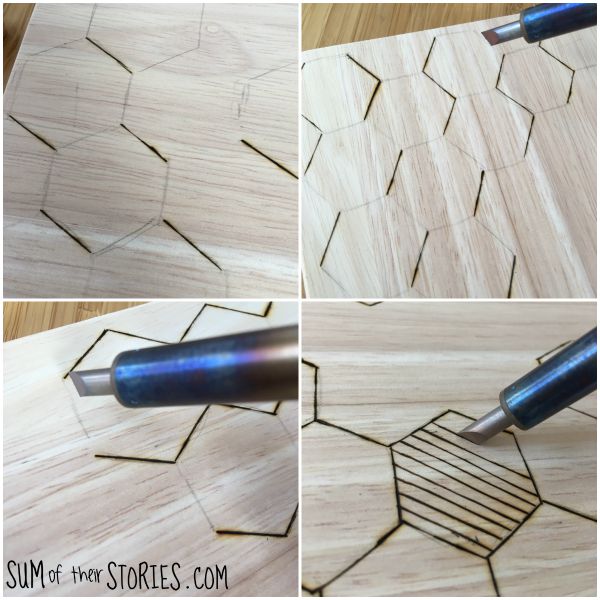
When all the outlines are covered you can start filling in some of the hexagons with patterns.
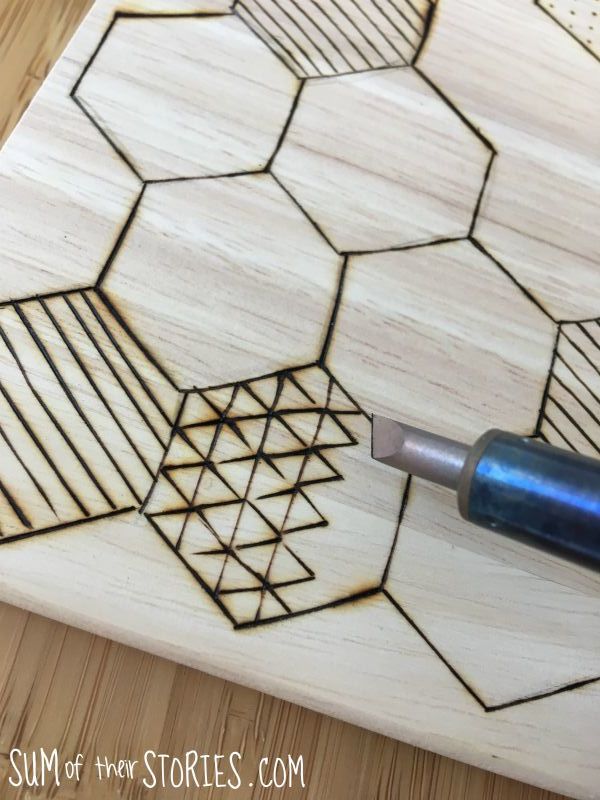
Dots, lines, wiggles, long lines, short lines - you can literally do whatever you fancy. I left some hexagons blank too.
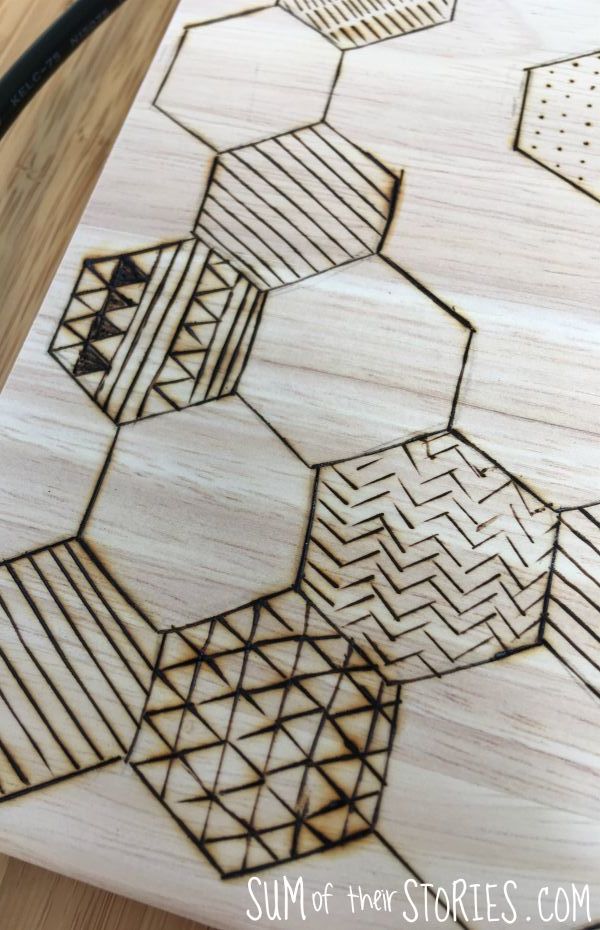
I’m sure pyrography experts are cringing at these photos, you can see it’s not very even and I have some splodgy brown patches too. But as with most crafts I think the idea is not to make something that is necessarily perfect but to have enjoyed making it and for it not to be embarrassingly bad! I feel these wooden chopping boards come into that category!
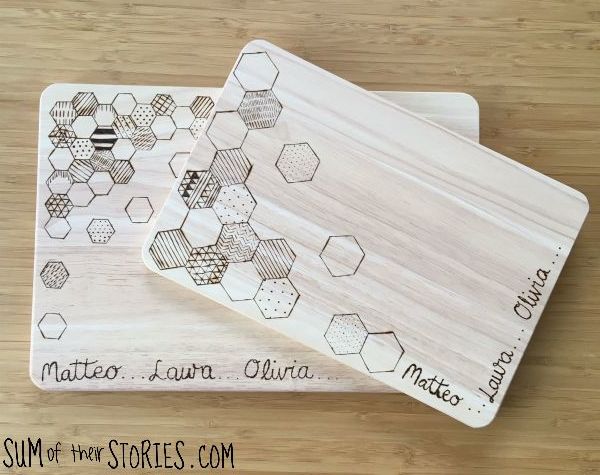
When the hexagons were completed I changed to a more pointed nib on the pyrography tool and wrote the names of our friends (the ones these chopping boards were for!) along the edge of the board. There is room for more names in case they decide to have more children. I’ll have the boards back and add as necessary!
I wrote them free hand in pencil first but you could use a computer font and transfer the words if you prefer - I explained that technique here when I made a coat hanger for my cousin.
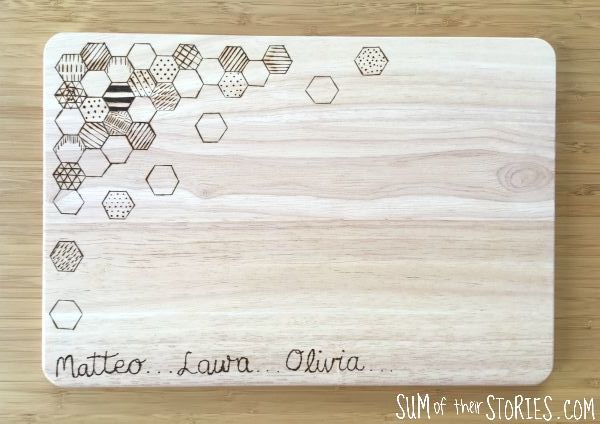
You could do a family name instead of the first names that I did here. I did first names for our friends as they don’t all have the same family name. Laura is Spanish and has kept her dad’s family name too in the traditional Spanish way. The nice thing about making something personalised is that you can personalise it however you want of course.
I did something really similar on the smaller board, I used a slightly larger hexagon, just to mix it up really and have some fun with the idea.
This idea could be adapted in lots of ways too. A geometric border all around the edge of a board would look great, instead of just in one corner as I did.

This was such a fun house warming gift to make and thankfully it was very well received too.
I will continue to use my pyrography tool to practice, after all practice makes progress.