How to paint your own vibrant fabric
/

A piece of plain old fabric and some bright fabric paints is all your need to create your own, unique, one of a kind fabric.
It’s time for another Sustainable Craft Challenge, when I join some of my creative blogging friends and we all create a project with a sustainable twist. Something upcycled, recycled, stash busting, using an eco friendly product etc. Our theme for April’s challenge is VIBRANT so you might want to get your sunglasses out!
Creating your own vibrant and colourful painted fabric
Anyone who follows me on Instagram will have seen this idea to paint your own fabric popping up every now and again over the last few months. Back in November last year I enjoyed a fabric painting workshop with a very talented textile designer Sarah Campbell. Sarah showed us how to do simple mark making and masking to fun effect. You can see a little video of my first attempt at the workshop on Instagram here.

Safe to say I LOVED this technique and have become a little bit obsessed since. And you know what? I’m not even a tiny bit sorry!
Around the same time as the workshop our middle son was moving out and into his own place. His bed here had a mattress protector on it that had worn out completely in the centre but the fabric was pristine and as new all around the edge - I guess this is what happens when a single person sleeps centrally in a double bed - and because he knows me so well he asked if I wanted it to upcycle. Yuh huh!

You can see where it’s worn right through in some areas (red) and in perfect condition in others (green).
After a good wash I cut the good pieces off and threw away the middle. I ended up with several rectangles, ranging from about 30cm x 60cm (12” x 24”) to 15cm x 30cm (6” x 12”).
The fabric I had was quilted as you can see in the photos but for this fabric painting idea it doesn’t have to be. You can paint like this on any light coloured plain fabric. Curtain lining, old table or bed linen etc would all work well.
To create your vibrant painted fabric you will need:
Plain white fabric, or at least a light colour for best effect
Fabric paint in bright colours (mine are a mix of different brands that I’ve collected over the years)
Painting tools like paint brushes, foam brushes and applicators, foam blocks, cotton buds, pencils with an eraser end etc
A tray or old plate for your paints
Masking or washi tape if you want to mask off areas
If you don’t have fabric paint you can mix acrylic paint with a fabric medium to turn it into fabric paint, but here all the colours I used were fabric paint.
You could draw a basic design idea out first on paper with coloured pens but I just dived straight in.
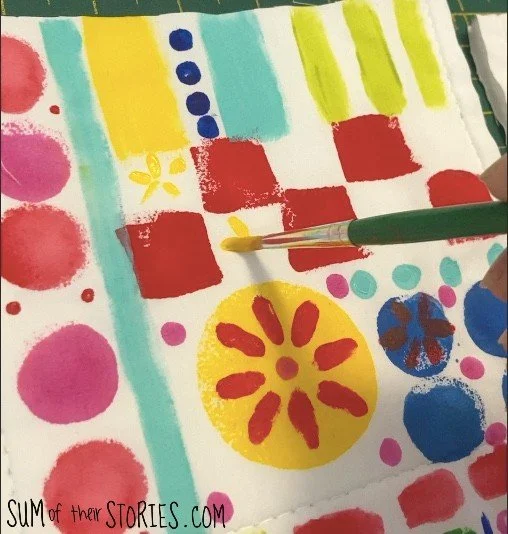
Use your masking or washi tape to mask off a few lines or areas on your fabric. This is optional but can give some really cool effects and it perfect if you want to create a straight line anywhere.
Next tip a little of your fabric paint in a chosen colour out onto your tray or plate and just start painting. Paint blocks, stripes, whatever takes your fancy. The red and white check here in these photos is my washi tape.

It’s easiest to paint in a few places in one colour before moving on to another colour. So paint or sponge a load of red areas, then move on to pink, then blue etc.
If you add a little water you can make a colour a little paler or even blend two colours into one another in a ombre effect.

Don’t think too much, just have fun covering most of your fabric. You can completely cover it or leave some gaps where the fabric colour shows through, it’s completely up to you. You can see from these photos how I just built the design up.
Round foam paint applicators can be a lot of fun to create circles which look great grouped together or on their own.
This will take longer than you would think. It’s very easy to get lost in the process - which makes it such a lot of fun - especially if you are painting several pieces of fabric at the same time.

I painted my pieces in dribs and drabs, so half an hour here, half an hour there. I didn’t keep a close eye on time and just fitted it in around other jobs.
It’s a good idea to stop and let the fabric dry every now and again anyway. Colours might run in a way you don’t want otherwise. It’s also nice to stop looking at your painted fabric for a while and come back to it fresh. I found that makes it easier to decide what to add next.
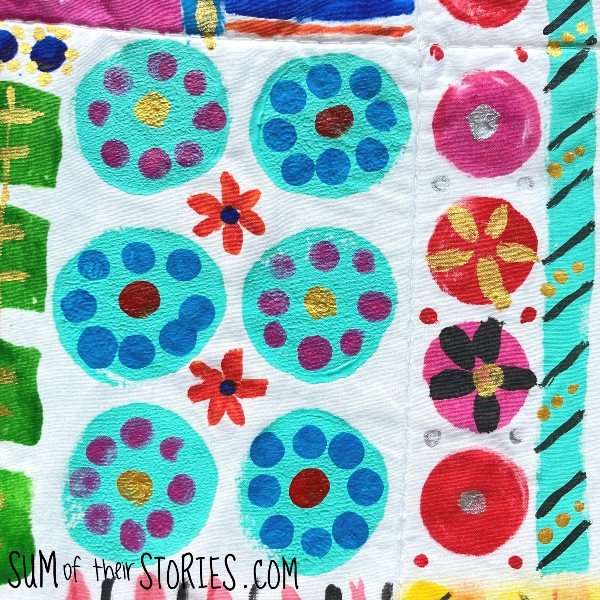
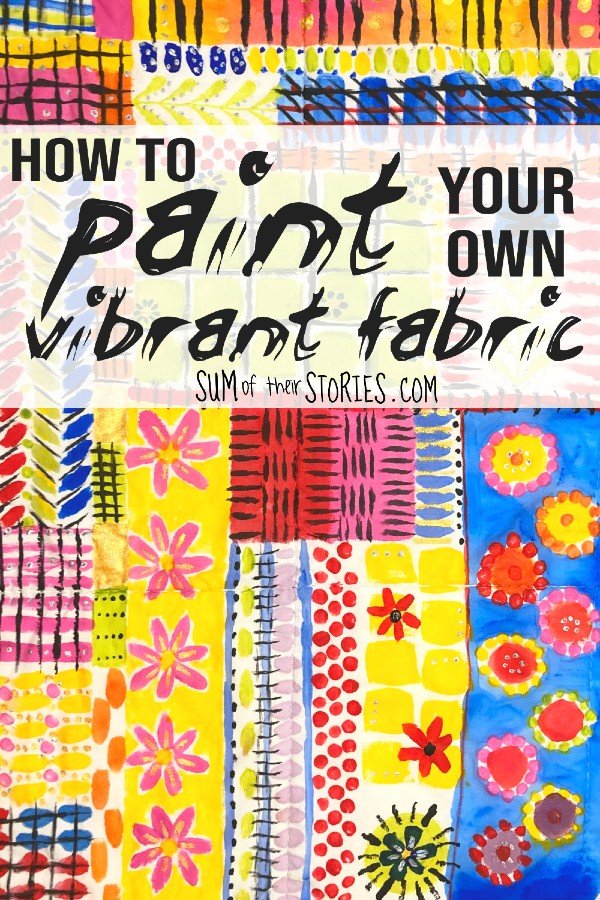
Just keep building up your design. Add lines, flowers etc. Small dots can be made by dipping the eraser end of an old pencil into your paint. Tiny dots can be made with a cotton bud or an embossing tool.
If you look closely at all these photos you can see that nothing here is complicated. It’s the simplest of blocks and lines, dabs of paint and dots. It’s the overall effect that you are going for, nothing has to be perfect.
Lines can be made with a fine paint brush or the edge of a foam paint applicator.

Small details in black paint can be really effective against bright blocks of colour.

Toning colours look great together but bold clashing colours can also look fabulous.

For extra dazzle I added some gold and silver fabric paint at the end, I absolutely love the extra zhuzh they give.

There are literally no rules with this fabric painting idea. Just play and have fun. For me I found that “more is more” and quite literally the more I added the more I love it. My top tip is to take breaks, put your fabric to dry somewhere out of the way so you don’t see it, then when you come back to it fresh you’ll just know if it needs more.
No clever painting skills are needed. You are just mark making, a wonderful phrase which can be very liberating for people who consider themselves less artistic. Blobs and marks, that’s all it is!
When you feel you have finally finished you simply set the fabric paint with an iron. Follow the instructions on your fabric paint for temperature and timing, but it doesn’t normally take too long. Then your fabric painting will be permanent and washable.

You can make your gorgeous decorated cloth into anything you like. I made a clutch bag with my first piece and have vague but not yet defined plans for the rest. I’m thinking maybe needlebooks for the smaller pieces and perhaps book covers or more bags with the larger bits.
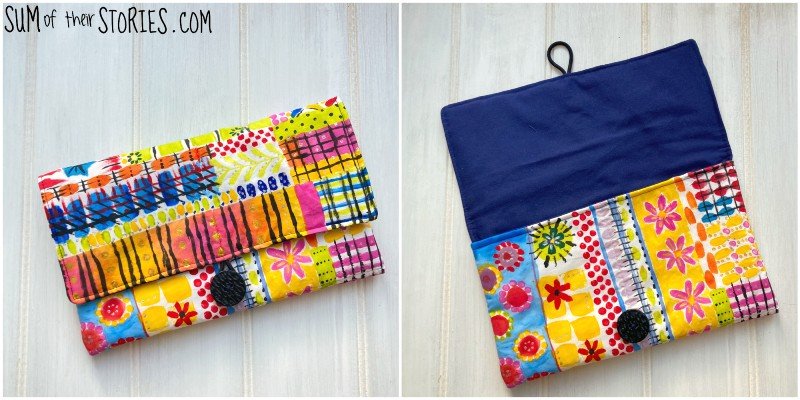
To make the clutch bag I adapted the instructions for the Make it Yours Clutch Bag by So Sew Easy. They way the outer and lining folds together seems all wrong until then end when it works like magic and these instructions just explain it so well.
Do you have an plain old fabric that just NEEDS a vibrant makeover? I highly recommend it. It’s a simple way to paint, I found it quite repetitive, methodical and therefore quite soothing and mindful but the results are so vibrant and fun.

Now let’s check out all the other VIBRANT creative projects from my friends for the Sustainable Craft Challenge.
Christine’s Crafts: Transform an Old Plastic Bangle into a Stylish Bangle Bracelet
Our Good Life: Painting Vibrant Loose Watercolour Birds
Purple Hues and Me: Vibrant Volume Decoupage Flowers DIY
Decor Craft Design: Upcycled Spring Sign from Bottle Caps
Old Rock Farmhouse: Growing a Garden Gnome
The sustainable craft challenge is all about finding more sustainable and planet friendly ways to create. We can still enjoy the crafts we love but do them with a more mindful approach that involves using what we already have, recycling and upcycling things we might normally throw away and thinking about the impact our hobbies have on the environment. I hope you feel just a little bit inspired. If you are a creative blogger who would like to join us please do get in touch and I’ll send you the details: sumoftheirstories (at) gmail (dot) com