"Cornishware" Ruffled Shopping Bag
/Update an old shopping tote bag with scraps of fabric to give it a pretty cornishware look.
This tutorial was first published in April 2014, and has been updated to add additional information.
I love reusable shopping bags, I simultaneously have loads and never enough - how does that work?
Sometimes we get lucky and are given promotional bags at open days and events and though it's nice to have another bag they are not always the prettiest things on the planet. To fix this I have a cunning plan and a stash of fabric scraps.
Ideas to decorating a fabric tote with fabric scraps
In the past I have just covered the fronts of promotional tote bags with a piece of fabric or two.
See how the fabric covers the writing and logos on the outside, I feel like the inside doesn’t matter so much.

Just let me point out now that I would never cover something promoting a charity or the like, if a bag was sold to raise money and awareness I would use it with pride as it is of course. Government departments I’m afraid I’m not so bothered about.
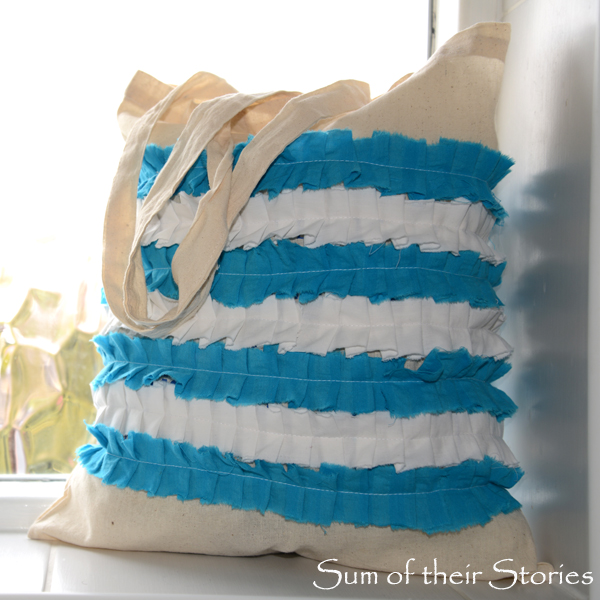
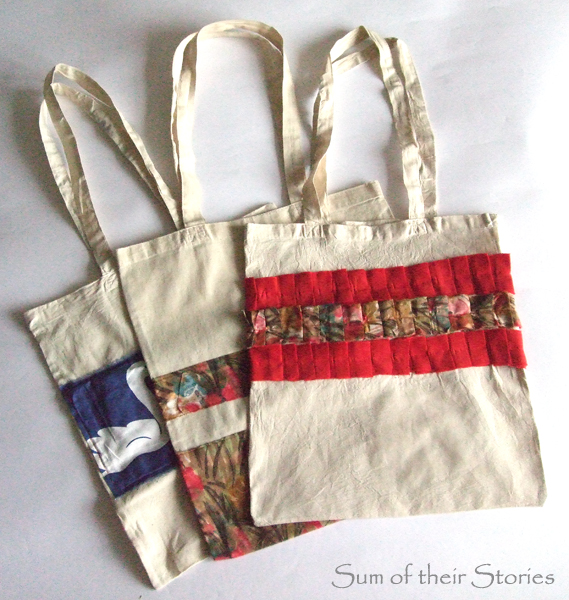
The bag upcycle I have had most compliments on is this one with the ruffles.
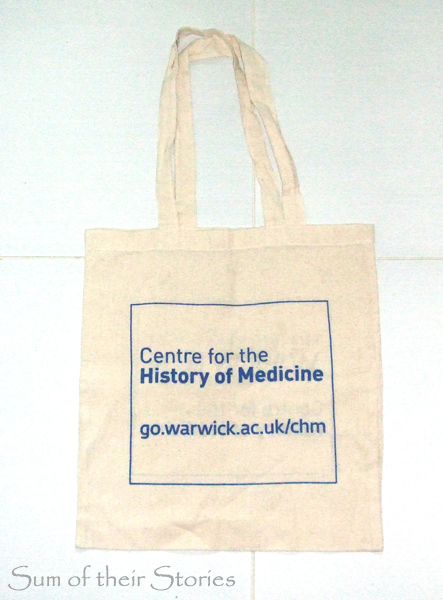
So when this bag came my way (and obviously I have nothing against the Centre for the History of Medicine at Warwick Uni but do I want it on my shopping bag?) I thought I could given it a makeover and redo the ruffle idea with photos and a tutorial to share with you.
To make your own Stripy Ruffled Tote Bag you will need:
A plain or unexciting shopping/tote bag
Scraps of fabric, you’ll need long strips
Sewing machine
Thread
About 30 minutes
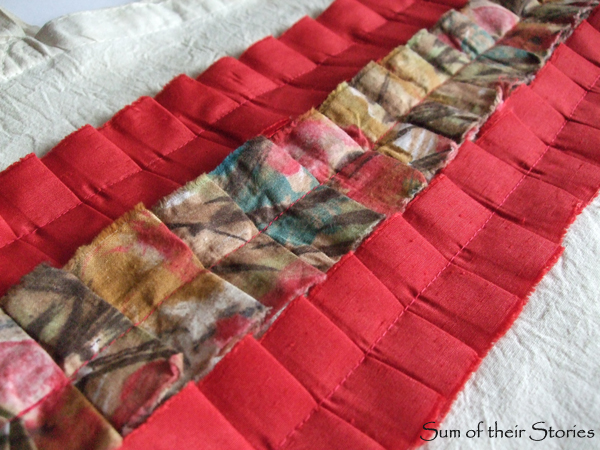
First rip the fabric into long strips each about 1.5" wide. Ripping the strips of fabric will mean the pieces are straight and the fraying will add to a lovely shabby chic look. You can cut your fabric with a rotary cutter or scissors if you prefer of course.

Make a straight line horizontally on your bag where you want to ruffles to start from. Pencil is fine, or use an erasable fabric pen. No one is going to see it anyway so it doesn’t matter too much. Mine had the box round the writing so I used that as a guide and didn't need to draw a line.
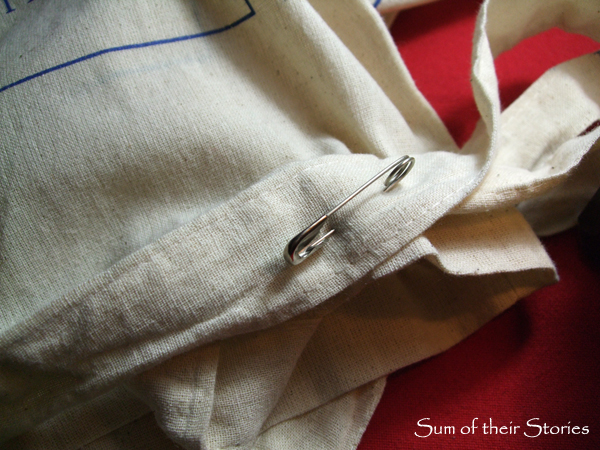
Before you start sewing you need to get the handles out of the way so they don’t get caught up. Pin them up close to the top of the bag with safety pins.
Slide the flat bed cover off your sewing machine (if it has one) to reveal the free arm. Slide the bag over the free arm and under the sewing machine needle, right side up, starting at a side seam. Line up with your pencil line, grab one of your strips of fabric, pop it under and do just a few stitches to hold it in place.
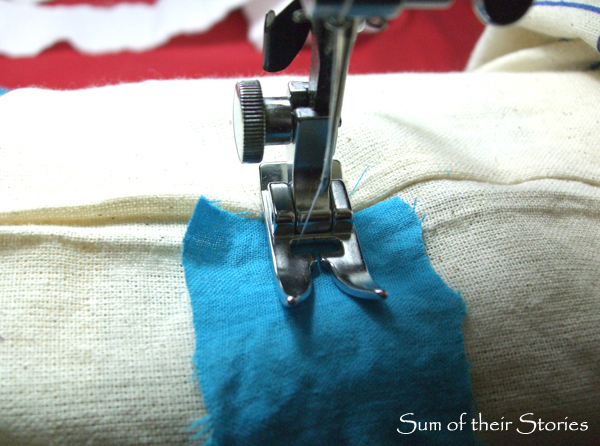
Now stitch the strip of fabric using the line you drew to keep it straight and then just pleat it as you go, the photos show it best.
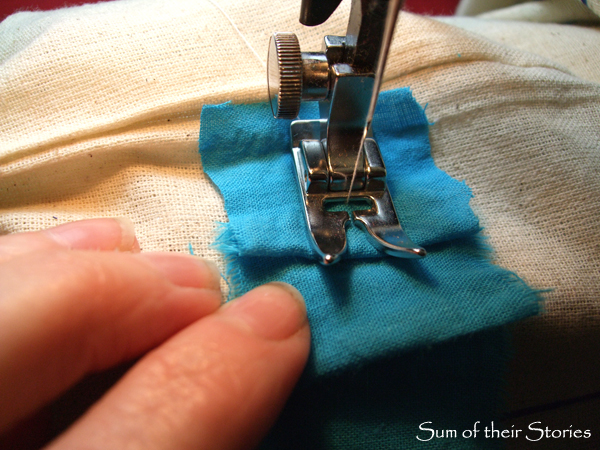
Fold a pleat under about 1/4 inch every inch or so. You can do more or less pleating, it's up to you. The more you fold the more strips of fabric you will need, and the more frilly the bag will end up.
When you get to the end of a strip, just pop another one under with a bit of an overlap and carry on, no need to join them first.
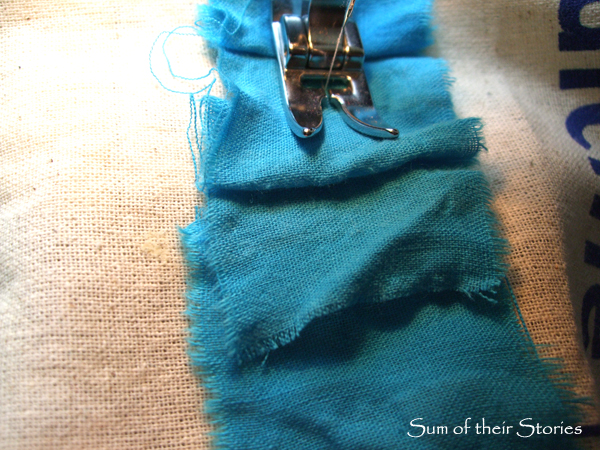
When you get back to the beginning, just cut off any of the fabric strip remaining and get ready to join the next strip of fabric right along side the first.
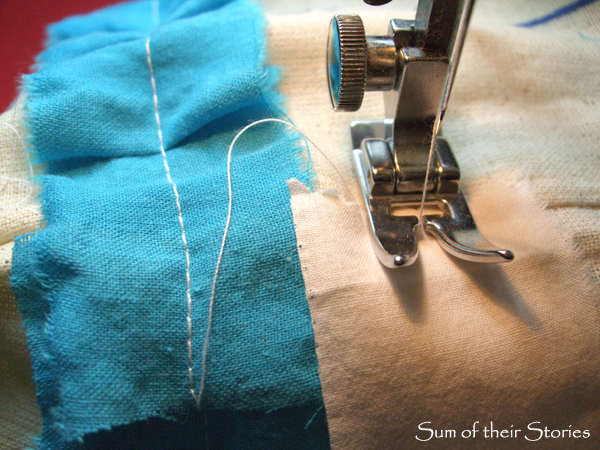
I overlapped the strips very slightly as you can see, just to make sure none of the graphic from the bag would show through. I alternated blue strips of fabric with white strips but I kept the same thread colour throughout, for speed and because I think it looks quite nice!
That's it, just keep going round and round as many times as you want. I stopped when all the writing on my tote bag was covered.
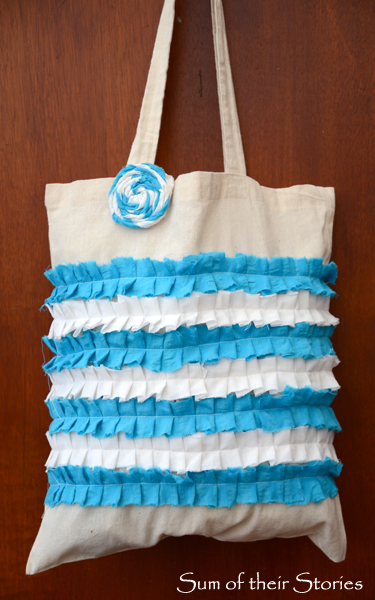
It was completely unintentional but when it was finished I thought this bag had a bit of a "Cornishware" look to it.
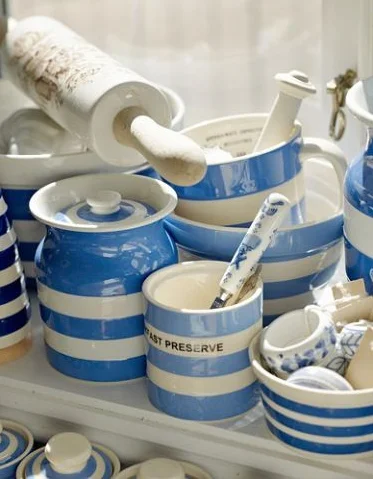
Are you familiar with Cornishware pottery? I love it, so much that I have a pinterest board dedicated to it! When I was little we went to Cornwall most years on holiday and I remember visiting a pottery factory, maybe that's why I like it so much.
I had a few strips of fabric left and had just seen a lovely little flower by Emily from Jones Design Company so decided to give it a go.
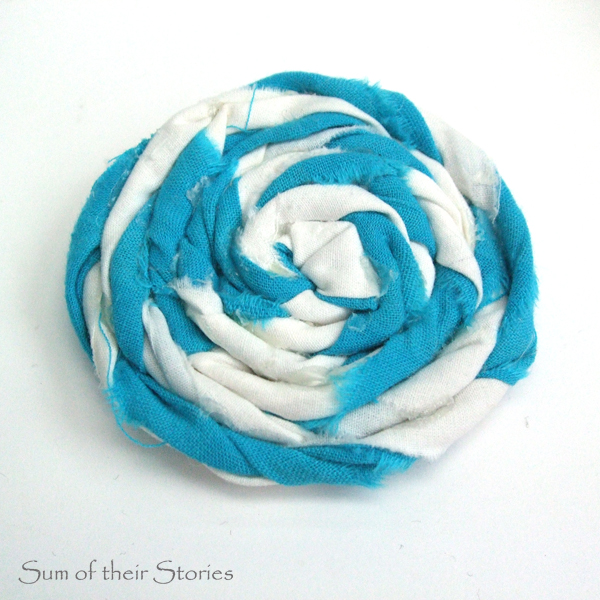
I doubled up my blue and cream fabric strips, tied a knot and just started twisting and glueing, following Emily's tutorial. This is pretty easy and fun but if you try it please do be careful as the glue from a glue gun gets REALLY hot - obvious I know, but when you are concentrating on the twisting apparently it's easy to forget! Ops and Ouch!
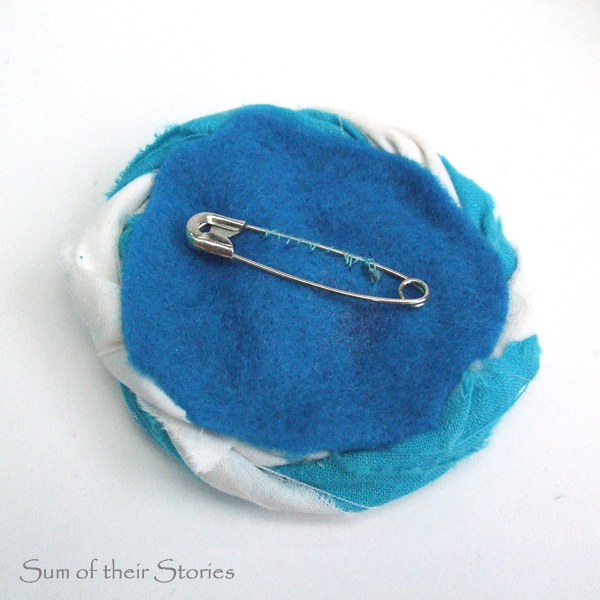
I attached a safety pin on the back and now have a removable flower to add more shabby chic charm to my shopping experience!
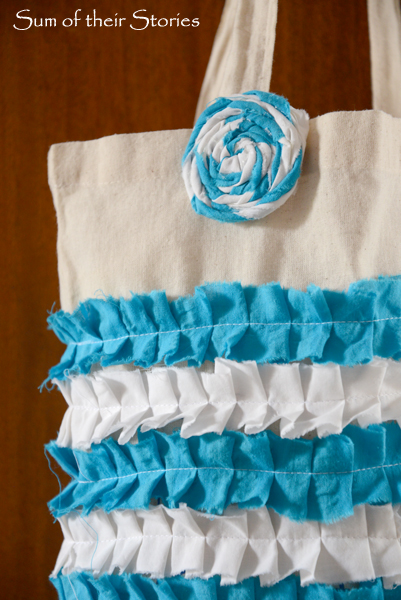

The bag was a freebie, the blue fabric was from an old shirt and the white fabric was a old duvet cover that had trim which had gone all bobbly. My lovely new bag didn't cost me anything but time and a bit of sewing thread, whoop whoop!
Do you have an old promotional shopping tote that could do with a little ruffled glow up?
Julie
I'll be sharing this idea at these link ups
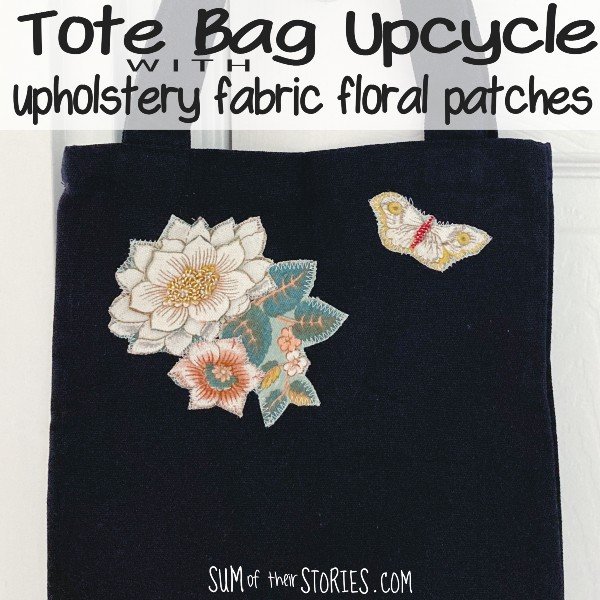
This reusable cloth gift bag also has a store logo hidden under that embellishment, read all about how to create something similar here: Cloth Gift Bag Upcycle
This cloth gift bag also has a logo hidden under there, this version is a no sew option, read all about it here: No Sew Gift Bag Upcycle

Vicky Myers Creations has a lovely idea to cover a logo on a cloth bag to really make it fit your own style. Find the tutorial here: Cover a branded logo on a bag
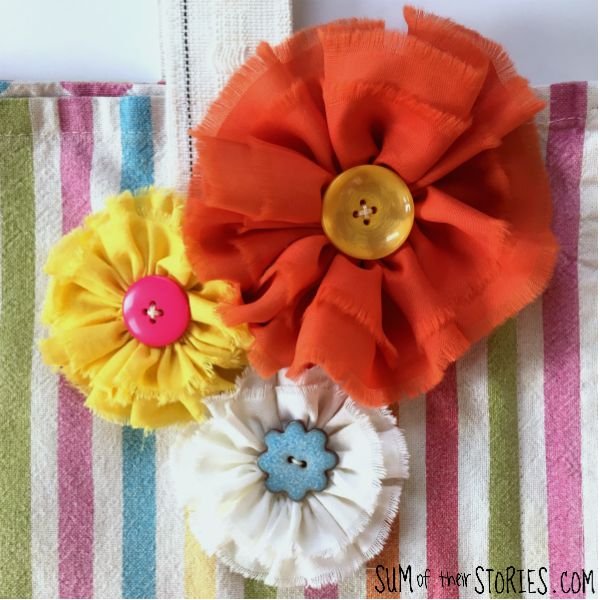
I love fabric projects like this one that use up little fabric scraps. If you have lots of small pieces of fabric to use you might like some of these ideas that use them up.