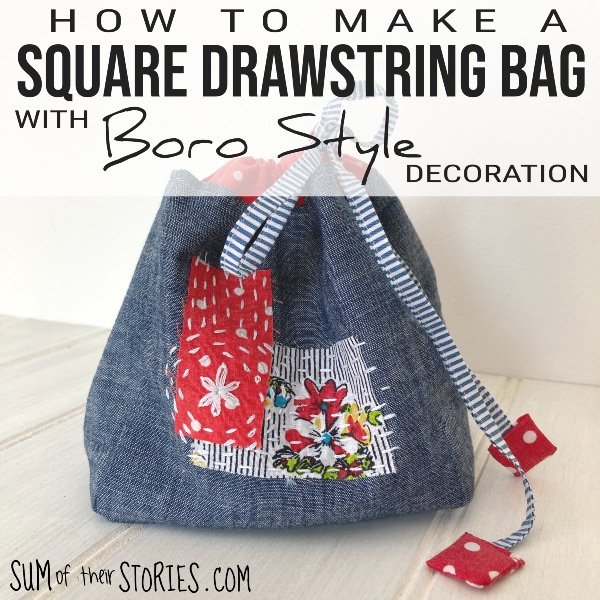
How to make a Square Drawstring Bag with Boro Style Decoration
/

A square drawstring bag, otherwise known as a Komebukuro or Japanese rice bag is a little more complicated to make than a basic drawstring bag but is still simple enough to be attempted by someone without lots and lots of sewing experience.
Komebukuro bags were traditionally used in Japan to carry rice offerings to the temple during important religious ceremonies, or made to hold a gift for a special friend or relative for a special event. If you are interested in their history then you can read a little more about them and other Japanese textiles here.
Tutorial and pattern to make a square drawstring bag.
These bags have a lovely fat shape and can be decorated in any way you like. Here I’m going to show you a simple boro style that uses small pieces of scrap fabric and just a couple of very easy hand stitches.
You can, of course, skip the embellishment step and just make a sweet square komebukuro bag from a beautiful fabric that you’d like to showcase.
I enjoyed this project SO much that I’ve actually made quite a few of these drawstring bags. They are quite addictive once you get started, you have been warned!
To make my komebukuro style bags I used a blue chambray outer fabric which was originally a dress. The dress was a little short and tight for me now and so this seemed like a good way to upcycle it into something completely new. I used leftover pieces of patterned print fabrics to line my bags, to make the drawstring channels and to decorate the outsides.
For the drawstrings I used a mix of cords, ribbons and ties from old garments that have long ago been upcycled into something else. I tend to keep everything just in case it comes in handy and for this project I was glad that I had!
I actually have 2 different methods for making the drawstring channels, I’ll go through one method completely and then add the second separately at the end of the tutorial. I don’t want to make it confusing by mixing the 2 methods up.
Materials needed to make a Square Drawstring Bag
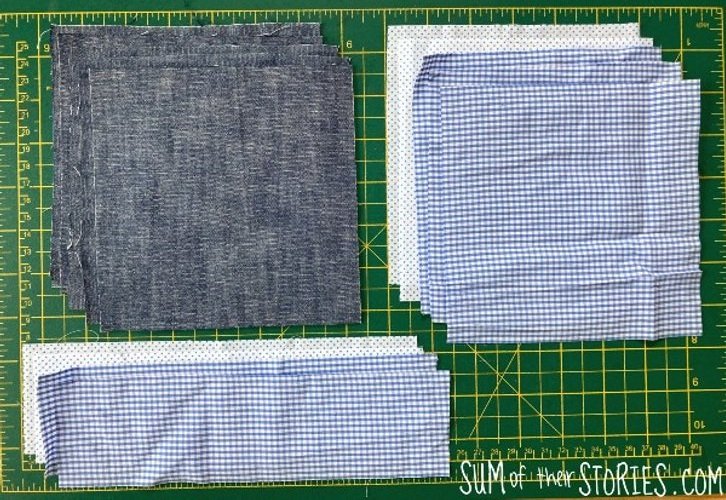
5 squares of outer fabric - 6” x 6” (15cm x 15cm) I used a chambray
5 squares of lining fabric - 6” x 6” (15cm x 15cm)
4 pieces of patterned fabric for the drawstring channels – 2.5” x 9” (6.5cm x 23cm)
a length of cord approx 36” (92cm)
Scraps of pretty fabric - I used the same fabrics as the lining and drawstring channel pieces
Embroidery thread - mine is white but you can use whatever you like.
Decorating your bag with Boro Style Embellishment

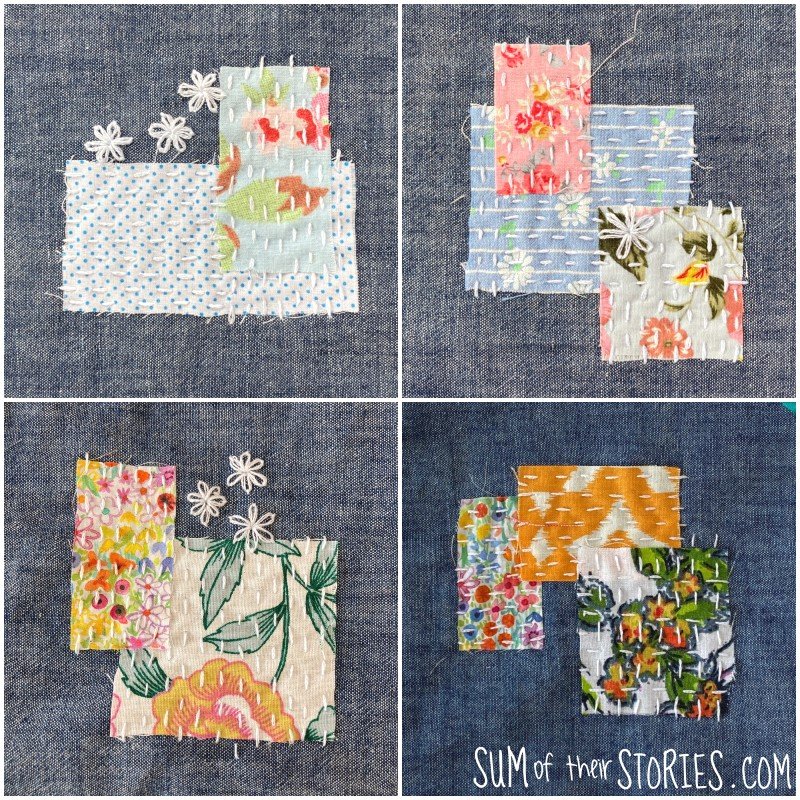
Rummage through your scraps of fabric and pick out a few pieces that take your fancy. Play around with them on the centre of one of your outer fabric squares until you’ve got an arrangement you are happy with and then pin it in place.

Using 2 or 3 strands of your embroidery thread stitch running stitch all over the scraps of fabric to hold them in place. You can work all your lines in the same direction, do some in one direction then switch or have them criss crossing.
You can stitch just straight rows of running stitch, or stitch a lazy daisy and then stitch round that in a circle. If you want an even circle then draw around something using an erasable pen (this one is my current favourite)
If you are new to embroidery I have a guide of some basic stitches which should be helpful.

Have fun, just enjoy the simple stitching process. Add extra embroidery stitches if you want to, or keep it really simple.
When the fabric pieces are secure you can stop. Or carry on, it’s up to you!
I decorated 2 of my outer pieces so that 2 opposite sides of each square drawstring bag would have an embellishment. You can decorate all 4 or just 1 if you prefer.
One of the outer squares is for the base of the bag so you’d probably not want to decorate that too but if you do want to, guess what? That’s fine too!
Once you are happy with the boro stitching style decoration it’s time to assemble the bag.
How to assemble a square drawstring bag.
I used a 1cm seam allowance throughout. (You can actually pick any seam allowance you like but choose one and stick with it)
You are going to make 2 floppy boxes, one with the 5 outer pieces and one with the lining pieces.
I took these photos as I put the lining together, as the fabrics are different I thought it might be easier to see what I was doing but you make both boxes in exactly the same way.
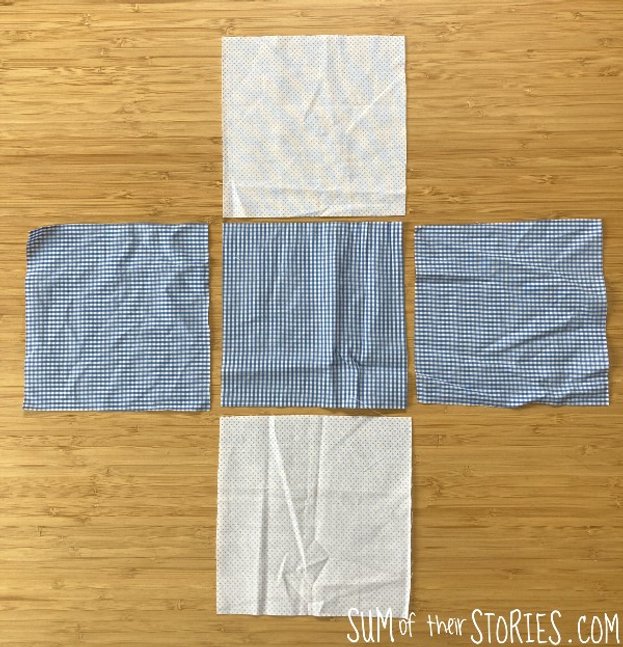
Start by laying the pieces out in a cross, think about any directional prints or embellishments you’ve done. The centre of the cross is the base of the bag, so the side pieces have the bottom of the fabric touching the base.

Join each side piece to the base by placing the pieces right sides together and stitching across leaving a 1cm gap unstitched at each end. Remember to do a few back stitches at each end to make your stitching secure.
I find it easiest to do the 2 sides that are opposite each other first, then the other 2.

Next stitch the sides together, leave the 1cm unstitched gap at the base end of your seam but stitch right to the edge at the top. Leave a 2”/3” gap in one of the lining side seams for turning the bag out later.

You should end up with something that looks a bit like this, a floppy box.
Then repeat the same thing with the 5 outer pieces. The only difference is that you don’t leave a gap for turning in a side seam this time.


Prepare the drawstring channels:
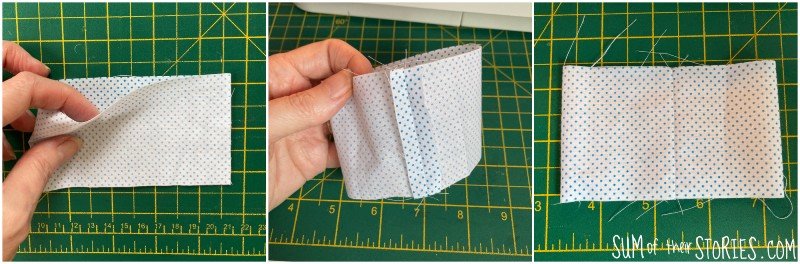
Take one of the channel pieces and fold it in half, right sides together so and stitch along the short sides to make a tube.
Turn the tube to right side out and press flat.
Fold it in half lengthways and press again.
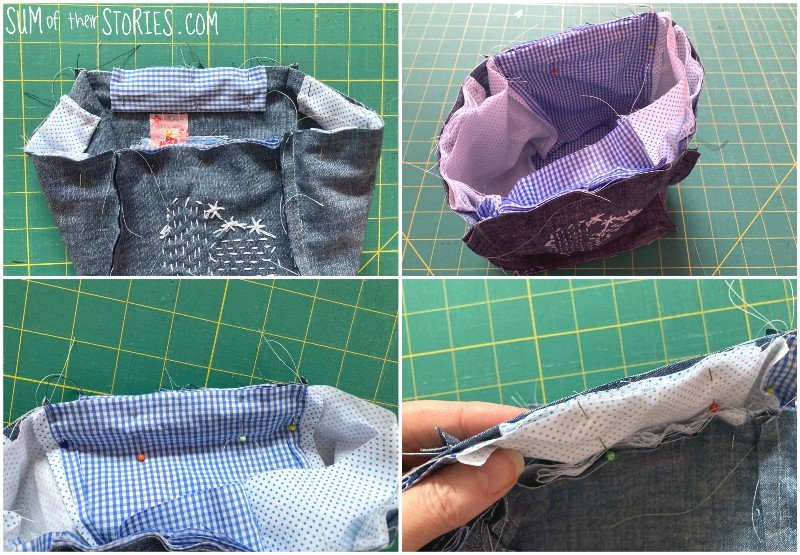
Pin these channels centrally to each side of the outer ‘box’ - raw edges together.
Turn the lining ‘box’ right side out and place inside the outer ‘box’.
Line up the side seams and use LOTS of pins to hold all the layers in place.

Stitch all around the top.

Turn out through the gap in the lining and then stitch the gap closed.
Push the lining back into the bag, press and then top stitch around the top.

Thread the cord through the channels.

To finish the drawstring cords you could tie a knot, add a bead and knot or, as I did, add a sweet little fabric tab. Find out how to make them here: fabric tabs for drawstring cords tutorial
Ta dah! A finished bag!

The alternative way to make the drawstring channels

Cut 4 pieces of fabric 5” x 2.5” (13cm x 6.5cm)
Turn and stitch a narrow double hem at each short end.
Press the pieces in half lengthways, wrong sides together.
This method is better if your fabric is a little thicker.


You can see what I mean in the photo above about watching which way up the pieces are when using directional prints, I wouldn’t want that little bird standing on his head!
These bags are great for using up small pieces of fabric, you can mix and match the lining, channels and outer fabrics as you like and the outer decoration is great for really tiny scraps.
I don’t use interfacing on these bags as I love the floppy nature of them but by all means add a light interfacing to add structure if that’s what you prefer.
You can size your bag up or down as you wish. As all the squares are the same size it’s really simple. I’d not recommend going any smaller than a 4” square starting fabric really as it will get very fiddly under your sewing machine but you could make a teeny tiny bag if you really wanted to by hand stitching part or all of it.
If I were to try making a really big version, say with 12” squares to make a big knitting project bag for example, I’d use a thicker fabric. Something like an upholstery fabric or a canvas would work, or I think I’d use a substantial interfacing.

The bags flatten nicely if you want to send them as a gift in the post.
I did warn you that these bags are very addictive to make didn’t I? I have another 4 cut out now and ready to sew!

These bags would be lovely with names or initials embroidered on them to give as gifts. Or use them as a gift bag for a really special present as a nod to their original purpose in Japan.

You can make bags like this from plain squares of any fabric too, you don’t have to decorate them with boro style stitching. Or you could make patchwork squares like I have here to create these monochrome bags.
Have I tempted you to have a go at making a square drawstring bag? Or do you fancy adding some boro style decoration to something else? I did some a while back to cover a little hole in a pair of jeans, it’s a practical way of repairing things as well as a beautiful embellishment.
If you do ever make something using one of my tutorials please do tag me if you share photos on social media, or email a pic or two. I LOVE seeing your makes. Facebook people can share on my Share it Saturday comment thread on the Sum of their Stories Facebook page too.
Julie
I’ll be sharing this post at these link ups.
You might also be interested in: