

Decorate a Ring Binder with a Paper Rainbow Collage
/

Decorate a plain ring binder with a rainbow of punched paper shapes.
It’s time for another Sustainable Craft Challenge, when I join a group of my creative friends to bring fun craft ideas with an eye on sustainability. We reuse, reduce and recycle, we upcycle and we shop our stashes to avoid buying new in the hope you will be inspired to craft in a more sustainable and planet friendly way. This month our theme is RAINBOW, so I’ve used paper from old colourful envelopes to decorate a plain ring binder.
I’ve mentioned it before, I keep ALL colourful envelopes, the ones that often come from greeting cards. Even when our kids were little they all knew to immediately hand me the envelopes from their birthday cards as they opened them! The paper is perfect for all sorts of paper crafts.
A couple of years ago I decorated 2 plain kraft ring binders with doodles. They were a lot of fun to do and I intended to decorate the 3rd ring binder in the pack I had purchased in the same way. 2 years later and that 3rd ring binder was still shamefully plain and boring, ops! The RAINBOW theme of the Sustainable Craft Challenge has given me the perfect opportunity to finally give this plain old ring binder a new fancier look. This is a really easy way to decorate a plain ring binder but it is not especially quick, you’ll need an hour or two to get your rainbow collage done.
Let’s get started.
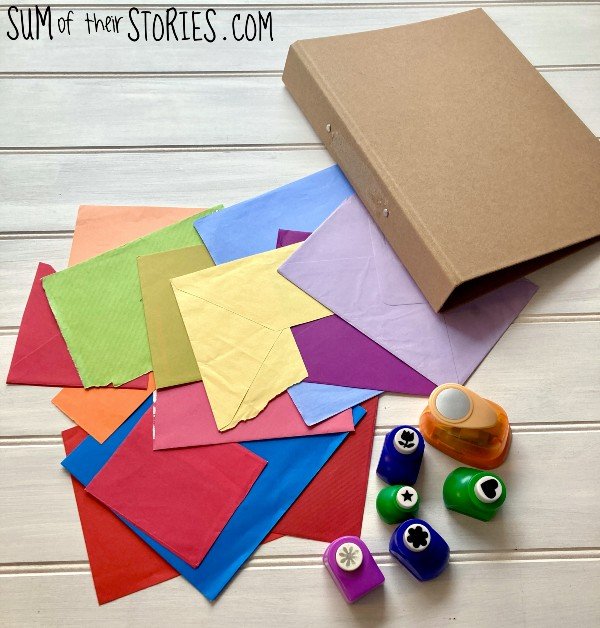
To decorate a ring binder with a paper rainbow collage you will need:
Colourful used envelopes
Paper glue, I used a Pritt glue stick
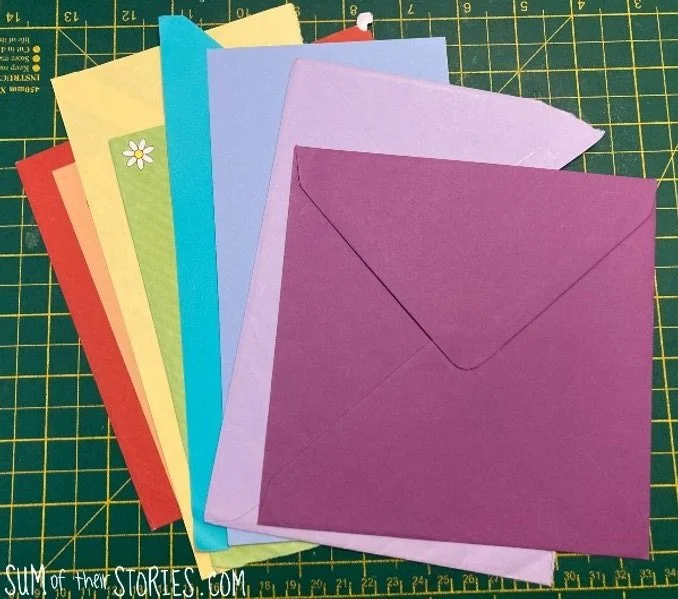
Start by selecting the coloured paper you’d like to use for your rainbow collage. You can use traditional colours like I have or maybe pastel shades.

Punch loads of shapes from each coloured paper. I didn’t count, I just punched loads of each so I had plenty to play with.

Once you have all your paper shapes ready start to arrange them on your ring binder.
I found it easiest to start at the outside edge of the rainbow arc, so with the red flowers I’d punched, then work my way in. It took a little while and a bit of shuffling around to get the rainbow looking how I wanted it to on the ring binder.
I’d really recommend that you keep the windows shut whilst you do this and keep any pets and really young children away! A gust of wind or a cat wandering across could make this take WAY longer than you intend!
Once you are happy with the arrangement you just need to glue the paper shapes down. I used a stick glue, Pritt is the brand leader here in the UK and the one I usually use. Pick up the shapes, one at a time, glue the back and then stick them in place. This is not a quick job but it’s the best way to keep the arrangement you’ve spent so long getting just right. I’d suggest listening to the radio or a favourite podcast whilst you do all the sticking and it’ll be finished in no time!


More ideas for decorating with a paper rainbow collage

I had quite a few punch out paper shapes left over so I made a little greeting card too. I confess this is not all my left over paper shapes, I have the rest in a little pot on my desk waiting for something to stick them onto - waste not want not :-D
You could decorate a plain notebook or square greeting card with a rainbow arc like this if you don’t have a ring binder than needs jazzing up. Instead of the arcing shape you could arrange the paper pieces in lines - straight lines or wiggly lines maybe.

Or how about using your leftover paper punched out shapes to decorate an envelope?
Have fun making paper rainbows this spring!
Julie
Now let’s check out the other RAINBOW themed craft ideas from my creative friends in the Sustainable Craft Challenge.

Christine’s Crafts: Easy Rainbow Brooches
Our Good Life: Easy Rainbow Hearts Tote
Purple Hues and Me: Upcycled plastic bottle rainbow flowers
Sew Crafty Crochet: St. Patrick's Day Rainbow Scarf
Mimi, a great name for Grandma: Upcycled Tin Can Planters
Southern Sunflowers: Diy Rainbow Wall Art using Inspirational Quote


