Smashed Flower and Doodle Art Ideas
/Have you ever heard of smashing or pounding flowers to make art?
I came across it the other day and thought it looked like a fun idea to try.

I’ve seen the idea of flower pounding or flower smashing on Instagram and Pinterest. It seems easy enough, you place flowers onto watercolour paper, cover them with greaseproof paper (or baking parchment/parchment paper) and then bash them with a hammer.
Sounds simple enough right? Unfortunately I didn’t find my results were quite as nice as I had hoped but I’m not someone prepared to give up too easily so after a cooling off period I added doodles to my smashed flower art and they turned out ok in the end.
Let me show you what I did, then you can decide if you fancy giving it a go too.
Smashed Flower Art with added Doodles
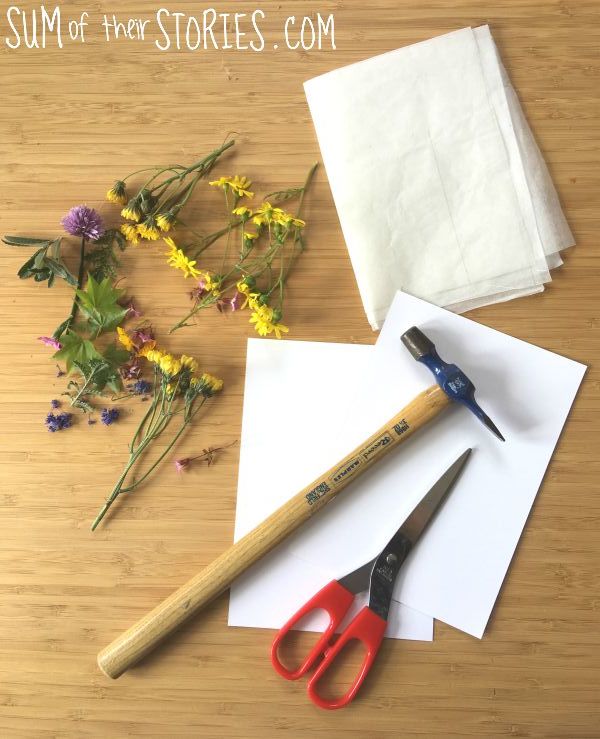
What you need for smashed flower art
To make a smashed flower and doodle art card or bookmark you will need:
Watercolour paper
Flowers and leaves - you’ll need plenty so you have some spares for practice*
Baking paper/greaseproof paper/parchment paper
A hammer
Scissors
A pen for doodling - I used a Pigma Micron pen (I love these pens, they don’t bleed and don’t smudge when wet)
Patterned card or card blank
Prepare flowers for smashed flower art
Cut the stems off your flowers and arrange them face down on the watercolour paper.
For my first attempt I arranged a circle of yellow, pink and blue flowers and filled in the gaps with leaves.
Smashing the flowers
Lay the greaseproof or parchment paper over the flowers and then whack them with your hammer.
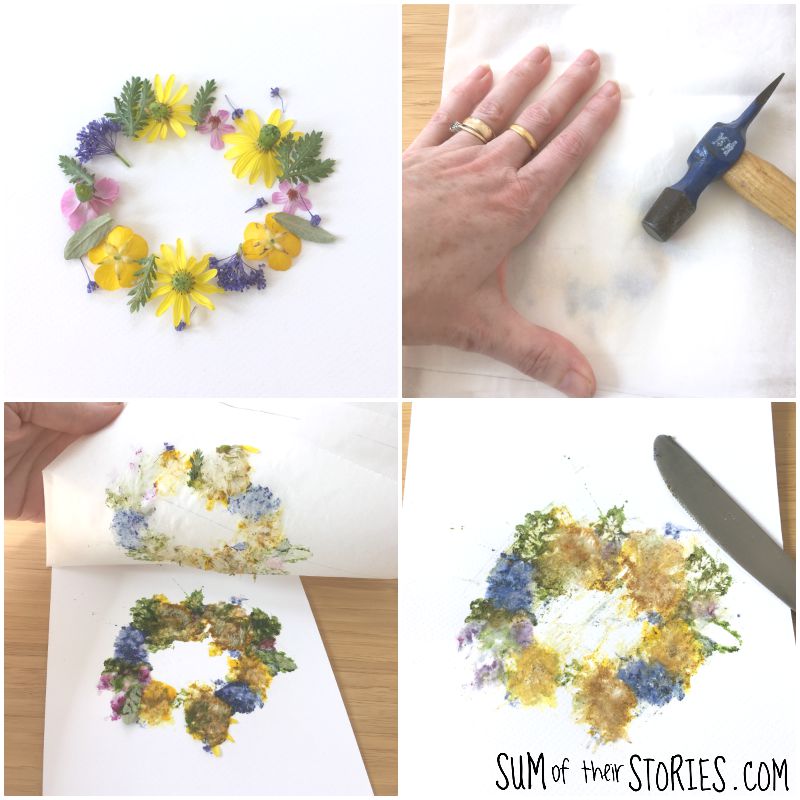
When I pulled the greaseproof paper off I had quite a mess!! Where I had smashed the fluffy, pollen laded centres of the flowers I had made a big old brownish yellow squish. I had to scrap some of the squished flowers off the paper with the back of a knife.
For my next attempt I stayed away from the flower centres and tried removing the petals and arranging them on the watercolour paper.
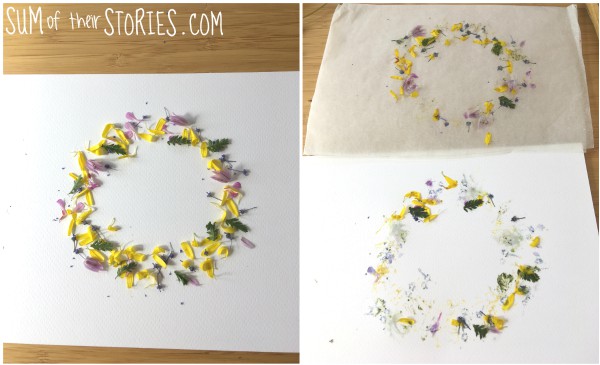
Again, as you can see, the petals stuck on the paper a bit but the effect once I peeled them off was much more subtle, maybe a bit TOO subtle now!
For attempt 3 I tried a mix of the 2 previous ideas. I had found that the blue, purple and yellow flowers worked best, the pale pink flowers I had barely showed at all. *I’d really recommend testing all your flowers and leaves out on scrap paper so you can plan your design a little better than I did!
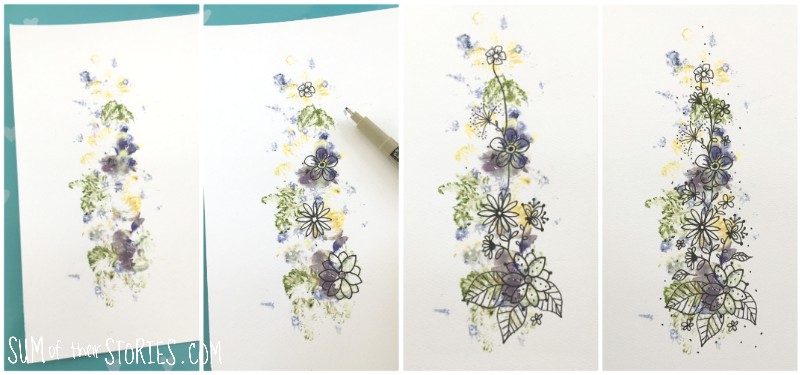
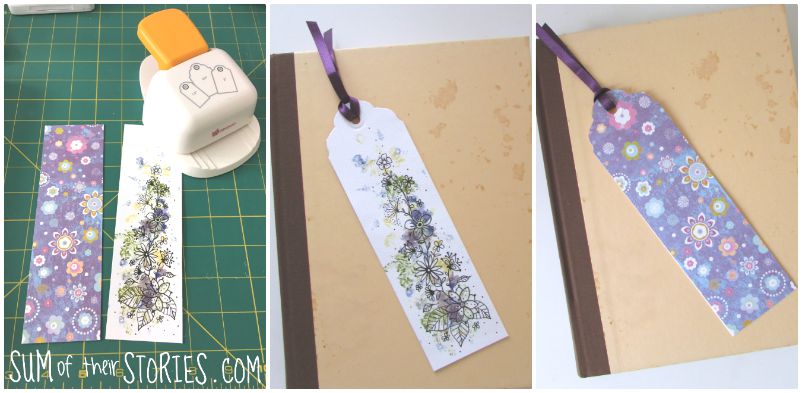
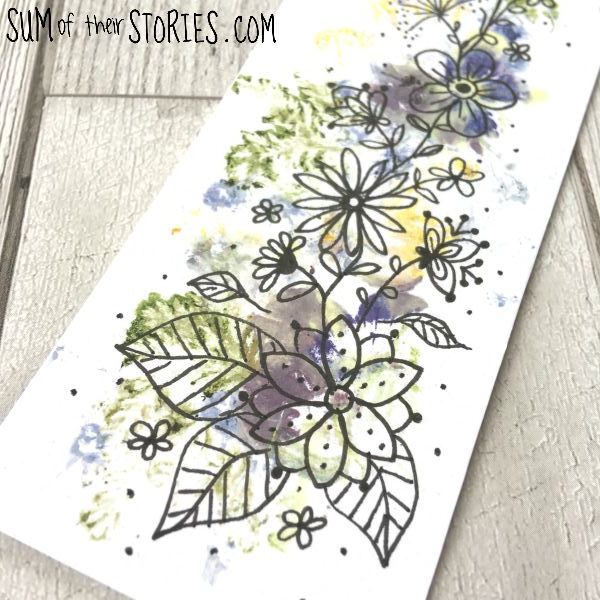
This time I arranged the flowers in a column, I had the idea that this one could be a bookmark if it worked.
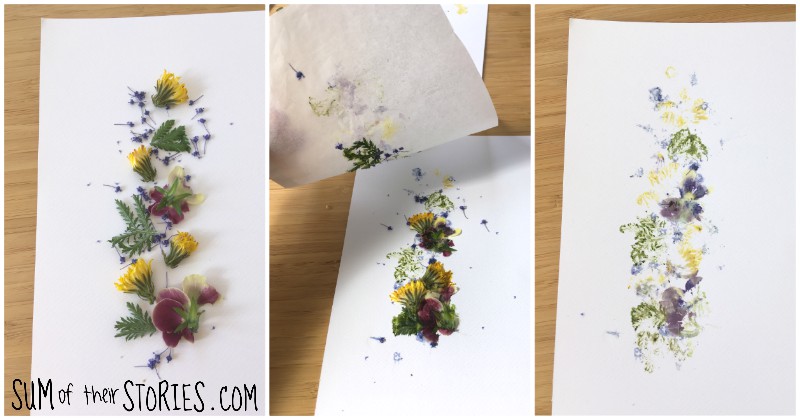
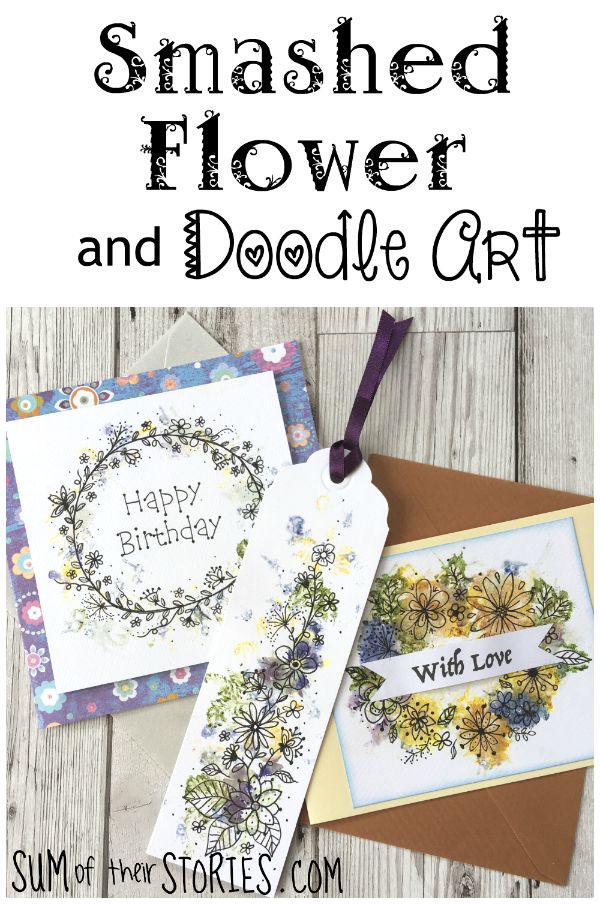
What I ended up with were some ok-ish splodgy art. I put it all to one side for a couple of days to contemplate my next move and then decided that some doodling was the way to go. You do need to leave the smashed flower art to dry completely before you doodle but an hour is probably plenty - you don’t need to leave it for days like I did!
Adding doodles
For the first smashed flower art that I’d made, I started by doodling a few evenly spaced big flowers. Then I filled in the gaps with leaves and little flowers.

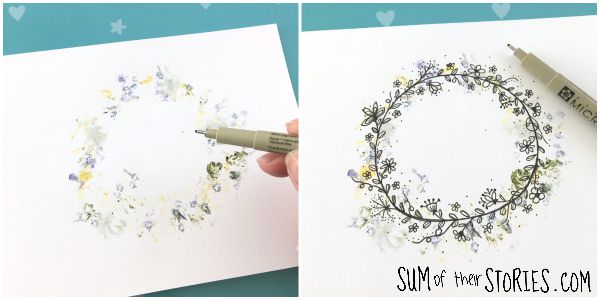
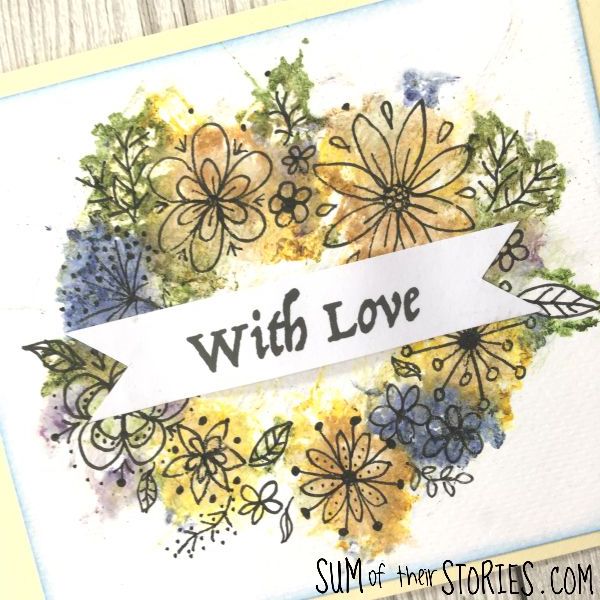
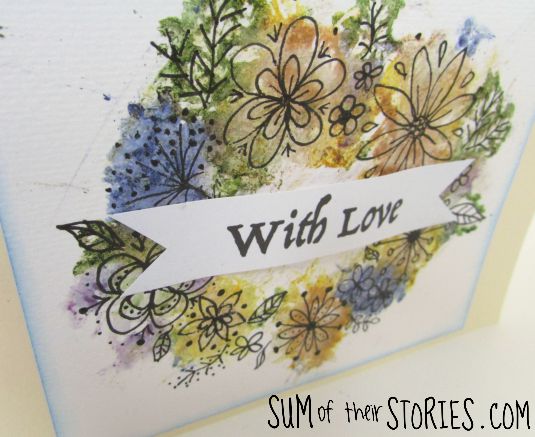
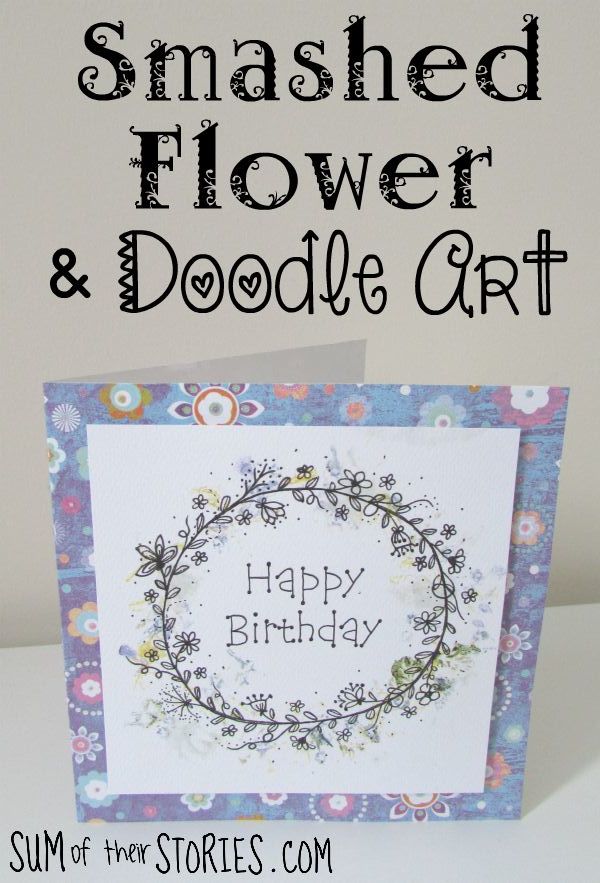
For my next attempt I tried a more delicate wreath look as the squished flowers were a little bit more delicate on this paper. I drew the circle and then added flowers and leaves, then finished it off with lots of little dots.
For my last bit of pounded flower art, the bookmark, I started with a few big flowers and then just filled in the gaps with some more flowers, leaves and twirls.
I was much happier at this point! Of course you might love your pounded flower art just as it is and then doodling will not be necessary. These are just ideas.
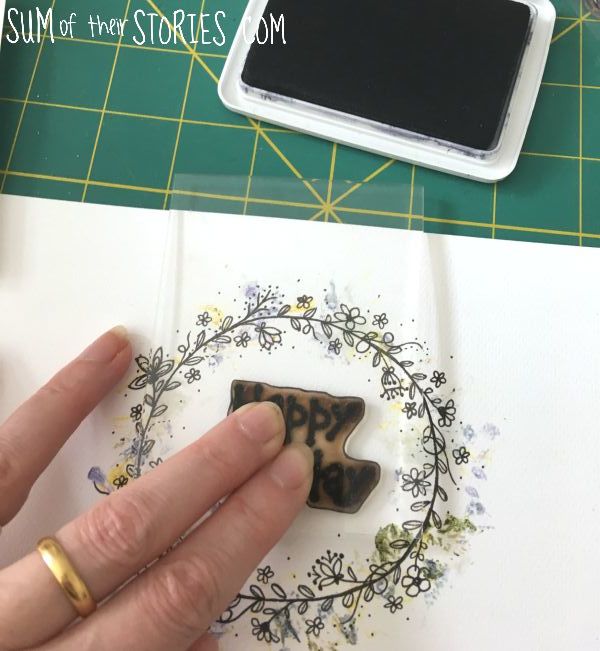
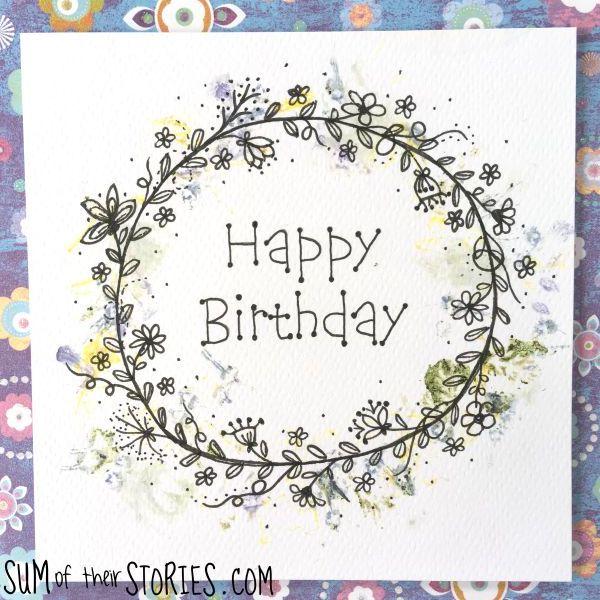
I turned the first two designs into cards. One with a stamp and one with a message on a strip of card.
To make a bookmark cut a piece of patterned paper the same size as your smashed flower doodle art and glue the two together. Punch a hole in the end for a length of ribbon. I’ve got a lovely punch that cuts the shape like a tag, this one is similar.

Do you think smashing flowers is something you fancy having a go at? I did enjoy my experiments, I ended up with some pretty cards and bookmark and with all that bashing it was quite a therapeutic thing to do!
Julie
I’ll be sharing this idea at these link ups.
More papercraft ideas you might like to try: