Upcycled Denim Bean Bag Game
/

Bean Bags are so versatile for playing with, they make a perfect summer outdoor game. You can use them to help little children with co-ordination with throwing and catching, you can set out boxes, rings or bowls for throwing and aiming games, use them to learn to juggle etc.
If you add numbers as I have here, use different colour fabrics etc you can add lots more play and learning value.
How to make a bean bag game using upcycled denim

To make this bean bag game you will need:
Scraps of denim from an old pair of jeans
Scraps of colourful cotton fabric
Number stencil - these and these are similar to my very old stencils
Plastic Poly Pellets - to make 9 bean bags you’ll need about 150g (6oz) of pellets
Funnel
Thread, sewing machine, scissors etc
You could use any plastic/pony/perler/hama beads instead of poly pellets, I just happened to have some already. Poly pellets tend to come in pretty big bags so you’ll have loads!

My stencil is one I’ve had for over 30 years! I honestly can’t believe how long I’ve had some things. I used this set of stencils for some signwriting back in the early 1990’s and they’ve just sat in a drawer ever since. I think the kids probably used them now and again during their school years. One of those things that doesn’t take up much space and you never know when it will come in handy - like now!
Prepare the bean bag squares
Start by cutting 9 squares of denim 4.5” (11.5cm) and 9 squares of colourful cotton. I cut 3 of each of 3 fabrics but you can do all the same, all different, whatever takes your fancy.

The colours here are all a bit off as I took the photos at night. I confess, this bean bag game was a gift for a little girl turning 3 and I needed to get this made quickly in time for her birthday. I had to take some of these photos in artificial light, there was no time to wait until the morning to get them finished. Serve me right for not being more organised and making them in plenty of time really - doh! I’d say rookie mistake but I have been sharing tutorials on the blog here for over 7 years now so you’d think I’d know what I’m doing by now.
Using the fabric paint, stencil a number centrally to each denim square.
You can use a regular paint brush for this as long as it’s not too soft. Don’t load it up with much fabric paint at all, you can always add more. Just dab, dab, dab the paint on until it’s all covered. Numbers that have a gap in the stencil can just be filled in carefully with fabric paint once the stencil is removed.
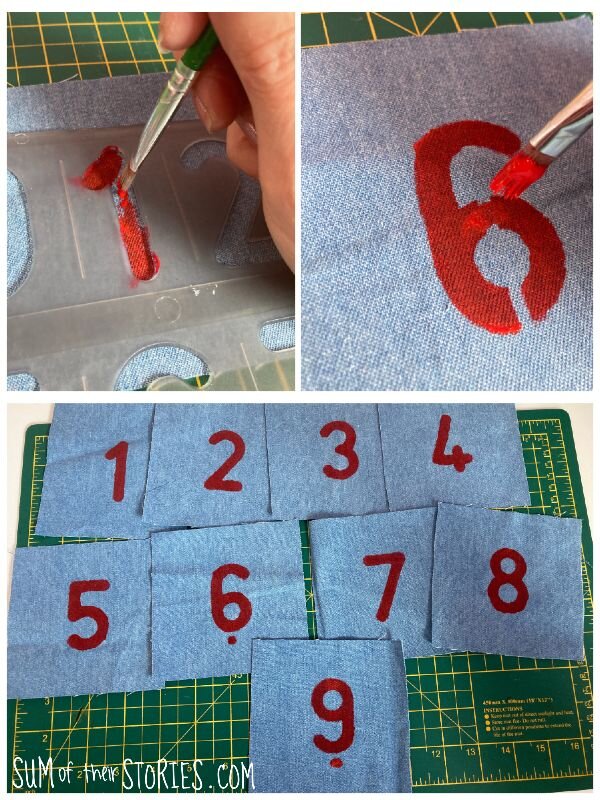
I washed the stencil between each number to make sure any excess paint wasn’t transferred onto the denim, I’m a messy crafter and with things like this it’s better safe than sorry. You can also see that I added a dot underneath the 6 and 9, just to make it clear which is which.
Follow the instructions on your fabric paint re. setting it. Mine needed ironing for 5 minutes with a hot iron.
Sew the bean bags together
Place a denim square onto a cotton fabric square, right sides together and stitch around leaving a 2” gap in the middle of one side.
Clip the corners and then turn right side out through the gap. Press with an iron.

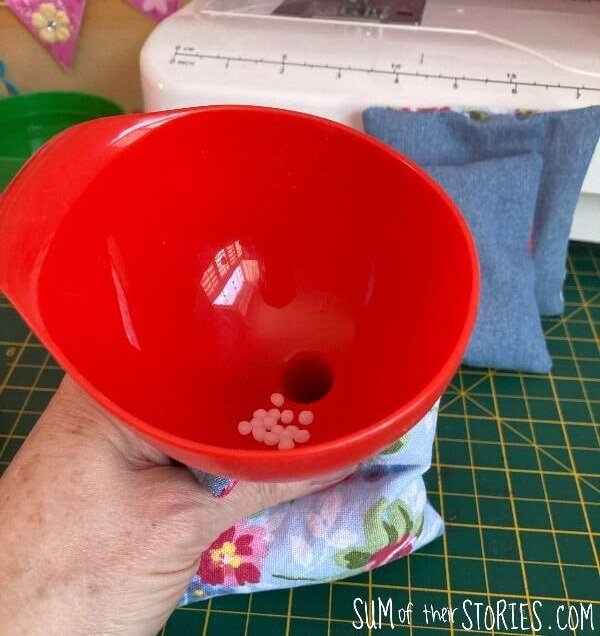
Use a funnel to fill the bean bag with beads or poly pellets. I filled mine somewhere between 1/4 and 1/3, you could do more but if you over fill them it will be much harder to finish sewing them up.
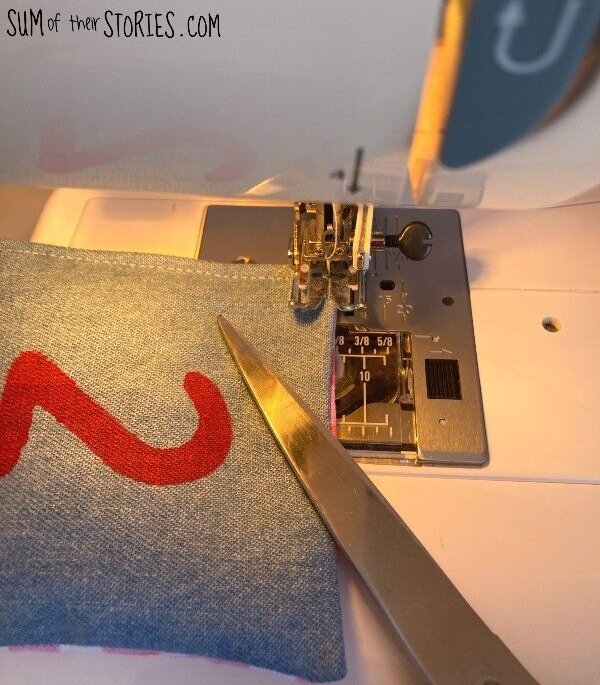
To finish, top stitch round the bean bag. Start on the side with the gap (to make sure the pellets don’t suddenly go everywhere) . After 2 sides this is a little bit fiddly. Use something flat, like your scissors, a chopstick or a pen to push the pellets away from the sewing machine foot.
Finish the top stitching with a few backstitches to make the stitching super secure.
If you do want to fill your bean bags more and have them pretty weighty then you could. If you choose to do that however I think you’d need to sew the gap up by hand instead of the top stitching on the sewing machine. I prefer to machine sew them, I think the bean bags are less likely to split or spill if they are machine sewn like this which makes them safer for very little children. That was a priority for me here as the little girl they were for is only 3 and she has a baby sister too.

Because they are filled with poly pellets rather than rice or beans these bean bags can be washed when they get dirty.
I like the idea of toys that can be washed at the best of times, but something that is played with outside is going to need a means to keep it clean right? That’s a no-brainer! The fabric paint I used is machine washable and the poly pellets are fine in regular washing temperatures.
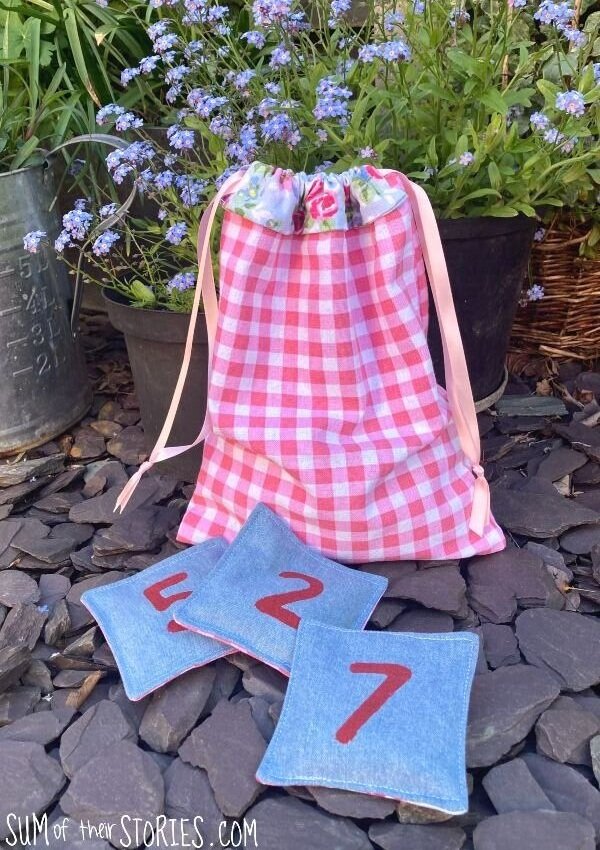
I used some of the same fabrics to make a little unlined drawstring bag to keep these bean bags in. The two together make a nice gift set.

More bean bag ideas
make more than 9 bean bags in a set if you like. I can imagine a set of 18 with number 1 to 9 in 2 different colours for team games
use letters instead of numbers so the bean bags can be used for word games
leave off the numbers and just make bean bags in different colours, how about 2 of each colour for matching games?
So many options!
Julie
I’ll be sharing this post at some of these link ups