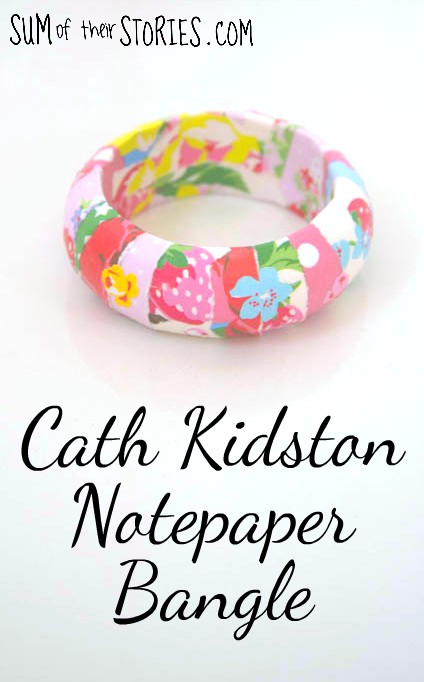
Cath Kidston Notepaper Bangle
/I love Cath Kidston's beautiful designs so used some scraps of pretty floral notepaper to makeover an old bracelet.
Back in 2015 I was a guest over on The Pinning Mama with this tutorial, but when I wore this bracelet the other day and shared it on Instagram as part of Me Made May I thought it was high time I added it here too.
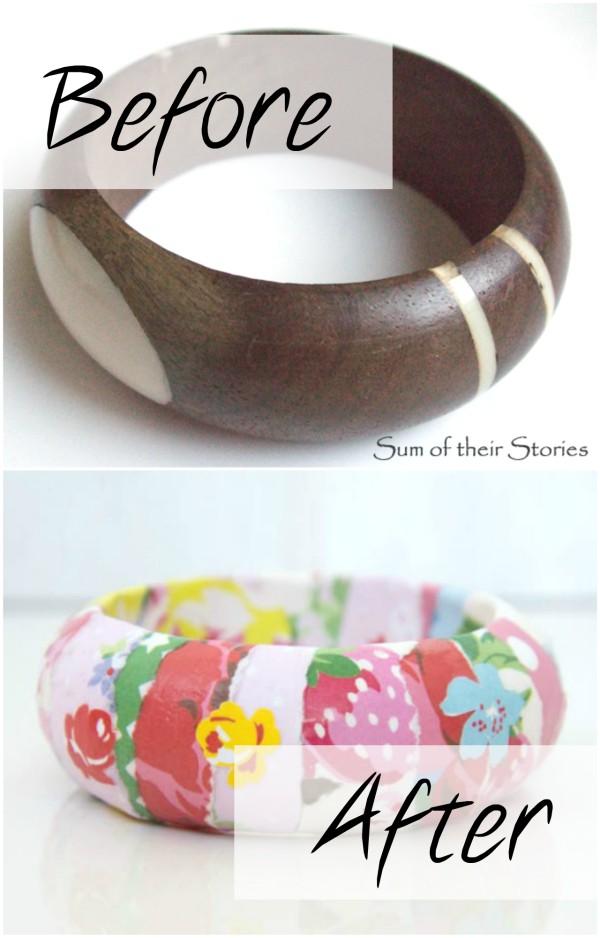
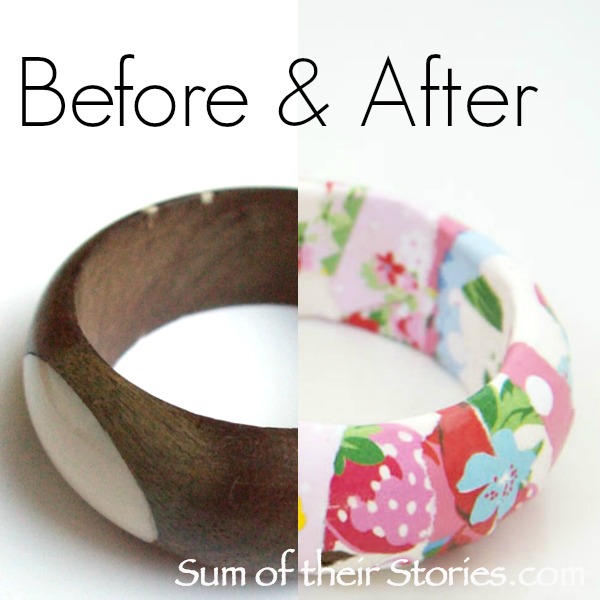
It all started when I fell over a wooden bangle in a charity shop for 50p.
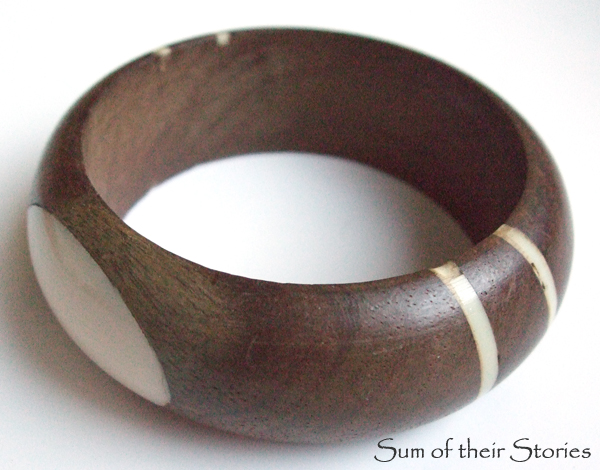
Some of the cream coloured bits were chipped and the wood was a bit discoloured so it was perfect for a makeover.
My first thought was to cover it with comics, a bit like my pen pot.
Then I saw something similar done with pages from a book, which was lovely, except I thought it would have to be a book I love and I just can't bring myself to ruin a book on purpose! It would only be ok if the book was already falling apart. What does it say in A Series of Unfortunate Events? - "there are few sights sadder than a ruined book".
I'm not sure that is strictly true but still...
I found some old sheet music which might have worked but then I remembered I had some beautiful Cath Kidston writing paper.
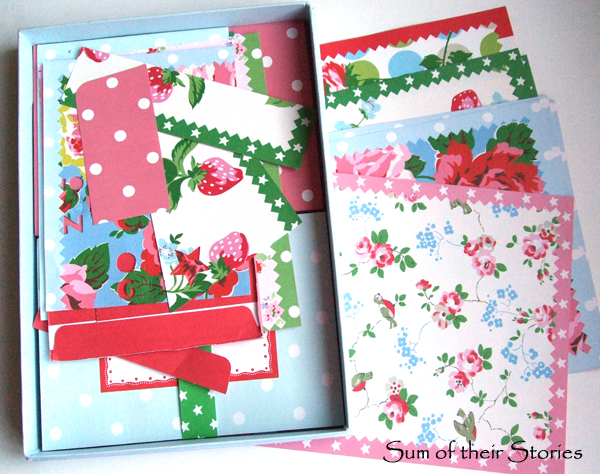
I had already used a lot of this for other crafts, you can see the little scrappy bits on the left in the box. Perfect.
How to Upcycle an old Bangle with Cath Kidston Notepaper
Do you want to make one? This is what you will need:
An old bangle
Scraps of pretty paper
Mod Podge or PVA glue
Fine sandpaper
Spray Sealer (optional but highly recommended)
I used Cath Kidston Notepaper to update my bangle but I’ve not been able to find any to link to for you. I did find some paper napkins - pretty paper napkins and this scrapbook paper with a similar vibe. You can use any paper you have that you like of course.
Prepare the old bangle and paper
First give the bangle a quick going over with sandpaper, just to rough it up a bit.
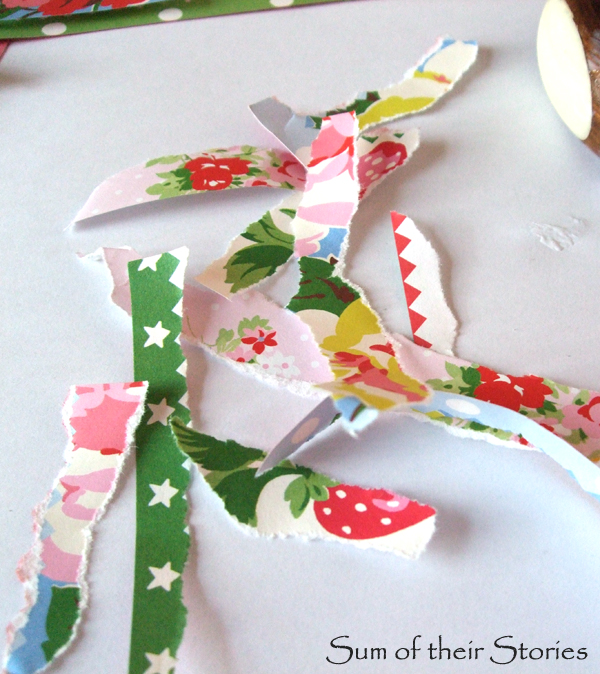
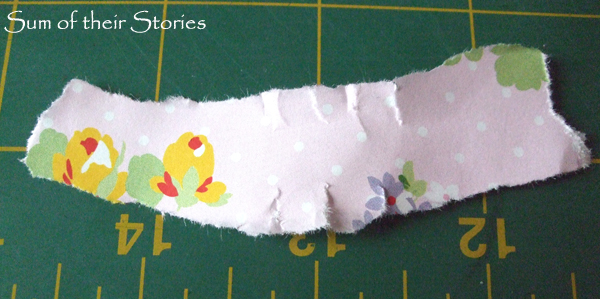
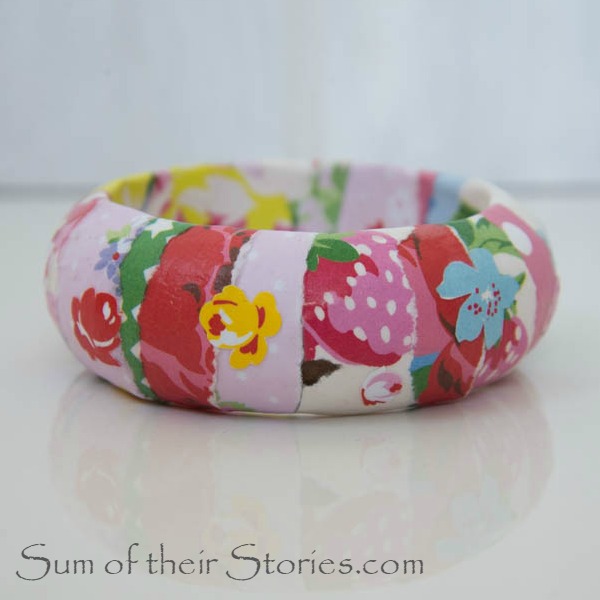
Tear lots of the pretty papers into narrow strips.
Decoupage over the bangle
Spread Mod Podge all over the bangle and stick the strips of paper on. Cover each strip with more Mod Podge to help it stick well.

If any of the strips of paper were more than 1 cm wide give them a few little tears sideways to help them to curve round the bangle more easily.
When the bangle is almost all covered with the paper strips leave a gap of an inch or two and leave it to dry hung up on a chop stick.
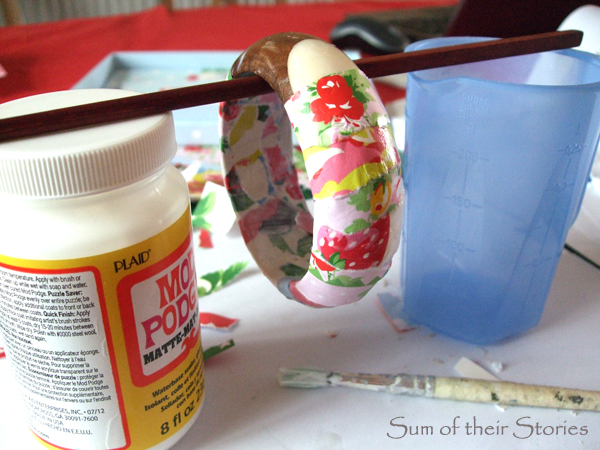
Once it is dry (about an hour) cover the gap with more paper strips and leave it to dry again.
Whilst waiting for the bangle to dry you could cut some flowers from more paper scraps using a craft knife.

You can use these flower cut outs by glueing them on any parts of the bangle that seem a little plain or where there are any little creases to cover.
Once everything is dry give the whole upcycled bangle a few layers of clear sealer spray.
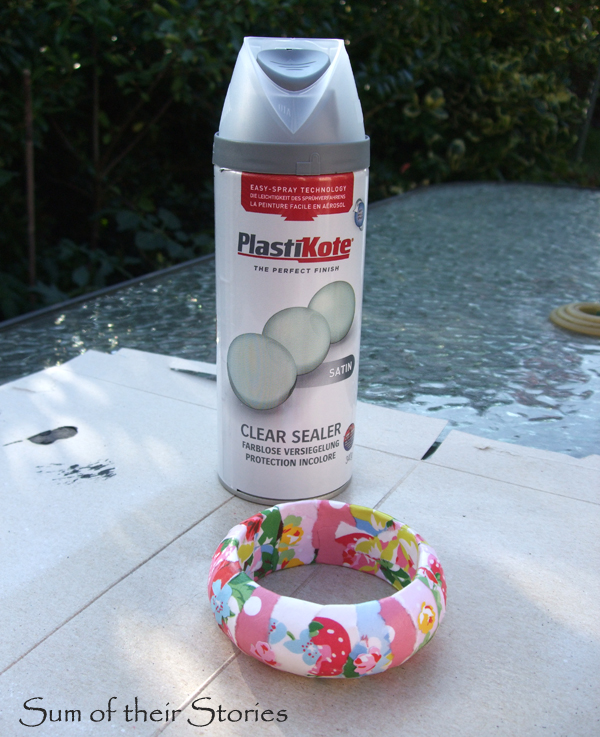
My plastikote clear sealant smells pretty bad so I always use it outside.
You don't have to use the sealer but it does make the bangle more durable. Although I try to keep it as dry as possible I have found I can wash my hands without having to worry about getting my bangle splashed.
Update after 1 year: I've had this bangle a year now and have worn it often. This photo from instagram was taken just last week and as you can see, no peeling or damage at all.
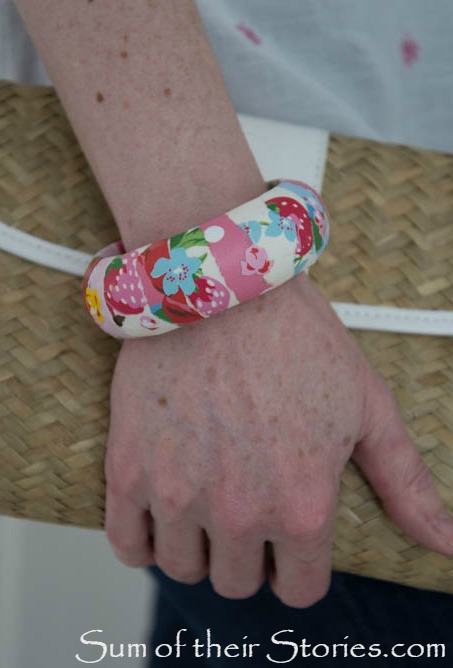
So on reflection I would recommend at least 2 layers of sealer of some sort if you want your bangle to last well.
Do you have an old bangle that could do with a pretty paper makeover? What kind of paper would you use?
Julie
I'll be linking up at these link parties,