

How to re-cover a sleeve board or ironing board
/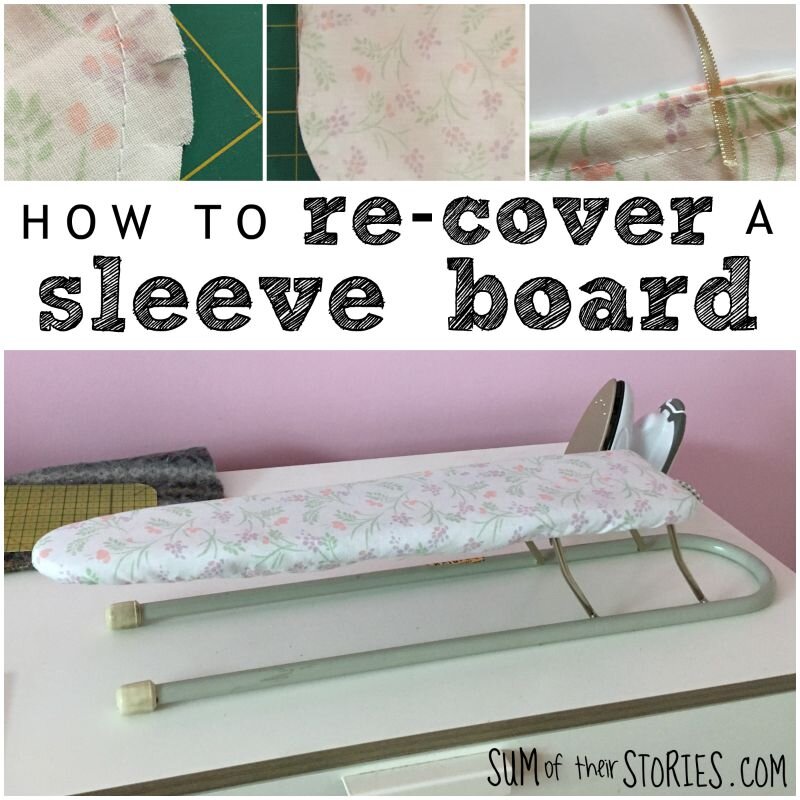

Making a new cover for an old sleeve board or ironing board is really straight forward. Here I’m going to show you how to cover a mini ironing board or sleeve board but the process for a larger cover for an ironing board is exactly the same, just bigger.
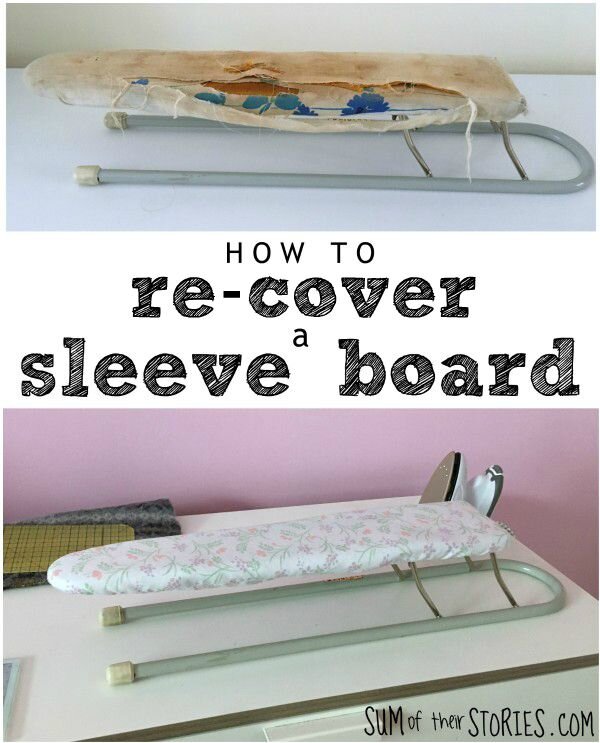
First I have to show you the little sleeve board that I inherited before it’s new cover. This is a matter of deep shame, I honestly don’t think it could have been much worse! I’ll let you judge for yourself:
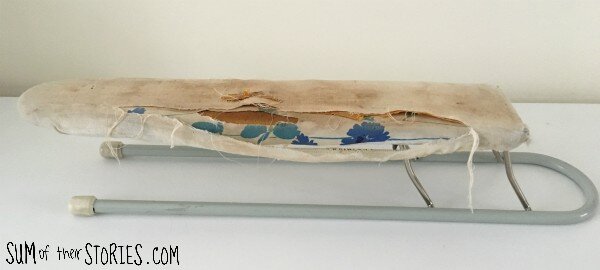
Oh dear, oh dear, oh dear! Time for a new cover right? The worst bit is that I’ve been using this little board like this for best part of 3 years.
The easiest way I’ve found to make a new cover is to do it with a double layer of fabric. So you’ll need enough fabric to cover the board twice. For a sleeve board like mine a small piece of fabric will so, something like a cotton pillow case is ideal, for a full size ironing board a cotton double size bed sheet would be perfect.
To make a new cover all you need is:
Fabric - You want it to be cotton so it won’t melt when you have the iron on hot!
A length of cord - something strong and nylon. I used cord from the tape of an old curtain
2 lengths of ribbon, how long will depend on the size of board you are covering. If it’s a sleeve board like this then the kind you get in garments to keep them on the hanger in the shop are just right. If you are covering a full sized ironing board then you’ll need them to be more like 40cm (15”) each
Sewing machine, thread, scissors, safety pin
If the old cover is completely shredded you’ll also need a piece of wadding, batting or felted wool the size of the board to go under your new cover. If the old cover is saveable at all then you won’t need this, just layer the new one on top.
Start by taking off the old cover, remove any cord or elastic.
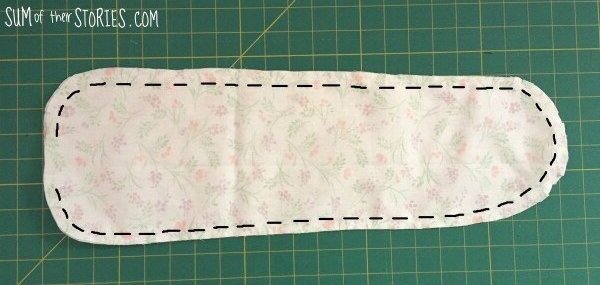
Lay your fabric out, smooth and doubled up right sides together. Lay the old cover on top. Cut around the old cover leaving an extra 2cm (3/4”) all the way round.

You could throw the old cover away now, especially if it is a nasty as mine! Actually as I say in the ‘what you need’ section, I’d normally recommend keeping the old cover on, and just adding the new one on top. I always think the more layers the better for an ironing board.
Sew all around the new cover leaving a 5cm or 2” gap at the non pointy end. Use a seam allowance somewhere around 1cm but it really doesn’t matter too much.
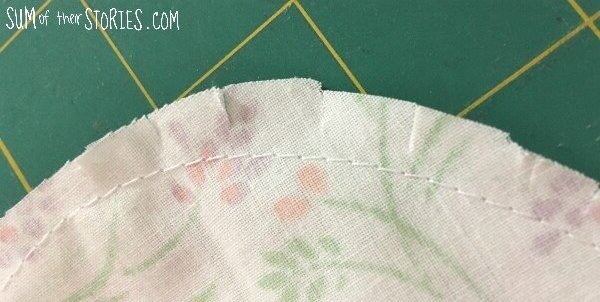
Snip the curved seams. (just don’t get too close to your stitches, you don’t want to snip them by mistake!)
Turn the cover right side out and press flat.
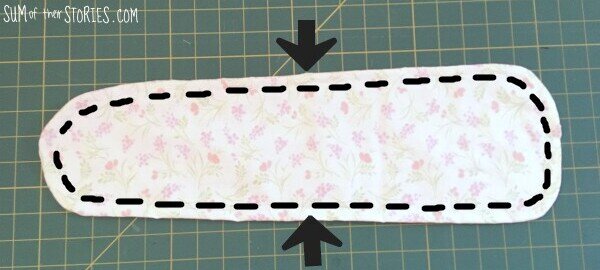
Take 2 lengths of ribbon or tape, position them where the arrows are in the photo below, with the ribbon sticking outwards. You can see that I did not do this and so it’s not in the photo. You’ll see in a moment how I resolved this but you would be quicker just to include them in here and now.
Now sew all around the cover about 1.5cm (5/8”) in from the edge. No need to leave a gap this time.
At this point I realised I needed to include ties at the mid point to stop the cover from flapping so I added mine with a few stitches. You can see why I suggest you include them with the previous round of stitching right? As my mum used to say; Don’t do as I do, do as I tell you!!!
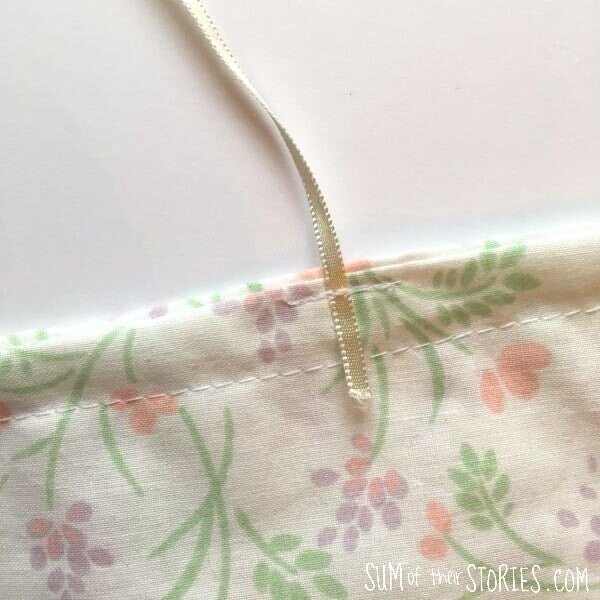
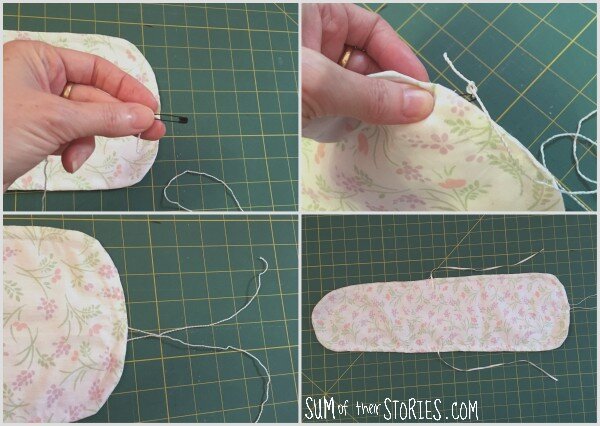
Tie the cord to a safety pin and then thread it into the gap and through the channel, all the way round.
Now your new cover is ready to pop on to the ironing board. If your old covers are completely beyond saving them cut a piece of wadding, batting or felt to the size of your board and lay it on top. This is rarely the case though, under my ‘absolutely disgusting’ cover was a ‘not too bad just slightly scorched’ one. I just layered my new cover over that one.
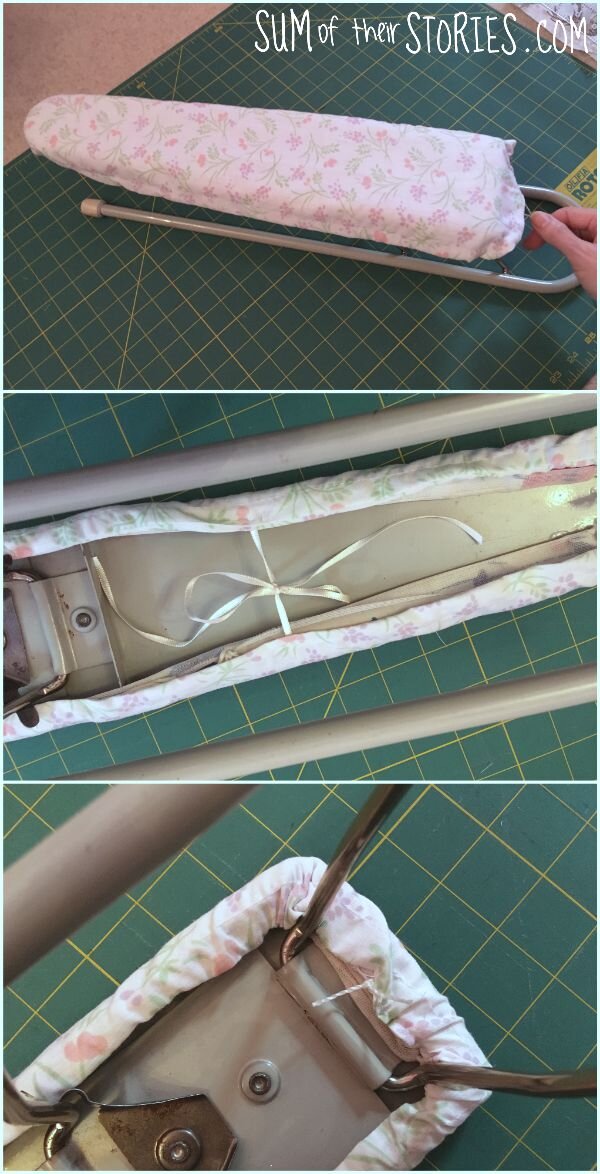
Lay the cover over the board and pull the cord as tight as you can. Double, triple, quadruple knot it, so it is secure then cut off the dangly ends. If you are the type who likes to regularly wash your ironing board cover then I guess you could leave it dangling but I’m just not that type of gal I’m afraid.
Tie the central ribbon or tape together too, to secure the middle of the cover.
That’s it, admire your new cover. This took me 15 minutes from start to finish. I’m embarrassed that I used this sleeve board as it was for almost 3 years and it took 15 minutes to make it like new!
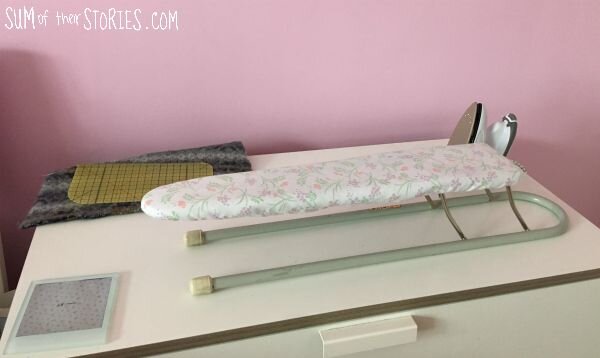
This is my little pressing station in my craft room, with my mini iron, beautifully covered sleeve board, piece of felted jumper than I use for pressing sometimes and a heat resistant pressing ruler. Plus a coaster for my cups of tea of course!
For pressing anything big I have to go downstairs and put up the proper ironing board but this mini pressing station is SO handy.
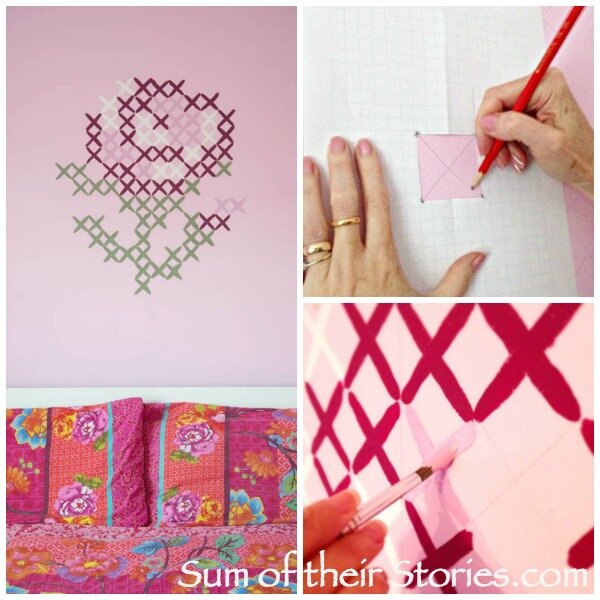
Anyone who has followed the blog for a while will know that I’ve not had a craft room for long. I used to be all over the dining room table all the time (dinner on a tray anyone?) Our daughter moved out a few months ago (thankfully just 10 minutes down the road so it’s ok) so her room is now officially my craft room/our guest room. This is the room with the cross stitch mural in it, just up and left of my pressing station as it happens. It’s one of my favourite ever home decorating projects so I’m happy I can enjoy it every day.
Honestly, I recommend not letting your board cover get quite as nasty as mine, but if it does it’s good to know that making a new one really is very quick and easy.

I’ll be sharing this tutorial at these link ups


