DIY Decoupage or Mixed Media Wooden Gift Tags
/
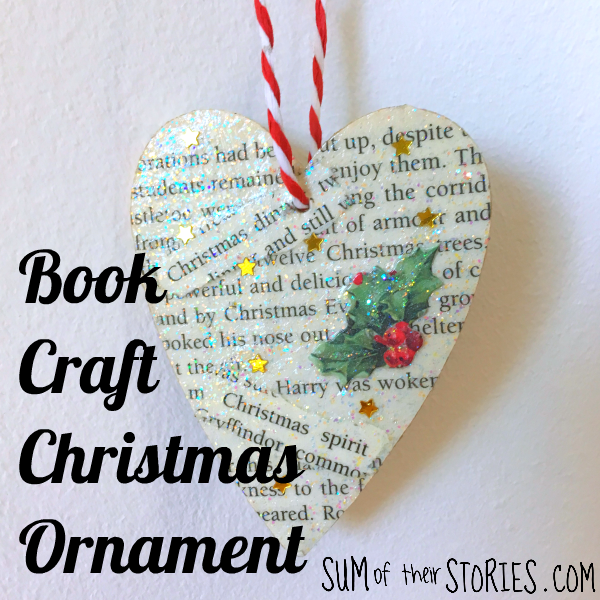
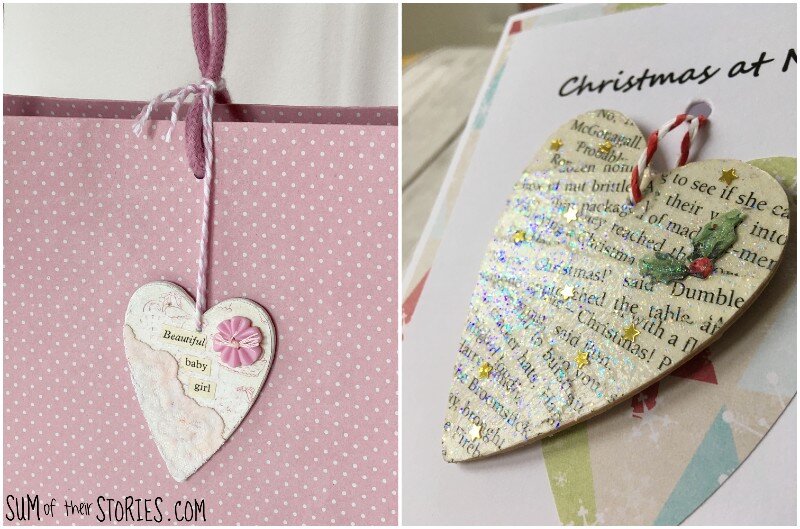
This tutorial has been a long time in the making! Back in 2018 I shared an idea to make a decoupage Christmas ornament from a book page. At the same time I started to decorate a few more of the wooden blank heart shapes that were in the packet in a variety of ways. Then I tucked them away in a box in my craft stash and forgot all about them.
I found them again when I had a bit of a much needed tidy up of my craft space. I finished them off by added just a little more to some and then thought it was high time I shared the ideas here. So here they are!
I wasn’t sure if I should call this decoupage or mixed media or something else. There are cut out and glued on paper elements, so that’s the decoupage bit. I feel like mixed media usually involves more paint techniques and pastes, stencils etc rather than the glueing on of extra bits as I’ve done here but I’m at a loss for a better description.
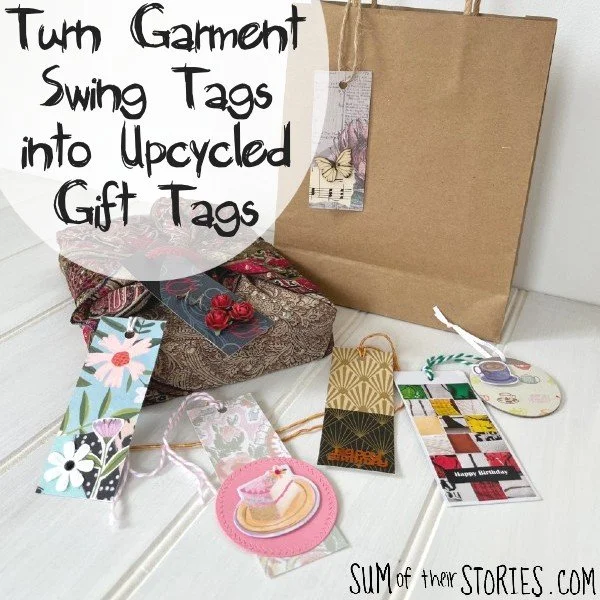
Your finished mini works of art gift tags can be attached to a gift bag or wrapped present in a traditional way. Or you can use them on a card as I did with the Christmas ornament. The nice thing about making a fancy gift tag like this is that is can become a keepsake too.
To be totally honest, making just one of these is going to take a while and be a bit of a faff. Each step is very quick but you wait for glue to dry between layers so it can take a while. If you are making one I’d really recommend making a few. It doesn’t take much longer to make five or even ten than just one. Get all your stash of crafty bits and pieces out and have a good play.
To make a Decoupage Mixed Media Wooden Gift Tag you will need:
Wooden tag blanks - any shape you like, I used hearts here as you can see!
Patterned paper - scrapbook paper or book pages, sheet music etc
Embellishments - All sorts of bits and pieces, buttons, sequins, paper doilies, lace, ribbon, old books etc
PVA Glue and a small brush - I used Mod Podge
A stronger glue like Anita’s Tacky Glue or High Tack
Ribbon or twine for hanging - snip those hanging ribbons from garments, they are ideal for this sort of thing
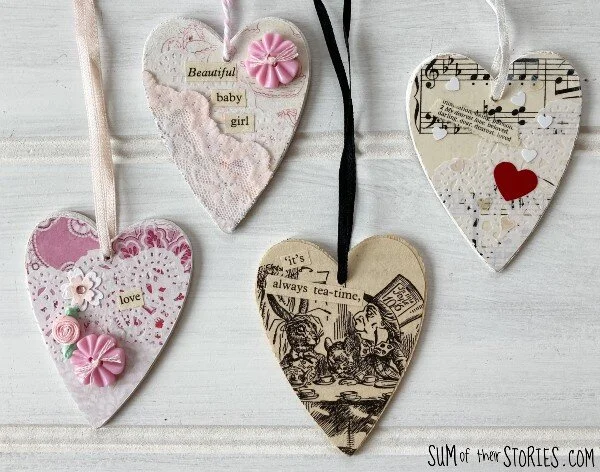
All these different styles of wooden gift tag where decorated in pretty much the same way, I’ll wizz through the basics with one and then explain any extras or differences in the others. When you make your gift tags though, you’ll be using the materials you have so of course yours will be different. This is just to spark some ideas really.
Making a Decoupage Mixed Media Gift Tag - the basics
Cover the wooden shape a layer of Mod Podge glue and a layer of paper
Cover with another layer of Mod Podge and add paper embellishments
Once they are dry cover with another layer of Mod Podge to seal
Add additional embellishments like buttons, lace, sequins etc with a stronger glue
Let me show you each gift tag I made in more details now.
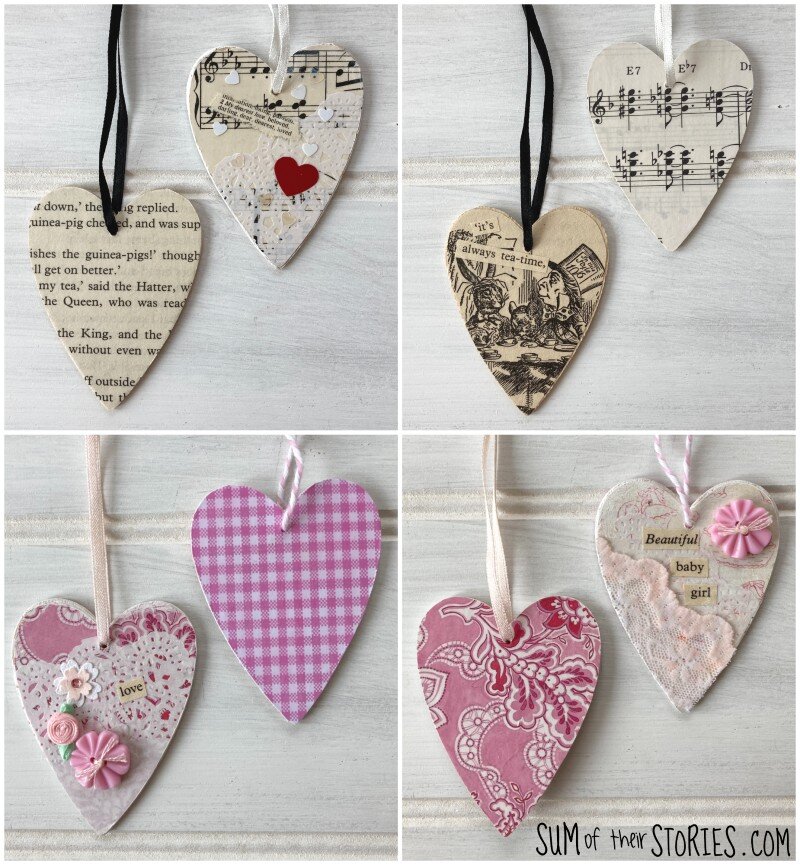
Let’s start with this super romantic tag with the sheet music and hearts. It’s ideal for a wedding, anniversary or valentines (not very seasonal I know, just pin the idea for later maybe!)
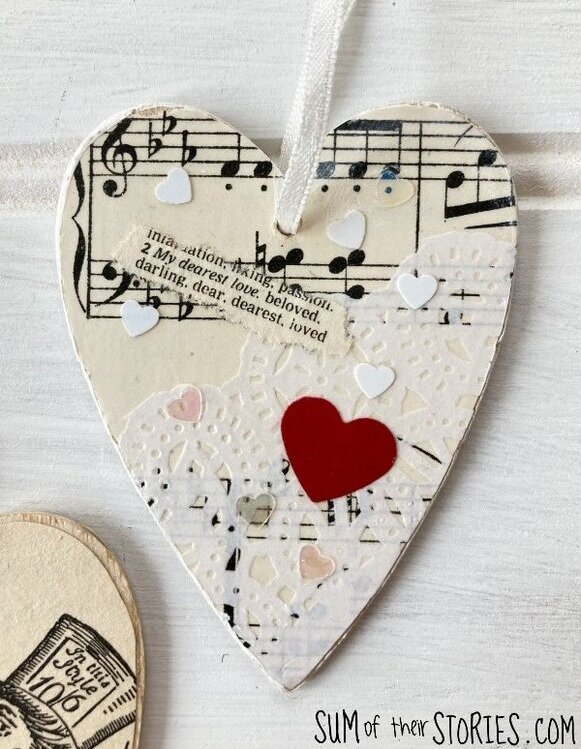
Start by cutting a piece of background paper to roughly the size of your wooden gift tag, just a little bigger. Here I used some old sheet music.
Use a brush to cover the wooden shape with a layer of Mod Podge and then lay the paper on and smooth gently. A good quality scrapbook paper will be easy to work with. If your paper is thinner then go gently so you don’t tear or wrinkle it, unless that is the look you are going for of course.
Using a craft knife or sharp scissors cut away the excess background paper.
Repeat on the other side if you like. That’s optional, I just prefer both sides of my tag decorated.
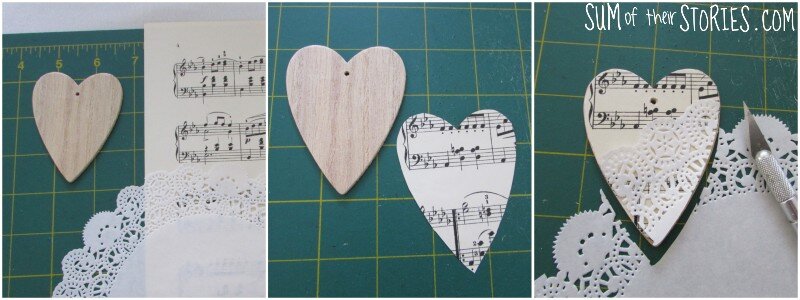
For this tag I added a little piece of paper doily over the sheet music. Add more Mod Podge to the tag and lay the paper doily on top. Gently smooth it, use your glue covered brush to do this. Try not to touch it with your fingers, it’ll all end up in a hot mess in no time. If you do want to use your fingers to smooth gluey paper like this then put your hand inside a plastic bag, a transparent food type bag, as that can really help.
To finish off the tag I added a little bit of paper torn from an old thesaurus, some heart sequins and a red paper punched heart. These are added in the exact same way, brush a layer of Mod Podge onto the heart and then pop the embellishments on top.
Once everything is dry give the whole thing another coat of Mod Podge to seal it all in.
You will have covered the hole in the gift tag with all this paper and glue so use a needle or pin to poke the hole again. If you hold it up to the light you should be able to see the hole easily to know where to poke!
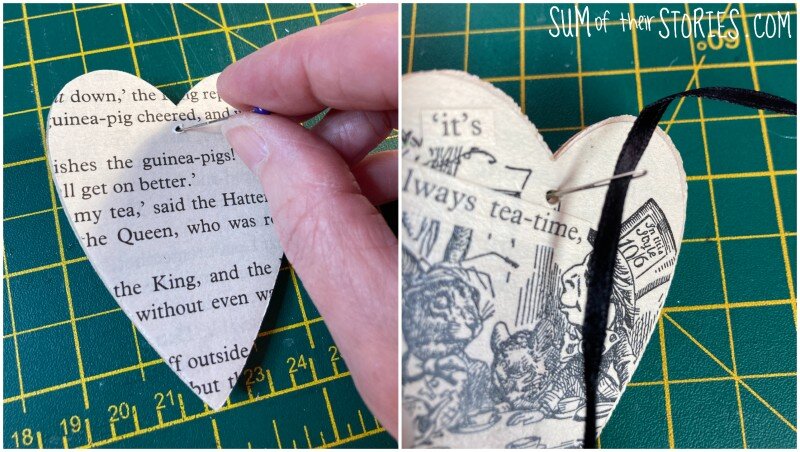
Add a length of ribbon or twine for hanging and it’s all done.
This Mad Hatters Tea Party tag is made from a page from an old copy of Alice in Wonderland.
This one is an absolute doddle to make. Use an illustration from an old book as your background, and a page from the book with text for the back.
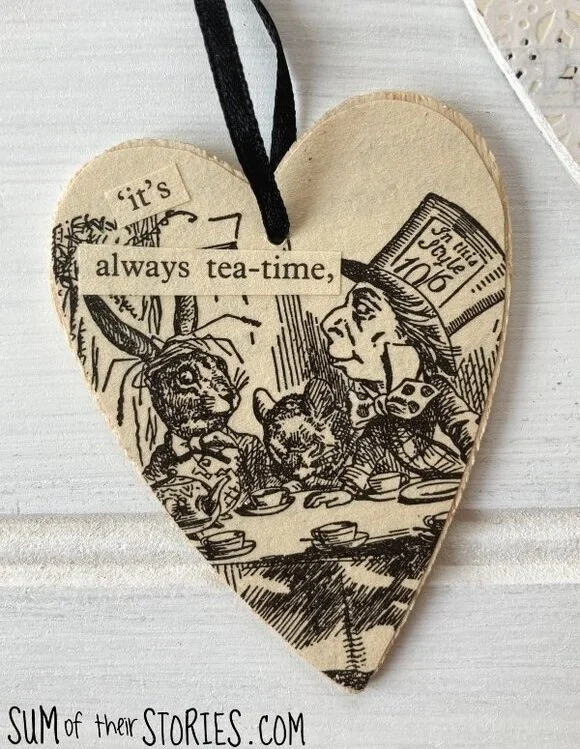
Cut or tear out a quote and layer that on. A layer of Mod Podge to seal and it’s finished!
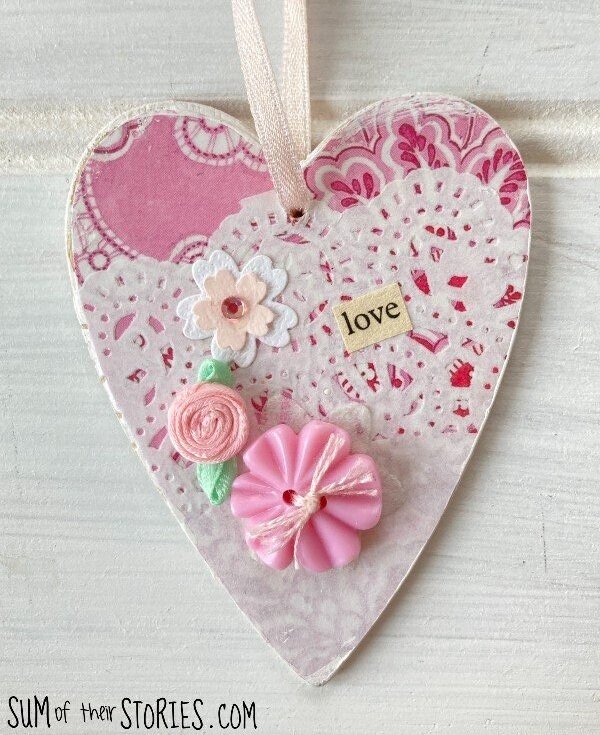
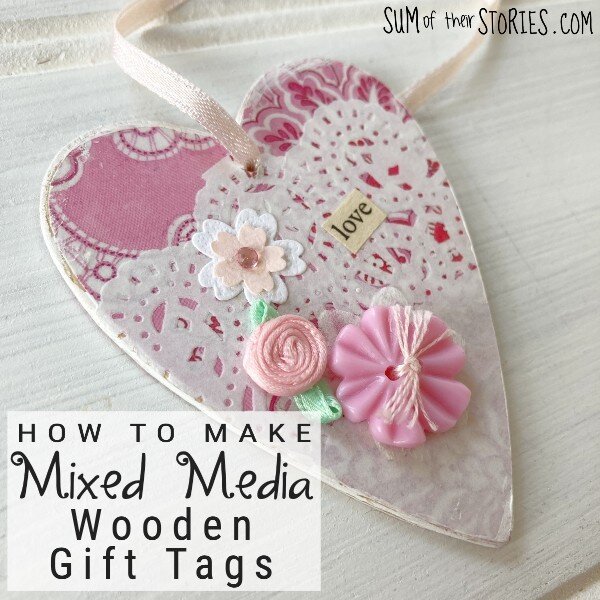
This pink and romantic tag is made in a similar way to the first sheet music tag to start with. A layer of pretty paper, followed by a piece of paper doily.
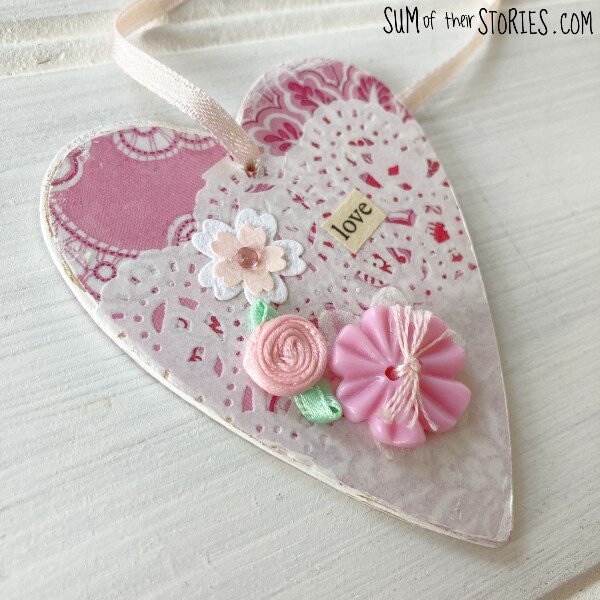
It is finished with the word “love” cut from the thesaurus and some embellishments from my craft stash. A paper flower with gem that was rescued from a card I’d received for my birthday. A ribbon rose and a flower button with some embroidery thread tied in the middle. I used a slightly strong glue to fix heavier things like the button, I tend to use Anita’s Tacky Glue or High Tack for this sort of thing.
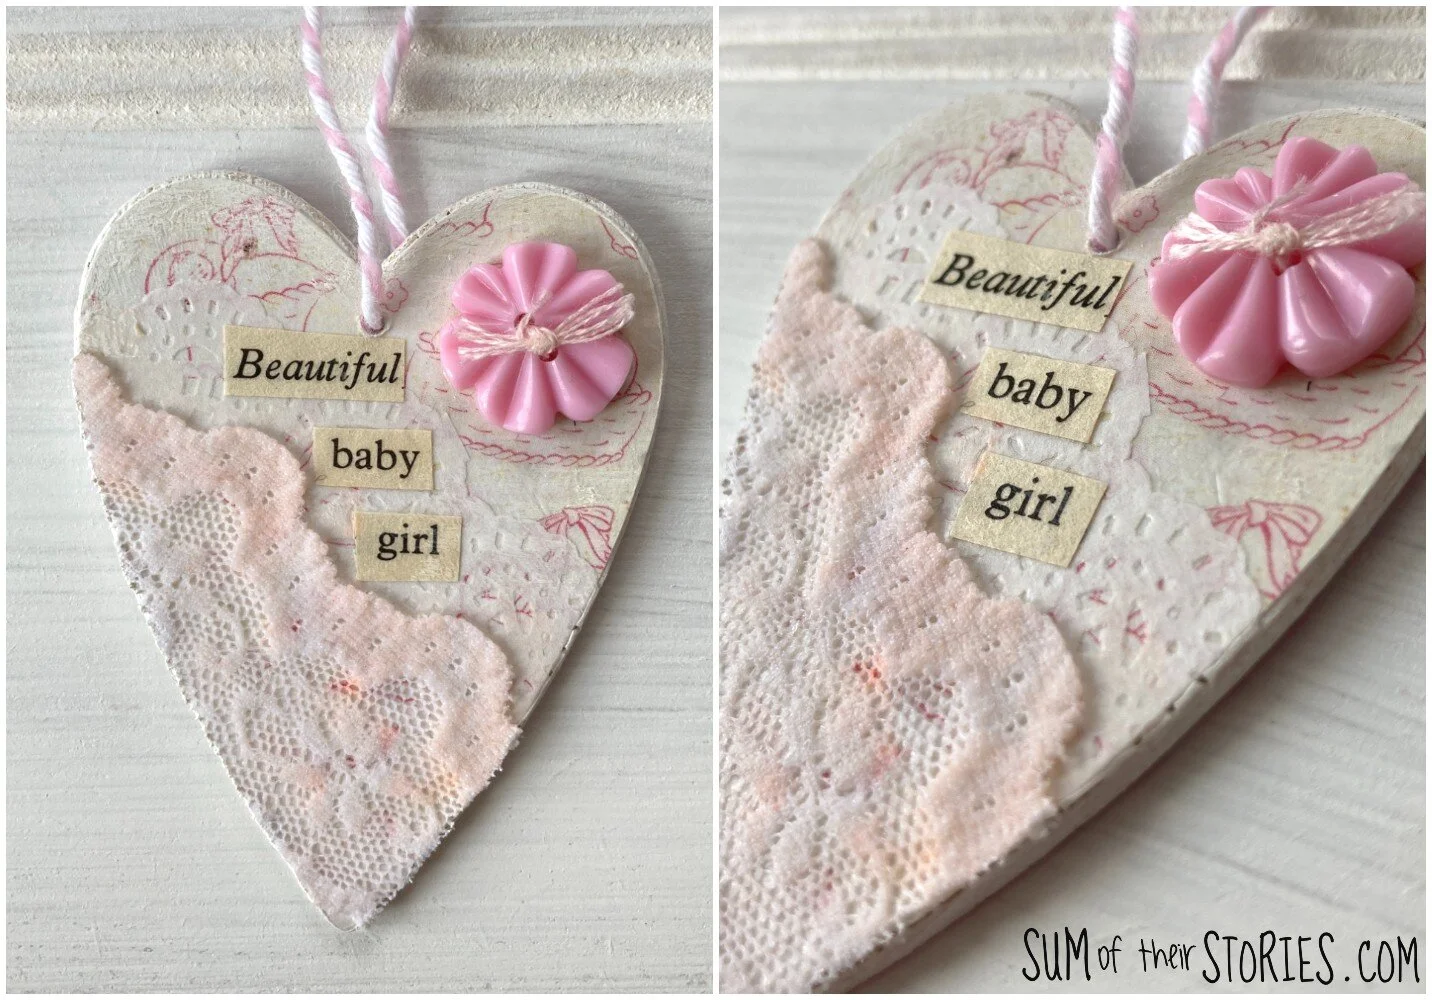
Last but not least is this baby girl tag.
As well as a pretty background paper and a paper doily, I added a small piece of real lace to this one. This took a little longer to dry that the paper elements, so allow extra time if you add cloth or lace. The words “Beautiful baby girl” were cut from an old book and this one had a flower button with embroidery thread tie added too.
I covered the back of each heart with a layer of patterned paper, but you could leave them plain, paint them, write a message on them or even decorate them just as fancy as the fronts!
These gift tags are a great way to use little saved bits and pieces in your craft stash, I don’t know about you but I have boxes and boxes of buttons, gems, cut of paper pieces, sequins, bits of lace ribbons etc. This is a way to put them to good use.
Julie
I’ll be sharing this tutorial at these link ups