Upcycling Old Paintings into Gift Tags
/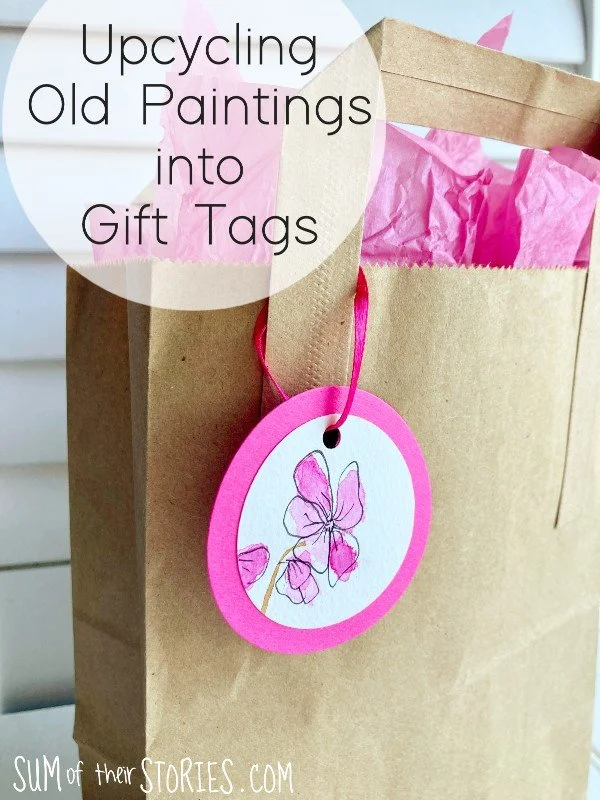
How to take old spare paintings and turn them into beautiful gift tags.

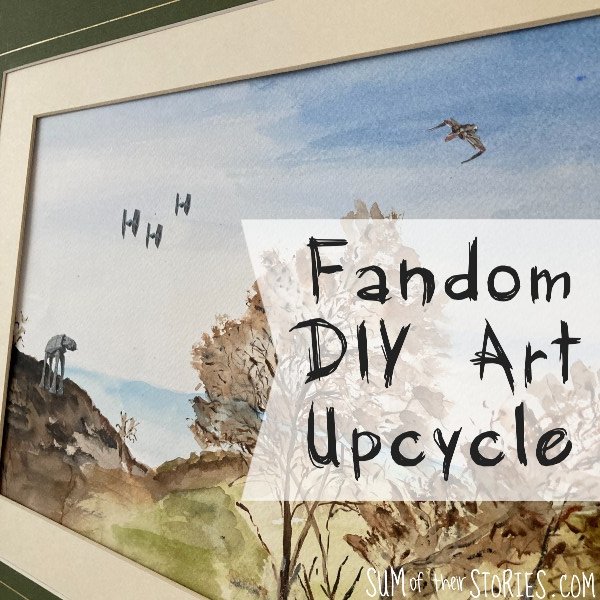
This is the final idea I have to share with you that uses the large box of my nan’s old spare painting. Last year I shared a few other ideas, a mosaic art canvas and a DIY art upcycle where you add a little of your favourite fandom.

The collection of art I had to upcycle was my grandmas. She was an extremely prolific painter, it gave her great joy in her retirement and she liked to experiment with different styles and techniques. When she was still alive she was very generous with her paintings and everyone in the family had several on display. When she died my aunt put all the spares, the experiments, the duplicates in boxes and it was only when they moved a few years ago that the collection resurfaced.
Once again, everyone in the family chose a few more favourites to frame and hang but that still left us with boxes of paintings, literally hundreds of them.

Once I had made the 3 mosaic canvases and the 3 fandom art pieces I was left with mostly scraps of the paintings with some really lovely colours and patterns. Perfect for one last upcycle - I turned them into gift tags, some for me and some for my aunt.
If you don’t have a vast collection of spare paintings that you’ve inherited (I realise not everyone has!!) you can make gift tags from your own painting experiments and practice pieces, from the kids paintings or even from pretty packaging. Tissue/kleenex boxes are often patterned and sometimes the packaging of chocolates, biscuits, cereal or even tea is lovely.
How to upcycle old paintings into gift tags
All you need is:
Old paintings
Circle punch or circle cutter
Scraps of colourful card
If you have a die cutting machine you could use this to cut the gift tag shapes instead of punches. If you don’t have a cutting machine or punches you can just cut gift tags shapes with scissors, it’s just easier to get a neat and professional finish with a punch or die cut.
Making the gift tags - a basic tag shape
If your painting is on a fairly thick watercolour paper and is plain on the other side then all you need to do is punch tag shapes. Even paintings that are not very successful (a polite way to say “not very good”!) as a whole can look great when just a small part is used.

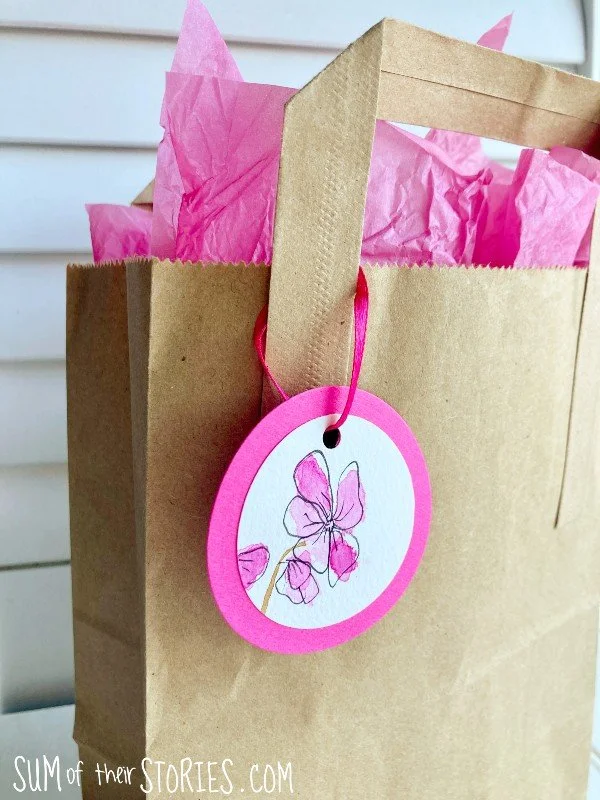
Making circular gift tags
If your painting has marks of any sort on the back you can still turn it into lovely gift tags but you’ll need to cover the back.
Here I cut circles from the left over scraps of paintings and then cut slightly larger circles from scraps of colourful card.
Glue the smaller decorative circle onto the larger one and then punch a hole at the top.

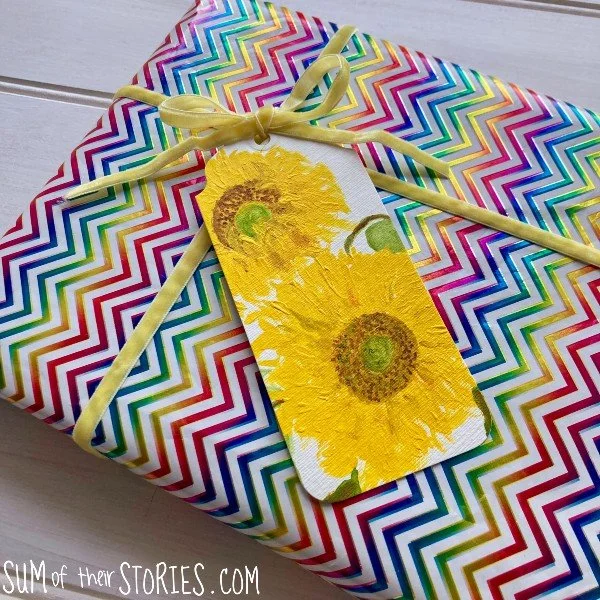
Cut out image gift tags
The last idea I tried was a really simple one. I cut out elements, mostly flowers and simply glued them to tag shapes punched out from scraps of plain card.

Here I cut a rose from one of my nan’s paintings, and cut a tag shape from a scrap of cream card. I added a little strip of hessian (burlap) fist and then popped the rose on top. The ribbon at the top is just one cut from the shoulders of a garment. I always keep those little ribbons, you never know when they will come in handy.
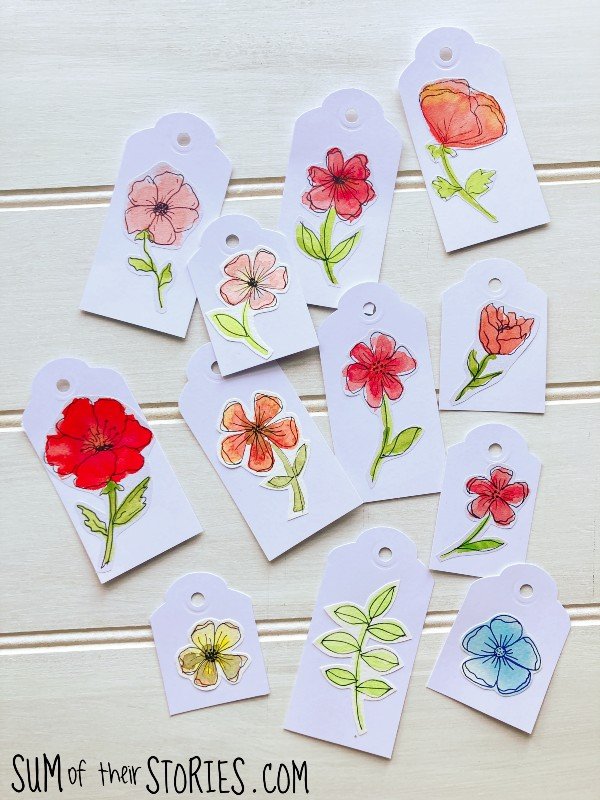
These last few little flower paintings were actually some of my own practices and not from my nan’s enormous body of artistic work. I had some lovely watercolours for my birthday last year and really enjoy practicing with them, but the more you practice the more paintings you acquire! I completely understand how my nan created so much now.

I feel sure that my nan would be pleased to see all her spare paintings turned into lovely things that we can use and enjoy. Cutting up someone else’s work can be challenging, especially at first, but once the various projects came together I felt better about the whole thing. Cutting up my own spare and practice art on the other hand is easy, funny that!
The equipment I used
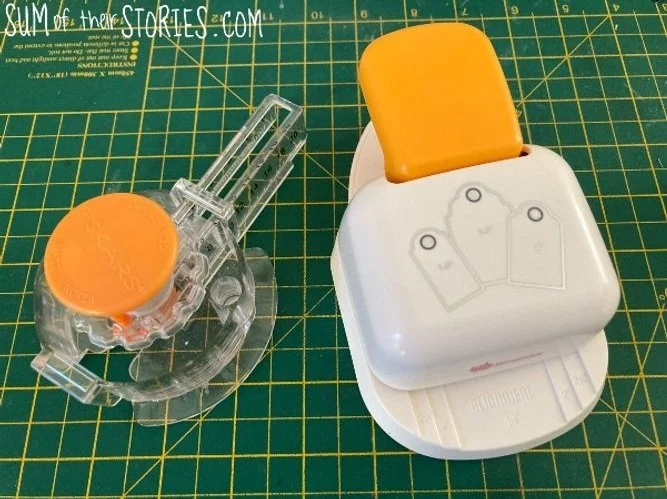
I’ve had my tag punch for years now, it’s definitely one of my most used punches. You can get all sorts of different styles and sizes and those with a cutting machine can make tags of all sizes and shapes too with metal dies or files depending on the machine type. My punch just shapes the end and can cut various widths. You can make little label type shapes too, by punching both ends of the card. I’ve found it really versatile. The tag shape is great for making basic gift tags of course but I’ve been surprised how useful it’s been and how many things are improved by the addition of a little tag.
Mine is made by Woodware but this and this look very similar.
I’ve had my circle cutter for many years too, it’s a handy way to cut circles of different sizes with one piece of equipment. It’s the Fiskars Circle Cutter, you can get replacement blades for it and I confess I probably don’t change them as often as I should. It takes a little bit of getting used to as a piece of papercraft equipment to use without your paper tearing. You must press the centre down firmly as you turn but once you get it it’s very easy and effective.
Julie
I’ll be sharing this idea at some of these link ups