How to personalise a baby towel
/

A simple DIY gift idea for a new baby, embroider their name on a shop bought hooded towel for a quick and unique gift.
It’s Pinterest Challenge time! Yay! This is the time when I join a group of creative bloggers, we all take a pin from our pinterest boards and give it a go. The pinterest challenge is organised and hosted by My Pinterventures.
For this month’s challenge I took my inspiration from this pin. It’s a tutorial by Fairy Face Designs to embroider names onto fabric for quilts.
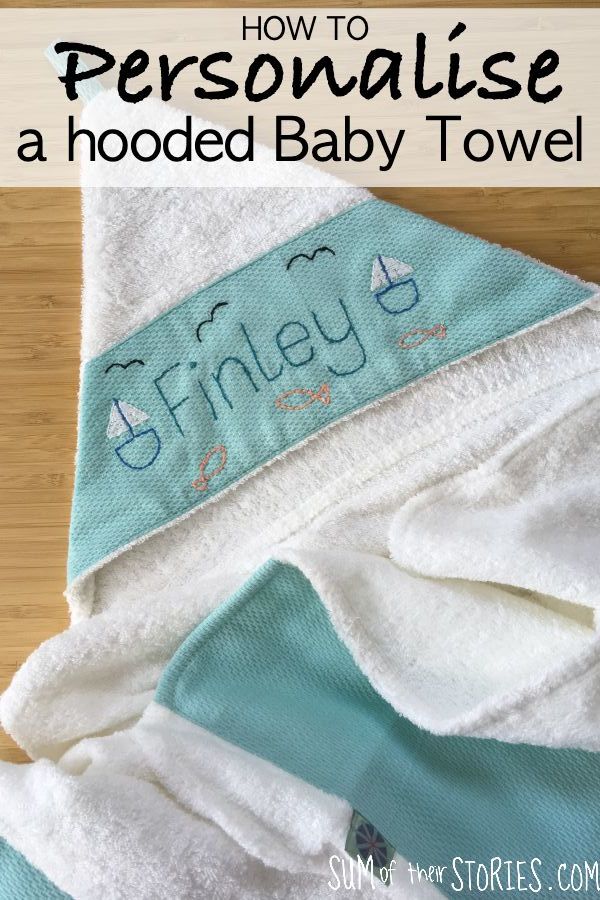
We had a new baby in the family a couple of weeks ago. My cousin and his wife had a beautiful baby boy who they named Finley. Finley arrived a little bit early and caught me out, gift wise. He’s a summer baby so he doesn’t need little crochet hats or knitted cardigans, I’m going to make him some of those in bigger sizes for when the weather changes, but I couldn’t go and see him for cuddles empty handed now could I?!
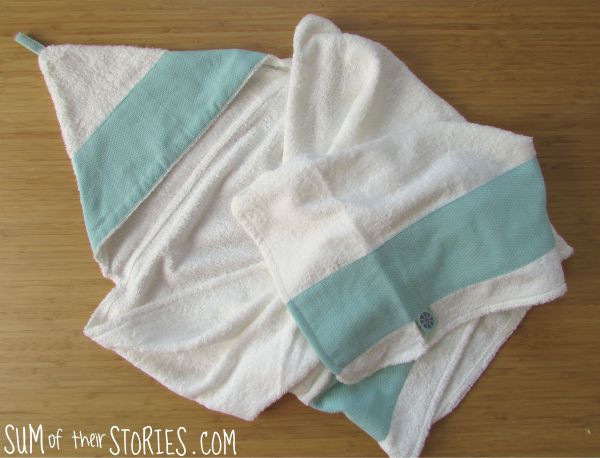
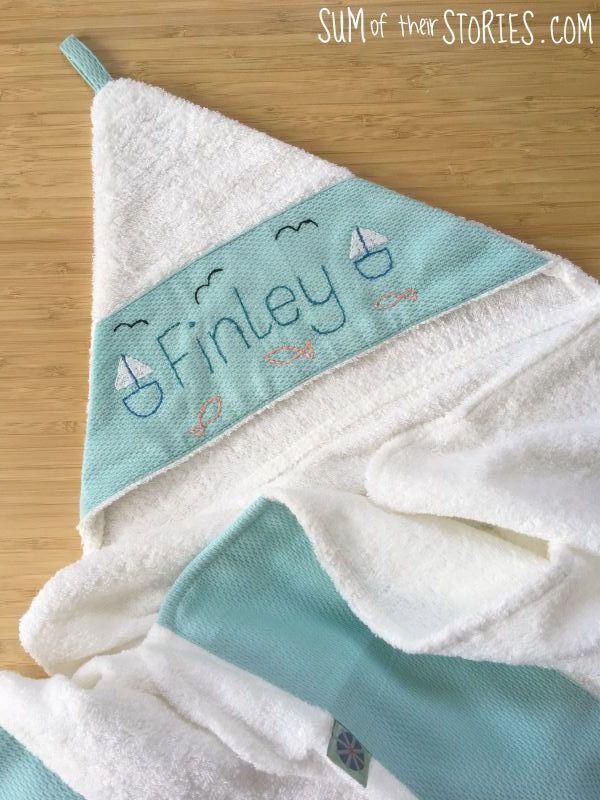
I was in Ikea picking up some picture frames when I spotted this hooded baby towel and, with the embroidery tutorial from Fairy Face Designs it all fell into place. The towel is called Tillgiven, measures 60cm x 125cm, cost £10 and is available with this turquoise trim or pink.
On the tutorial from Fairy Face Designs it suggests you print the name out from your computer in a font you like. On this hooded towel however, that was never going to work. The fabric layers were much to thick to be able to see the print out through them, so I kept things simple and just freestyled it.
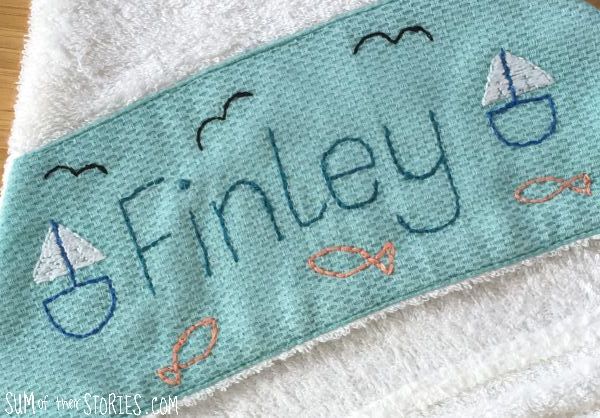
I used my water erasable pen to write ‘Finley’ in my best simple writing and then, because there was space and I thought it would be cute, I added some boats, fish and birds.
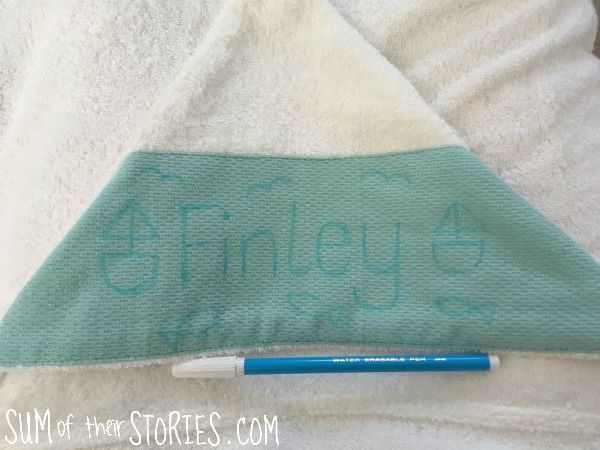
If you are not tracing a printed word or name the most difficult thing it to get the letters an even size. I think when we write normally our letters must vary a lot in size , I known mine do, so just take your time and use a ruler to make sure they are level and the same height and width. I guess that’s why the idea from Fairy Face Designs to trace them from a computer printed font is such a good idea!
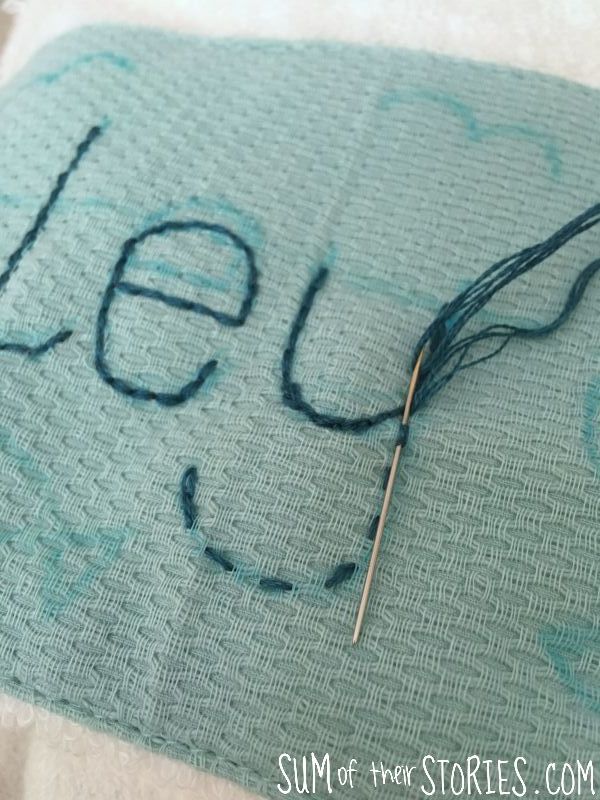
Once I was happy with the design I started to embroider. I used a long length of DMC embroidery thread and used 2 strands. I then doubled the long length in half (so I was working with 4 strands) That way I could start the embroidery from the front with no knot at the back.
I worked the embroidery in double running stitch - keeping it really simple! There’s a tutorial on how to work a double running stitch here if you need some help.
I did work the boat sails with the double running stitch outline but it just wasn’t ‘enough’ so I filled them in with a rather messy satin stitch.
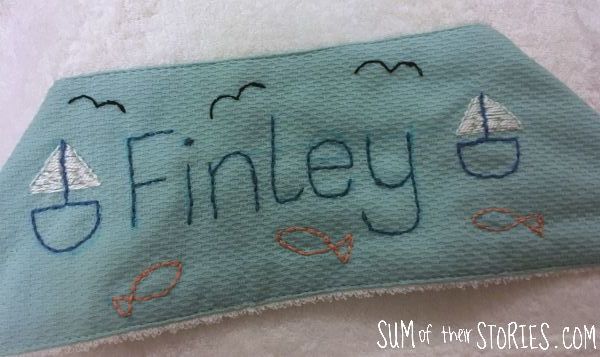
You can see here what I mean about getting the letter sizes even. I thought I had but when I stitched the e it was too tall, so I undid it, re drew it more carefully and had another go. If you look carefully you can see the original pen lines.
Once you are happy a quick rinse will remove the water erasable pen lines and it is finished.
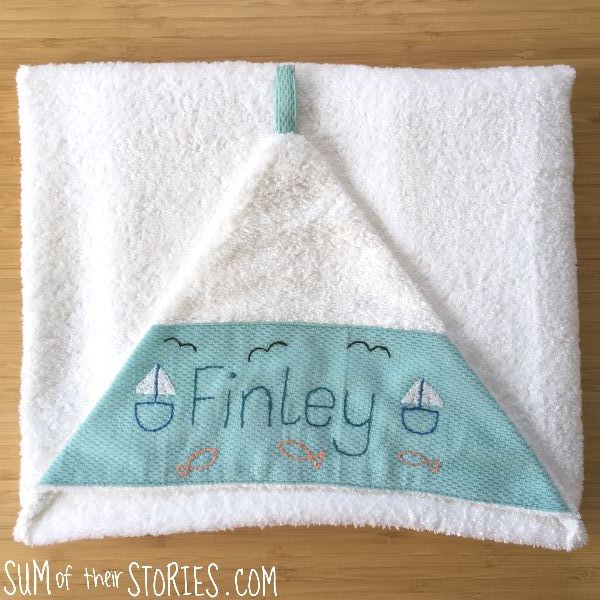
That’s it, a simple way to personalise a hooded baby towel to make a practical gift for a new baby.
Just keeping it real I’m going to make a confession here now. I finished this the evening before I was visiting Finley for the first time and rinsed the embroidered section to remove the pen and left it to dry. In the morning it was still damp so I was frantically ironing it lightly to try and dry it so I could wrap it ready to gift! Running out of time I even drove to their house with it spread out on the top of the dashboard of the car in the sunshine. It didn’t work, when I arrived it was still damp so i couldn’t wrap it nicely as I had wanted to. I had to hand it over with an apology! So my top tip is ‘do this in plenty of time and not all last minute.com’. I make these mistakes so you don’t have to!

I’ll be sharing this project at these link ups