The best simple embroidery stitches for beginners
/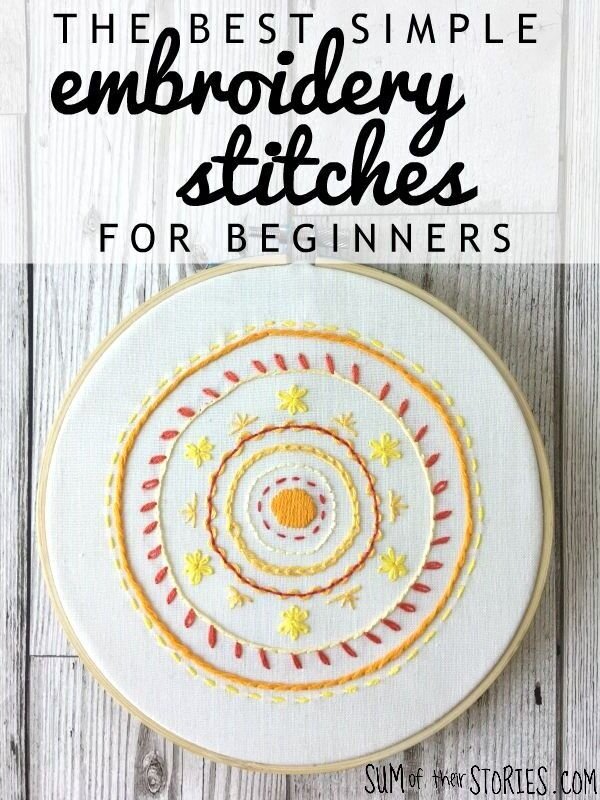

I love embroidery but I also love keeping things simple so I thought I would go through some really basic, simple hand embroidery stitches that anyone can learn really quickly. You don’t need to know lots of fancy embroidery stitches to be able to decorate lots of pretty things. I’ve put together a quick photo tutorial of 9 of the simplest embroidery stitches that I use the most often.
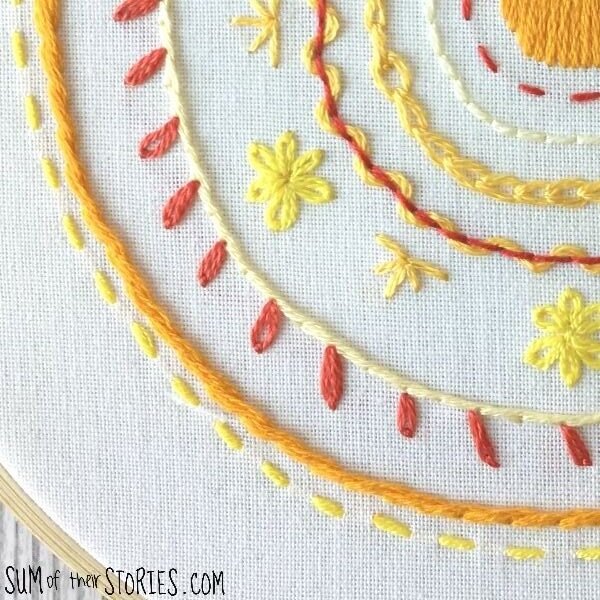
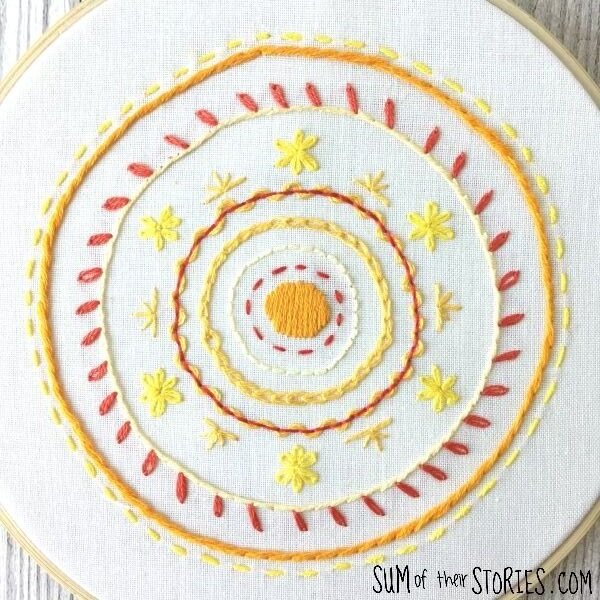
I’ve designed a quick and simple circular design that uses all the stitches that I worked as I took the tutorial photos in case you’d like to try out all the stitches and have something pretty at the end of your practice.

You can copy this, switch it up to make it your own, do what you like with it! I did try to do a slightly more high tech version of this design but in the end paper and my coloured pens seemed the easiest way to create it for you. You can download it from here to print.
To get started you will need:
Fabric: You want something plain and with a reasonably tight weave. An old sheet or pillowcase is ideal. I cut up some old curtain lining for mine. If it’s not too thick then you’ll find transferring the design on to the fabric easier too. But you can embroider on pretty much any fabric so I’d say use what you have and don’t let the lack of perfect fabric put you off!
Embroidery thread: I think you are probably best starting with a few skeins of stranded embroidery thread. You have more control as you can separate the strands and vary how thick the thread is. I always used DMC threads but there are lots of different brands to choose from. You can work this design in any colours that you like. I was using up some little left over bits so I didn’t keep track of the colours or their codes I’m afraid. Go for toning colours like I have here or go for contrasts, brights or pastels whatever takes your fancy.
An embroidery needle: This is a sharp needle with a large flat eye. The large eye is so you can get the thread through and the point is so you can pierce the fabric easily.
Something to mark the design onto the fabric: You can use a pencil or a heat erasable pen. You can also get special pens for marking fabric, water erasable and air erasable. I’d recommend water erasable generally as the air ones disappear after a while with exposure to the air. If you don’t stitch quick enough you can find that you have to draw your design several times!! UPDATE: I used a water erasable pen for these tutorial photos but more recently I’ve started using a Frixion pen for marking fabric. The line is much finer which makes it easier to stitch more neatly. To remove it you use heat, so you iron your fabric and it’s gone. The only time it’s not suitable is if you put your embroidery somewhere where the temperature regularly goes below minus 10 degrees C. If it gets super cold the lines can reappear!
An embroidery hoop: If you are stitching on a substantial fabric like felt then you probably don’t need an embroidery hoop but it’s recommended for all floppy fabrics. It will keep the fabric stretched taut and prevent the finished embroidery from puckering.
You’ll also need scissors. You can get some beautiful embroidery scissors but you can cut your thread with any scissors so maybe add cute scissors to your Birthday present list!
Before we start stitching I want to add a quick disclaimer here, I’m not an embroidery expert. I have no special training, I don’t have a City & Guilds Embroidery qualification, I just like to add embroidery to things now and again and I’m going to share how I do it. The way I do it might not be the ‘proper’ way!
Transferring the design to the fabric
How you do this will depend on the fabric you are using. If the fabric is thin enough to be see through then print the design out on the computer, hold it up to a window or light box and then lay the fabric on top and trace it with an erasable pen (see above, the list of what you need)
If you fabric is thicker you might need to transfer the design using iron on transfer paper, carbon paper or a heat transfer pencil.
I’m in the process of re doing the photos for this tutorial so they currently switch part way through, bear with me, it’s a work in progress!
Starting your embroidery with no knot
Let’s start with an easy way to start your embroidery without a knot. I’m quite sure this is not the proper way and is frowned upon by embroidery experts but it is quick and easy and it works perfectly well for the standard of embroidery I do.
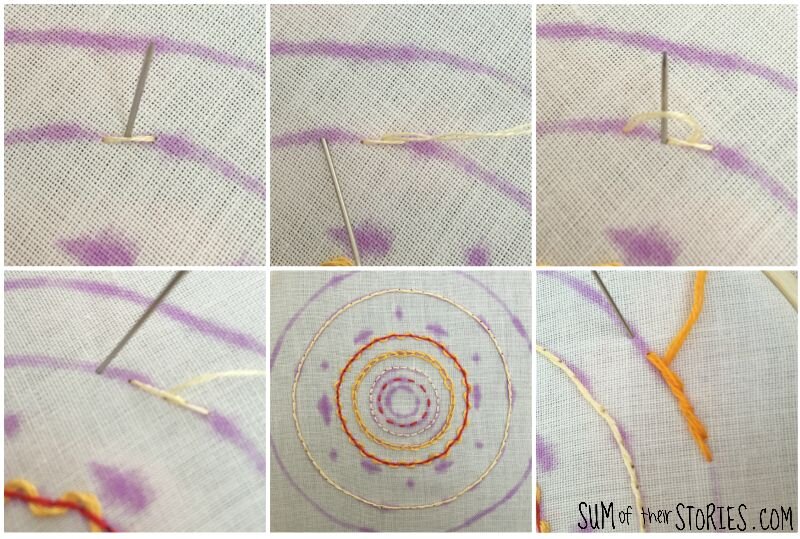
Cut a length of your embroidery thread about 60cm (24”) long. Pull out 1 strand of the 6 and fold it in half. Thread the loose ends onto your needle.

Take the needle up through the fabric from the back to the front, pull it almost through all the way but not quite, leave a little loop on the back. Make a stitch by going back through the fabric from front to back, flip your embroidery hoop over and make sure the needle goes through the loop. You can pull it tight now. You’ll have made a little stitch on both sides of the fabric, your thread is secure and there is no lumpy knot.
Running Stitch
Running stitch is the name for the super simple ‘in and out’ stitch that you would have learnt as a kid.
For this design you are working the running stitch on the 2nd circle from the centre.
Start using the ‘no knot’ method as above (or use a knot if you prefer of course) You simply pass the needle up through the fabric a short distance from your starting stitch, pull it all the way, then the needle goes back into the fabric from the front to the back.
Try to keep the length of each stitch the same size as the gaps between them.

Top Tip: As you pull the needle try to hold the needle right at the bottom over the eye so you are holding the thread too. That way you avoid pulling too far and unthreading the needle.
Stitch all around the circle and then you are ready to ‘cast off’.
Casting off your embroidery thread
Finish your stitching with the needle on the back, the wrong side of the fabric.

Poke the needle under the thread of the last stitch, you are not going through the fabric here, just under the thread.
Pull it until the thread is almost through and there is just a small loop and then poke the needle through the loop. Pull tight.
Repeat the exact same thing again making another loop and poking through again (I have no better words to describe this!!) This creates a double knot to keep your stitches secure.
Slide the needle under a couple of nearby stitches, and then snip off the excess thread.
Back Stitch
For the next circle we will do back stitch. Start exactly the same as before. Come up from the wrong side to the right side with the needle, just like you did for running stitch but this time when you go back down into the fabric put the needle in EXACTLY the same spot that the last stitch ended. You are going back on yourself which is where I assume the name comes from.
Come back up through the fabric a stitch length away and repeat all the way round.

Cast off in the same way as for the running stitch. When it’s finished it’ll look like this.
The right side on the left and the wrong side on the right. I think it’s helpful when you are learning to embroidery to know what you are aiming for on the back as well as the front!

Chain Stitch
The third round is chain stitch. Chain stitch is harder to start with the ‘no knot’ method so as a beginner just start your chain stitch with a small knot at the end of the thread. You still want to use 2 strands of thread as before.

Start by coming up from the back to the front. Loop the thread round and poke the needle back in the exact same spot that you just came up from.
Pull the thread but not all the way, leave a loop on the right side of the fabric.
Come back up a stitch length away and make sure the needle goes through the loop. You can now pull the thread tight.
You’ve done 1 chain - yay!
The rest is just a repeat of what you just did. Loop the thread round again, and then go back in the fabric at that same spot. Come up again a stitch length along, making sure you go through the loop.
Continue all the way round.
To finish work a tiny stitch into the bottom of the first chain.
This is what the chain stitch will look like from the back:

Double Running Stitch
The next stitch we are going to look at is double running stitch. This is one of my favourites. The finished look is pretty much the same as back stitch but it uses quite a lot less thread. This is a great stitch for outlines, letters, stems etc.
You work a circle of running stitch, exactly as you did for the first circle and then you work a second circle where you are basically filling in the gaps. You can carry on in the same direction, or turn and go back the way you came. It makes no difference.

You can leave your double running stitch just like that or add a little something extra by making it :
Woven Double Running Stitch
Top Tip: you can add this extra woven element to a regular running stitch and back stitch too.
Take a contrast thread, I like to use 4 strands for this but you can experiment and see how many you like. You’ll need to come up from the wrong side to the right side right underneath one of your existing stitches to hide where you are coming up. I use a knot again for this as it’s difficult to do the ‘no knot’ technique here. All the rest of this element is worked on the right side of the fabric so your needle will stay on the right side of the fabric until the end.
Poke the needle under the thread of the first stitch and pull through. Now poke it under the second stitch in the opposite direction. Don’t pull too tight.
When you get back to the beginning just go back down through the fabric in the same spot that you first came up.


It’s a fun effect isn’t it?
Stem Stitch
Stem stitch is a very useful stitch for when you want a line so it’s great for outlines and writing and of course stems! It’s a bit thicker and more substantial than back stitch.
For this design I’ve done the next 2 circles in stem stitch. One round using 2 strands of embroidery thread and 1 round using 4 strands. This is so you can see the difference that varying the number of threads can make.
Start using the ‘no knot’ method, and make your first stitch, make the stitch just a fraction longer than the ones you did before as running stitch and back stitch. Now come up next to the stitch in the middle. Choose which side of the stitch you are coming up and stick with it throughout. If you are stitching a curve, like you are here, then make it the outside edge.
Pop you needle back in a stitch length along and then come back up at the end of the last stitch. Note in the 3rd photo here how the needle is above the thread. Make sure that is always on the same side as you stitch.
Now you just repeat this all the way round.
You can see here the difference between using 2 strands of thread (the pale yellow) and 4 strands (the orange)

Stem stitch is one that is lovely and neat on the back!
Satin Stitch
Satin stitch is my nemesis! I love how it looks but I’ve always struggled to make it as neat as i’d like.
That is no reason not to show you how to do it here though, you might love it and it will be your favourite ever stitch! We are going to use it for the centre of the embroidery design so let’s go back to the middle. This is a fill in stitch so you cover a larger area of fabric, it’s perfect for eyes, that’s when I use it the most, it also makes beautiful flower petals and leaves.
In my quest to make my satin stitch neat I always use 3 or 4 strands of embroidery thread for it. It’s another one where you can’t really use the no knot method so go ahead and start your stitching with a small knot.
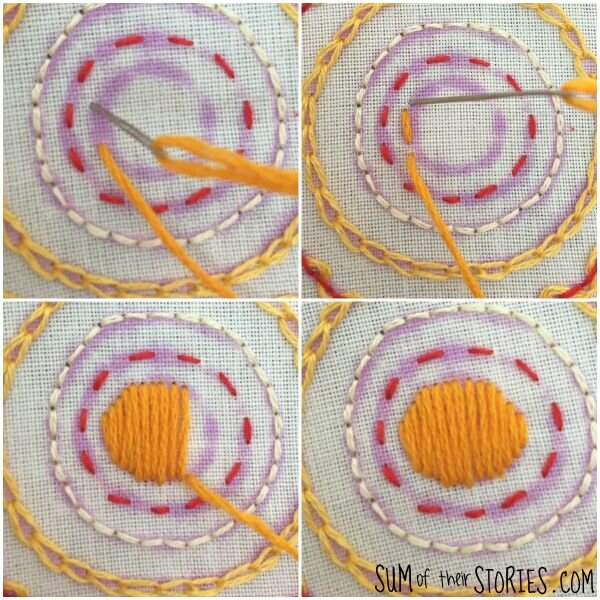
You start by coming up from the back to the front at the edge of your shape. Use the photos to guide you.
Go back into the fabric a short distance away on the outline of the shape you are filling.
Come back up right next to the first point, you want to be just 1 or 2 threads of your fabric away, as close as you can get without being in exactly the same spot.
Come back in right next to the spot you went in last time.
Repeat all the way across the shape.
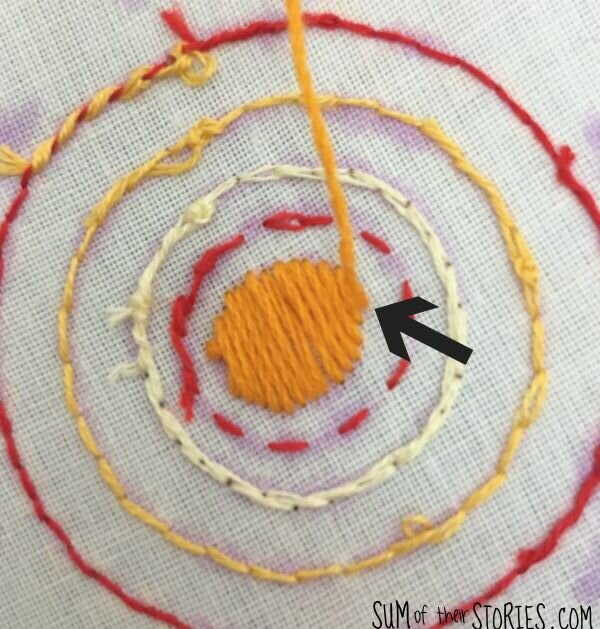
Even looking at these photos I can see that I should have worked the stitches a little closer to one another! I think at the time that I’m doing them as close as can be, but no - could do better!
To cast off the satin stitch, work the cast off stitches in the last stitch you did on the back. You can see that satin stitch looks pretty much the same on both sides.
Lazy Daisy
Lazy daisy is my absolute favourite embroidery stitch, you will see me using it all the time. It’s simple and it’s cute. The best news is that because you already know how to do chain stitch you already know how to do the lazy daisy, it’s almost exactly the same.
On the design the place to pop the lazy daisies is marked with a dot. That is where the centre of each lazy daisy flower will be. I like to use the ‘no knot’ method for lazy daisy but you can’t just go straight into the stitch easily so I like to do a teeny tiny stitch to secure the thread right in the middle.
Start the first petal by coming up right next to your middle securing stitch and then put the needle back into that same spot. Don’t pull the thread all the way, leave a loop like you did for chain stitch.
It’s a good idea to use your finger just to make sure your loop doesn’t twist.
Come back up a stitch length out from the centre and make sure the needle goes through your loop.
Pull tight - not to tight, just to form a nice looped stitch and the secure with a tiny stitch at the top.
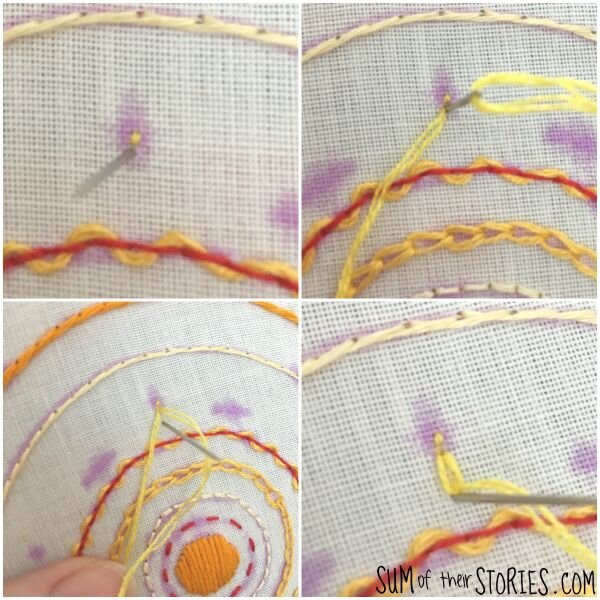
Come back up near the middle and work another stitch directly opposite.
Now work 2 more stitches on each side, each time starting from the centre.
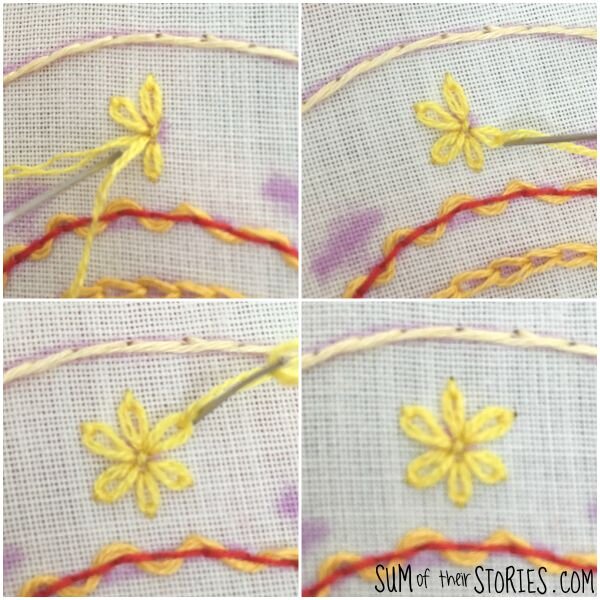
You can do any number of petals for your lazy daisy flowers of course but this way of doing 6 petals just makes it easier to keep things even and to avoid a lopsided flower.
It’s best to cast off each flower and start a new thread for each one unless they are very close together. On this design they are much too far apart to be dragging the thread across the back between them. Casting off and restarting is more work but will be totally worth it.
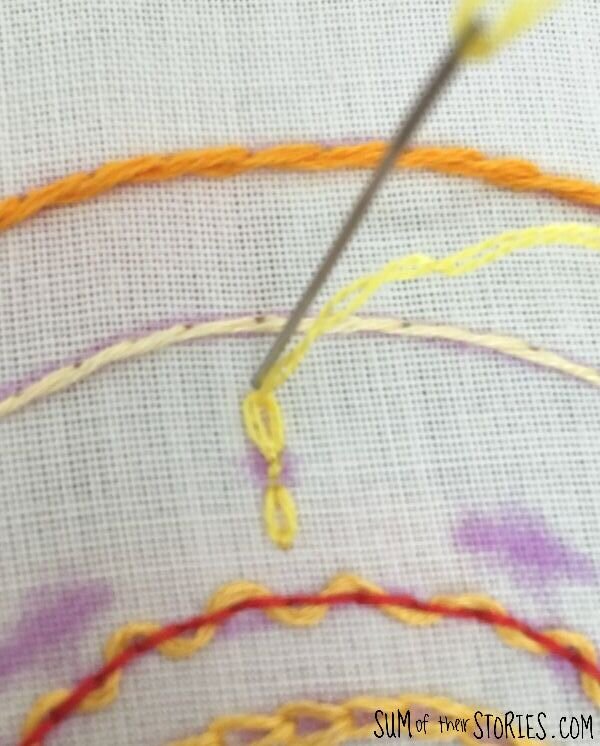
Straight Stitch
The last stitch I’m going to cover today is straight stitch. This one is an absolute doddle, a piece of cake for you now.
We are using it here to do a little simple starburst type thing between the daisies, marked on the design with a straight line. But you can use this stitch for all sorts of design elements, it makes a great confetti style fill in stitch.
Start with a stitch from the centre of the line to one end, you can do this using the ‘no knot’ method.
Now work another stitch from the centre to the other end and another straight up from the centre.
Fill in the gaps with 2 more stitches, each time working out from the centre.

Easy eh?
To finish the design work single lazy daisy stitches all around the circle with the thinner stem stitch. I did mine at an angle but you can play around and mix it up, yours could stick in any direction you like!
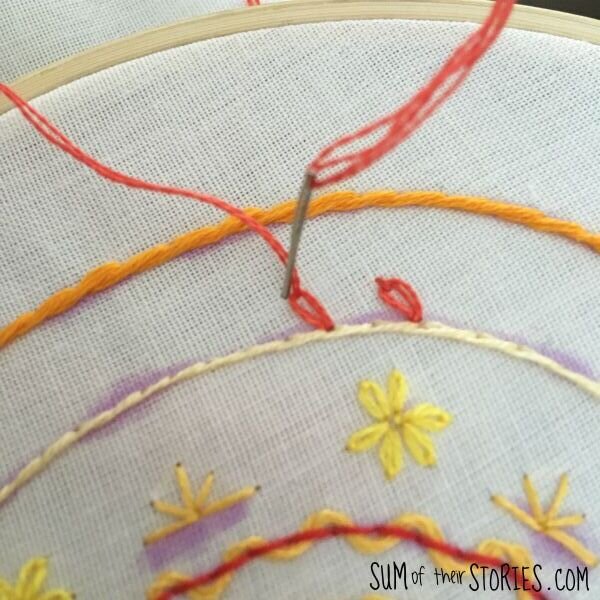
To finish I added a last circle of running stitch round the outside, this time using 4 strands of thread.
There you go! You’ve learnt 9 basic embroidery stitches and created something lovely at the same time. Bonus!
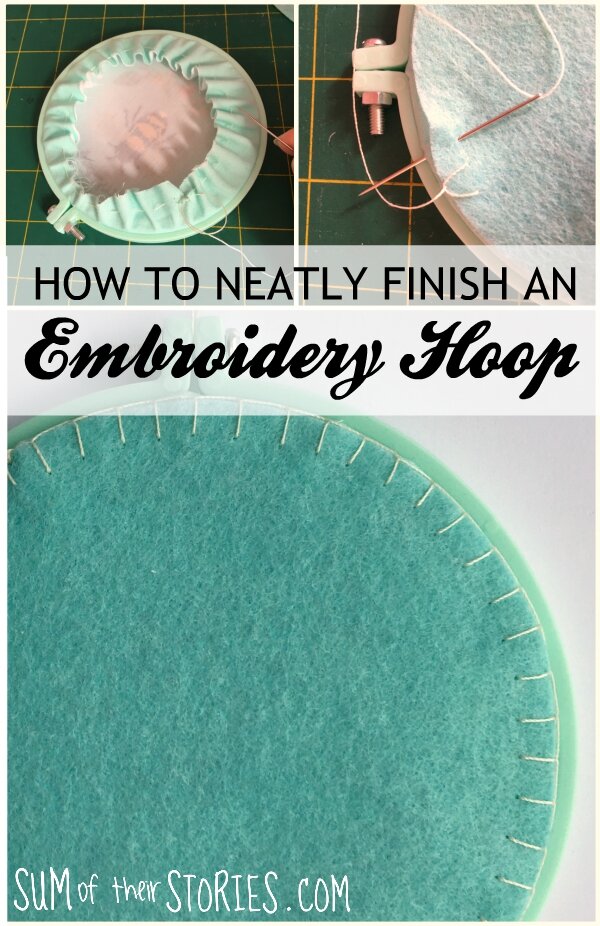
If you want to back your embroidery hoop nice and neatly then check out my tutorial that shows you my favourite method.
If this gives you the embroidery bug and you want to learn more then I’d recommend french knots and blanket stitch as the next 2 to add to your list. At some point I’ll try to put together another design and add some slightly more advanced stitches. Today I just wanted to show you that embroidery really can be very simple, it doesn’t have to be perfect or complicated. There is something very soothing about holding cloth in your hand and stitching into it, as long as you let any perfectionism go and just enjoy the process.

I’ll be sharing this tutorial at these linkups
You might also be interested in: