Quick Easy Recycled Christmas Card Ideas
/

This is a paid post for Bostik. Bostik has provided all the glue products that I used for these cards.
Christmas is fast approaching and I’ve got a few quick and easy last minute Christmas card ideas to make using bits and pieces saved from the cards you received last year. I always save last years cards as they are so useful for all sorts of Christmas crafting.
I’ve got 2 ideas for you today, one uses a scrap of gold haberdashery trim and toppers from old cards and the other is a little origami envelope. Let’s get started with the ones that use the gold trim and old card toppers.
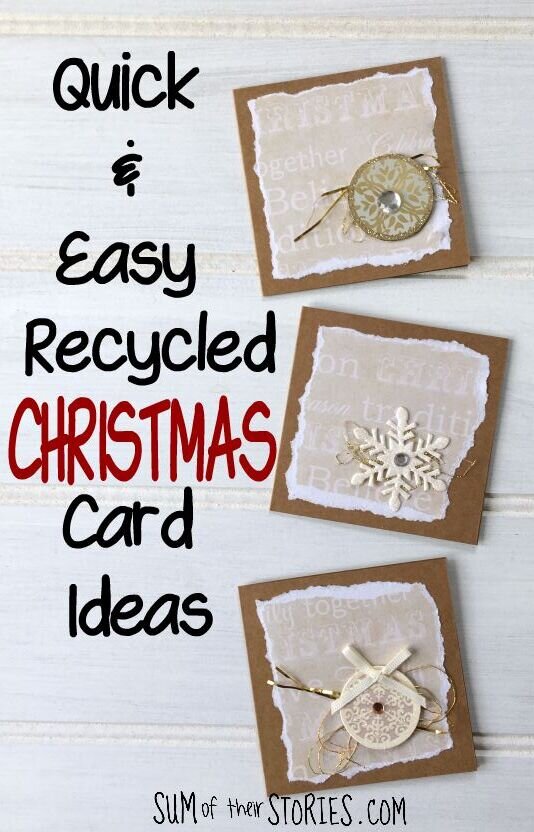
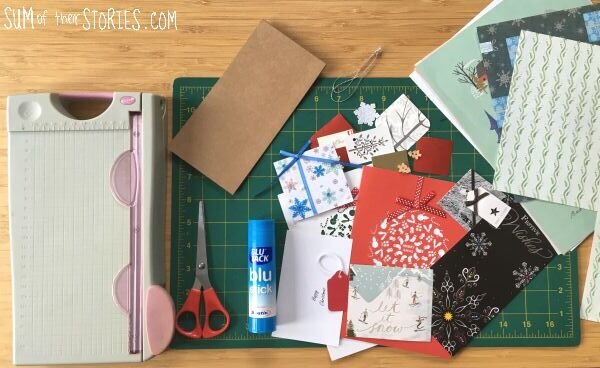
To make these quick and easy Christmas cards with recycled card elements you will need:
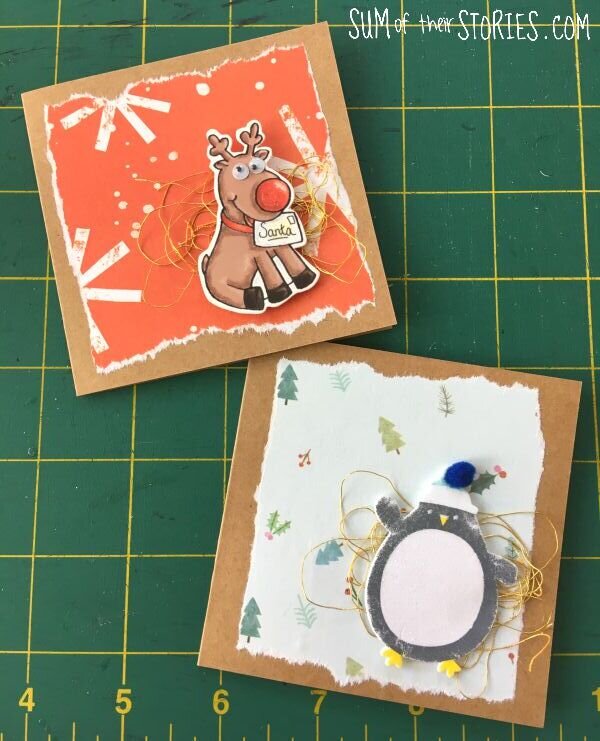
Mini Card Blanks - mine are 3.5” (9cm) square kraft card but you can make these cards any size you like
Scraps of patterned Christmas paper - a lot of mine are from old issues of Mollie Makes Magazine
A scrap of gold haberdashery trim
Toppers from old Christmas cards
Blu Stick paper glue
Foam Pads
Micro dots
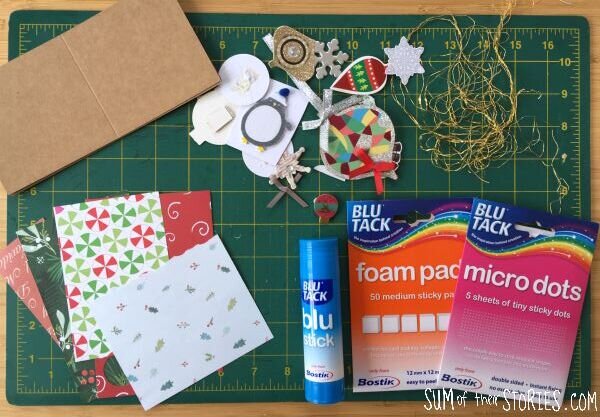
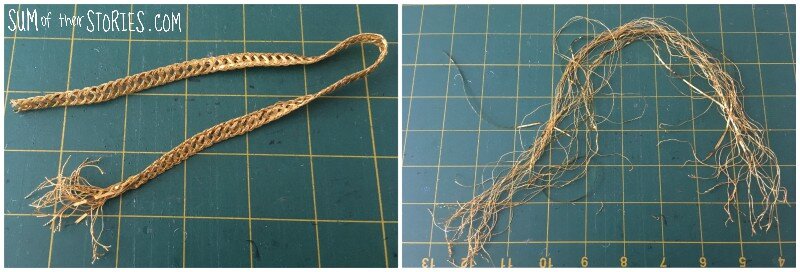
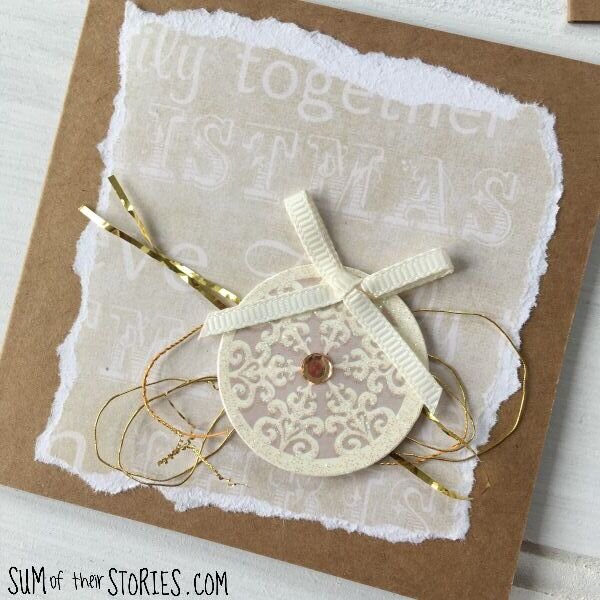
The scrap of gold trim was rescued from some gift wrap last year. I’d kept it all year thinking it would come in for something useful. In the end I unravelled it and the resulting gold threads were perfect for these cards.
I tore the patterned paper rather than cutting it. When you tear paper you need to decide if you want the white core to show or not. This is determined by the direction you tear, practice on a scrap frst and see what you prefer.
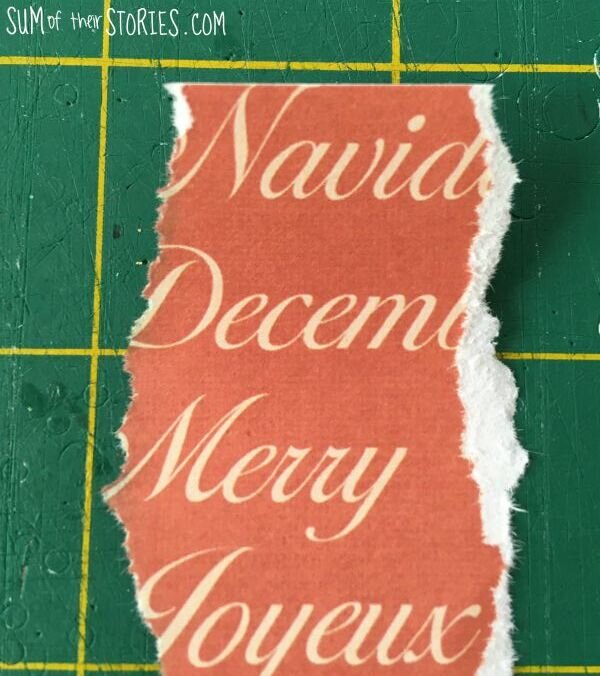
Tear down for a white core showing (on the right in this photo) and tear up for no core (on the left side here) I went for tearing down and the white core to be showing, I felt it kind of went with the shabby chic look I was aiming for!
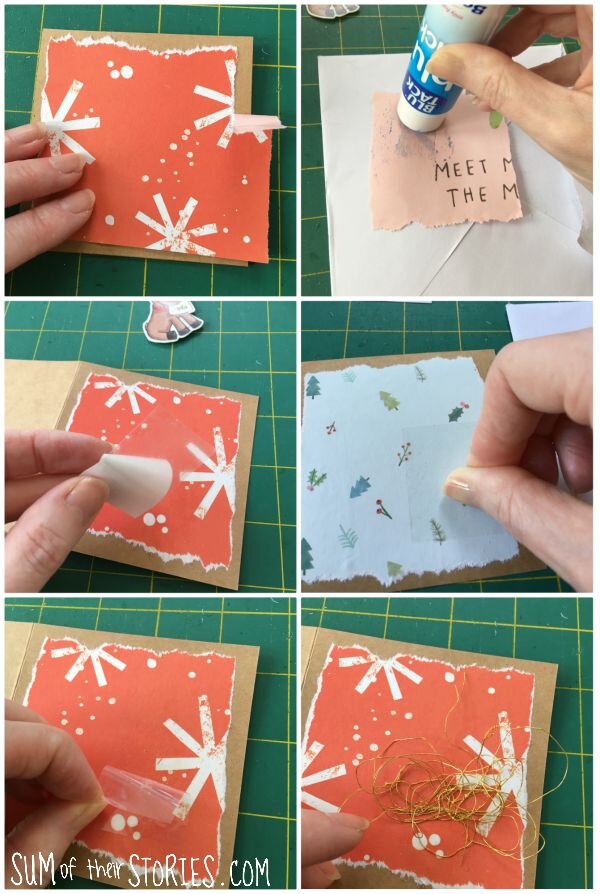
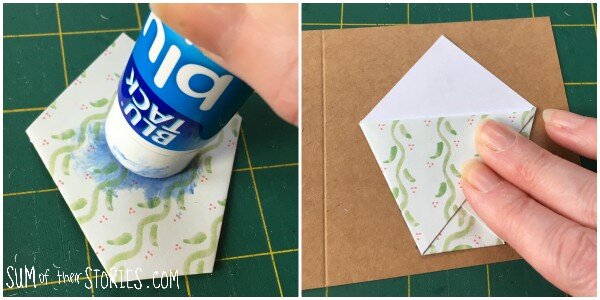
Tear the paper to fit the card blank and then glue it down using the blu stick. I like the blu stick as you can see in blue where the glue is but it dries completely clear. The paper I used was double sided, that’s why you can see writing where I was glueing. Always use some scrap paper underneath so you don’t get glue all over your table!
Next cut a small rectangle of the micro dots, peel off the backing paper and they place it onto the card towards the bottom right. Use your nail to rub the dots onto the paper, then peel of the film.
Bundle some of the gold threads and then stick them to the micro dots. You could use a double sided tape instead of glue dots but don’t try to use a stick glue or pva, you’ll end up in a hot mess!
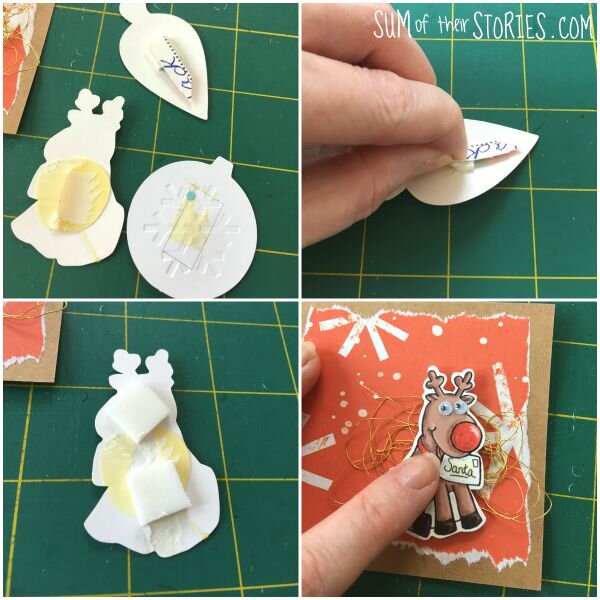
Now take an old card topper and remove any old foam pads or glue. To do this lay the card face down flat on your table and pick off any foam or glue. Don’t try to do this in your hand in mid air as you WILL crease the topper and spoil it (ask me how I know!)
Apply a new foam pad or two and the fix your topper over the gold threads.
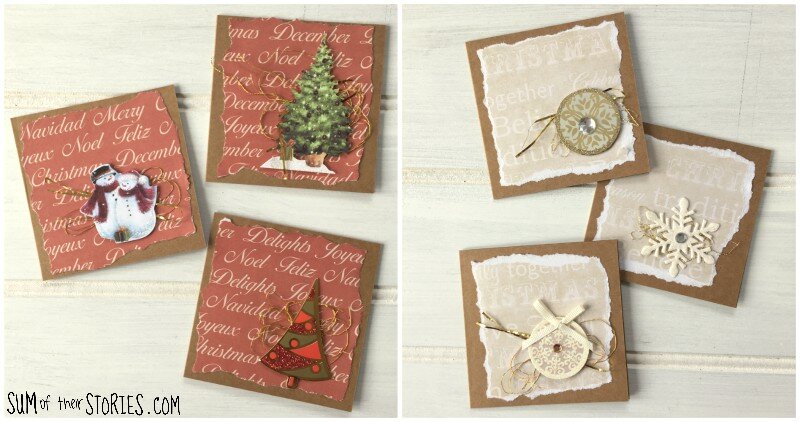
Ta dah! Finished! If you get a production line going these little cards really are super quick to make.

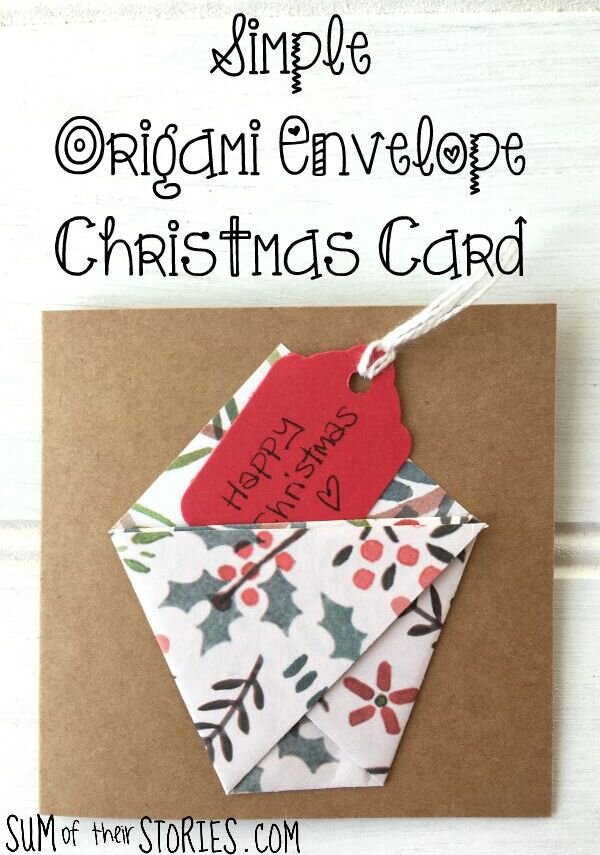
Now let’s make some simple origami envelope cards
For this idea you will need:
Mini Card Blanks - mine are 3.5” (9cm) square kraft card
Pieces of patterned Christmas paper - a lot of mine are from old issues of Mollie Makes Magazine - double sided is nice but not essential
Old Christmas cards
A little thread or cord
scissors and hole punch
a paper trimmer (not essential but it makes cutting your paper accurately MUCH easier)
Start by cutting an 11cm (4.3”) square of patterned paper, then fold it into a simple envelope. This is super easy - much easier than it looks I promise!
I usually make these with double sided paper but for this tutorial I’ve used a single sided paper just so it is easier for you to see.

Fold the paper in half diagonally
Fold the bottom right corner up to meet the left edge making a top edge parallel to the bottom. It’s hard to describe but use the picture to guide you. Press the crease firmly.
Fold the bottom left corner up so the top edges are level (again, I can’t describe this - use the pictures!)
Take the top, single layer of the top corner and fold it down
I turned my envelope round at this point to show you better what I was doing. Open the pocket you formed when folding the left corner up and tuck that top corner into the pocket.
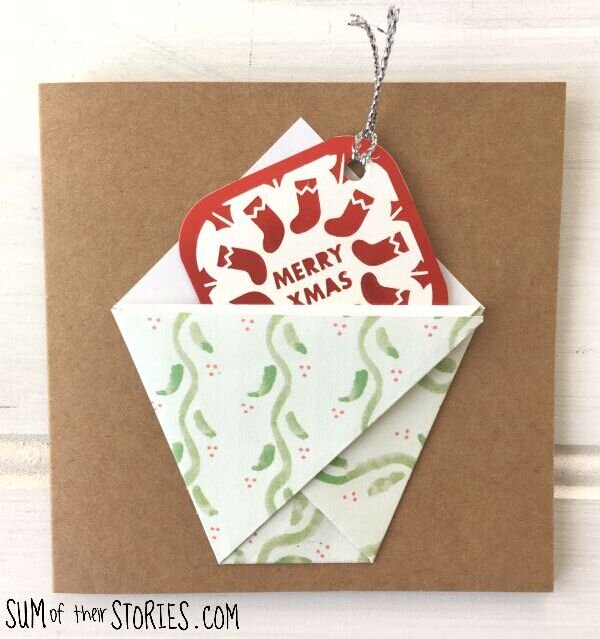
That’s it! You’ve made a sweet little envelope.
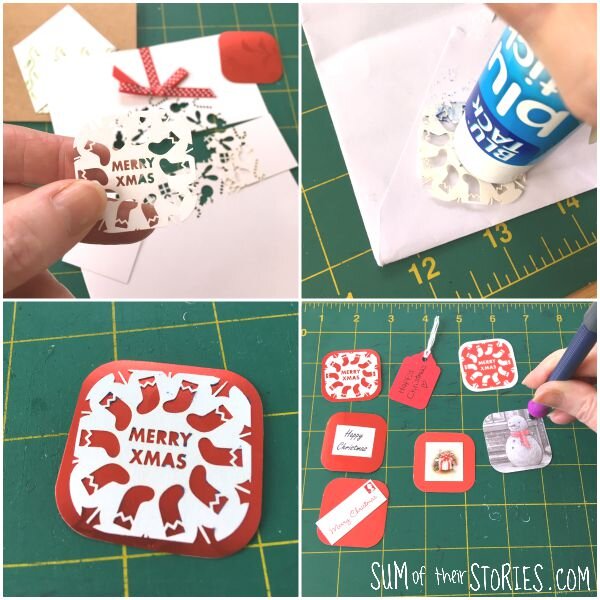
Use the Blu Stick to glue this envelope to the card blank.
Now you just need to make a little tag to go in the envelope. To do this I cut up old cards. I used greetings, pictures, whatever took my fancy. Each little tag can be up to 4cm (1.5”) square. Punch a hole and add some cord or thread. I have a nice little corner punch which I like to use to round the corners off.
The tags slip inside the envelopes and that’s another card finished. Definitely another idea that works well in a production line, you can get 10 made in no time at all!
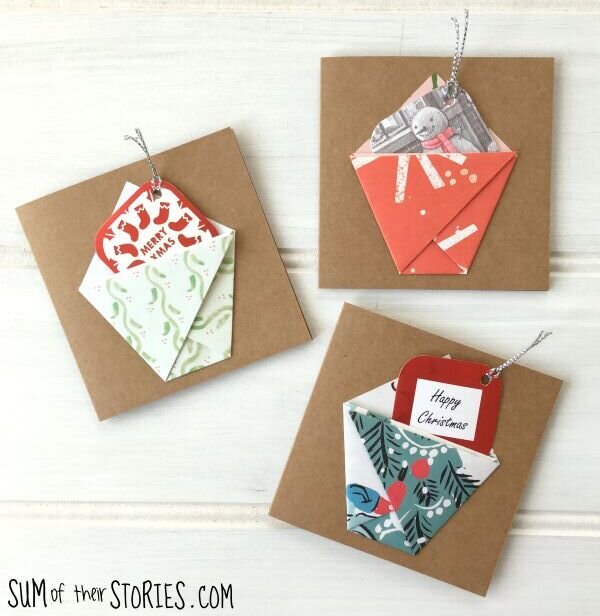

So there you have it, two really simple ideas to make new Christmas cards by reusing or upcycling last year’s old cards. Remember to save the cards you receive this year for your Christmas crafting next year!

I’ll be sharing this idea at these link ups
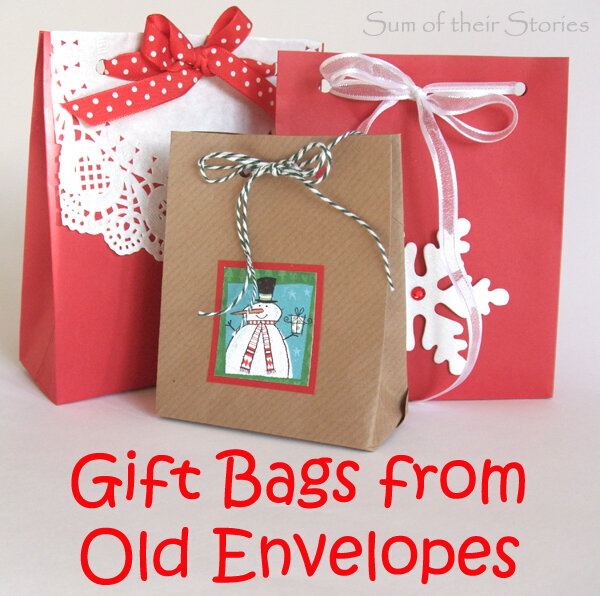
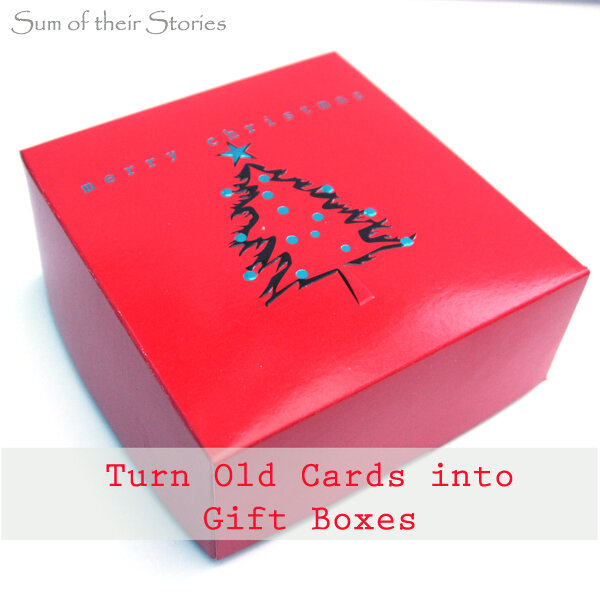
You might also be interested in these ideas to reuse old Christmas cards:
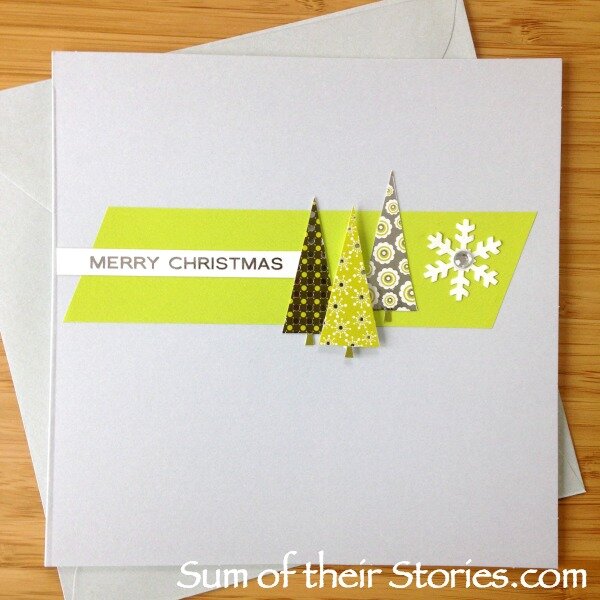
More DIY Christmas card ideas: