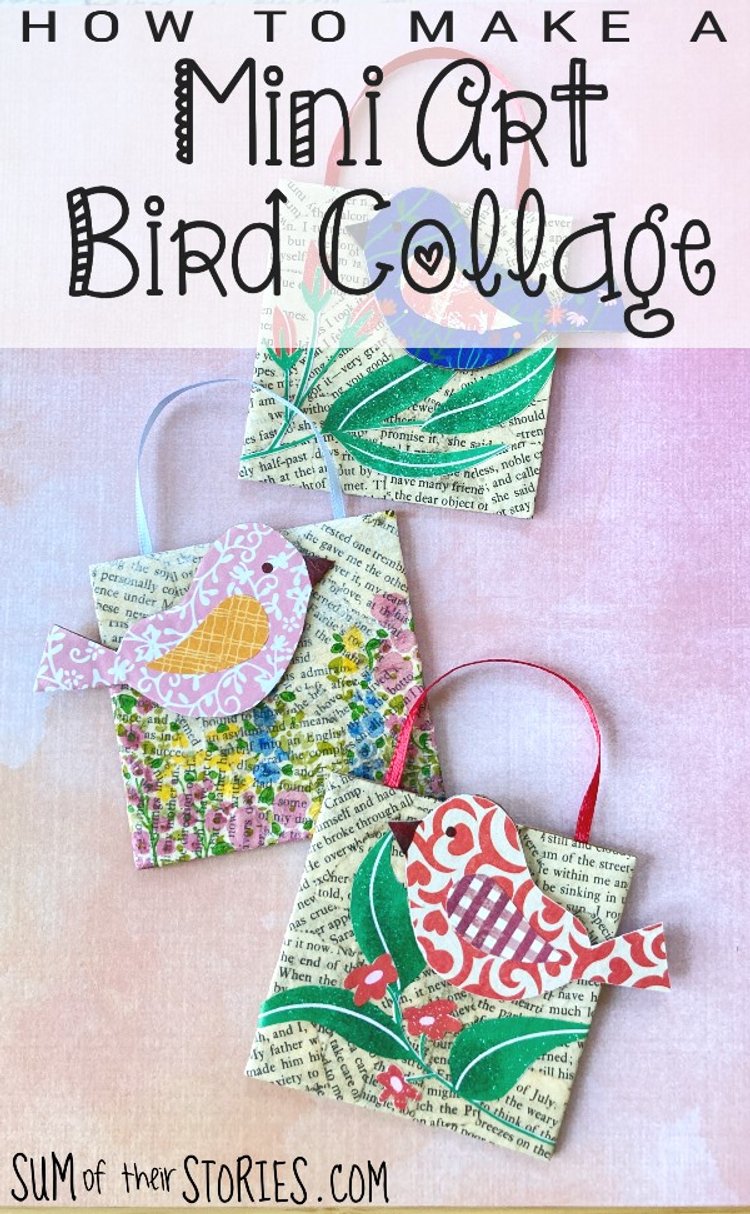
Mini Art Bird Collage Tutorial
/How to make mini art collages featuring pretty birds, from recycled materials.

I know I probably say this almost every time, but I had THE MOST fun making these little art collages that I’m sharing with you today.
After the enjoyment of making the spring tulip collage cards a few weeks ago I’ve been on a bit of a paper collage extravaganza!
These little mini art bird collages are made with bits and pieces that you’ll probably have just lying around the place, you may even need to fish things out of your recycling bin!

These little collages would be a fantastic idea for craft clubs too, absolutely minimal expense involved, and this is an art project that any age can enjoy.
Are you excited to get started? These little collages are not difficult to make and don’t take too long but there is a little drying time involved so allow time for that. I made mine in a couple of 1/2 hour sessions, one afternoon and then the following morning. If you are pushed for time you could plough ahead and skip the drying times but it may get a bit messy - gluey fingers etc. A warm day might speed things up, or even a heat gun or hair dryer!
How to make a mini art collage
Supplies needed to make a mini art collage
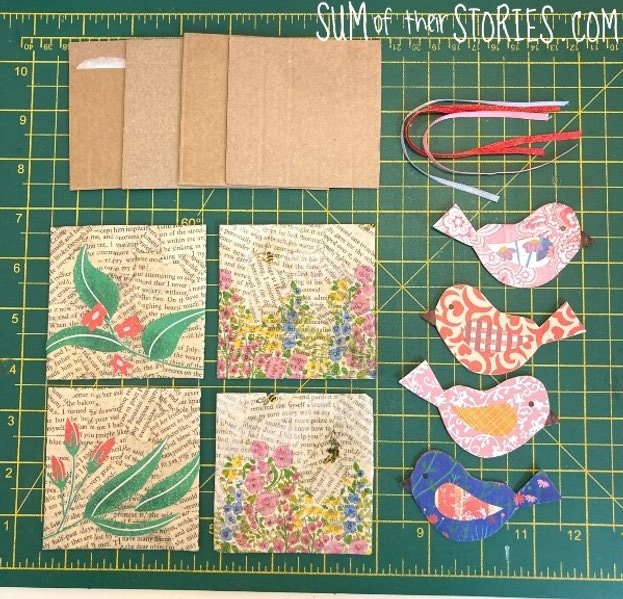
Cardboard - something thick or corrugated is idea, I used some old packaging
Paper scraps - old book pages, scrapbook paper, old birthday cards, pages from magazines etc
A pretty paper napkin - optional
Ribbon - a great way to use those ribbon loops from the shoulders of new tops and dresses
Scissors
A brown or black sharpie
Template - I use Google drive to share templates but sometimes it can behave like a bit of a silly billy so if you have any problems downloading the template do let me know!
Preparing the collage base

Start by cutting 3” squares from your cardboard. Of course you can make yours any size you like but the 3” square is a lovely dinky size without being too fiddly. You need 2 squares for each mini collage.
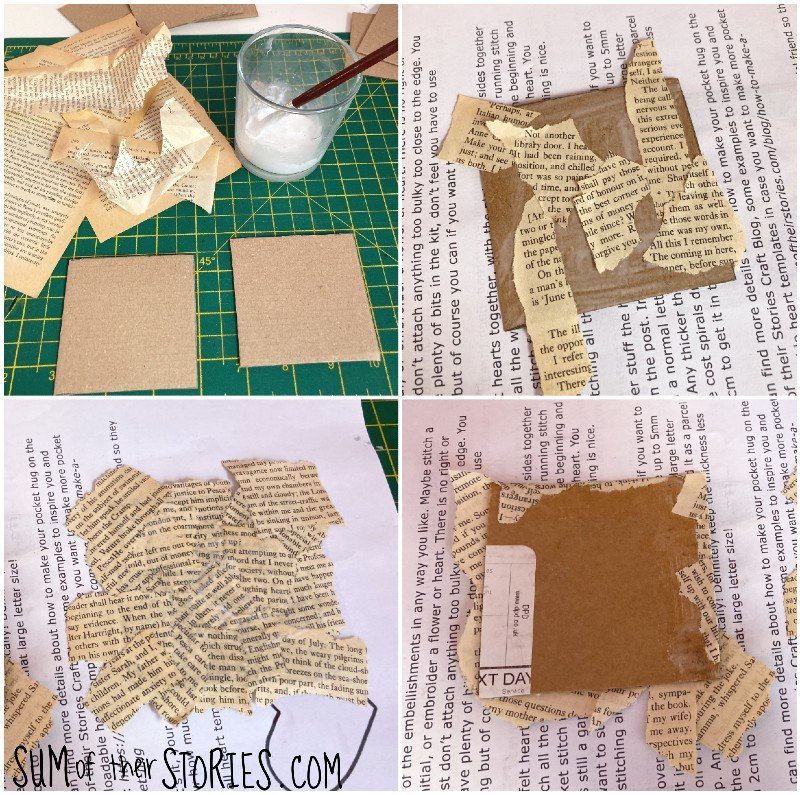
If you are using PVA glue you will want to dilute it very slightly with a tiny splash of water just to help it spread more easily. If you are using Mod Podge that probably won’t be necessary. Cover one of the squares with glue then layer it up with ripped up paper. I used pages from an old damaged book but you could use pages from an old magazine, wrapping paper, packing paper etc. The softly patterned inside of a business envelope would be good - I think I’ll try that next time.
Add more glue as needed to stick everything down and leave it to dry out a little.
Once it’s fairly dry you can turn your covered square of cardboard over, apply more glue and fold all the scrappy edges over to the wrong side. Leave to dry again.
You can leave it like that or add some more pattern to your collage base.

I did 2 collages with a pretty paper napkin and 2 with some cut outs from a magazine. I had a craft magazine page that was obviously misprinted somehow with a big grey border up the side but I was able to cut out some stems, leaves and flowers from the good bit.
Apply another layer of glue all over the square and the glue on the cut outs or separate the paper napkin so you are only working with the very thin top layer and GENTLY apply that. Don’t rub it or press too much or it will rip.
Leave this to dry completely.
Making your collage birds
Whilst the base square is drying you can make your bird decorations.
Use the template provided here: bird template : or draw your own bird of course.
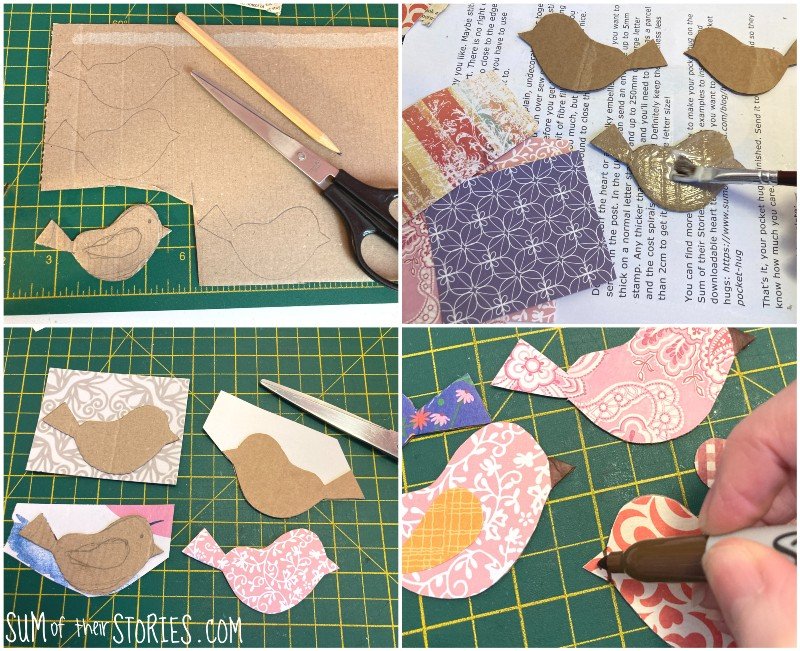
Cut a bird shape from card for each mini art collage you are making. Cover the shape with glue and cover the paper. Leave to dry a little.
Cut out a wing from a contrast paper.
Cut the bird shape out then use the brown or black sharpie to colour in the beak and to add an eye. Glue the wing into position and then cover the bird with a layer of glue.
At this point you really DO need your elements, the base and the bird, to be completely dry before you carry on. You’re going to be pressing the layers together under a heavy book or two and if it’s still sticky you’ll get in a hot mess!

Apply glue to the back of the collage 1/2” in from each edge and fix the ends of a 16cm 6” length of ribbon to form a hanging loop. I used undiluted PVA for this. These little collages are not heavy so it was plenty strong enough but you could also use a hot glue for this.
Apply more glue all over the back of the collage and then glue on the other 3” square of card, the undecorated one.
Press the little collages under a nice heavy book or 2.
I put my mini collages inside my notebook, with the ribbon side poking out, then put the heavy books on top of that.

They took about an hour to dry. Finish them off by gluing on the bird.
Aren’t they cute? One word of caution, if you position the birds as I’ve done, with the tail sticking out just be careful that you don’t bend it too much. It’s not the end of the world if you do, you could repair it with a little card support at the back, but if you take a little care it shouldn’t be too much of a problem.

Ways to use your mini art bird collages
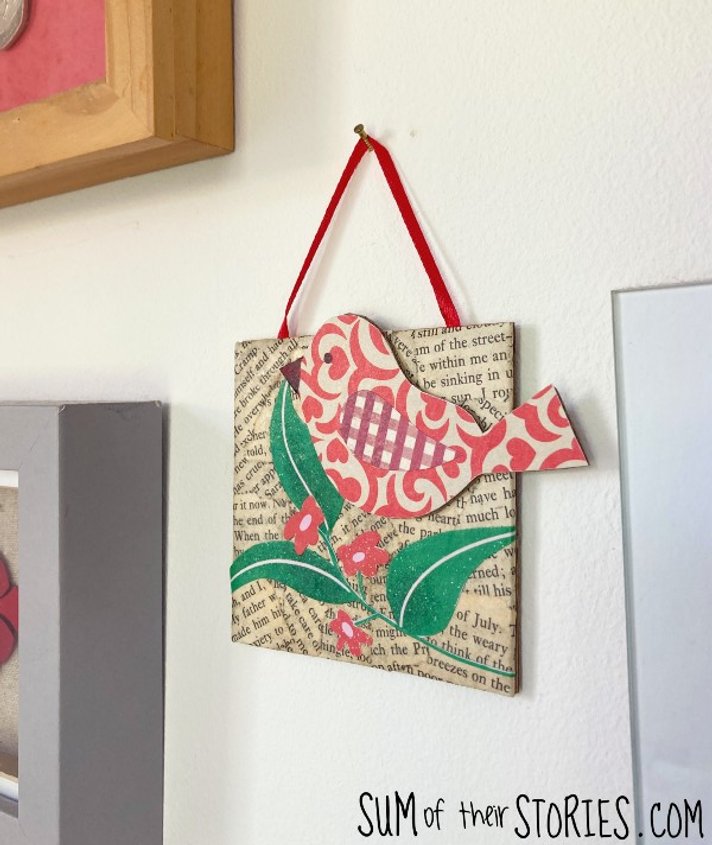
You can write a message on the back and send it to someone special or hang them on a notice board or little corner that needs cheering up. How about making them into gift tags for a really special gift?
You could miss off the ribbon and glue a magnet to the back instead and use your little bird collage as fridge magnets if you prefer. If you only make a single layer you could fix the collage to a card blank to make a beautiful birthday card or glue onto the top of a plain gift box.
You could make 3 that coordinate and then glue them to a longer length of ribbon vertically to hang in a narrow space that needs cheering up.

SO many possibilities, have I tempted you to have a go and make a sweet little mini bird collage or 2?
Update:

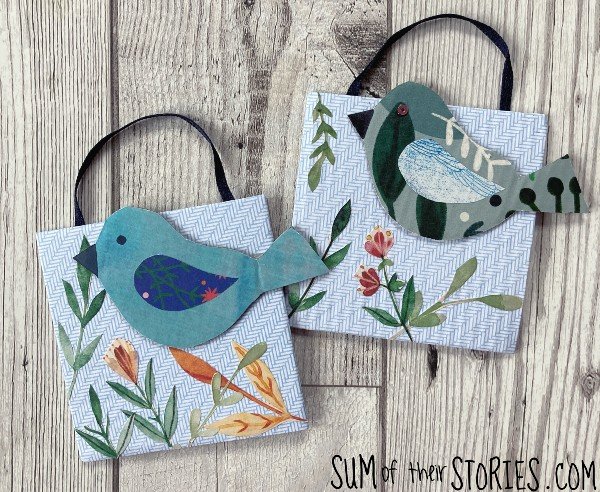
I’ve made a few more mini bird collages using the insides of old business envelopes as my background paper. I’ve always loved the geometric patterns you get inside some envelopes. These little collages are made in the exact same way as the other book decoupage collages above.

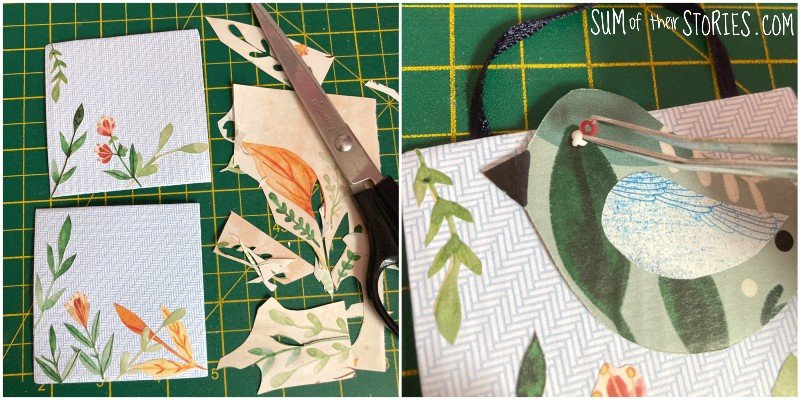
One of the birds I cut this time had a rather dark patch where the eye went so my little sharpie pen eye didn’t really show very much. I fixed that by gluing on a tiny sequin with a dab of pva glue.
Julie
I’ll be sharing this craft tutorial at some of these link ups
I’ve got a bit carried away making more versions of these little collages! If you prefer flowers then you might like this floral version:

If you like upcycling crafts and crafting with old books you might also like to check out some of these craft ideas: