

Upcycled Sewing Ephemera Shadow Box
/If you are lucky enough to have a dedicated sewing space it’s nice to have some sewing themed art for the walls and it’s easy to make your own.


Today I’m joining the Do It Over Designer Challenge with this upcycled art idea.

This month the theme for the Do It Over Designers is WOOD. Stay tuned at the end of this tutorial for lots more wood themed upcycling ideas.
I’ve had this tiny wood tray for about 2 years, it’s about 4” square. My friend gave it to me; one of those “I thought you might be able to do something with this” moments. It came from a craft shop filled with little wooden shapes that she used for her crafting, something similar to this on the right:

I said “yes please, I’m sure I can use that for something” of course and then it sat on the side gathering dust.
The Do It Over Challenge inspired me to put my thinking cap firmly on and come up with an idea to put it to good use. What I’ve made is a sewing ephemera filled shadow box to put up on the wall in my sewing space.
To make your own Sewing Ephemera Shadow Box you will need:
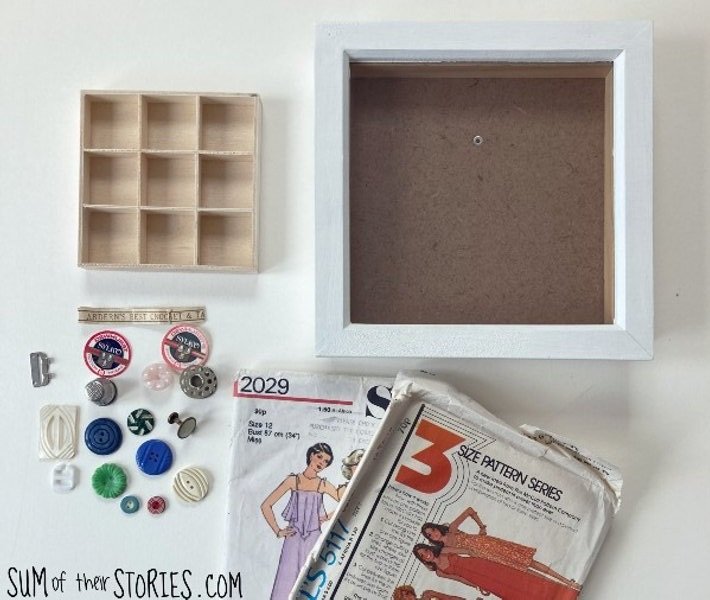
A deep box style picture frame, mine came from a charity shop
A divided wooden tray
An old sewing pattern
Sewing ephemera
Some scraps of pretty scrapbook paper, ideally sewing themed (not photographed)
Cardboard
PVA glue or Modge Podge (also not photographed)

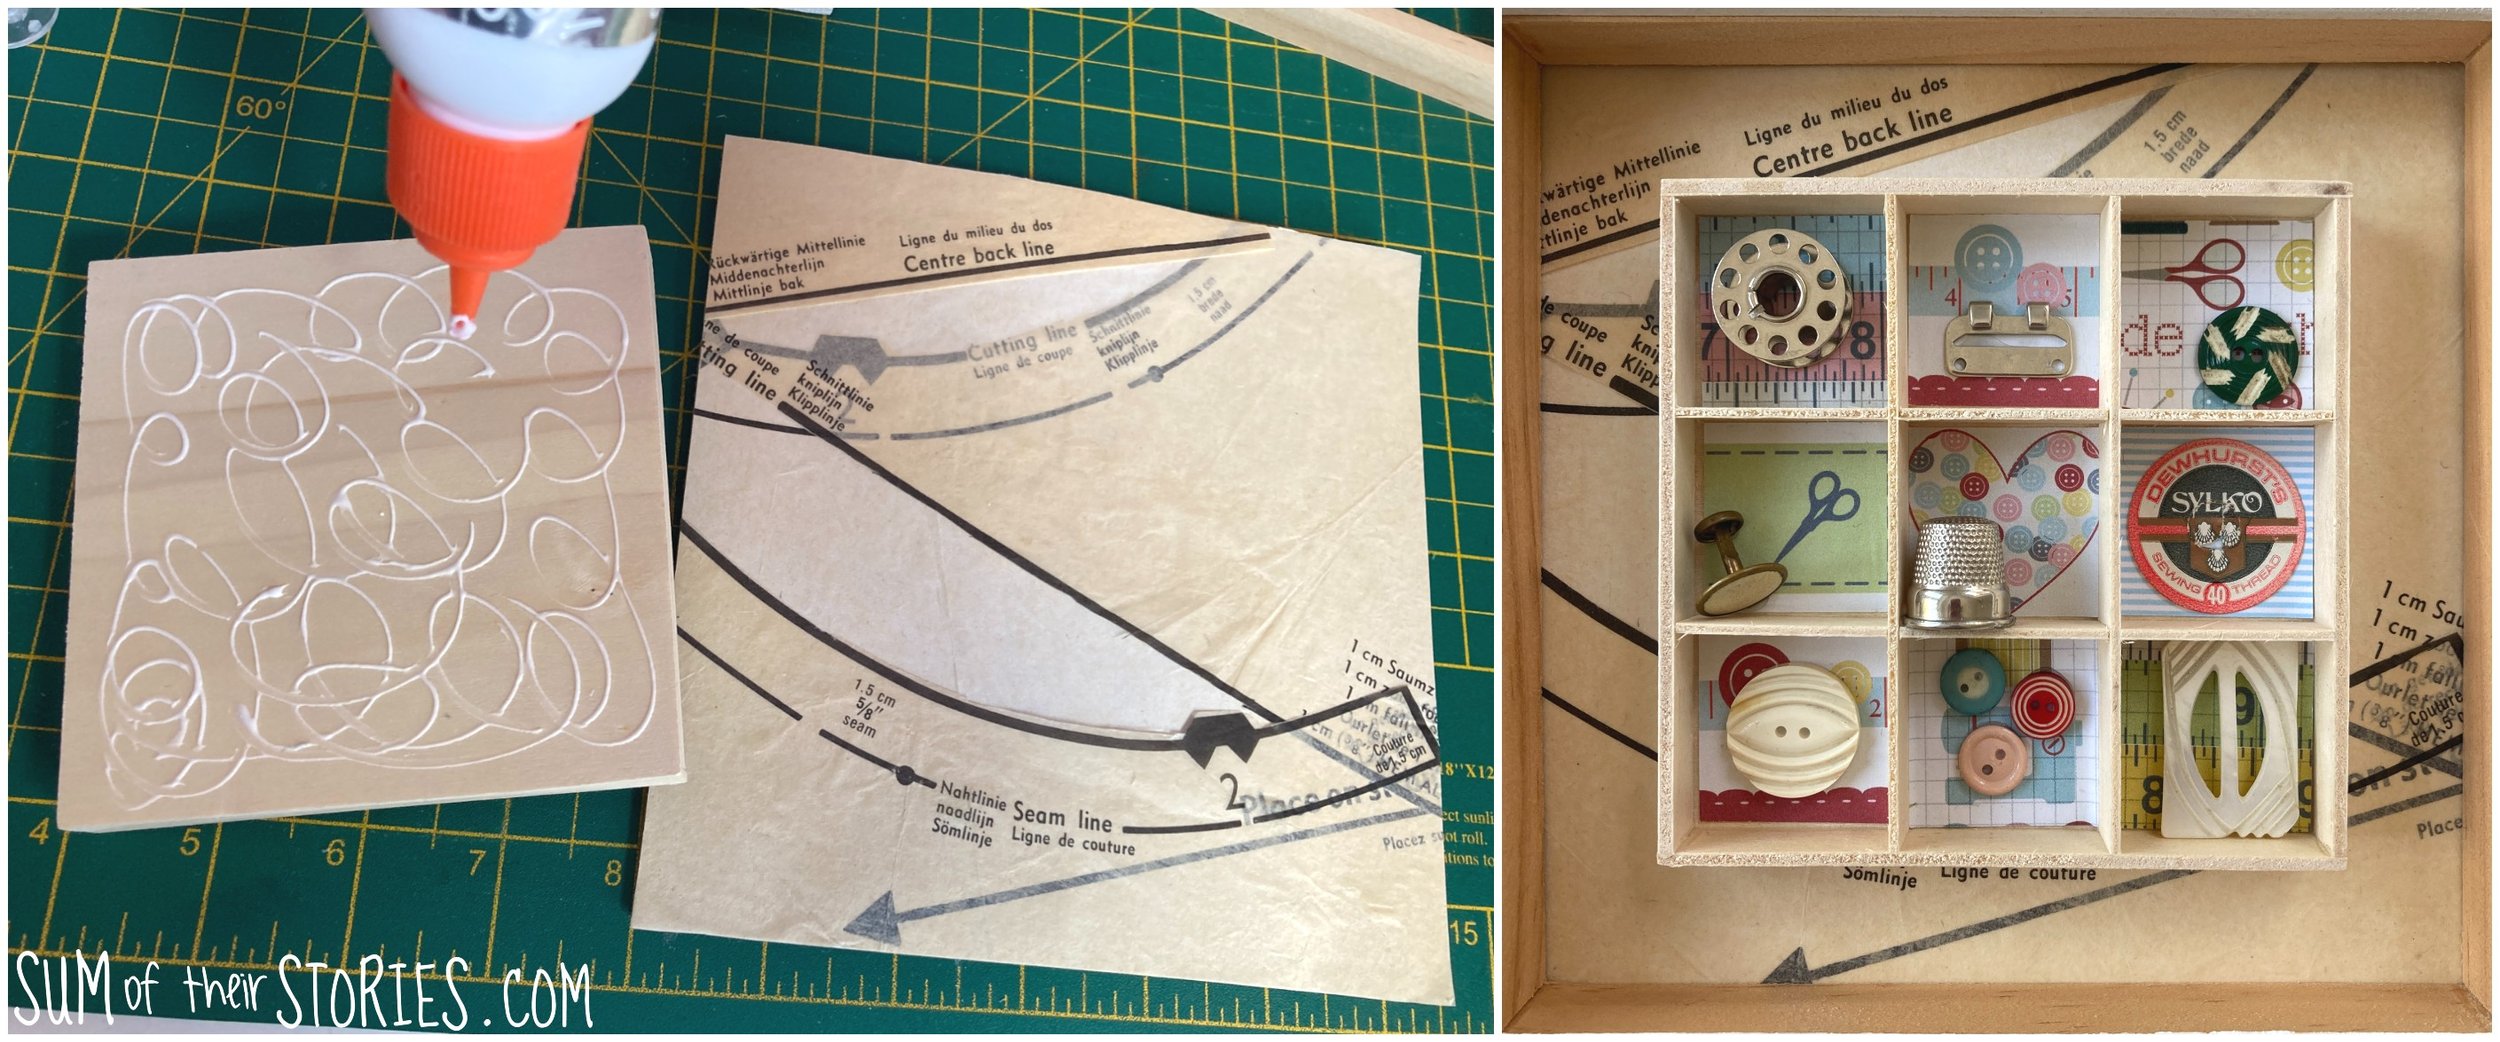
Start by cutting a square of card to fit your frame then cover it with some of your old sewing pattern paper. I used a stick glue for this but actually on reflection I think something like Mod Podge would have been better which is why the stick glue is not in the list of what’s needed for this art.
The sewing pattern I used is rather old, my Auntie gave me a few recently wondering if I had an idea for them and this one had some pieces missing so it’s perfect for a papercraft instead.
Apply a few layers of the tissue paper pattern, making sure some of the pattern markings are visible.
While that dries, turn your attention to the wooden divided tray.

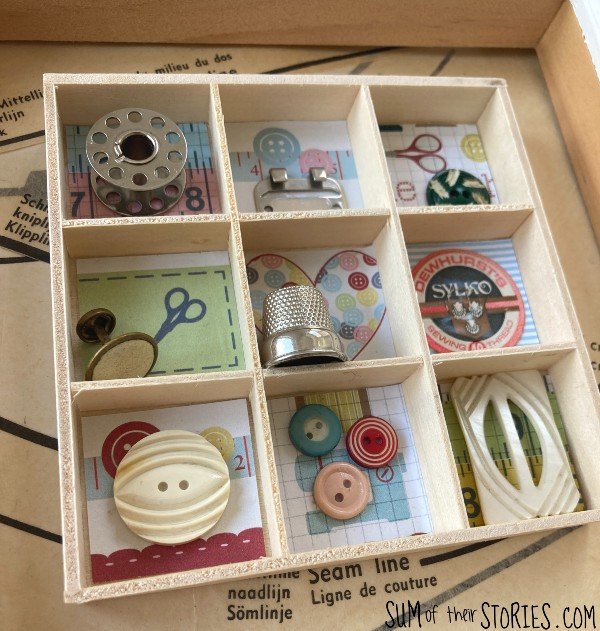
Cut little squares of pretty scrapbook paper to fit the sections of your divided tray and then play around with the papers and your sewing ephemera until you are happy with the arrangement.
I’ve used the word sewing “ephemera” but really I just mean bits and pieces! I had some old buttons from my button tin, some other fastenings, a spare very cheap thimble, a bobbin that doesn’t fit my machine, the paper top of an old cotton reel etc.

When you are satisfied with the arrangement remove the paper and sewing items one square at a time and glue them in place.
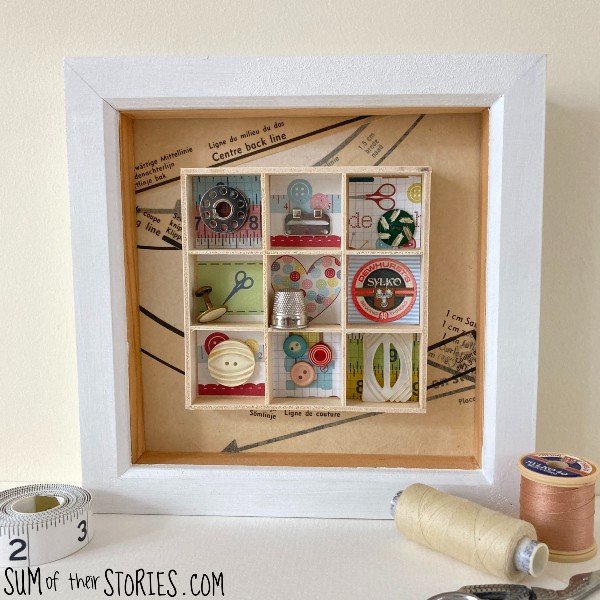
When everything is dry, glue the divided tray onto the card background centrally and then pop it into the frame. Everything I used for my sewing room art is very light so a good squiggle of PVA glue on the back of the wooden tray is plenty strong enough. I popped some books on top to weigh it down as the glue dried. If you have any heavy bits and pieces you might want to try a stronger glue.
I feel very pleased to have found a good use for this little wooden divided tray. I’d been almost at the point of looking for someone who had a doll house as the only idea I had come up with before was that it looked a bit like a doll house IKEA unit! Now it’s up on the wall in my craft space :-)

Now let’s check out the other wood themed projects in this month’s Do It Over Designers Challenge:
Exquisitely Unremarkable - unfinished wooden box makeover
Little Vintage Cottage - repurposed wood ring tray
Modern on Monticello - patriotic wooden centrepiece
Pandora’s Box - wooden frame with denim roses
Purple Hues & Me - DIY wooden patio lantern
Southern Sunflowers - Painted wooden serving tray
Unique Creations by Anita - wooden wall gecko art
Tea and Forget-Me-Nots - colorful farmhouse decor
The Apple Street Cottage - upcycled mail sorter


