How to fix small holes in clothes with visible mending
/Visible mending techniques using simple embroidery stitches.
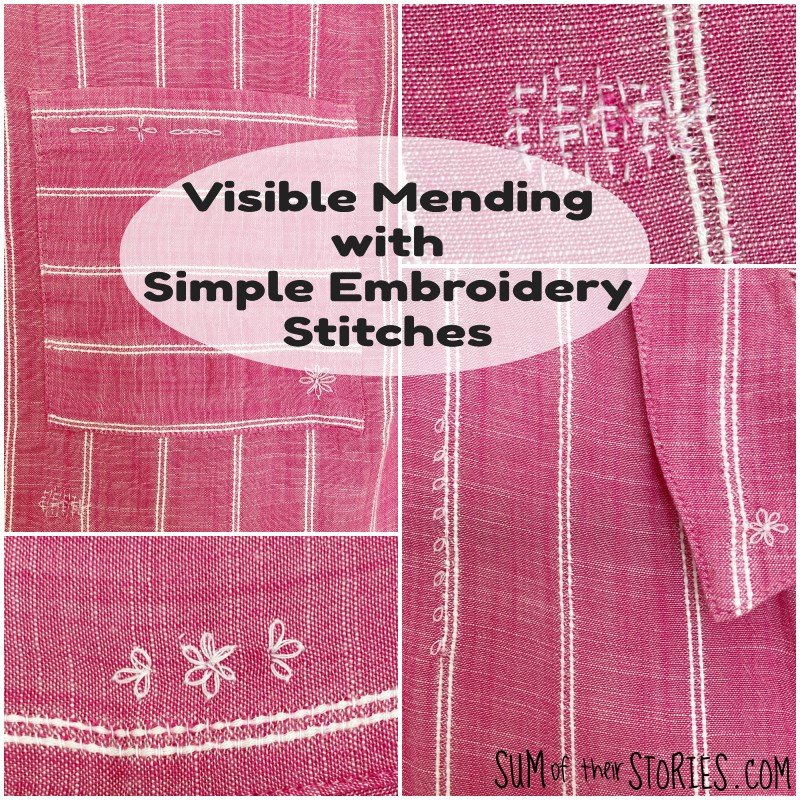
What do you do if a favourite garment gets a few little holes? You don’t have to throw it away, you can try a little simple embroidery and make it last a little longer with some visible mending.

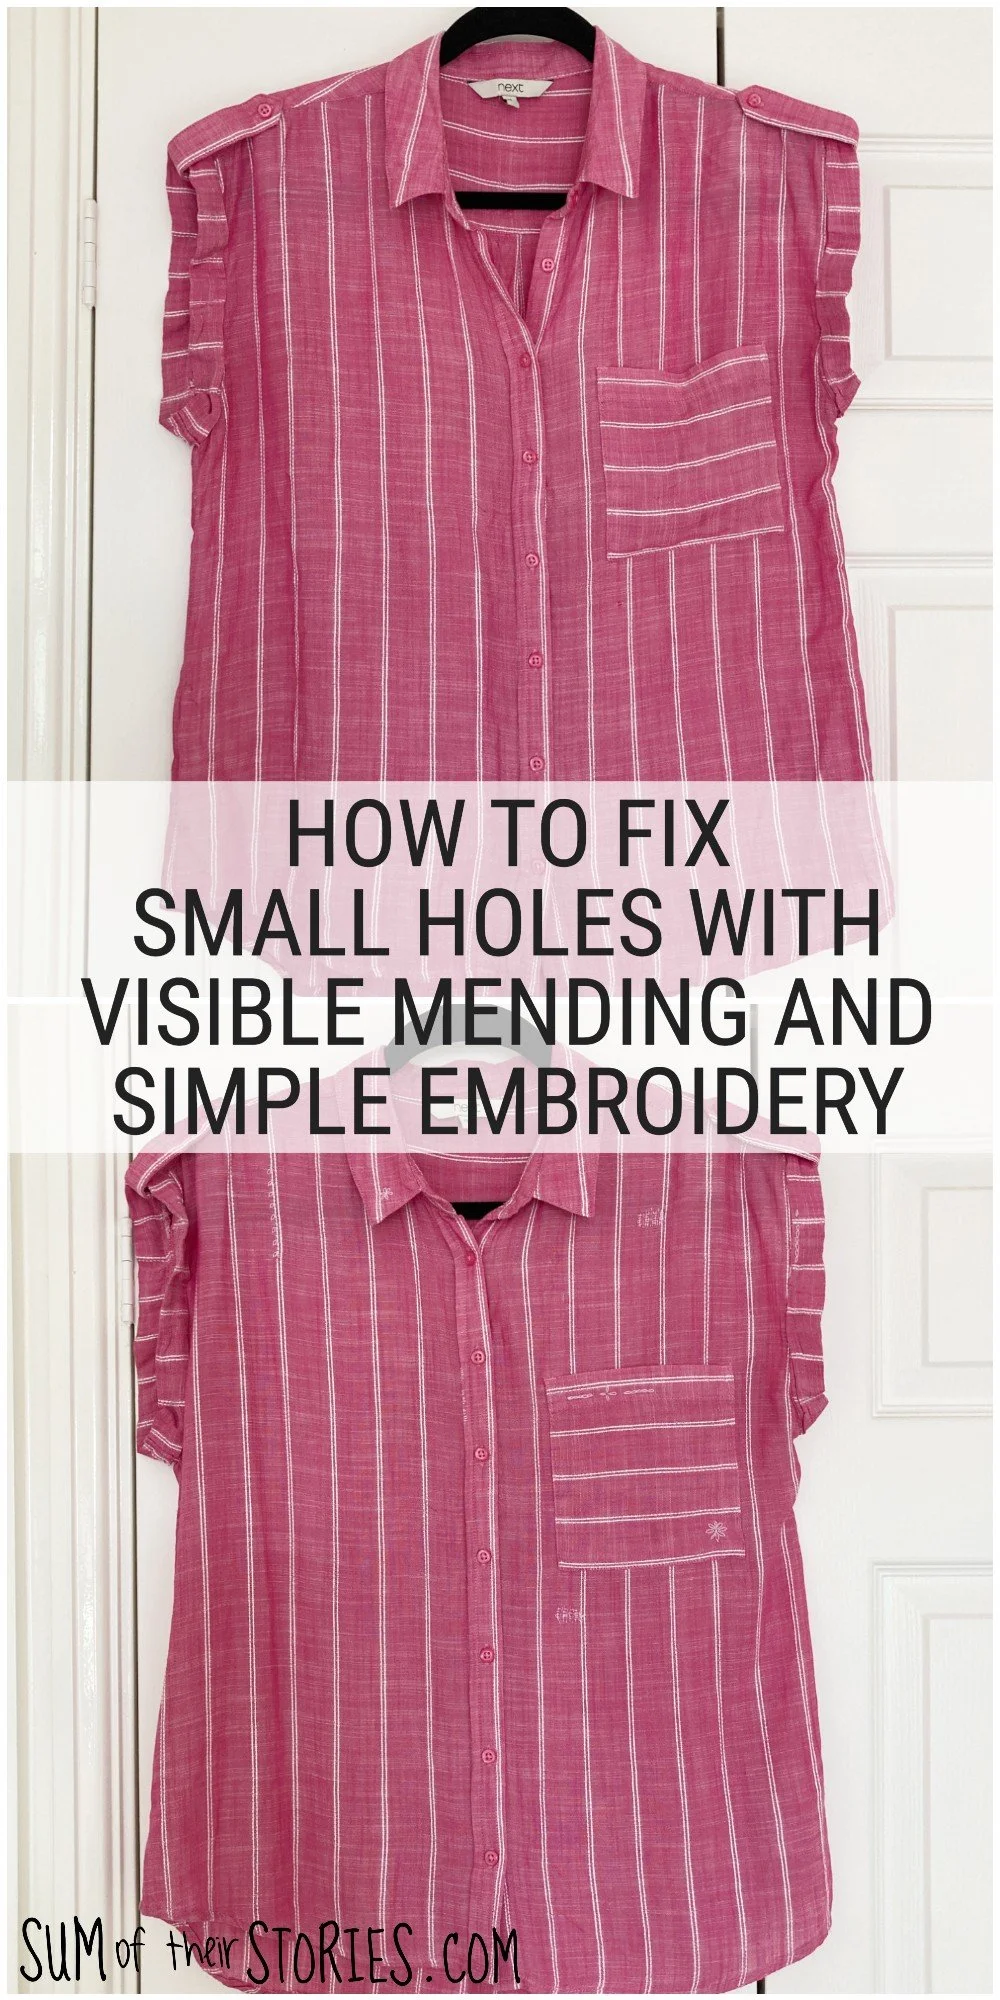
I’ve had this pink striped shirt for quite a few years. It is a nice loose fit, a pretty colour, perfect for warm summer days.
The fabric is quite a loose weave, it’s a lovely soft floppy fabric and a couple of weeks ago I noticed a couple of annoying tiny little holes and frayed spots had formed.
It was really quick and easy to use a simple visible mending technique to repair the shirt. All I used was regular white sewing thread, the kind you would use in a sewing machine, a needle and an embroidery hoop. The embroidery hoop is not essential but I found it easier to keep the fabric from puckering.
I used a couple of different techniques each used to suit the different areas of damage, let me show you each one. I used 2 strands of regular sewing thread together for all the mending and embroidery on this shirt:
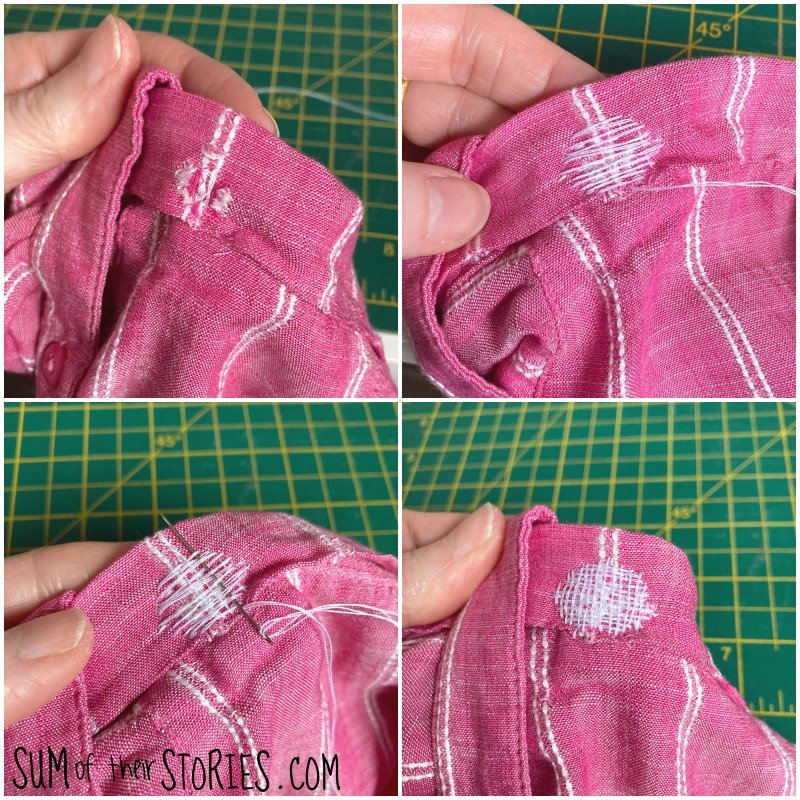
Boro Effect Stitching
I’m calling this boro effect; proper boro is a traditional Japanese stitching that involved applying patches and securing them with stitches. I didn’t add a patch, here I’ve just added some stitches to secure a hole and then disguise it with some additional stitches. This is ideal for a thin area of fabric or, like I had here, a tiny hole where just a couple of threads had broken.

Stitch a few horizontal lines of running stitch, securing the hole as you go.
Stitch a few vertical lines of running stitch, criss crossing over the horizontal lines.
Here’s another area fixed with the same effect:

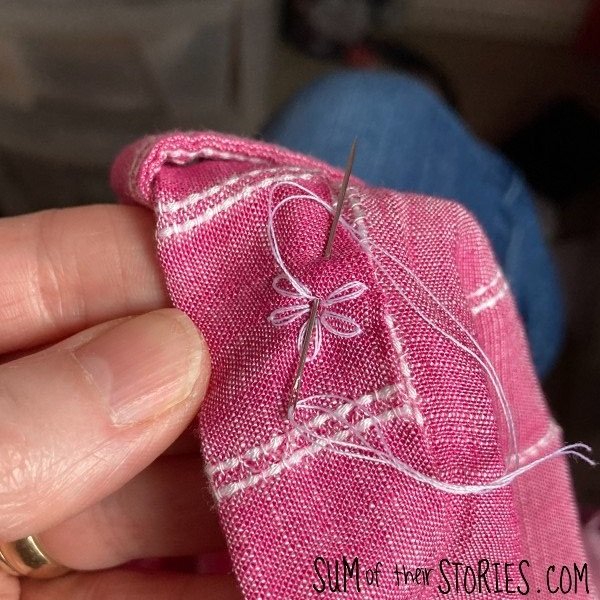
Woven Mending Technique
On the back of the sleeve there was a slightly larger damaged section which needed a more substantial mend.
Cover the damaged area with lots of horizontal threads covering the hole completely. Make them start and finish a good 1/2 cm away from the edge of the damaged area. Position them closer than the previous boro style mend.
Work vertical threads, weaving them in and out of the horizontal threads with your needle.
This creates a much firmer “patch”.
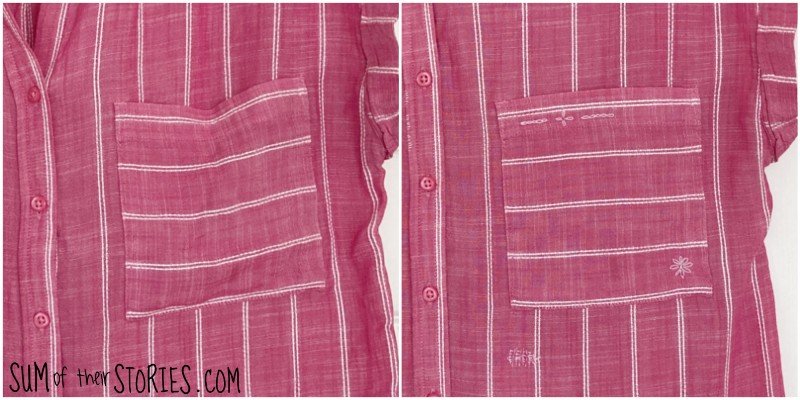
Lazy daisy stitch flower mend
Another way to cover a very small hole or mark is with a lazy daisy stitch flower. You can also use these flowers as a purely decorative element.
This is a really easy embroidery stitch, you work 5 or 6 together in a circle to create a flower. I go through exactly how to stitch a lazy daisy flower in this beginners embroidery stitch guide if you are new to embroidery.
Simple over sew stitch

There was a tiny amount of thinning on the very edge of the shirt placket so I used a super simple over sew stitch to cover that. I stitched over more than just the damaged area, varying the stitch length slightly to create a slightly wavy effect.
Fixing the pocket
Due to the floppy nature of this fabric the pocket on this shirt was a tad too droopy for my liking. I could have removed it altogether but that would have left a line of holes where the stitches had been.
As I never use a pocket like this for anything I decided to add some additional embroidery that would secure it in place and solve the droop!
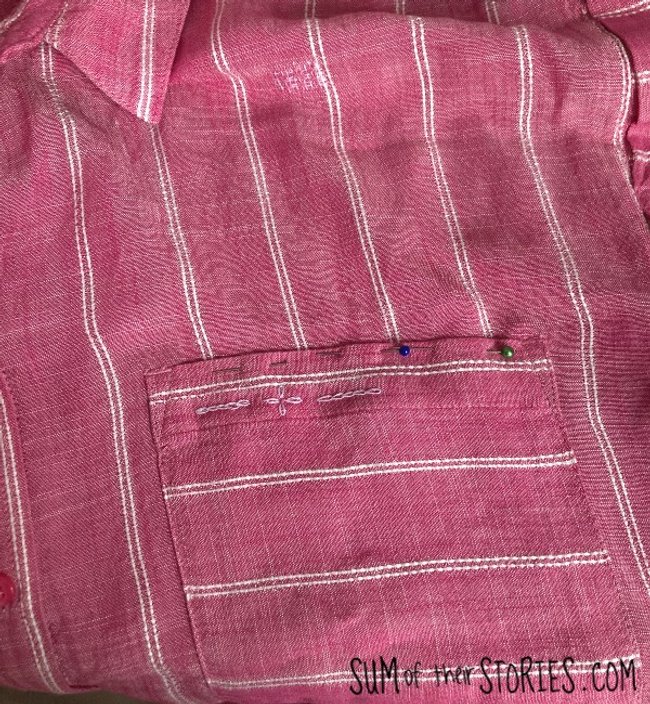
I pinned across the top of the pocket to hold in in place and then worked a lazy daisy flower with a row of chain stitch either side. This is stitched right through all the layers so the pocket no longer opens but it also no longer droops. I also added another lazy daisy flower towards the bottom corner, just because it’s cute!
Adding more embroidery
Once any damaged or problem areas are mended or held in place you can decide if you want to add any more stitches to your garment. Sometimes when visible mending the damaged areas of a garment are not where the repair will look best. Holes don’t always appear in the most aesthetically pleased arrangement! To avoid awkward looking repairs you can cheat a little and add more patches of stitches, embroidered flowers etc wherever you like to pull your embroidery together and create an intentional and cohesive look.
Knowing when to stop is the hardest bit of this whole repair. You can always revisit your visible mending and add a few more embellishments whenever it takes your fancy.

I added a little more embroidery on the back of my shirt, centrally on the back yoke.

I also added a few lazy daisy flowers and some single lazy daisy stitches along the stripes of the fabric in a few places, just because I thought they looked nice.

These are all the spots with some stitches, there are another 5 places on the back.
It’s not a massive difference to the shirt, from a distance I’m not sure you can even notice the changes but close up you can see a few pretty details and NO holes or frayed bits.

I might add some more embroidery to this shirt in the future, but for now I’m very happy with this simple embroidery take on visible mending. And just to finish here is a quick no frills, no make up pic of me wearing my shirt this morning.
Julie
You might also be interested in these other mending and refashion ideas: