How to make a simple straight skirt with elastic waist
/

This is probably the easiest kind of skirt it is possible to make. A simple straight skirt with a comfortable elastic waist and a split so you can walk in it. You can make this is less than an hour, start to finish.
I’ve spent almost the whole of 2020 and 2021 to date in jeans! I just bung them on each morning with a top and don’t really think about it. Easy, comfy, practical. When Minerva launched #sewyourstash in October I thought I’d jump on board and make myself something from my stash that would get me out of my jeans just once in a while. I rummaged through and found a large piece of soft floral drapey fabric, I think it’s a viscose, but I’m not completely sure.
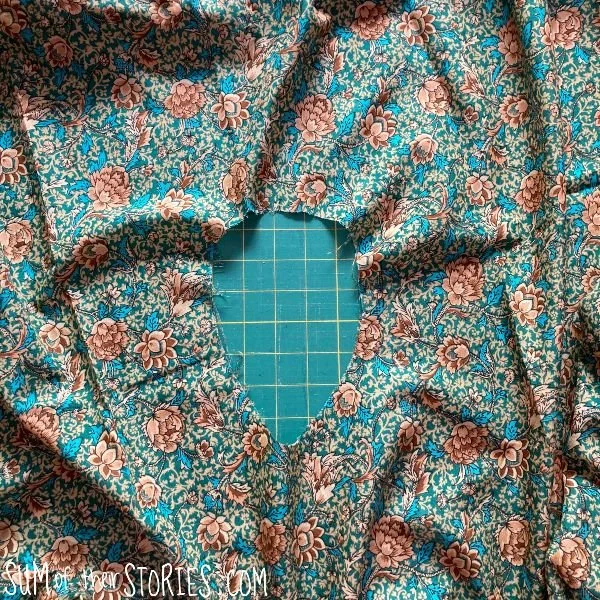
The fabric I had was just short of 3 metres but it had a circle cut from the centre. It looks like someone was going to make one of those floaty dresses or maybe a poncho type something. I don’t even know who I got this fabric from, it’s been in my stash for years so it was probably from my mum or my nan originally. I’m thinking it’s probably from the mid 1980’s.
For this skirt you don’t need anything like as much as 3 metres. However, how much you need will depend on your size. You can make this skirt any size, but the way you make it will depend a little on your measurements.
I’ll explain what I did for my size and what you’ll need to alter for larger or smaller sizes. It’s super simple.
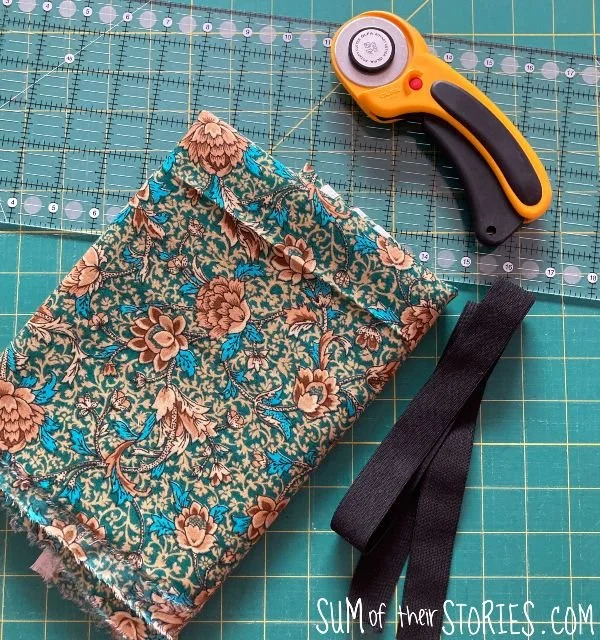
For my skirt I used 1 metre of fabric, which is 46” (116cm) wide. For a larger size you may need 2 metres.
You also need a length of 1” (2.5cm) wide elastic, long enough to go around your waist, plus another inch.
Let’s get started making a simple straight skirt.
Now this bit is going to sound like complicated maths but it’s really not. I promise. Once you are doing it, it’s really easy, just trust the process!
Start by measuring your hips at the widest part. Mine is 39.5” (100cm)
Add 1” (2.5cm) for seam allowance plus another 5” (13cm) for ease - this will allow you to make a skirt you can actually sit down in. Add more ease if you’d like a fuller skirt.
So my sum is 39.5 + 1 + 5 = 45.5 (100cm + 2.5cm + 13cm = 115.5cm)
This is the width you need your fabric to be. As my fabric was 46”, which is so close to 45.5” it’s ridiculous, I just used the full width of the fabric and felt it was serendipity!
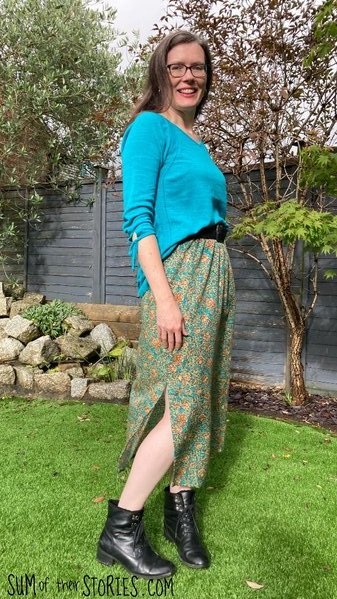
Next work out the length you’d like your skirt to be. I wanted a long length, somewhere between a midi and a maxi and settled on 34” (86cm) from my waist to the hem. I’m 5’6” just to give you an idea, and you can see in the photos how long my skirt ended up.
Add 2.5” (6.5cm) to this length for the hem and elastic casing.
So my sum is 34 + 2.5 = 36.5 (86cm + 2.5cm = 88.5cm)
This is the length you need your fabric to be.
My fabric size is 45.5” x 36.5” (115.5cm x 88.5cm)
If your fabric is not wide enough you will have to join two lengths to get a piece of fabric the right size. To do this join two lengths of fabric, right sides together and then cut this to the size you need so that seam is central. Your skirt will just have a side seam both sides whereas mine only has a seam on one side. Either way works perfectly.
Once you have your correctly sized rectangle of fabric, start by creating the casing for the elastic waistband.
If your fabric has a directional print you’ll need to think carefully about which is the top waist edge and which is the bottom hem edge.
With the wrong side facing, turn a small 1/4” (1/2cm) hem and then a larger 1.5” hem (3.5cm) at the top edge.
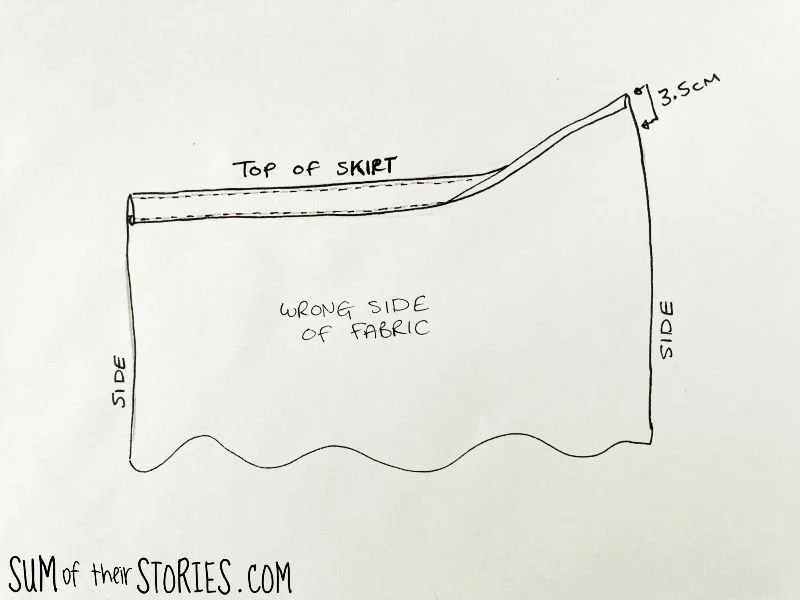
Stitch along the bottom and the top of this wide double hem. You’ll need to stitch pretty close to both edges, you want the gap between the lines of stitching to be just a fraction over 1” so your elastic will thread through but be a snug fit.
Thread the elastic through (use a safety pin on the end to help you do that) and then secure it temporarily at each end with a pin or safety pin.

That row of stitching at the top edge is not strictly necessary but it does help to stop the elastic twisting so I prefer to add it.
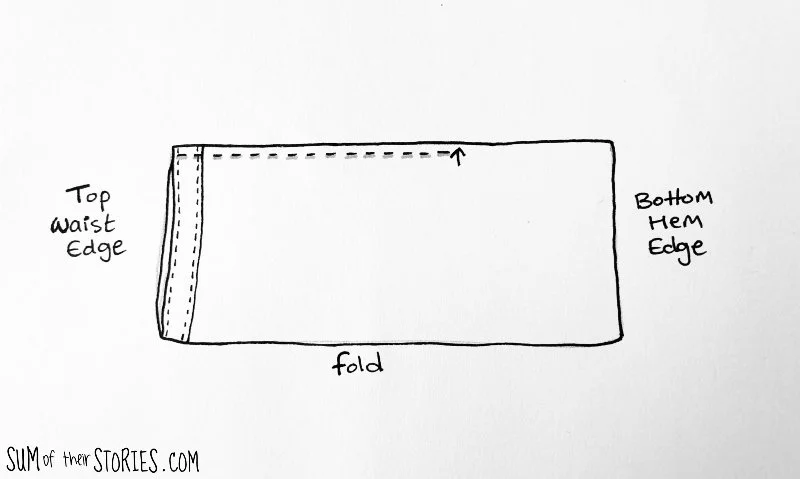
Next fold your fabric in half, right sides together so that it forms a tube. Measure from the bottom hem edge as high as you’d like the split to be, mine is 15” from the bottom of the skirt. Stitch along the side seam, from the top waist edge to the point you marked for your spilt.
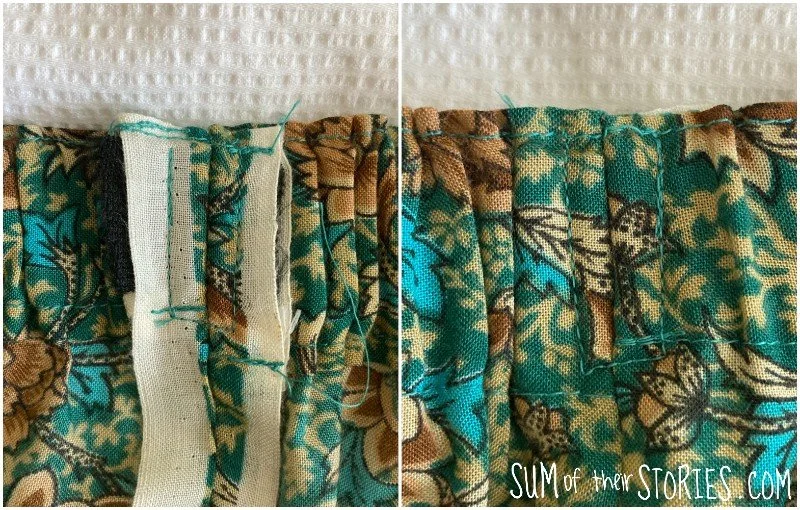
Press the side seam open and stitch around where the elastic joins in a rectangle to secure it. Mine looks a bit of a mess on the inside but the outside is fine.
Nearly there!
Now you just need to hem the bottom of the skirt and tidy the side split.
Fold a narrow double hem (1/4” or 1/2cm) all around the bottom edge and along both sides of the split. Can you see all the pins in this photo?
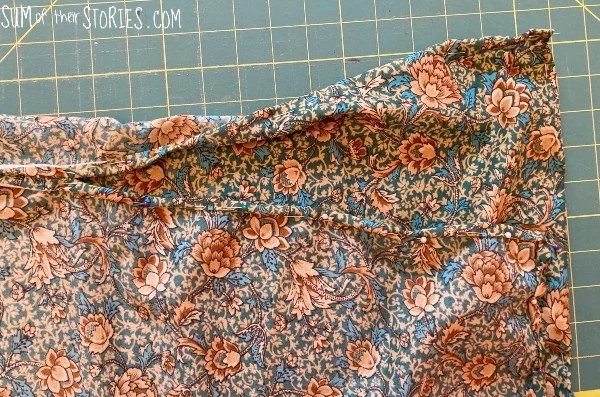
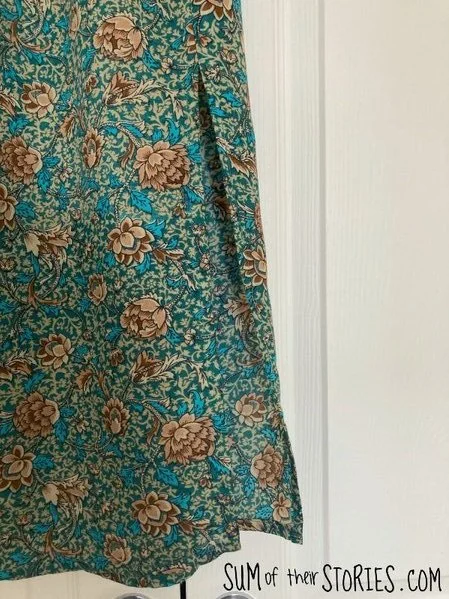
Stitch all around, you can stitch the hem and split all in one go.
Tidy the inside side seam if it needs it. Mine had the selvedge edge which I left in place so no seam tidying was needed, but you can use pinking shears, or an overlocker or a zig zag stitch on your sewing machine.
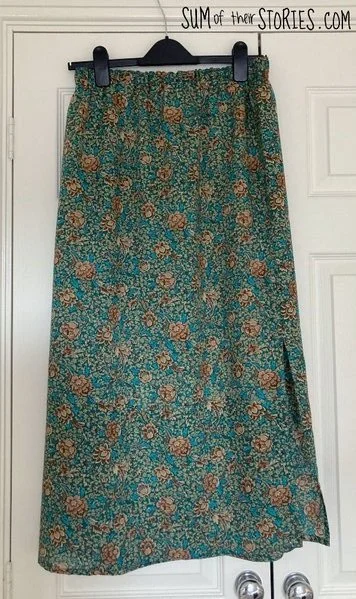
Give it a press and that’s it, your skirt is finished! Whoop whoop!
“Twas a little bit damp when we took these photos so I had to sit on a cushion! I’m wondering if I made my split a little bit too long as I’m flashing quite a bit of thigh when I’m sitting down. I might stitch that up an inch or 2 more at some point, or maybe just pop on some nice thick warm tights!

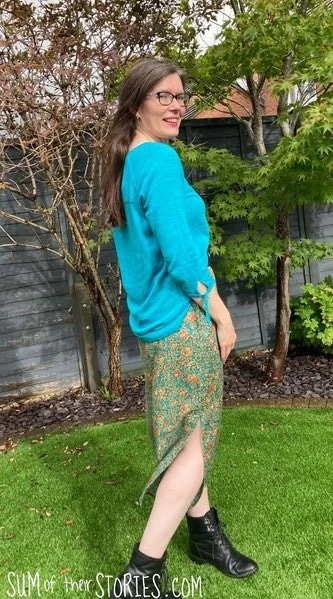
I discovered that for photos I need to stick my leg out to show the split which can look a little awkward. I now understand poor old Angelina and all that grief she got on the red carpet one year! I’m sure she’ll find it a comfort to know I can relate to her now!! :-D

I’m definitely going to attempt to make a top with my remaining fabric, so I can make a dress effect with this skirt too. It felt really nice to wear something that’s not jeans though and as the weather cools further I will be wearing my cosy tights with this skirt. Autumn weather is kind of bonkers here in the UK generally. It looks beautifully sunny in these photos but we got really lucky taking these shots. I had originally wanted to go over the road to the woods near us and get some lovely photos there, all autumn leaves etc, but I was expecting a parcel to be delivered any moment so decided to just pop into the garden instead. Just as well! About a minute after we came in from taking these the heavens opened with torrential rain and thunder with a spot of hail for good measure! (And 5 minutes after that my parcel arrived!)

I’m really happy with my autumnal skirt, made from a piece of fabric that had been in my stash for far too long. It’s nice to finally make it into something and allow it to fulfil its destiny.
This style of skirt really is super quick to make. These instructions make it sound more complicated than it is, honestly! After a bit of measuring it’s really just a couple of seams, dressmaking doesn’t get much simpler than this.
Anything hanging about in your fabric stash that needs to be made into an easy peasy skirt?

I’ll be sharing this idea at some of these link ups