Scrap Fabric Christmas Cards
/

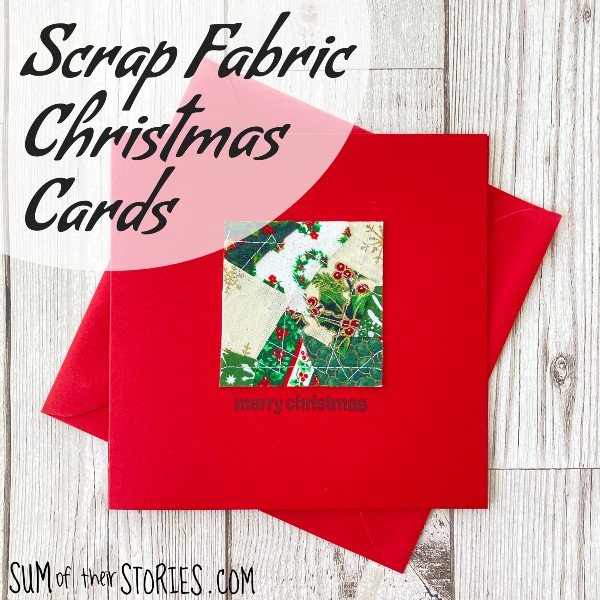
Make unique Christmas cards for the special people in your life using teeny tiny scraps of fabric.
This is a win win craft idea. You get to make simple but lovely cards to send out for Christmas plus you get to use up even the tiniest scraps of festive fabric and save them from being thrown away.
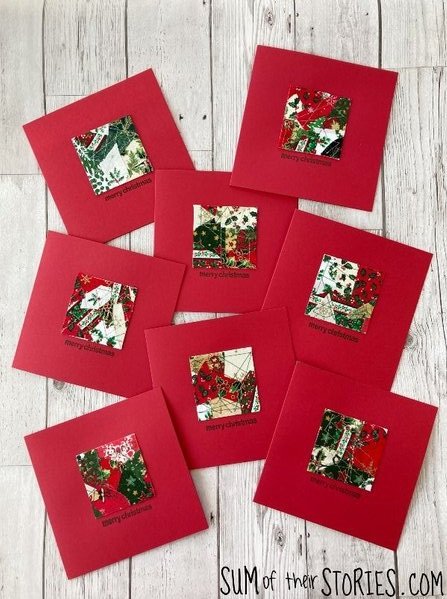
This is a great card making idea for mass production too, in fact it’s much better to make loads than just one or two. Get a production live going and you’ll be able to rustle up a whole batch of cards pretty quickly.
Warning - I’ve done this project entirely in inches just as it was easier that way. Feel free to do all your measuring in cms if you prefer! I’m fluent in both due to my age and switch between them mid project sometimes which can make things tricky. You’ll be adjusting the sizes to suit your choice of card anyway, these instructions are just to give you a guide and get you started.
To make scrap fabric Christmas cards you will need:
Blank cards - mine are red and 6” x 6” square but you can vary that and choose a colour and size you prefer.
Scrap card - I have a whole pile of 2.5” wide strips of card that were given to me in the hope I could “use them for something“. (This happens to me a lot!) You could use the backs of old birthday cards or cereal packet cardboard.
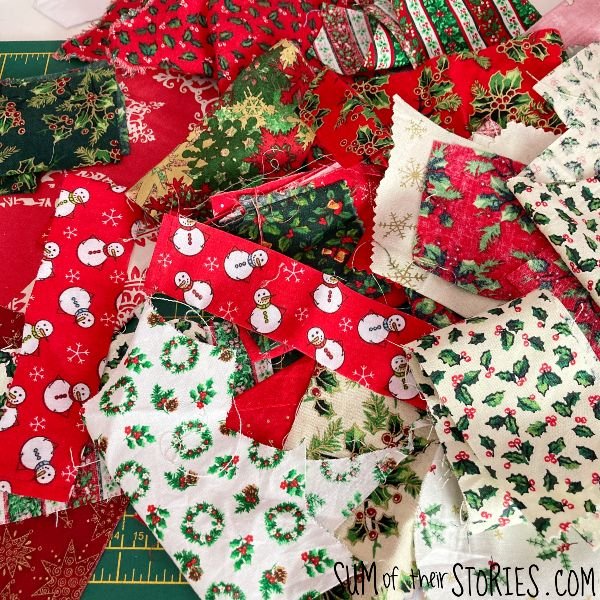
Scraps of Christmassy fabric - even the teeny tiny bits. If you don’t have any festive fabric then any scraps that are the colour scheme you want will work.
A Christmas greeting stamp and ink.
Glue - a stick glue like Pritt is ideal for holding the fabric in place temporarily. You will also need something strong, like High Tack or Anita’s tacky glue.
Sewing machine and thread - this is a great way to use any cheap or old threads you might have lurking around. No need to use the good stuff for this.
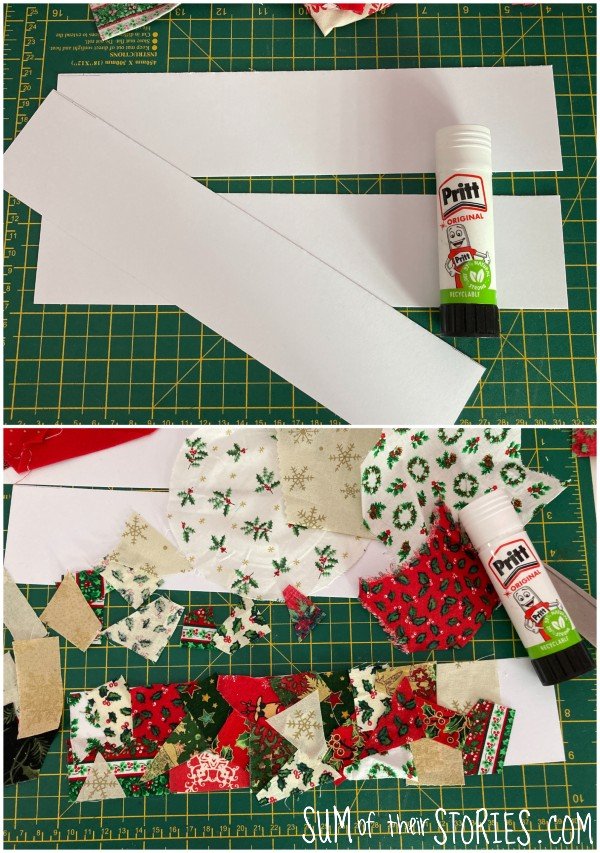
My scrap card is cut into long strips, 2.5” x 11” already. It’s a big pile of offcuts that I was given and am steadily working through. You can use any scrap card at all, it doesn’t have to be pre cut into strips like mine. You can decorate a whole sheet with fabric and then cut it up if that suits what you have better.
You are going to cover the scrap card with the tiny scraps of fabric. There is no right or wrong way to do this. I apply a patch of stick glue to about 3 inches of the card and then press down a bunch of fabric scraps quickly, before the glue dries and then move on to the next section.
You might need to trim your fabric pieces into even smaller bits, cutting them up to fit pleasingly with one another. It really depends what you have to work with.
Once your scrap card is completely covered and you are happy with the look then you are going to secure all the fabric with stitching.
The first thing you want to do is to change the needle in your sewing machine to an old one. I keep one especially for stitching into card and paper as I stitch quite often for cards and other papercrafts. Needles blunt easily and so rather than ruining lots of sewing needles just keep one especially for paper.
Use any colour sewing thread you like. It can match the fabrics or contrast with them. It’s a good chance to use any less good threads too. Any that are a bit old and you are not sure about, or some cheaper thread that might have come in a pack with something else. Good quality thread is fine to use of course if that’s all you have, but if you have anything questionable then now’s a good time to use it up for something!
Set your sewing machine stitch length to a pretty long stitch, I usually do 3 or 3.5. You don’t want the stitches so small that they perforate the card and it falls apart!

Now just start stitching. You are going to cover the whole thing, all over in multiple directions so you can be pretty random. I usually go all around the outside first, then start criss crossing up my card strips, then a few long up and downs. At this point I’ll have a look for any areas I’ve missed and just head on over to them.
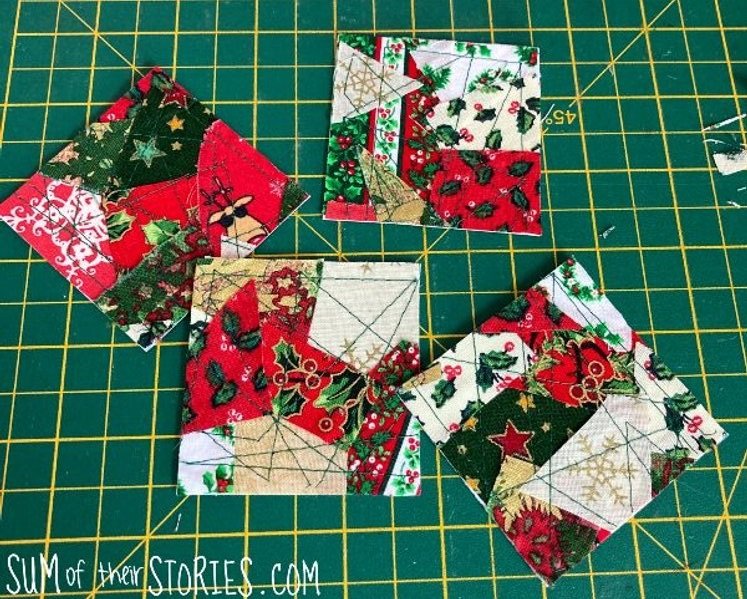
Once all the fabric is secured down with stitching you are ready to mark it out into squares on the back.
As my card strips are 2.5” wide it made total sense for me to make 2.5” squares. You can cut bigger or smaller if you like but I think on a 6” square card the 2.5” square fits quite nicely.
Mark on the back and then cut out your squares, trim any excess fabric from the edges.

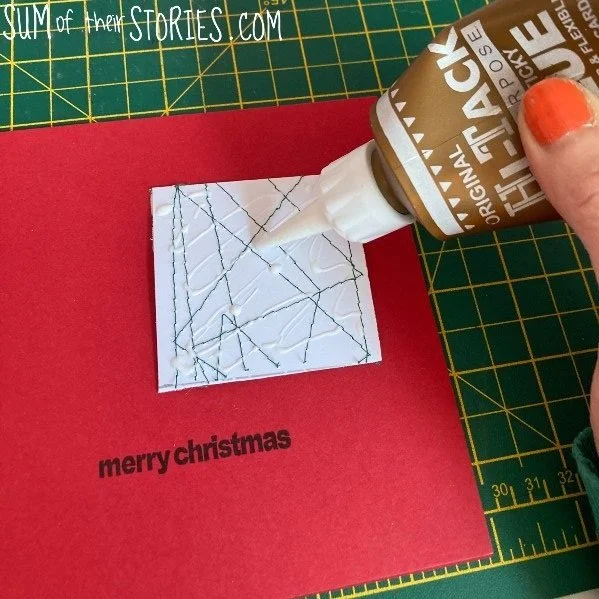
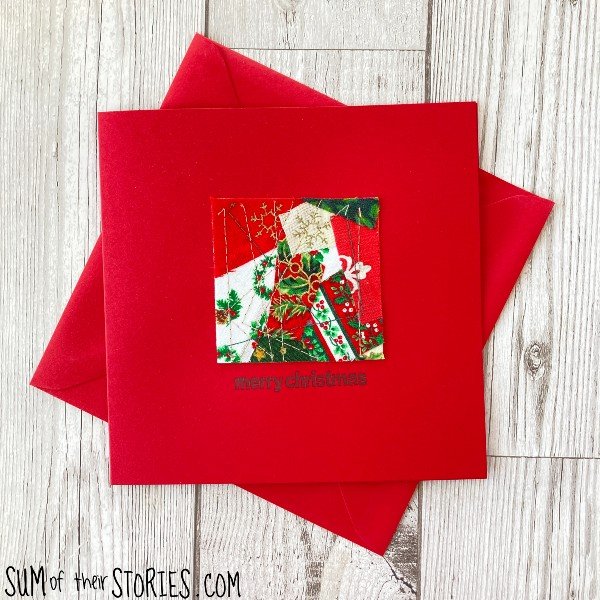
Position your fabric scrap square onto the middle of your card blank, just a fraction above centre. Fix with a squiggle of high tack pva glue. Stamp your greeting below and then place the card underneath something heavy to press it flat as the glue dries. A stack of books is ideal.
You can glue the shape on first or stamp the greeting first, it makes no difference unless your stamp is very thin. In that case you’ll be best to stamp first, you don’t want the stamp getting caught up on the card shape. I made 2 batches of these and did one lot stamping first and the second set gluing first.

Once you get going , as I said at the beginning, you can get quite a production line going, making all your fabric shapes first and then a whole bunch of stamping, then a whole lot of gluing.
If you don’t have a Christmas greeting stamp then you can hand write a greeting or just position the fabric scrap square completely centrally and let the lovely fabric speak for itself.

You could try cutting different shapes from your fabric covered scrap card but I would recommend keeping it simple. A star sounds like a lovely idea but that might be tricky to cut neatly! I think a heart would work well or you could maybe cut a tall triangle to fix onto a taller card which would give more of a Christmas tree vibe.
If you want to mix things up maybe you could add a border or frame around the square with a gold marker pen or a black fine liner.

So there you have it, Christmas cards made with teeny tiny fabric scraps. Really simple but full of texture and interest.
I’ll be sharing this Christmas card idea at some of these link ups.