

I can make you that hat
/A quick easy hat making story with links to a fab free pattern.

Back in January I was at a baby shower with some friends. It was a classy affair with afternoon tea at a lovely tea shop / boutique. We arrived a bit early so had a little look round the boutique whilst we waited and saw a lovely hat that my friend fell in love with.

Very pretty and hand made, totally worth the £35 price tag (I like to see handmade stuff properly valued) but that put it WAY outside my friend's budget.
"I'll make you one." I said boldly, "No problem!"
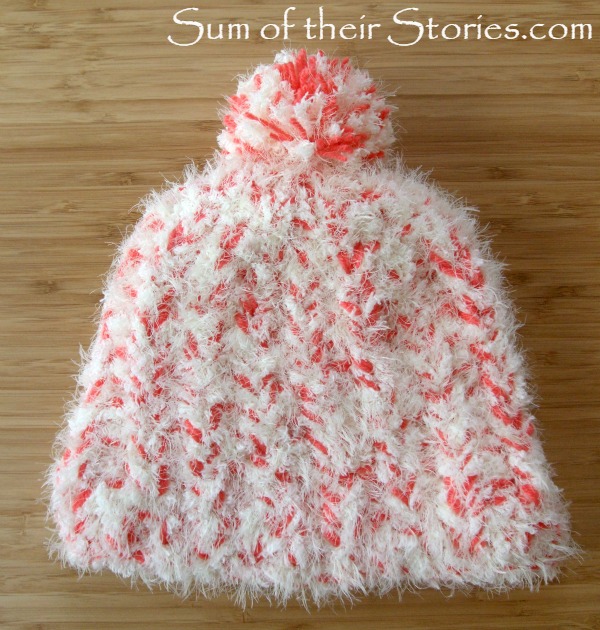
With the photo above on my phone I shopped for suitable yarn.
The only yarn I could find in the right colour was regular double knitting. I also found a ball of a fluffy fur yarn called Touch by Sirdar that I thought I could mix.
I found this brilliant free pattern from Classy Crochet for a chunky rib hat which I used as my guide and inspiration.

The pattern from Classy Crochet is done on a circular needle and I don't have any this big, so I just used regular straight needles and did a little bit of experimenting and made some adjustments to make it work with what I had. I did a mock fisherman's rib to get the chunky rib look, due to my lack of circular needles. If you've not done it before there's a great tutorial with photos for it here from Wool and the Gang.
I used 2 strands of my peach Double Knitting and 1 strand of the fluffy stuff.

I wound a small ball of the peach from the main ball so I could use the 2 strands together without getting in a right mess.
I used 9mm needles for the rib band (first 5 rows) and then switched to 10mm needles.
Cast on 45 stitches
Using 9mm needles work 5 rows of k1, p1 rib.
Change to 10mm needles and work row 6: k2tog, p1 to the end, (30st)
Row 7 : p to end
Row 8 : p1, k1 below, p1, k1 below to the end.
Repeat rows 7 and 8 until the work measures 6.5 - 7" ending on a p row.
The decrease bit - attempt to keep your ribs in line as much as possible, it will not always be possible bit the fluffy yarn will cover any mistakes so don't worry too much.
Work 3 rows of regular k1,p1 rib
next row: k2tog, repeat to end of row.
next row: work a row of k1, p1 rib , lining up with the previous rib as best you can.
next row: k2tog, repeat to end
Thread the yarn through the remaining stitches and draw up tight. secure with a few stitches.
Sew up the side seam and add a big ol' pom pom to the top.
The yarn is so fluffy it doesn't show any slightly odd things that happen to the rib anyway!
I gave the finished hat to my friend as an early birthday present.
She said she already had some flowers to add so I didn't try to recreate that bit. If I get chance I'll photograph it completely finished next time I see her wearing it.

As you can see my version is a little more white fluff than the original inspiration but it's close enough.
If you want to make one I suggest checking out the pattern from Classy Crochet too and then just having a go. If you have chunky circular needles do the Classy Crochet version, if not then try mine! As with any pattern, if you don't use the same wool your results can vary, but this pattern is quick and easy enough to experiment with. I made this in an evening, and sewed it up/added the pom pom the next evening.
The only thing I'd add is that if you are a total beginner, stick to a plain chunky yarn like the original pattern, this knitting with several strands and all that fluff took a bit of concentrating!
Julie
I'll be linking up at these great link parties


