
Tetris Tote Bag Tutorial
/I'm not a big gamer type person but I did love Tetris back in the day. The colourful shapes are so instantly recognisable I thought it would be fun to put them on a tote bag.
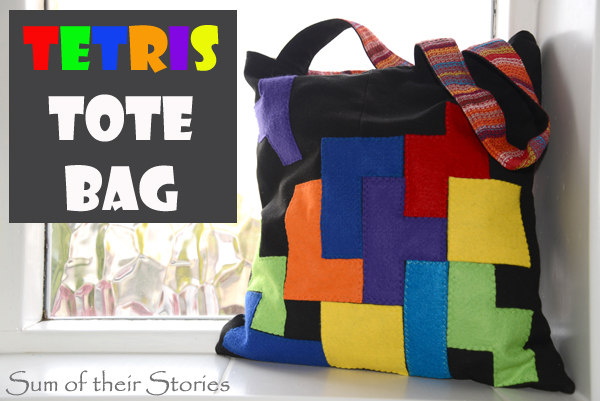
This tutorial was originally published back in 2014. It has been updated and republished.
I made this Tetris themed tote bag from an old pair of my son’s black school trousers, 2 tea towels and some felt. You could just use regular black fabric.
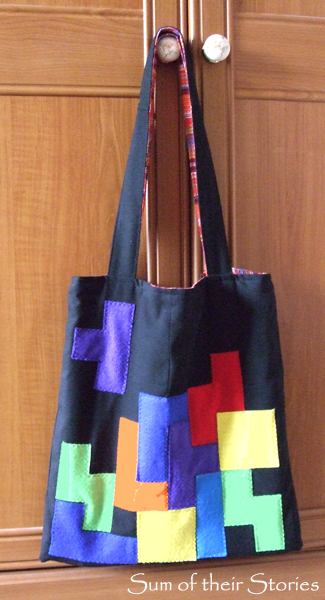
I stitched my felt Tetris shapes on but you are not really into sewing you could use a fabric glue instead for a no-sew version.
You could even just add felt tetris shapes to an existing bag if you have one. Make this project as easy or complicated as you like.
How to make a Tetris Tote Bag
What you need to make a Tetris tote bag
Black fabric - around 1/2m should be plenty, or upcycle an old pair of trousers like I did.
Bright lining fabric - 1/2m of fabric again, or upcycle 2 tea towels like I did.
Pieces of colourful felt - red, yellow, light blue, dark blue, orange, green and purple
Sewing thread
First prepare the felt Tetris pieces
Start by making templates from card, 4x4cm (1.5”) squares, in the right shapes.
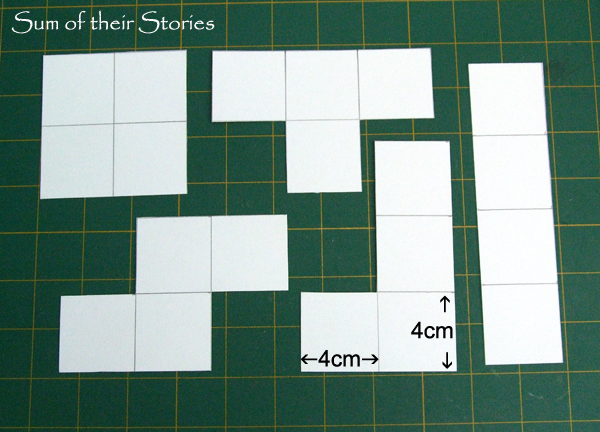
You only need 1 template for the L shape and the flat s shape as you can just flip the template over to cut the felt shapes that are the opposite way round.
These are the shapes and colours you need:
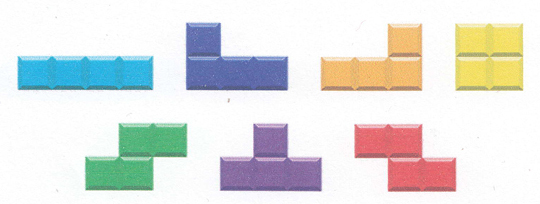
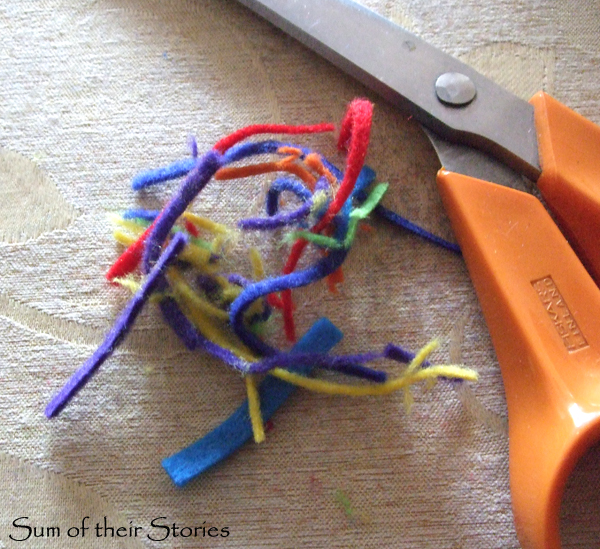
Use the templates to create your Tetris pieces from your colourful felt. You can cut as many or as few of each shape as your felt allows. It’s nice to have at least 1 of each shape/colour plus a few extras. Unfortunately I don't seem to have photographed my pile of Tetris shaped pieces. Sorry, you'll see them in just a second.
Next prepare the fabric bag pieces
First I’ll explain what I did with my upcycled trousers/tea towels in case you are doing the same, then I’ll list the finished piece sizes need to guide you if you are using regular pieces of fabric to make your bag.
I used 2 tea towels to line my bag, so they determined how big it could be. I chopped a piece of the top to use for the handles, like so:
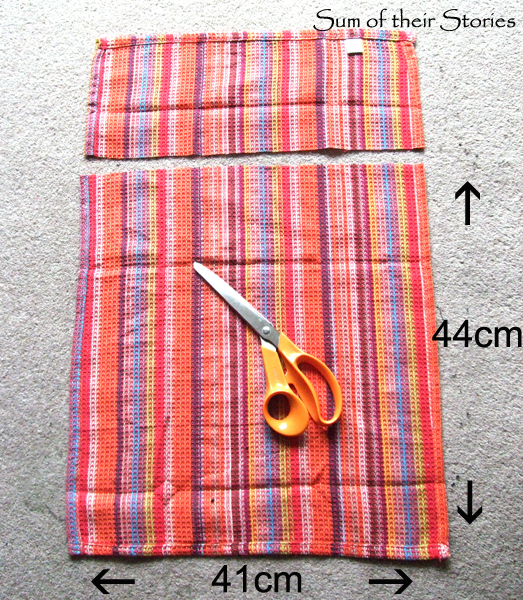
I used the lining fabric to measure my outer fabric from the trouser legs.
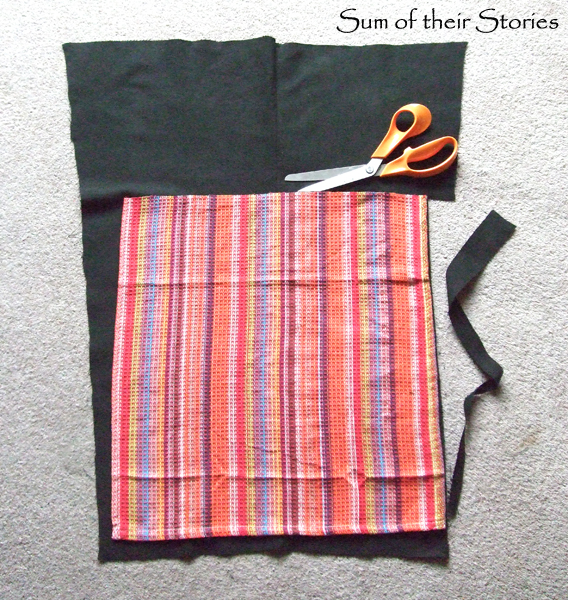
Then I used the off cut pieces to make the handle pieces. As my fabric was limited I had to join shorter pieces to make the long handles I wanted. (more of that later) If you have more fabric you can just cut longer pieces all in one. Or you could have shorter handles - your bag your choice!
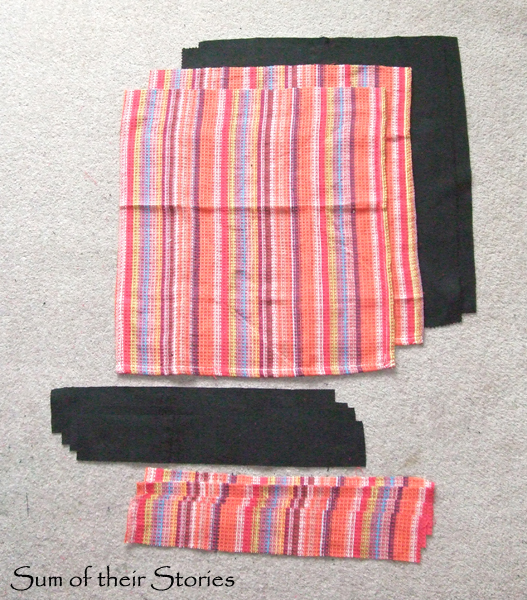
However we get there, we are aiming to finish with 8 pieces of fabric:
2 x 41 x 44cm (16” x 17”) outer "trouser" fabric
2 x 41 x 44cm (16” x 17”) tea towel lining fabric
2 x outer fabric handle pieces 7 x 79cm (2.75” x 31”) that’s 2 pieces joined in my case
2 x lining fabric handle pieces 7 x 79cm (2.75” x 31”) that’s 2 pieces joined in my case
Attach the felt shapes
Before you make your bag you want to add the decoration to one of the large outer fabric pieces.
what can go wrong: If your felt needs ironing do it before you cut the shapes out, I did mine after and they pulled out of shape so I had to trim them again to make them fit - doh!
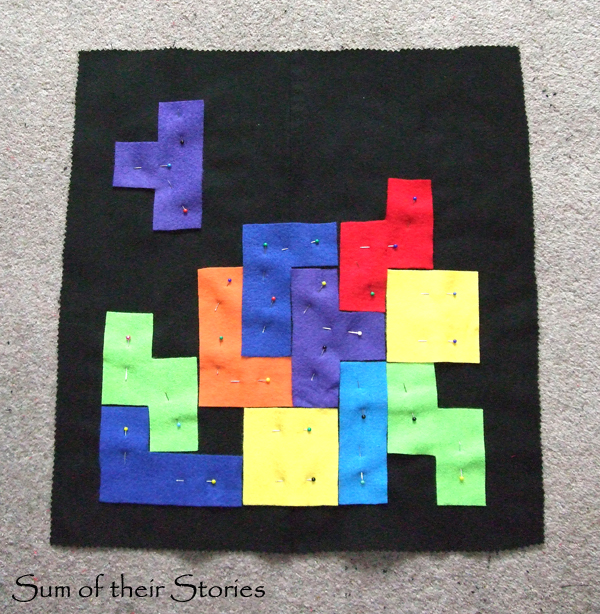
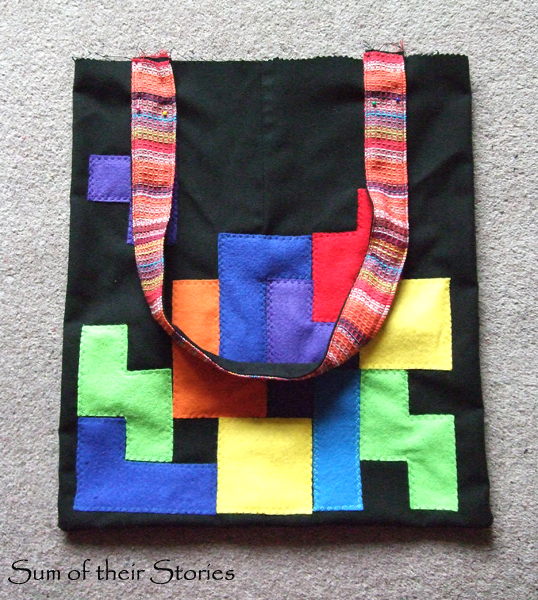
Play around with your felt Tetris pieces until you are happy with the arrangement. I was a Tetris fan so it was important to me that the pieces fitted like they would in the game. Remember if a line is all filled in it disappears (and you get points!) so you need to leave gaps on every line.
Once you are happy with the arrangement pin them centrally to the bag front piece.
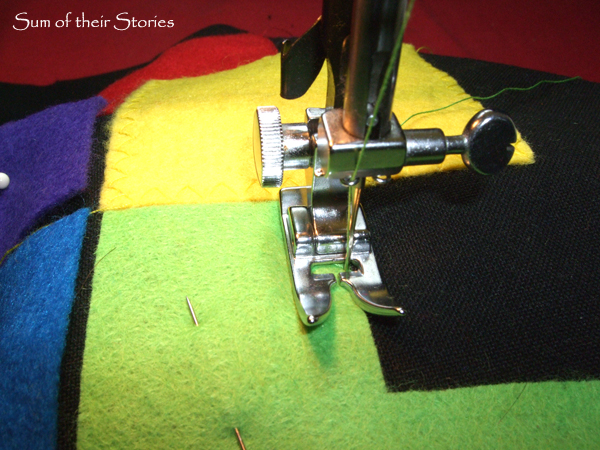
Attach each piece of felt by stitching all around the edge with a zig zag stitch. I wanted the thread colours to match so I stitched all the yellow, then all the green etc changing the threads as I went. It was a bit of a fiddle but worth it.
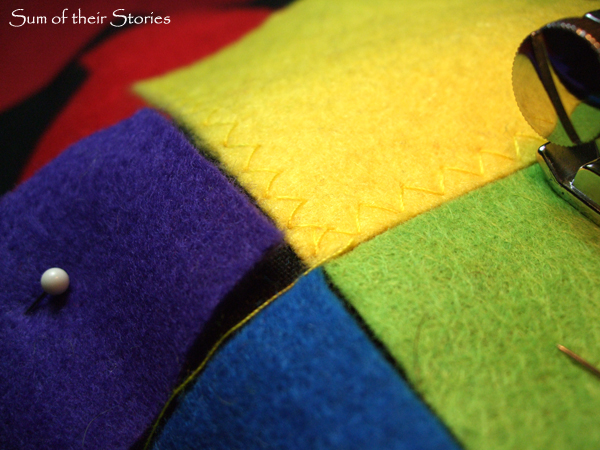
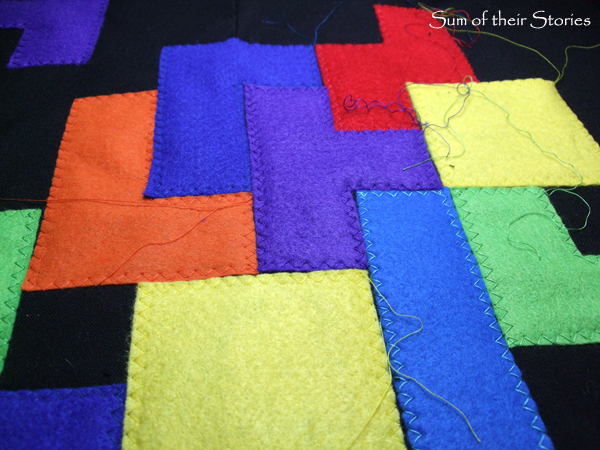
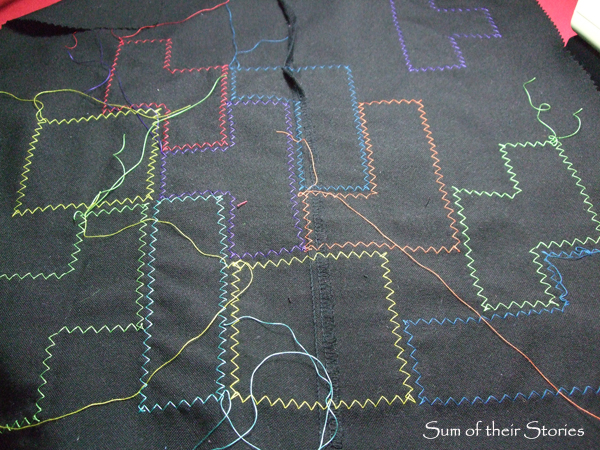
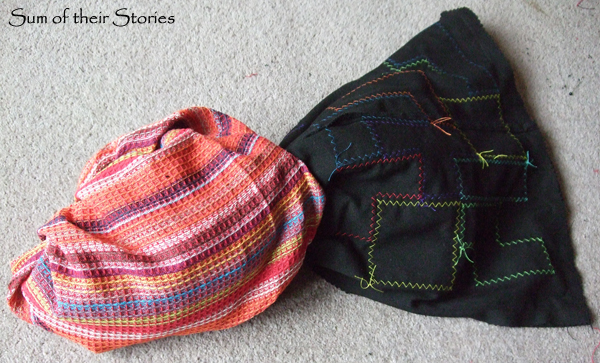
This is what the back looked like, I kind of like it!
I secured all the threads on the front by poking them all to the back with a needle, then tying them together in pairs.
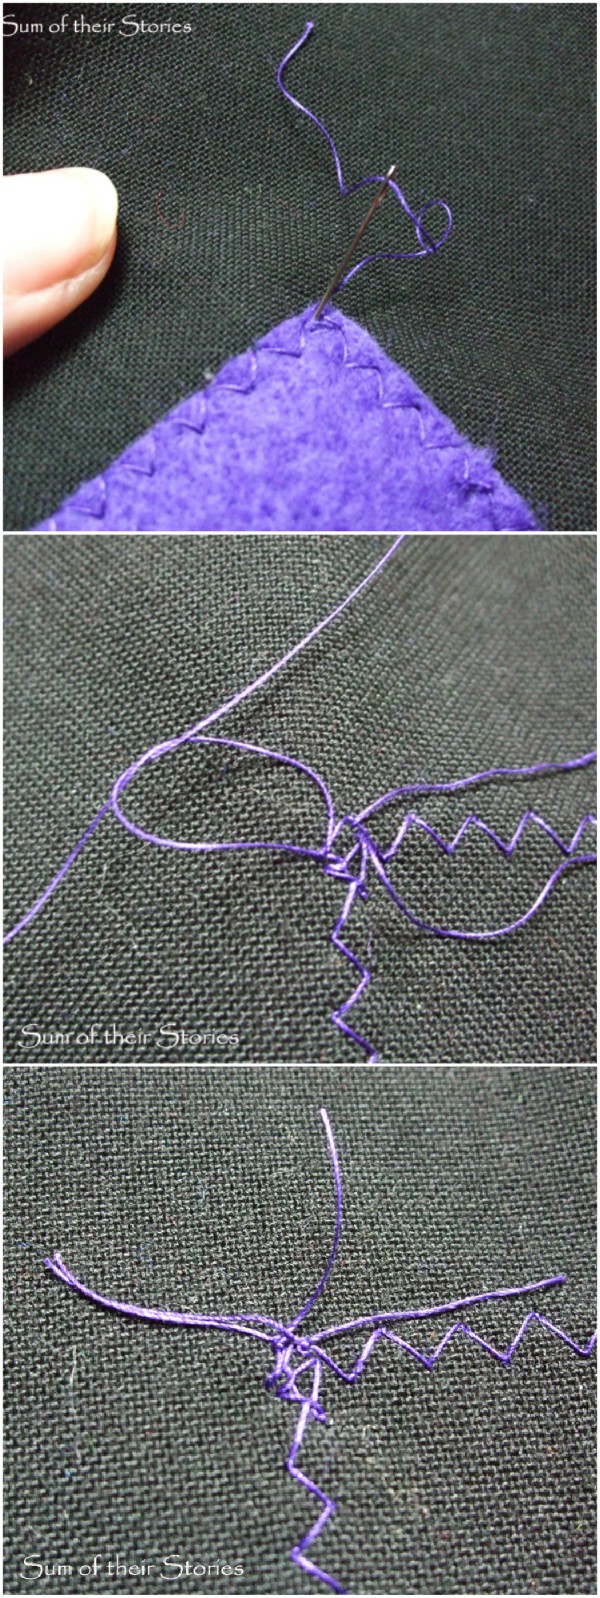
If you don’t wish to sew the felt in place you could try a fabric glue. Sewing is obviously more secure and long lasting but does take a lot longer. I’ve not made a Tetris bag using fabric glue so I can’t advise how well it would hold up to regular use.
Sewing the bag
Once the decoration is attached join the 2 outer piece by pinning them right sides together, then sewing down one side, along the bottom and back up the other side. Repeat with the lining pieces but leave a 3" gap at the bottom middle.
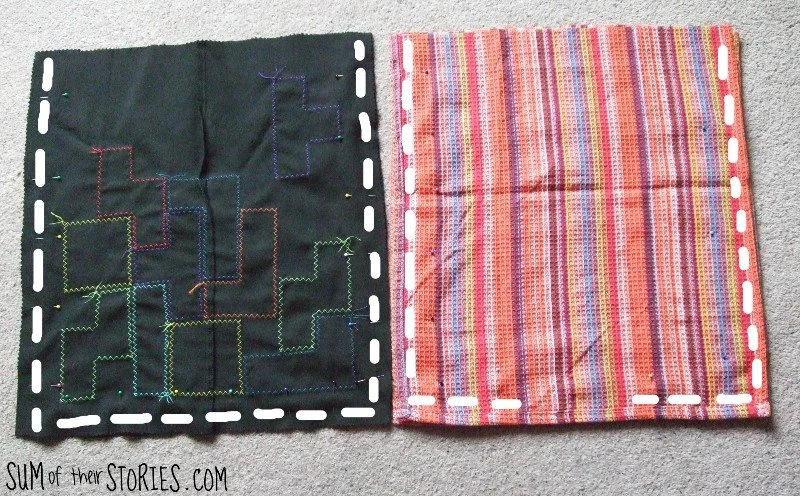
That gap is important, you'll need this gap later!
Sewing the bag handles
If you are piecing your handles together as I did then join the shorter handle pieces in pairs by stitching the short edges. If you had more fabric and were able to cut longer strips you won't need to do this.
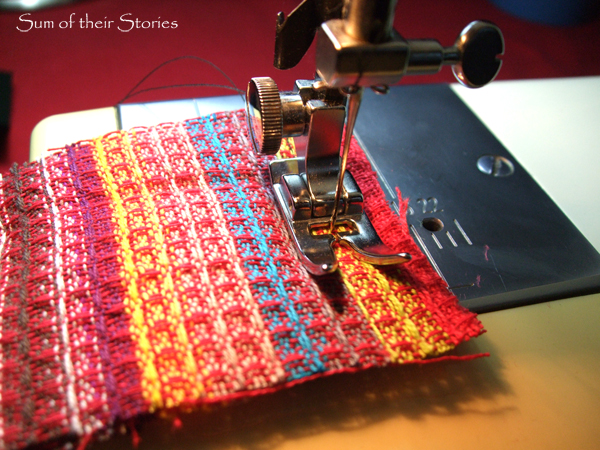
You’ll end up with 2 long thin strips of your main fabric and 2 of your lining fabric.
You are making 2 handles, both exactly the same.

Pin 1 outer and 1 lining, right sides together, then stitch down the long edges.

To turn them right side out, put a safety pin on the end and push through the tube...
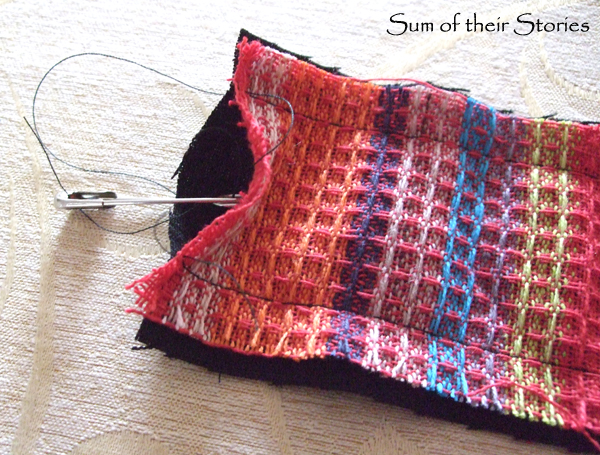
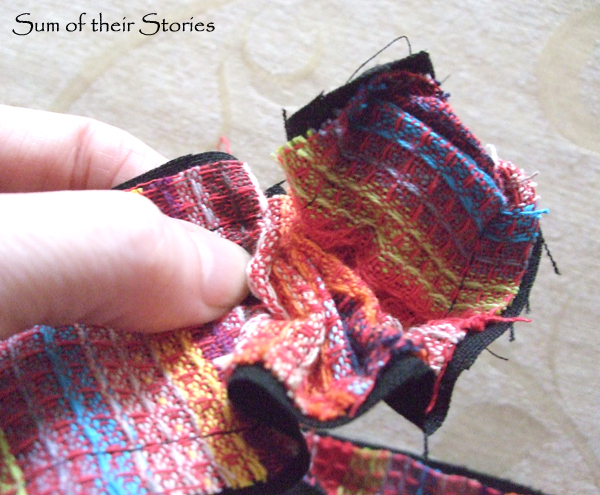
Depending on the thickness of the fabric you’re using you might need to encourage them to turn out. Just sort of bunch, then pull, then wiggle the safety pin through. Go gently if your fabric is fraying as my tea towel fabric did.
Once the handles are turned right side out press it flat with the iron. Top stitch down each long side if you want to. I almost always top stitch my bag handles, I like how it neatens it up.
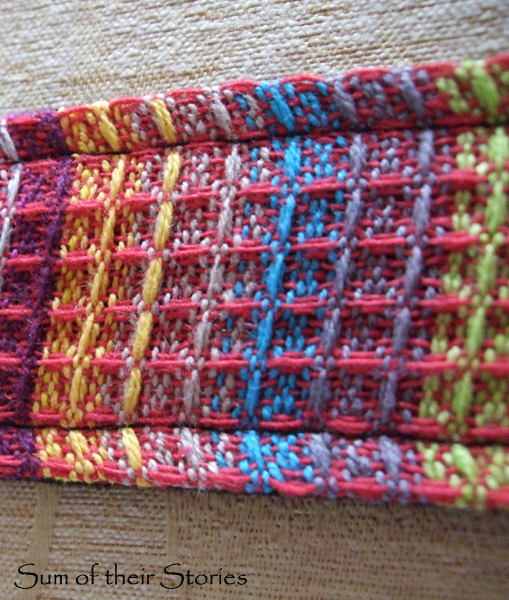
Now your handles are ready you can position them on the bag.
Assembling the tote bag
Pin the handles to the outer bag; one handle on the front and one on the back. The outer fabric handle is touching the outer fabric of the bag - so right sides together. Make sure they are evenly spaced, so the gap from the edge is the same for each handle. I found 6cm (2.5”) in from the edge seemed right on my bag but you can position them a little further in if you prefer.
Use 2 or 3 pins on each handle end, this helps to stop them slipping later. Make sure your pins are pointy end up and position them a little lower on the handle, we are going to stitch right past them.
Turn this outer bag inside out again and turn the lining bag right side out. Insert the lining bag into the outer bag so the right sides are together. Line up the side seams and make sure the bag handles are pushed down inside and not liable to get caught in the top seam.
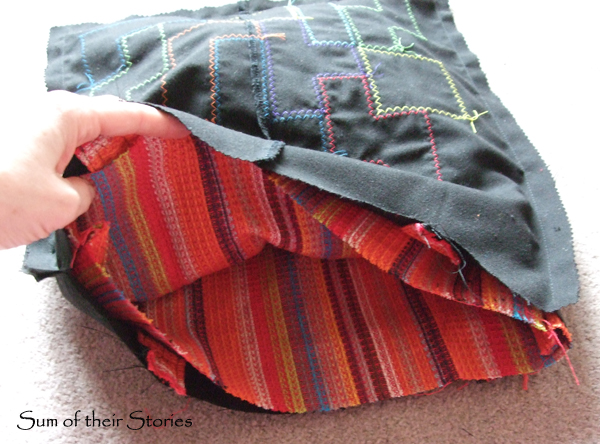
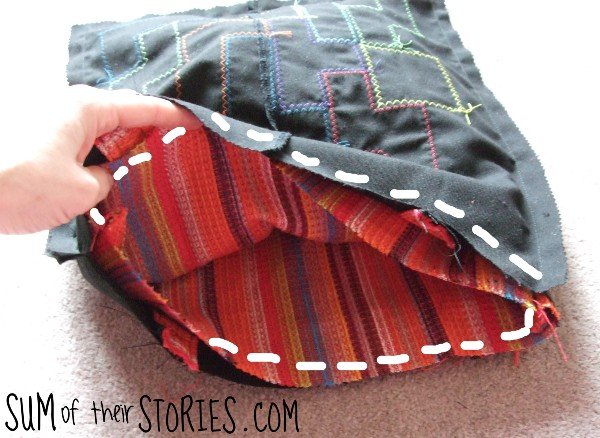
Pin then stitch the two bags together along this top edge.

Pull the lining bag out and find that gap you left in the bottom edge.
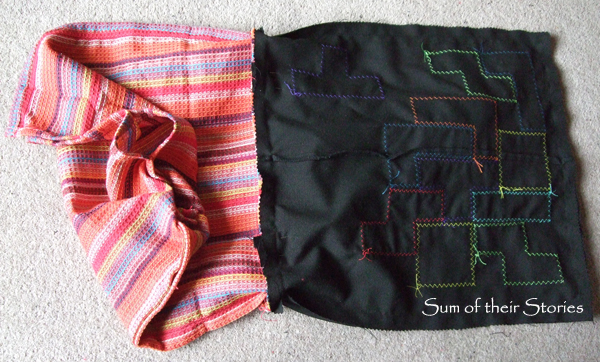
Now this is where the bag making magic happens - we are going to “birth” the bag!
Gently pull the whole bag through the gap in the lining until it's all right sides out.
Be careful because the pins will still be in the handle, remove them as you come across them.
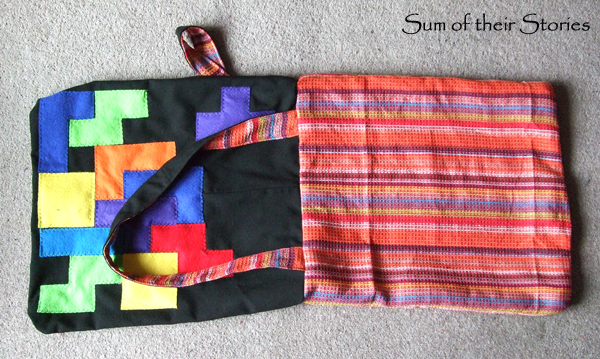
Stitch the gap in the lining, either by hand or by top stitching on the sewing machine. Push the lining back inside the outer bag and Voilà! A beautifully lined bag - how cool is that!

You can top stitch around the top edge if you like. I generally like to do that as it neatens the bag and strengthens the handles.
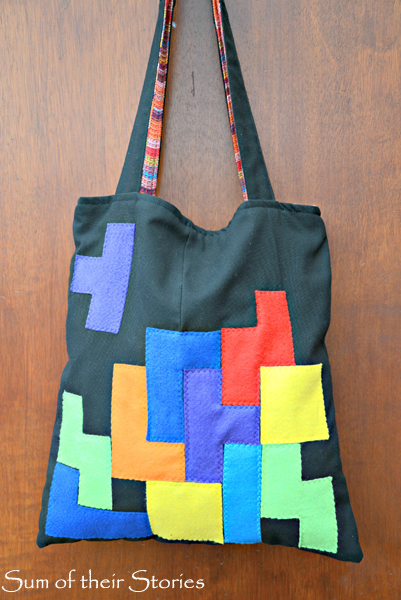
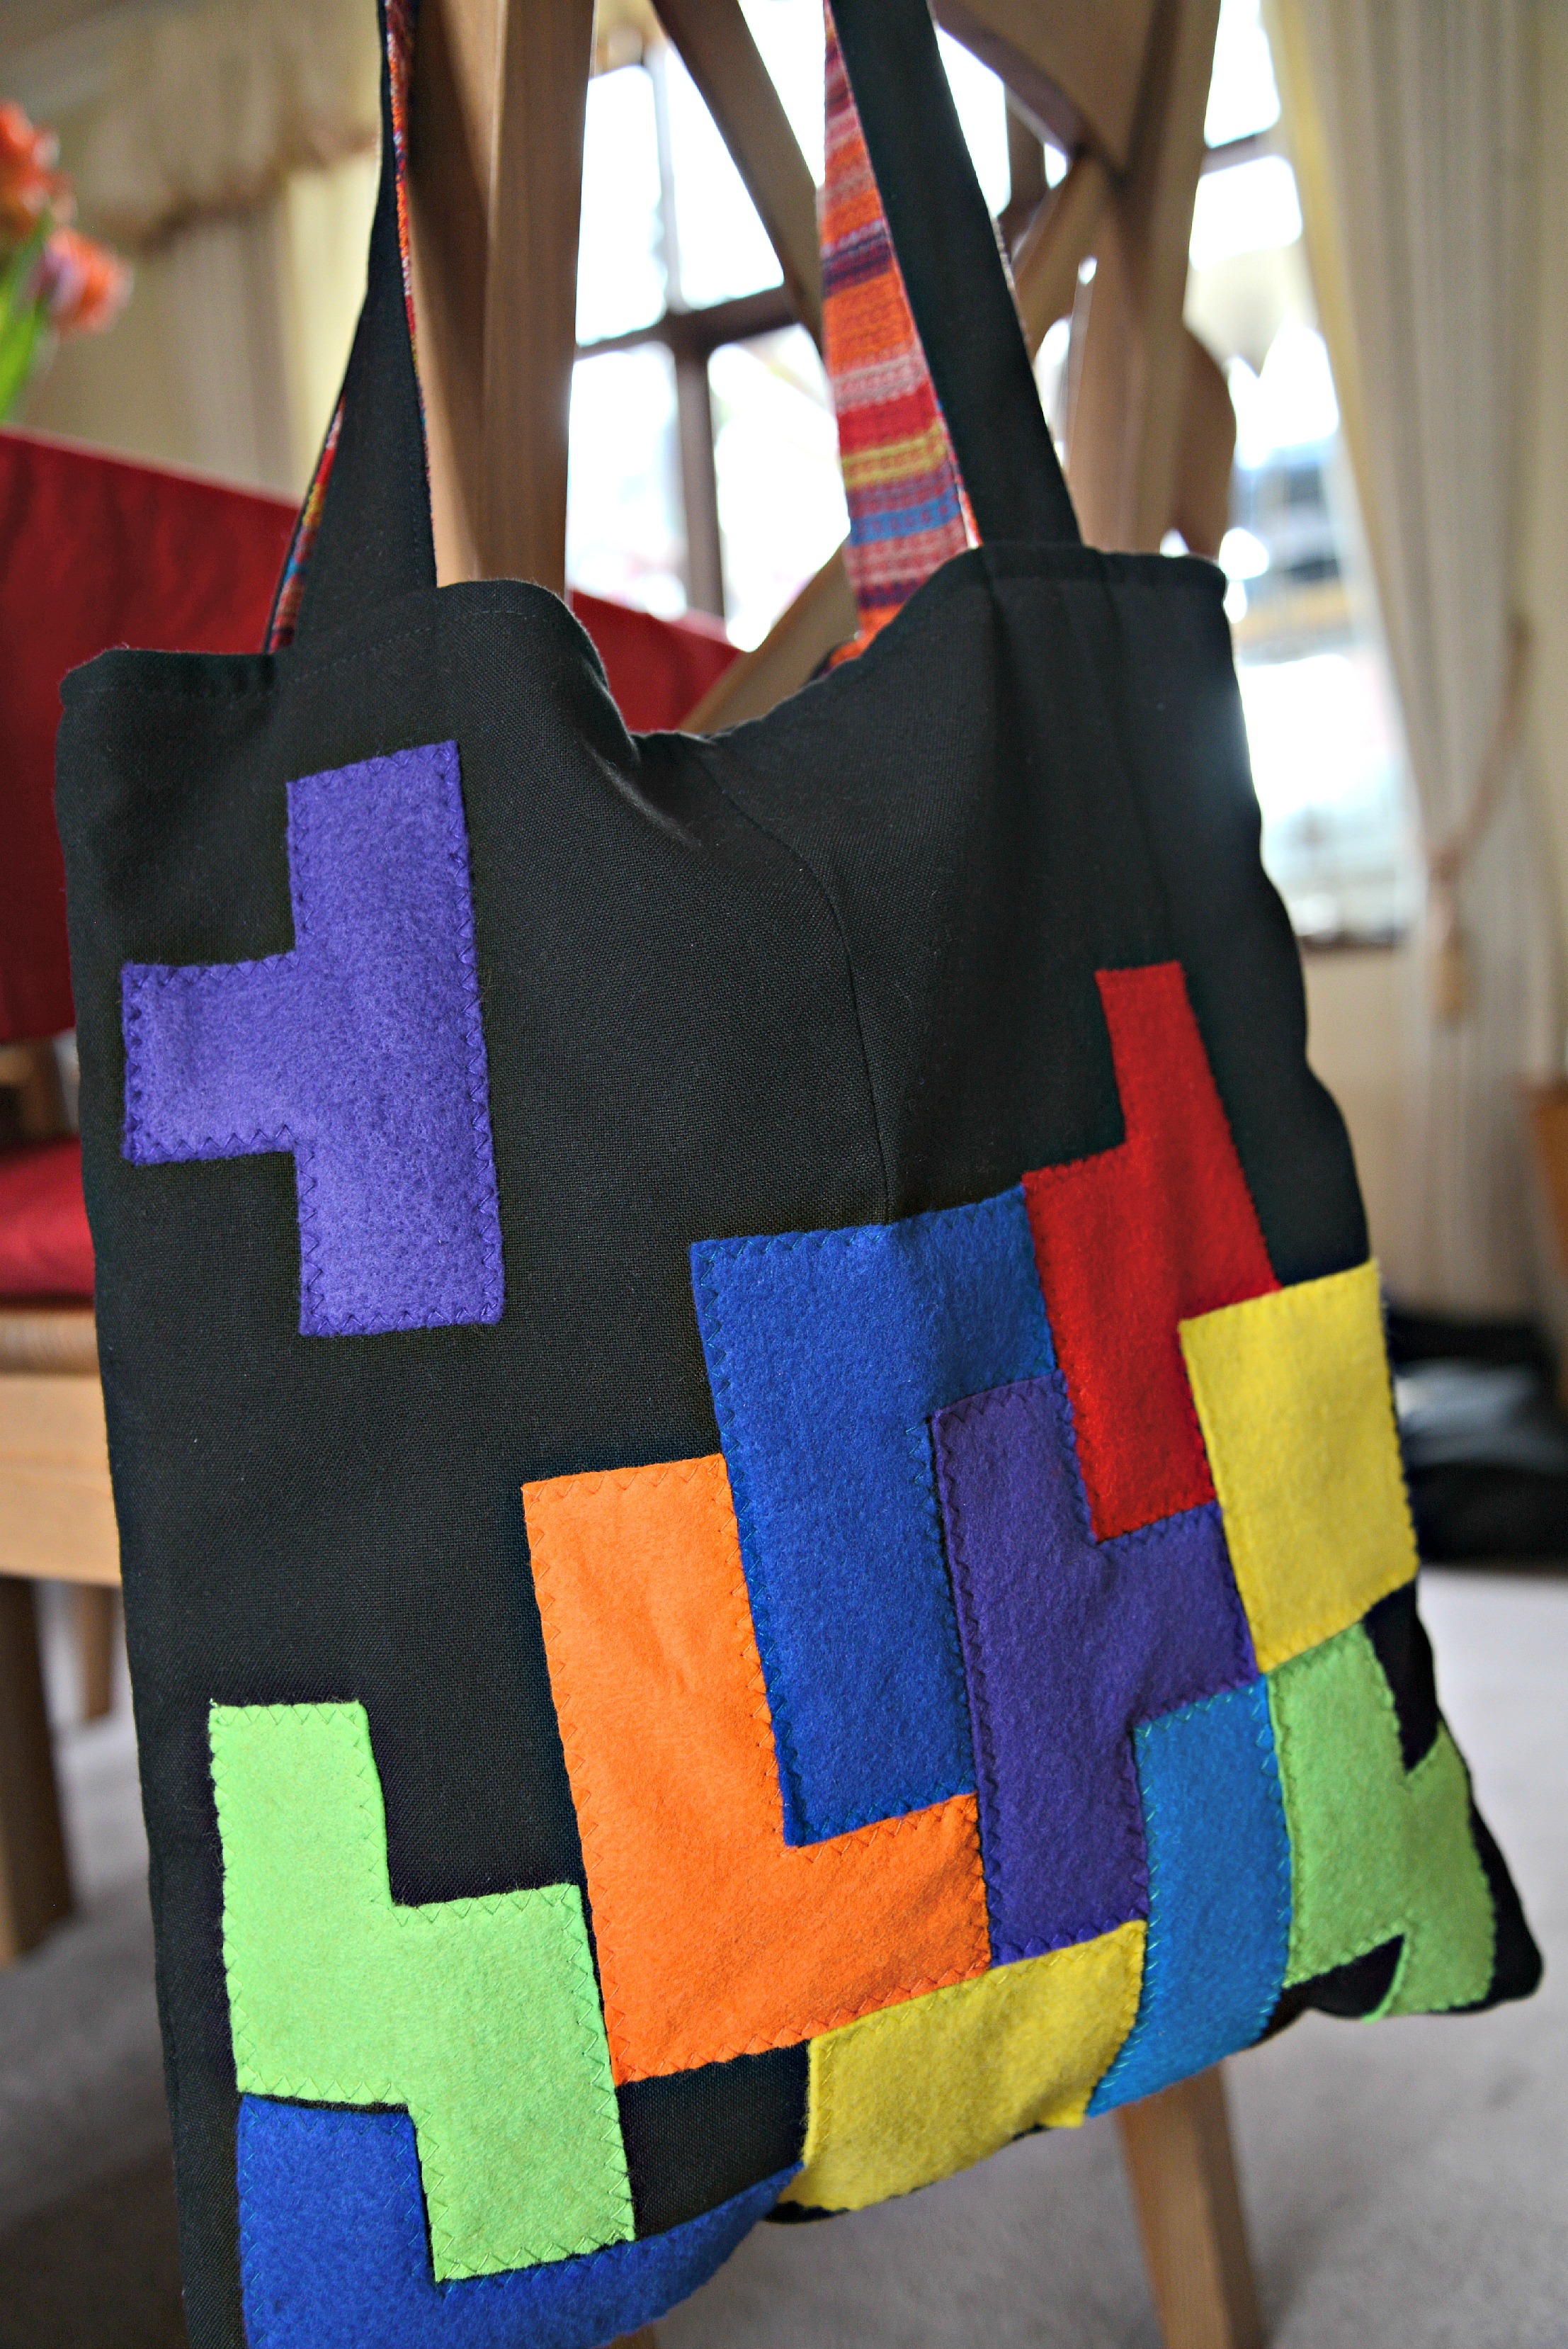
I love how this bag turned out, it's a fun nod to one of my favourite games from back in the day!
Update 2026: I ended up giving this bag to my daughter and I know she uses it regularly. I spotted a little bobbling on the felt last time I saw it. I’m going to ask her for a photo so I can update you as to its condition some 12 years on.
Julie
I'll be linking up to these great link parties






Details of my scrappy blue quilt made for the Festival of Quilts