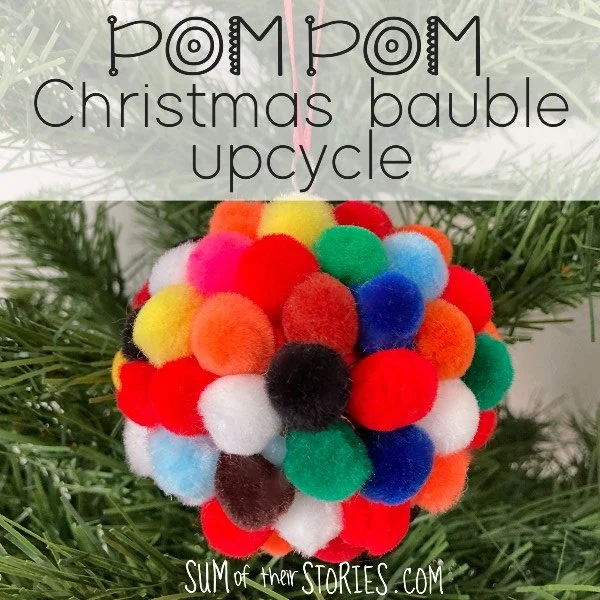
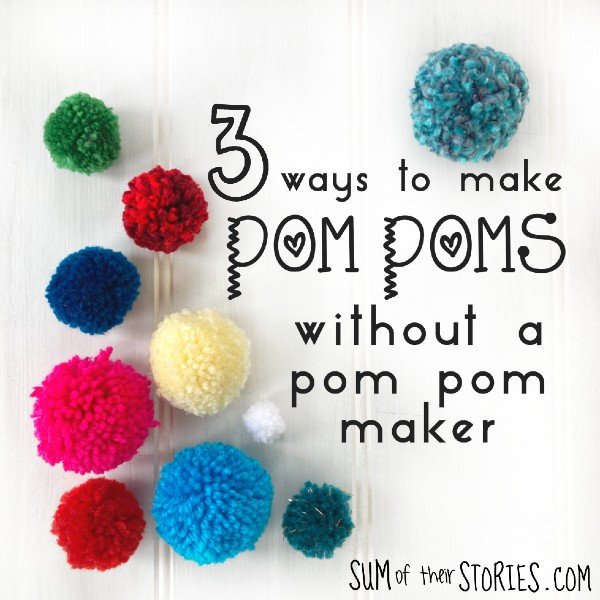
3 Ways to Make Pom Poms without a Pom Pom Maker
/
Pom Poms are a fun way to use up scraps of yarn and are useful for decorating all sorts of things.

When I was a kid my nan used to crochet a lot of these toilet roll covers that looked like poodles. (It was the late 70’s/early 80’s, they were a thing, honest!) Each one needed 10 pom poms so whenever we visited she would get me making pom poms. These were the days long before pom pom makers had been invented and mostly she had me making them in the traditional time consuming way, with 2 cardboard rings. That is still a good way to make a nice even fluffy pom pom but there are other quicker and easier ways too.
I do own a set of pom pom makers these days, more of them later, and they are a great gadget. If you are making a lot of pom poms I would definitely recommend them. However, as always, I hate the idea that a lack of equipment could put you off any craft so let me show you 3 ways you can make pom poms without any special equipment, tools, device or gadget.
3 ways to make pom poms without a pom pom maker
Which one of these methods you’d be best to use depends on the size of pom pom you are after, the yarn you have, how much time you have etc. They all work, why not try them all and see which suits you best?
The best yarn for pom poms
The good news is that you can use any yarn to make pom poms making it a great stash buster idea. I use a lot of DK (double knitting) which is like a light worsted or 8 ply. If your yarn is thin or not acrylic you might want to use a different yarn or thread to tie your pom pom. You need to pull the yarn REALLY tight and anything thin or pure wool is liable to break. But for the main body of the pom pom literally anything goes. Fluffy yarn makes especially lovely pom poms.
How to make a mini pom pom; the Fork Method
This is the best way I know to make teeny tiny pom poms.
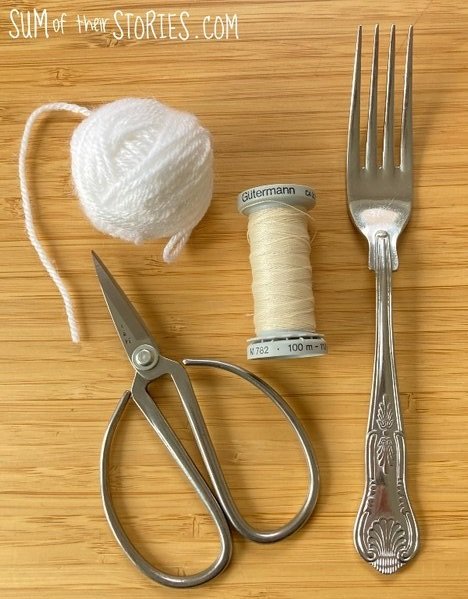
All you need is a fork with an even number of tines (prongs), some yarn, strong thread and nice sharp scissors.
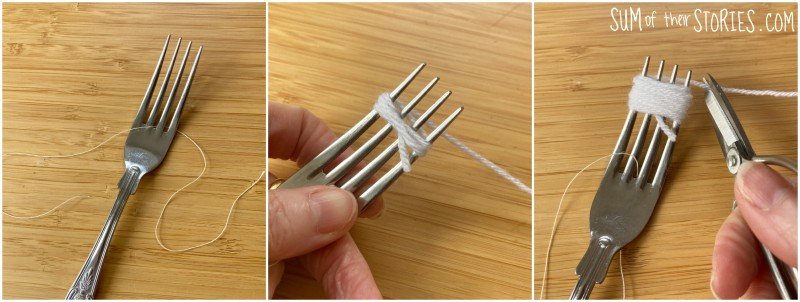
Cut a length of strong thread and place it through the centre of the fork tines.
Wrap yarn around the fork tines between 20 and 25 times, less if your yarn is thicker, then cut it off.

Bring the length that is between the tines up, pull it as tight as you can and knot it securely, poke the ends back though the fork tines so it is doubled up and tie it again twice.
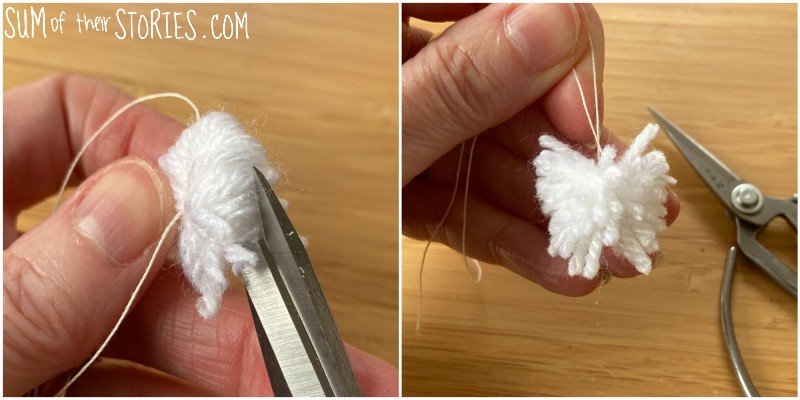
Slide the bundle off the fork and cut the loops on both sides.
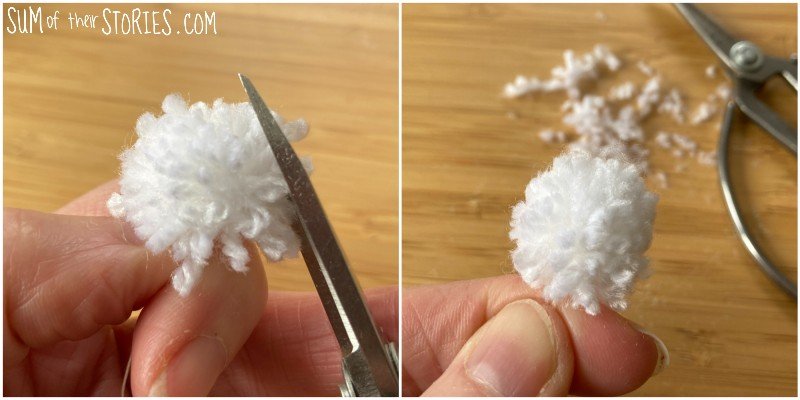
Give your pom pom a good shake to even it out then trim it all over to make it a nice shape.
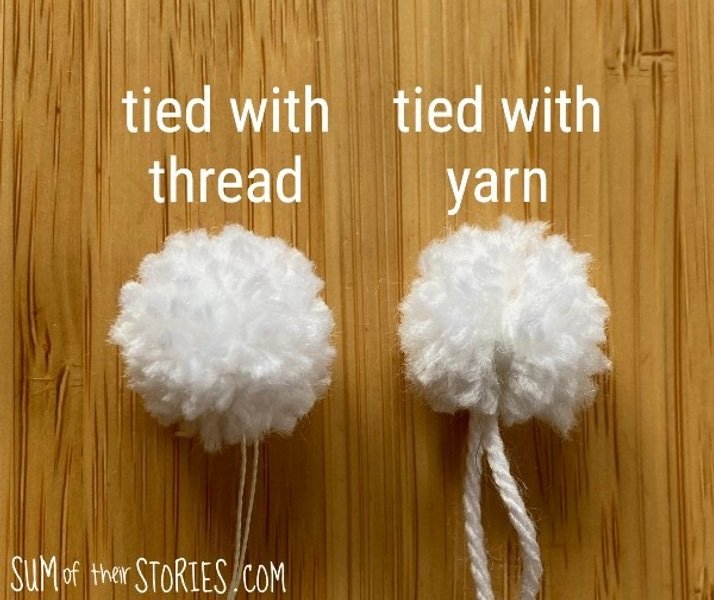
When you are making really tiny pom poms I think it is worth I used a strong thin thread to tie them in the middle. I used a strong quilting thread when making these little mini pom poms because that is what I had. You could use a fine crochet cotton or even double up a regular sewing thread. You can see from the photo above how it avoids the teeny tiny pom pom having a little bit of a gap in the middle.
You can see where I’ve used little tiny pom poms like this as tails for crochet bunnies on these Easter Gift Bags and to decorate these little Easter egg gift boxes.
How to make a Pom Pom on your hand
This is pretty much the same method as on the fork but on a much bigger scale.
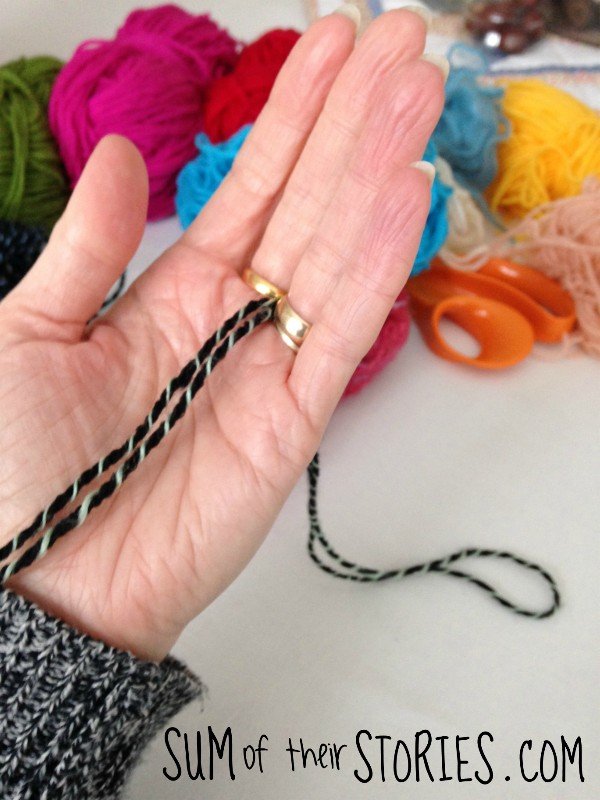
Cut a piece of one of your yarns, about 40cm or so. Choose a strong acrylic one (one that doesn't snap when you really pull it) Double it up and lay it between your middle finger and ring finger.
I’ve made this pom pom multi coloured by using lots of different yarns but of course you can make yours all the same colour with just one yarn.
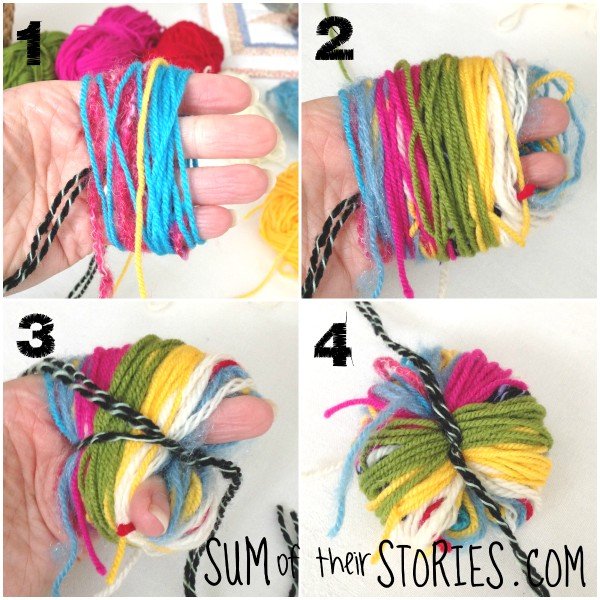
Wrap your yarns until it looks a bit like photo (2) The more you wrap the fatter the pom pom will be.
Pull the length that you left between your fingers together and knot (3). Pull it as tight as you can then slide the bundle off your fingers (4) Pull the knotted yarn really tight and knot again. Wrap it round the bundle a couple of times and knot again.
Holding the pom pom by the long lengths of yarn cut the loops on both side.
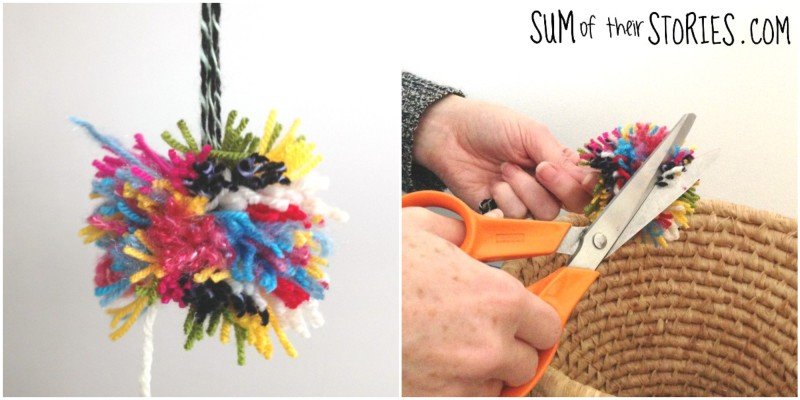
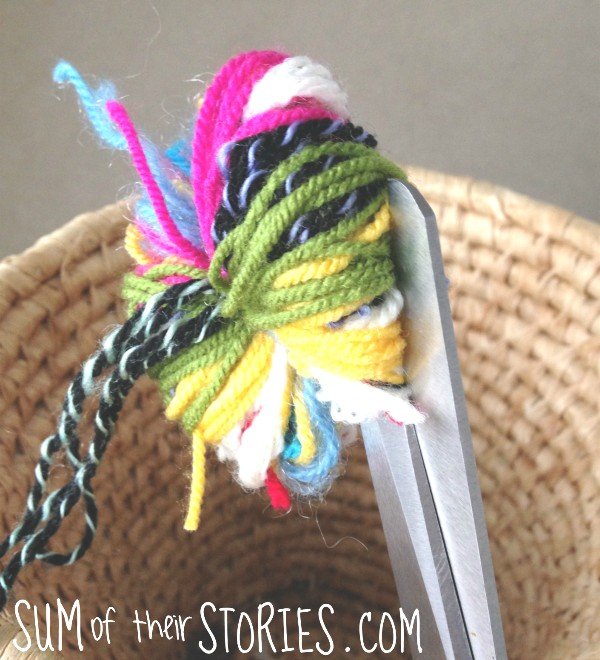
You should have something that looks like this, give it a good shake then take your sharp scissors and start to trim. It’s a good idea to hold the pom pom over a bin to catch all the little bits.
Trim a bit, give it a shake, fluff it in your hands and them trim a bit more until you are happy with the shape of your pom pom.

How to make a pom pom with cardboard rings
This is the old fashioned way to make pom poms, the one I learnt back in the 1970’s! It’s slower than the other methods but does waste less yarn as less trimming is required.
I’ve seen people create reusable cardboard rings with a gap cut in them but I’ve not had good results with that. In fact I got in a bit of a pickle and all my yarn got tangled. With that in mind I’m showing you how my nan taught me, back in the day when we were mass producing pom poms for her toilet roll cover poodles!
All you need is:
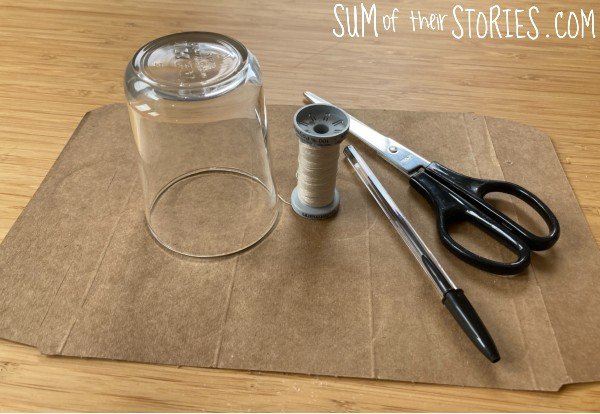
Cardboard - old packaging, cereal boxes etc all work perfectly
2 different sized round things to draw round
Pen
Scissors - both scissors for cutting the card and nice sharp scissors for cutting the yarn
Yarn
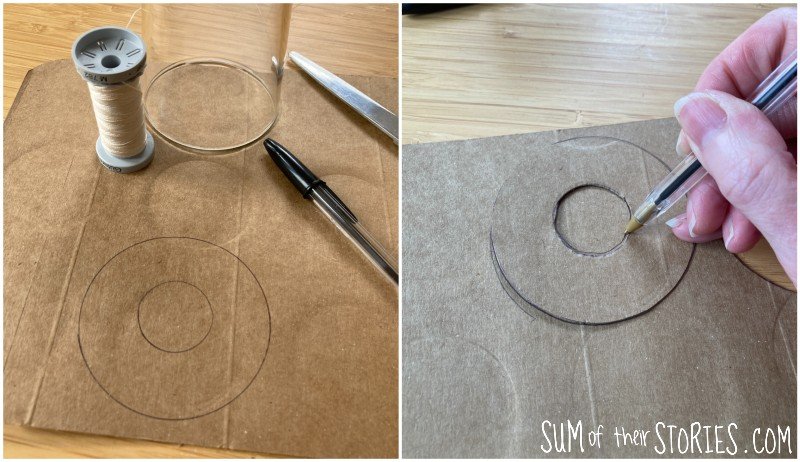
Create a doughnut template by drawing around the large and small things. I used a glass and cotton reel. You can make massive pom poms using this method by drawing round a dinner plate and side plate. That would take A LOT of yarn though!
Cut it out and then use that as a template to cut another.
The thing that really slows down this method is the fact that the hole in the middle of your cardboard doughnut is small and your yarn ball is unlikely to fit through. You have to cut of lengths of yarn and create small balls that you can poke through the hole.
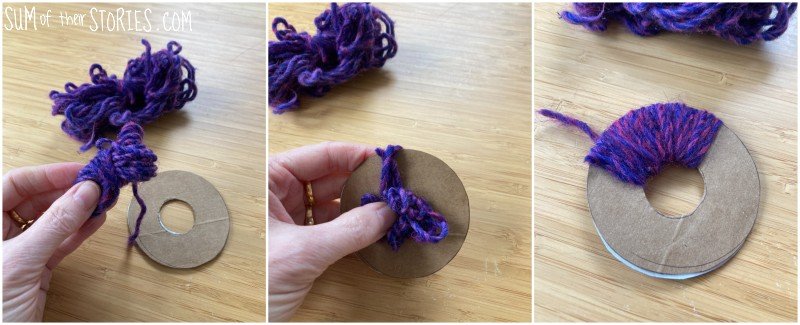
Place the 2 cardboard rings together and then start wrapping yarn.

When it’s getting tricky to squeeze any more yarn through the hole then you can stop.
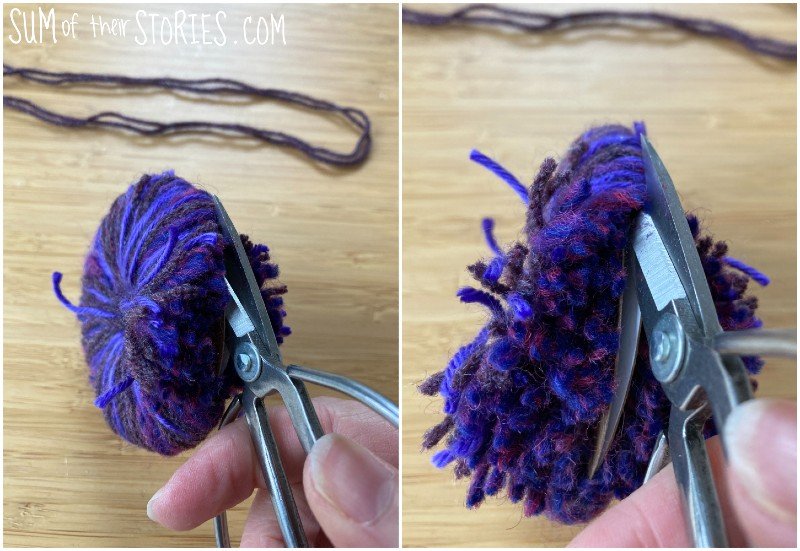
Take some nice sharp scissors and cut all around the pom pom doughnut of yarn. Try to poke the point of the scissors between the 2 layers of card so you are cutting right in the middle.
Place a length of nice strong yarn, doubled up between the 2 card layers, knot and then pull really tight. Wrap round a second time and knot again - then do one more knot for luck!
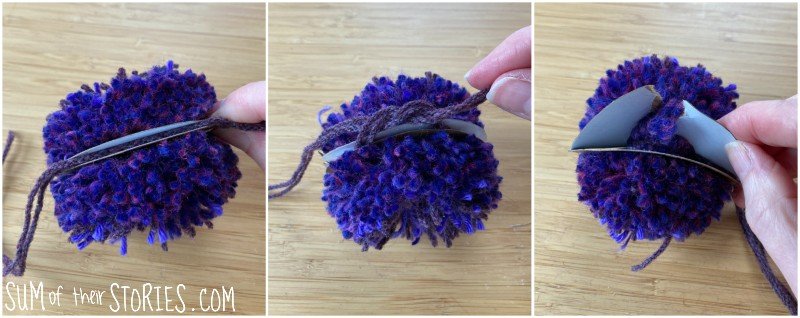
Tear the card rings to remove them.
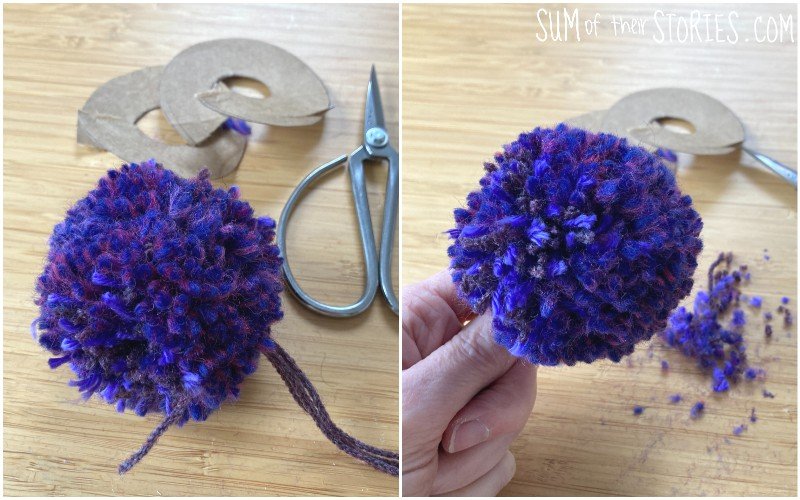
You can see here that this pom pom is going to need a lot less trimming than those made with the other methods. Just give it a little tidy up and you’re all done.
Which is the best method to make a pom pom?
The fork method is best for making teeny tiny pom poms.
The hand method is best if you want super quick and easy.
The traditional cardboard ring method wastes a minimal amount of yarn but takes much longer. This is also the best way to make a really large pom pom, the sky’s the limit (well, the size of your card is the limit really I guess!)
If you become obsessed and want to make a lot of pom poms regularly then you might well want to consider getting some sort of pom pom maker, they combine the speed of the “on your hand” method with the minimal yarn waste of the cardboard rings
These are mine, you can buy a really similar set here.
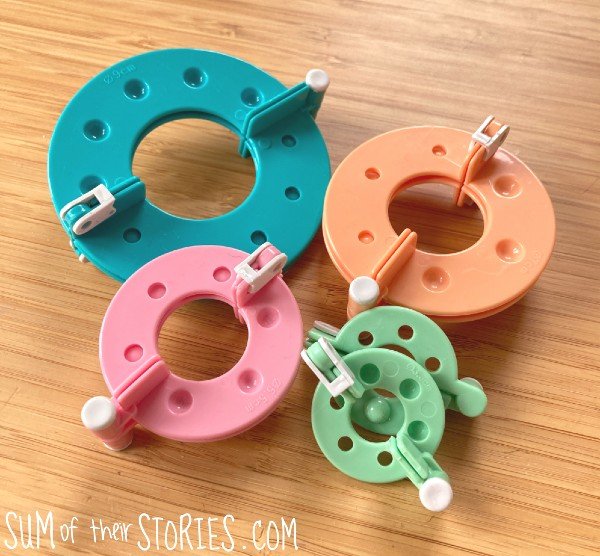
There are lots of different kinds available to buy from the popular Clover set to the large fork type gadgets.
Pom Pom Making Tips
Leave the thread or yarn you used for tying the centre of the pom pom nice and long in case you want to sew your pom pom into something
Use up even tiny scraps of yarn by turning them into colourful pom poms
Make sure that central tying thread or yarn is a really strong one and pull it as tight as you can. I can’t stress this enough, that’s how you avoid your pom pom falling apart. Pull tight and then pull even tighter!
If you are making pom poms with kids then do supervise the tying process, they will be disappointed if their pom poms fall apart after 5 minutes
You can mix yarn weights, colours, types in a pom pom. Don’t be afraid to experiment
Don’t attach homemade pom poms to anything that will go in the washing machine, they are very unlikely to survive that!