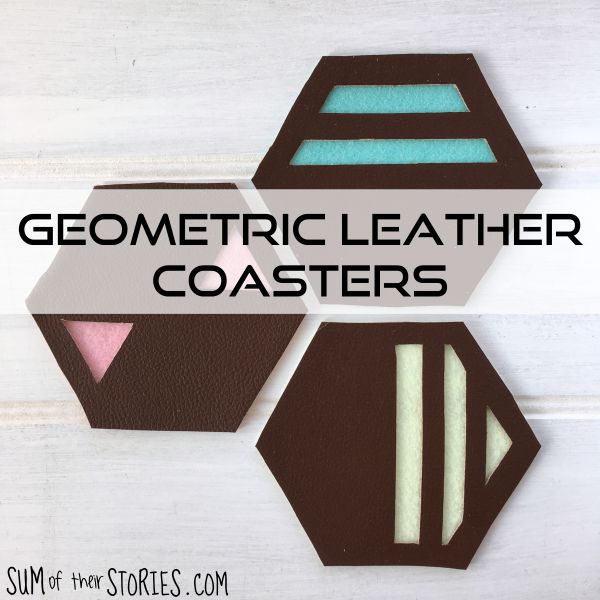
Geometric Leather Coasters
/
This is a paid post in partnership with Bostik. I was also provided with the leather adhesive that I used to make these coasters by Bostik.

Here’s a fun an easy gift your can make in an hour or so. Geometric leather coasters, great as a Christmas gift for that person who has everything, as housewarming present or perfect as for a 3rd wedding anniversary when the traditional gift is leather.
About 3 years ago we replaced our very old and battered leather sofa, it had to be cut up to get it out of the house and it really was in bad shape. Apart from the back that is. The entire back of the sofa was covered with leather than had barely a mark on it. Our sofa has always been up against a wall so it had no wear and tear at all. I kept it (of course!!) knowing that one day it would “come in for something”. I use this leather to make the little leather hearts on the 3rd Wedding Anniversary cards that I sell in my Etsy shop, but they use the tiniest scraps so I have plenty to spare for other projects too.
Assuming you don’t happen to have leather off cuts from an old sofa you can buy leather for craft projects from craft stores, etsy, ebay, amazon etc. Or you could dig out an old handbag that’s past it’s best or even search for a bargain leather jacket in a charity shop.
You don’t have to use real leather, a decent quality pleather would work just as well.
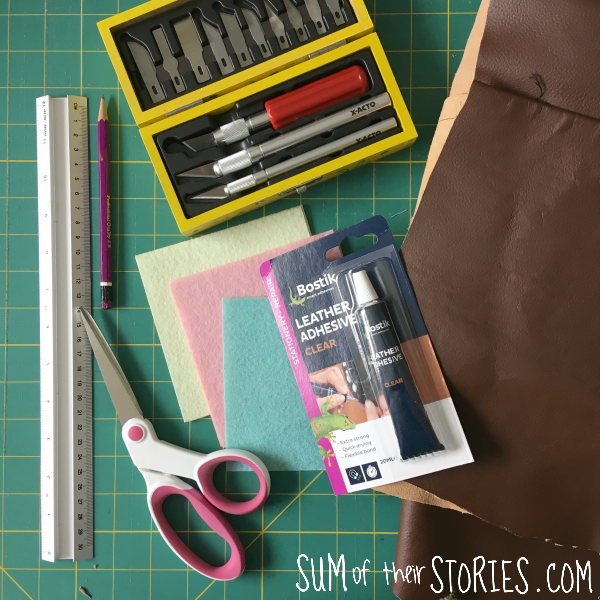
To make a set of geometric leather coasters you will need:
Leather
Felt
Leather Glue - I used this one
Sharp scissors - I used my 2nd best sewing scissors
A craft knife - mine is my trusty Xacto knife
A pencil and ruler
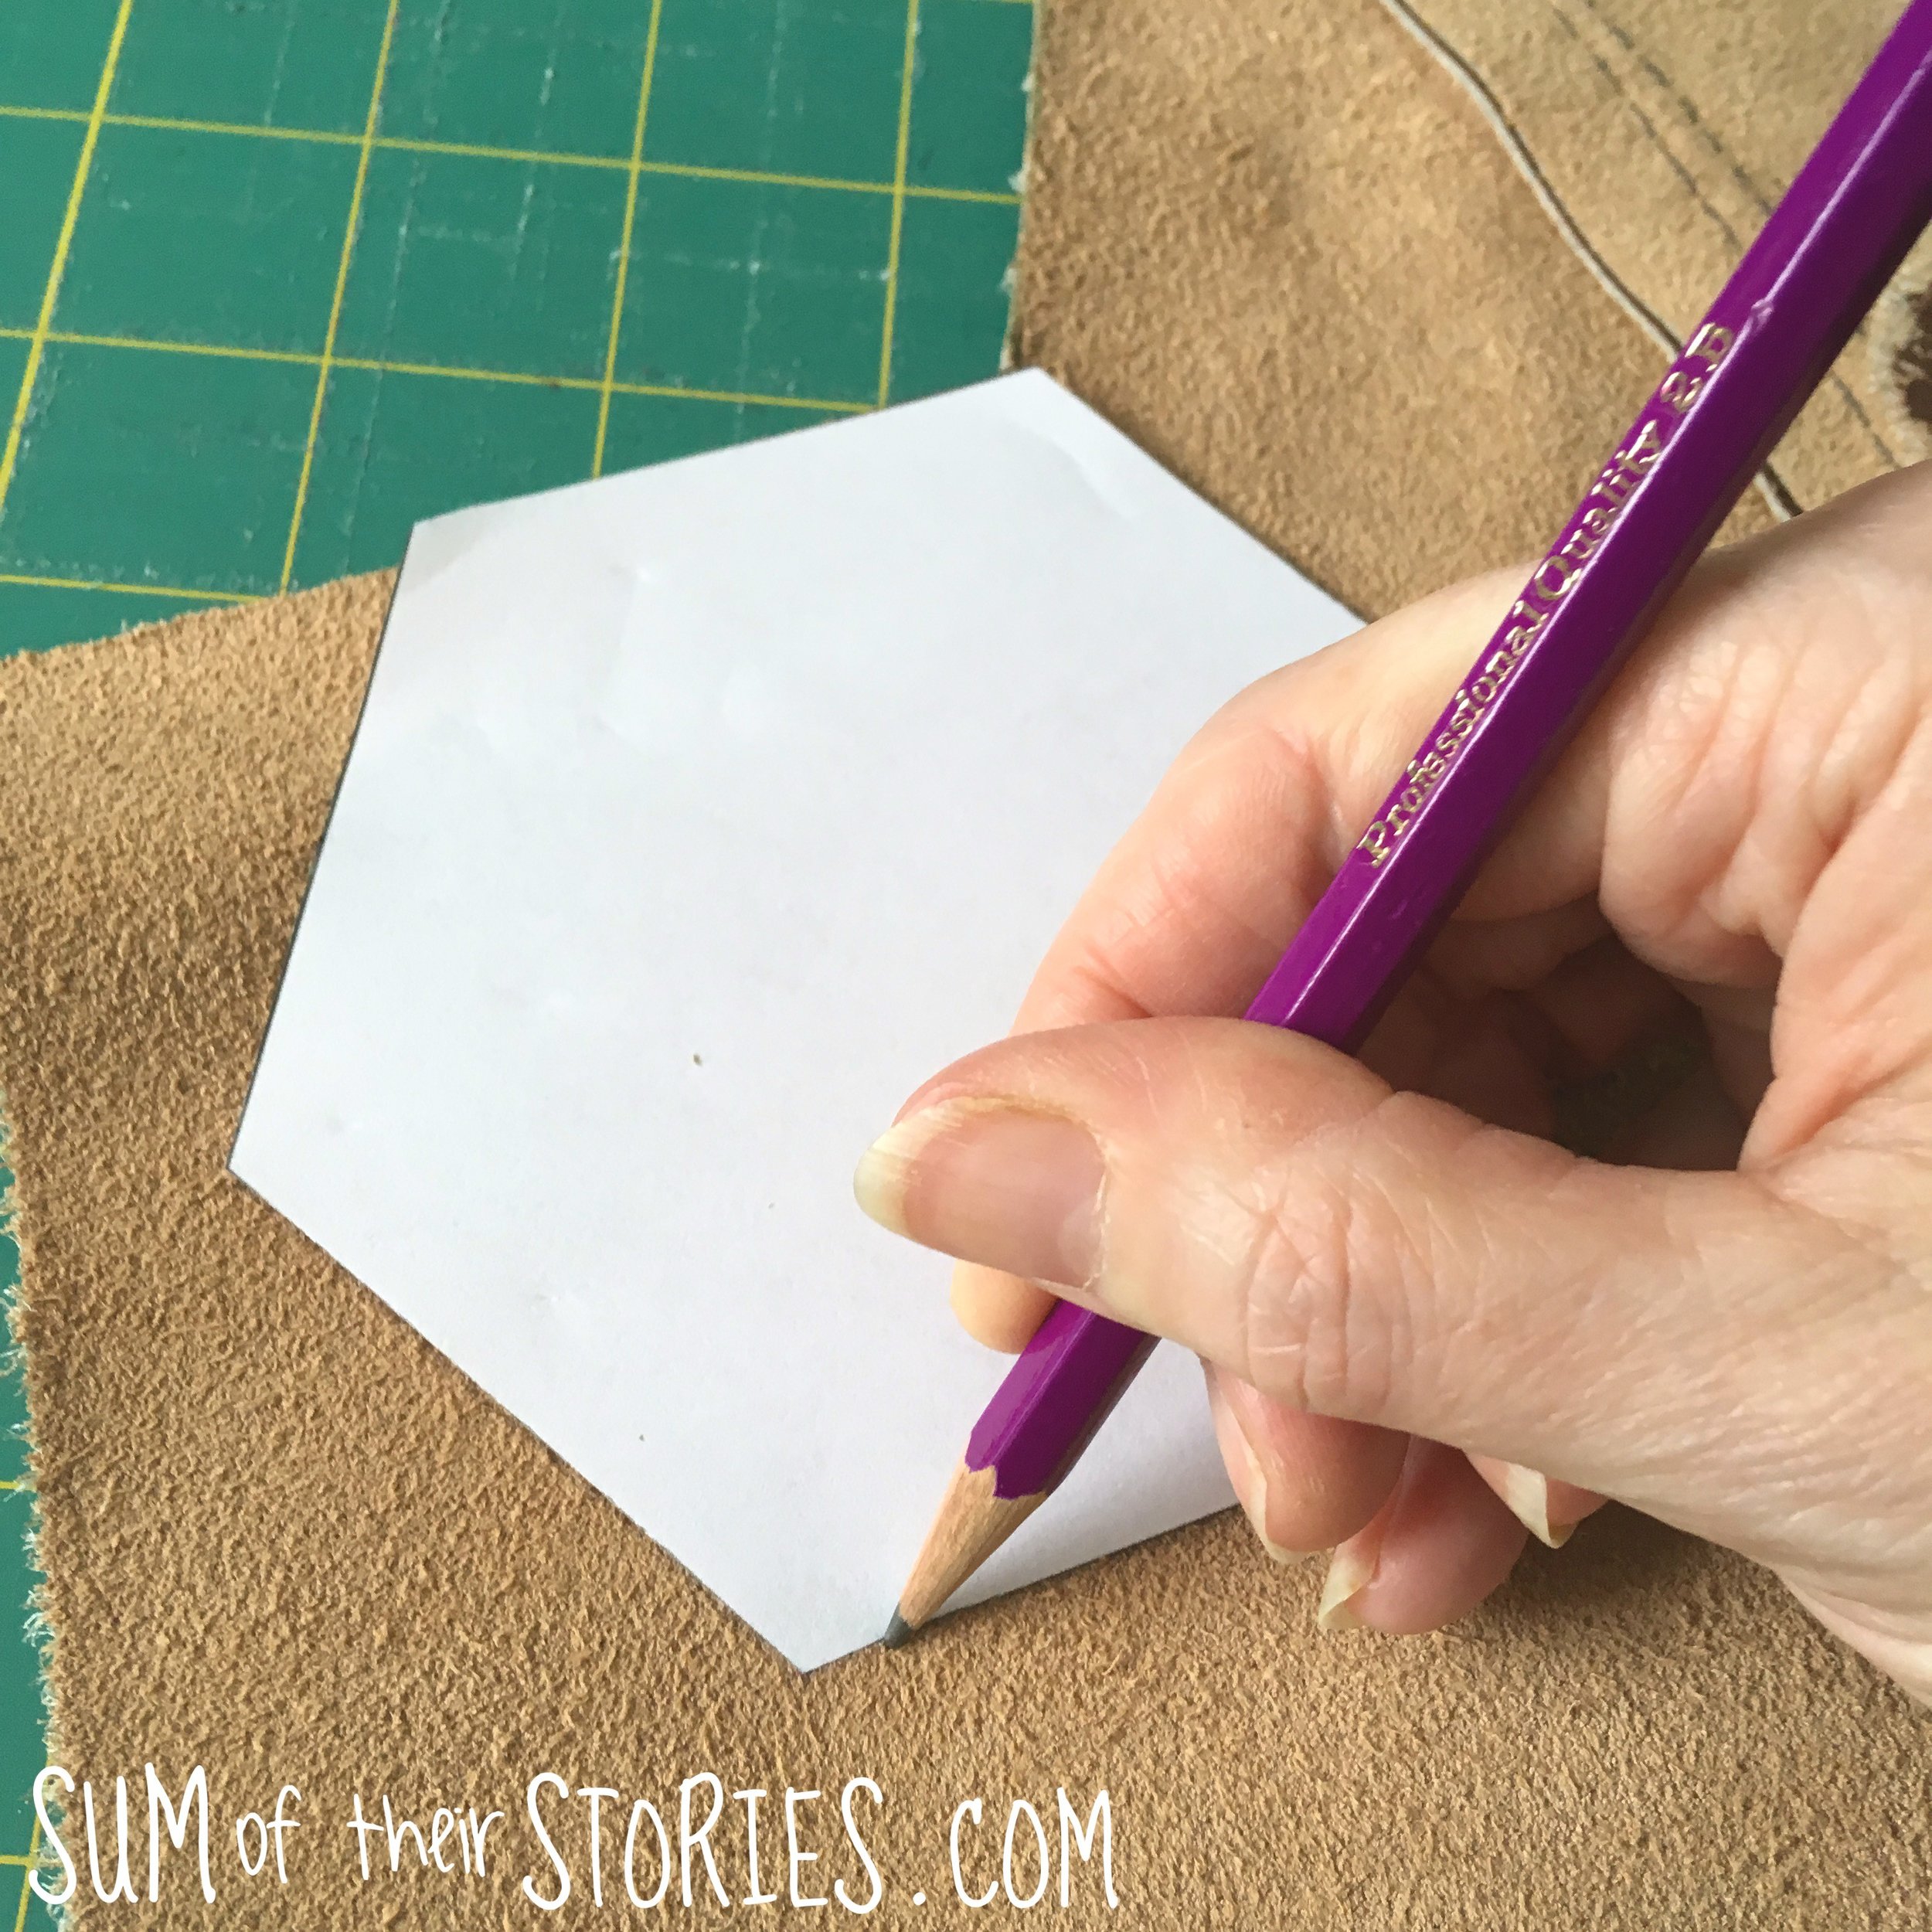
The first thing you need to do is to make a hexagonal template. The easiest way to do this is in word on your computer. Open a blank document, insert a shape, pick a hexagon and then fix it’s dimensions. Once you’ve inserted the shape you’ll see a ‘format shape’ tab appear at the top. Click on this and at the end you’ll see a the dimensions of the shape. Set them to 4” vertically and 4.62” horizontally. Print and cut out your template.
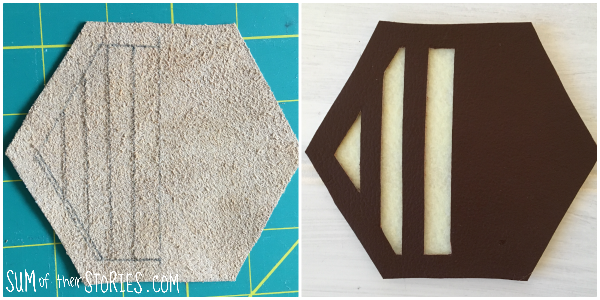
Draw round your template on the leather, a pencil is fine for this and then cut out.
With the wrong side of the leather facing up, draw out a simple geometric design. Think about which bits will be taken away and which bits will be left, make sure the whole thing won’t turn into confetti! As with so many projects KEEP IT SIMPLE for the best results.
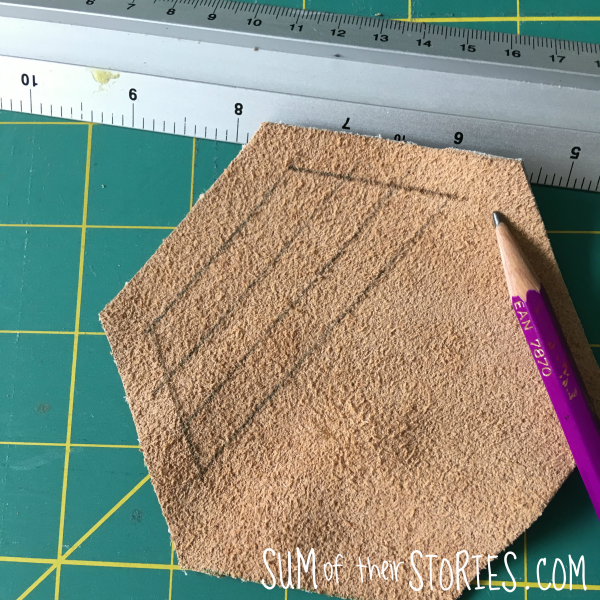
Then use the craft knife to remove the relevant sections.

Pop a piece of scrap paper down to protect your work surface and apply a layer of Bostik leather adhesive on to the wrong side of the leather.
This adhesive does smell pretty bad, make sure you are working in a room with plenty of ventilation.
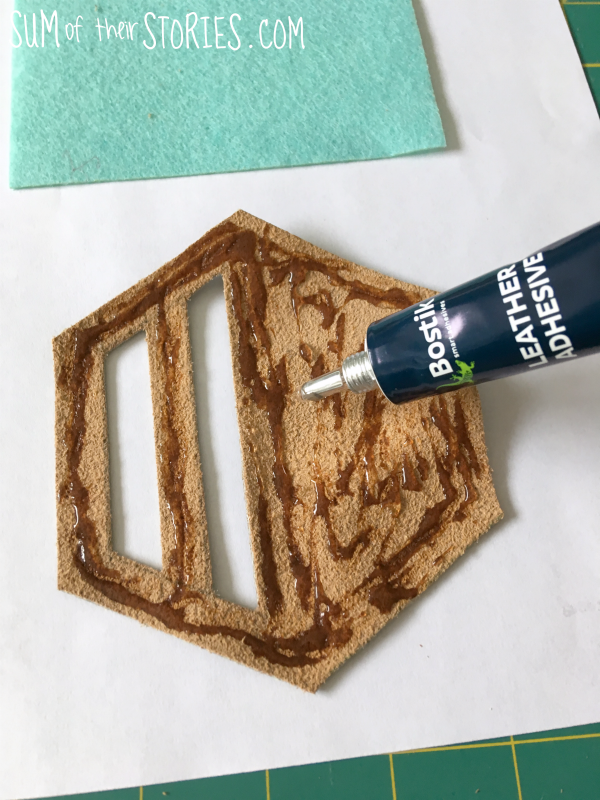
Leave for a few minutes for the adhesive to become tacky and then press, glue side down onto the felt.
Press under a book for at least an hour, ideally 24 hours so the glue can really set.
Then cut the excess felt away.
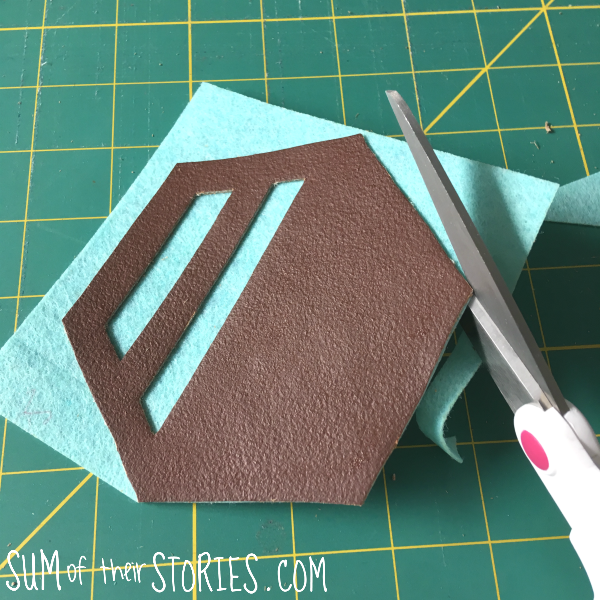
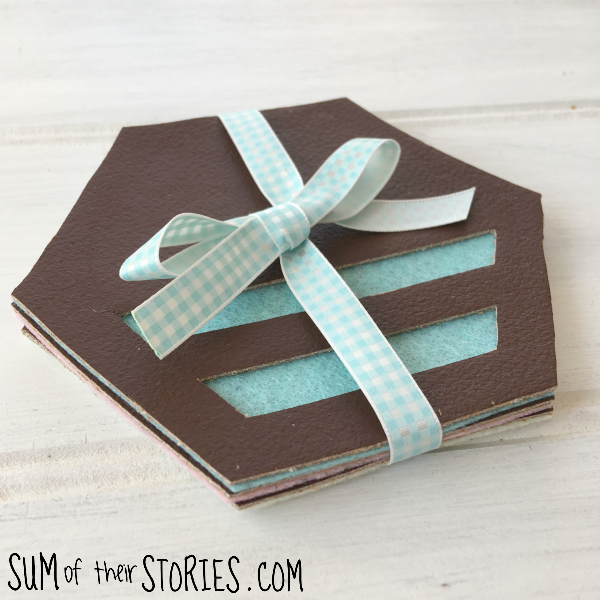
Ta - dah! Your Geometric coaster is finished and ready to use or to gift!
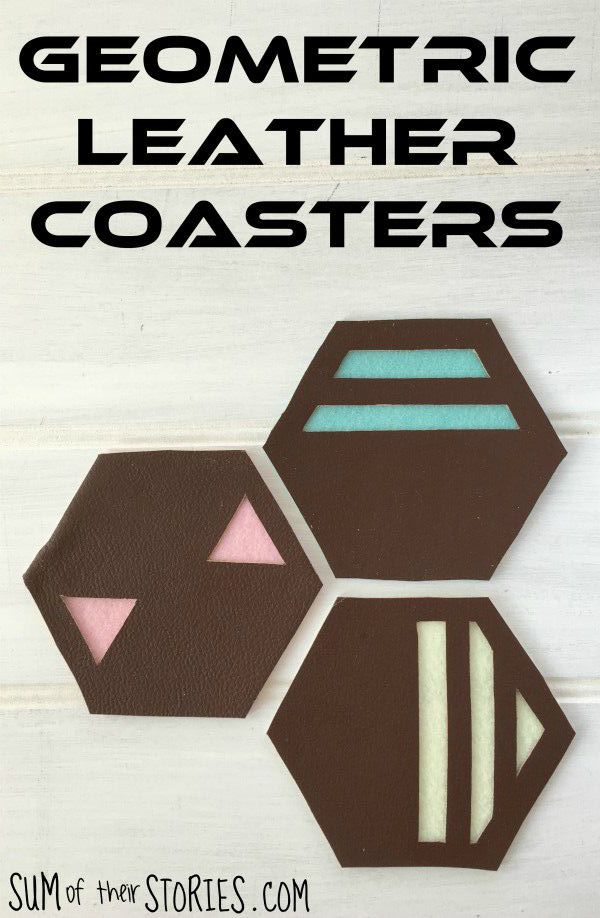
Here is what the other two simple geometric designs I tried out looked like to start with and how they turned out.
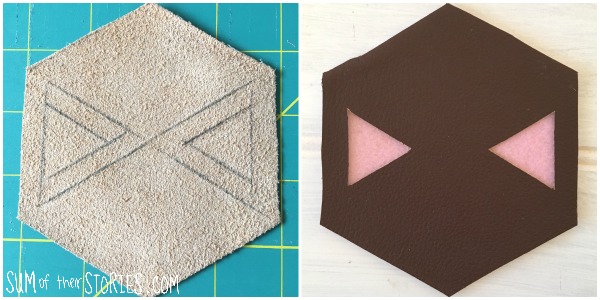
You could make all different designs in a set, or all the same design. All different colours or all the same colour, it’s up to you.
I was forced to make myself a lovely cup of tea so that I could take the mandatory photo of the coaster in use!

If you like geometric shapes and decor you might like to check out this collection of more geometric coasters that you can make yourself.
Julie
I’ll be sharing this idea at these link ups.