

Sew a Softie - Incy Wincy Spider
/A simple pattern and tutorial to sew a sweet toy spider. Perfect for children or complete beginners.

I'm joining in with the Sew a Softie blog hop, it's a month of simple-to-sew softie tutorials organised by Trixi of Coloured Buttons Every day a different crafty blogger will post a tutorial for a softie that's perfect for you to sew with your kids and today is my turn.
Our children are all grown up now but when they were little my daughter asked me to make her a toy spider * more on this later! When it was finished her littlest brother wanted one too! They are such a simple make that when I was invited to join the Sew a Softie Month it seemed like an obvious choice to share a little tutorial so you can make one too.
To make a spider softie you will need:
A small piece of fabric - scraps are perfect, you'll need less than half a fat quarter
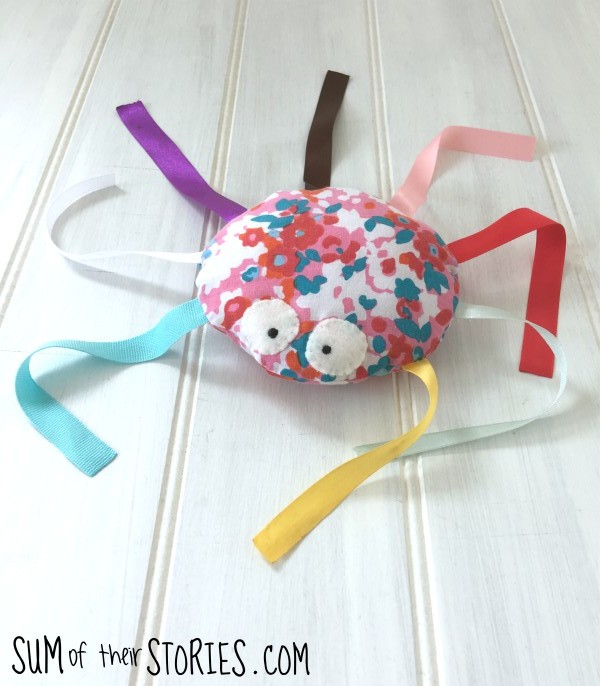
8 x 7" lengths of ribbon - all the same or all different, it's up to you
Either 2 x buttons or scraps of felt & black embroidery thread
Fibre fill
Sewing thread
Sewing Machine or needle for hand sewing
Scissors
A pencil
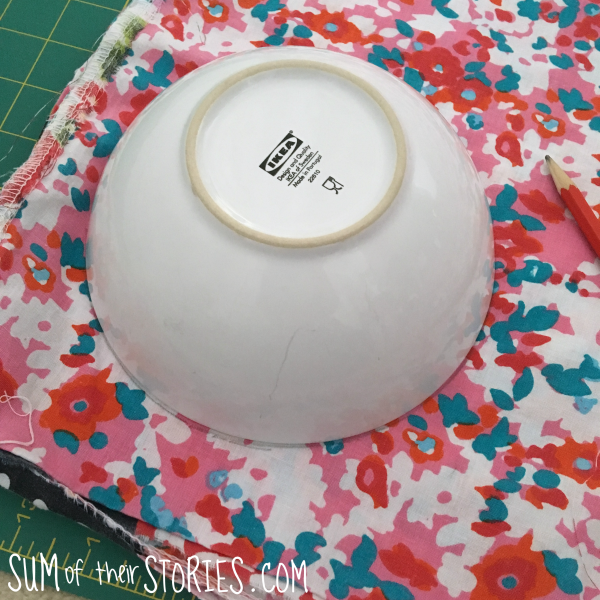
Something round, I used a bowl
Fold your fabric in half and place the bowl on top. Draw round it with a pencil then cut out both layer. You can use 2 different fabrics if you prefer.
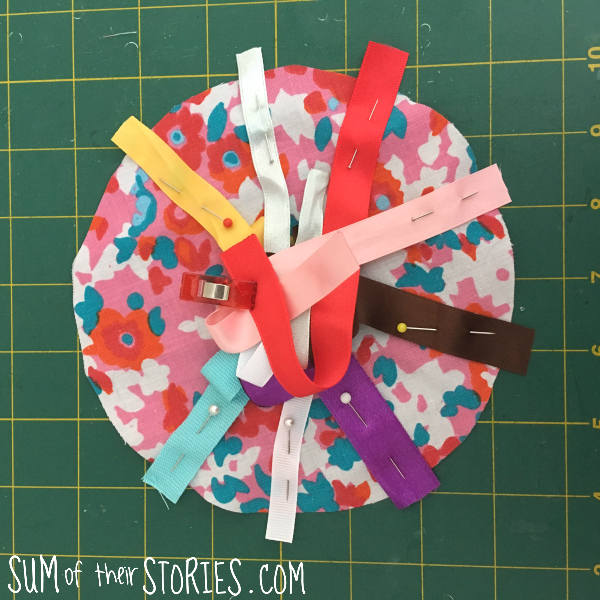
Lay one of your circles of fabric with the right side up. Lay the lengths of ribbon onto the circle about 1" apart. You want the long length of the ribbon in the centre of the fabric, use a few pins or a clip to hold them all in place. You don't want them to get caught when you stitch round the edge.
Lay the other circle of fabric on top face down and pin in place.
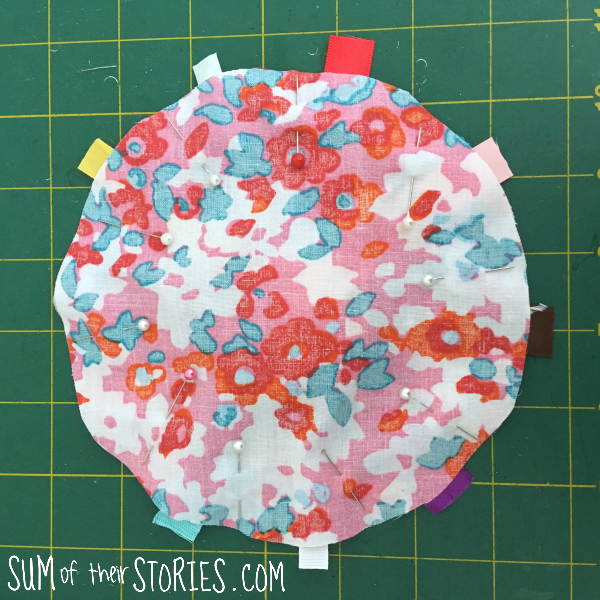
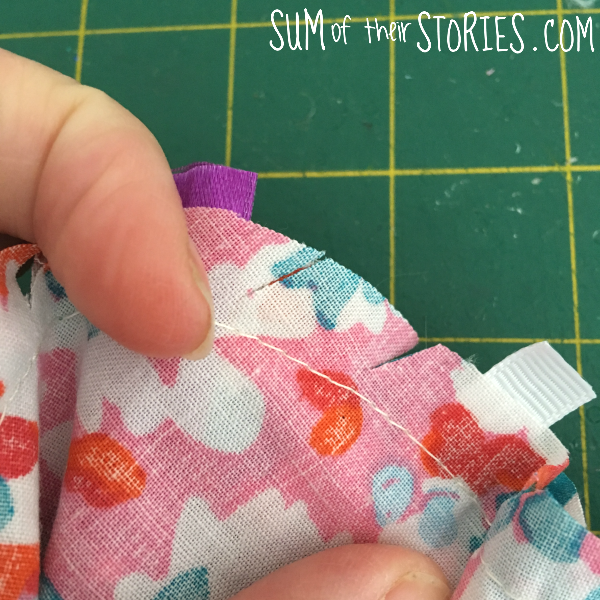
Sew all round the circles either using a sewing machine, or by hand sewing with a back stitch. Leave a 5cm (2") gap, ideally somewhere with no ribbons.
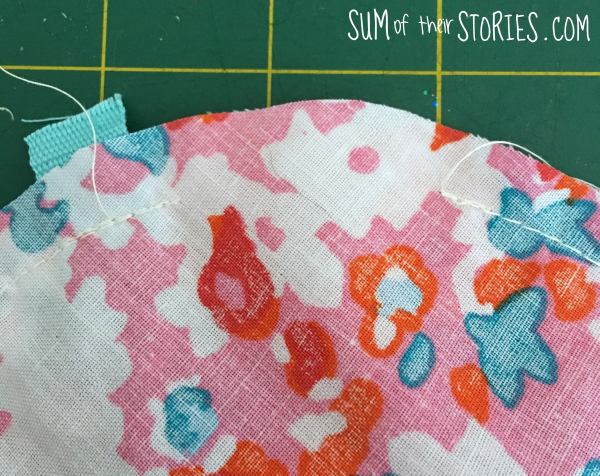
Make a series of little cuts at an angle all round the edge. ONLY cut the seam allowance, you want to get close to the stitching but not actually cut it. Only cut in the spaces between the ribbons, don't cut the ribbons themselves. This step is optional - if you are worried you'll cut your stitching then just don't do it. The cuts will make the round body of the spider look a little bit smoother on the seam but your spider will be perfectly lovely if you miss them out.
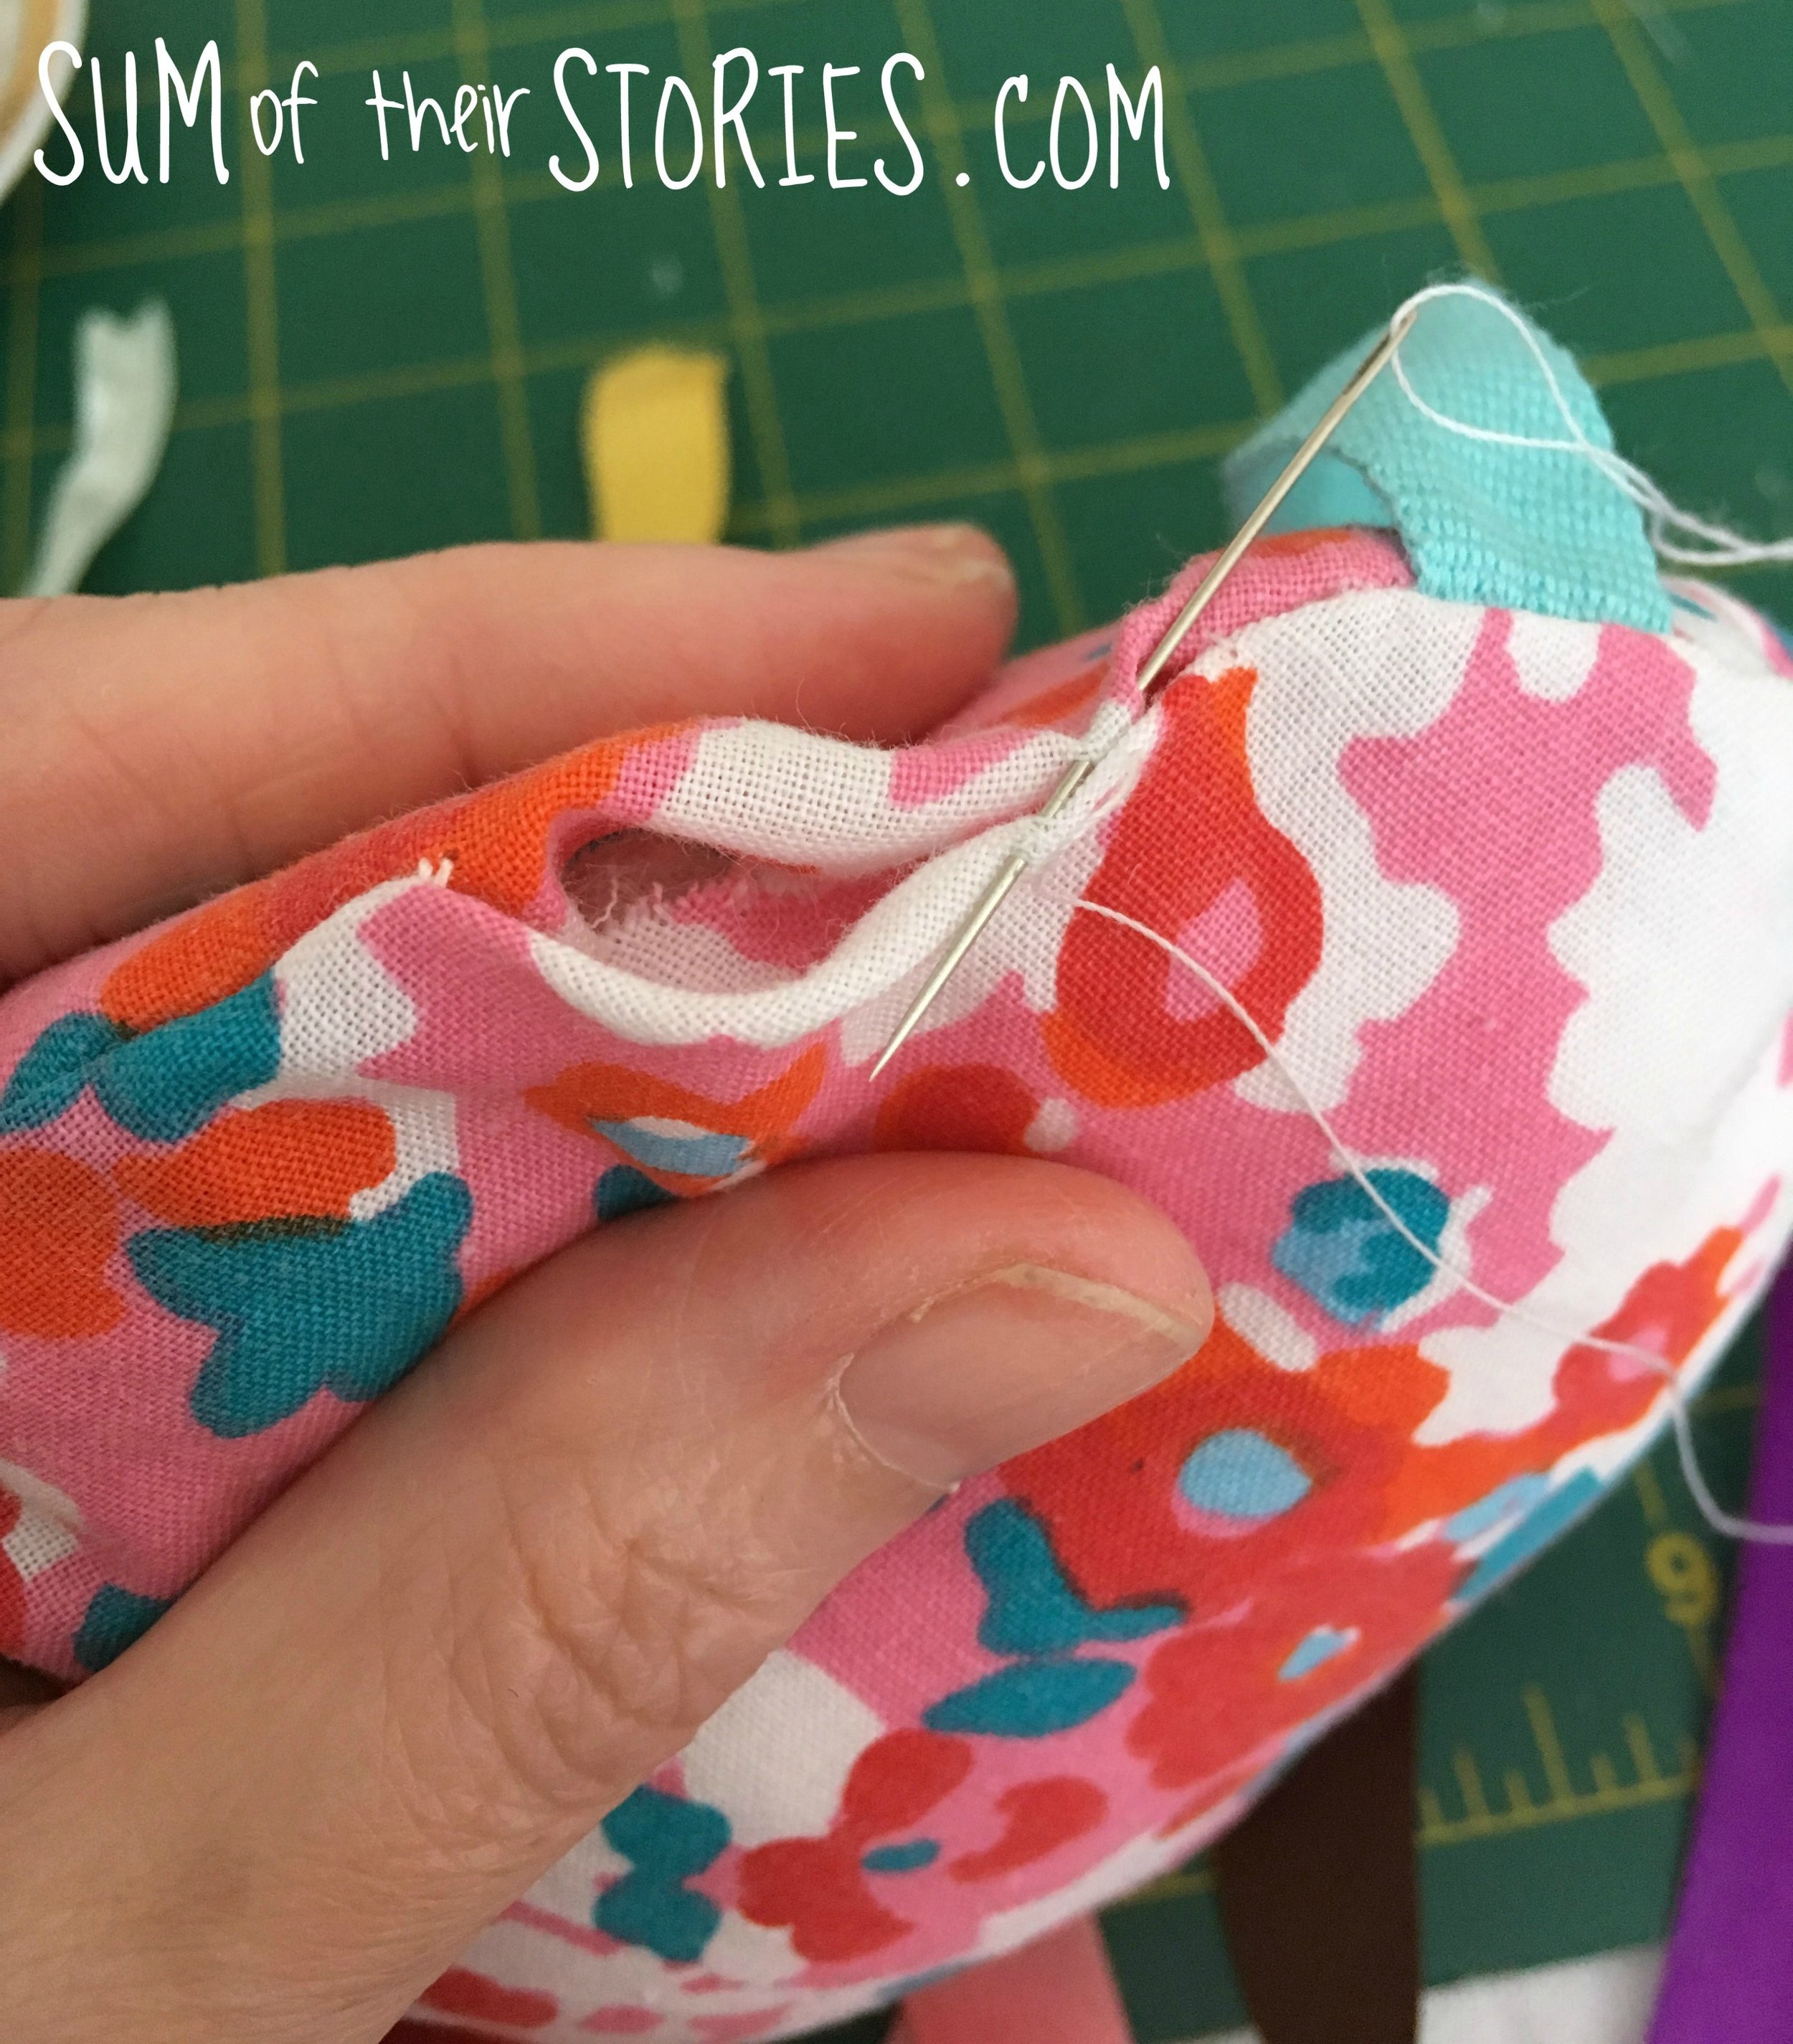
Turn the spider out through the gap you left and stuff it with fibre fill. Close up the gap by hand sewing it with a slip stitch.
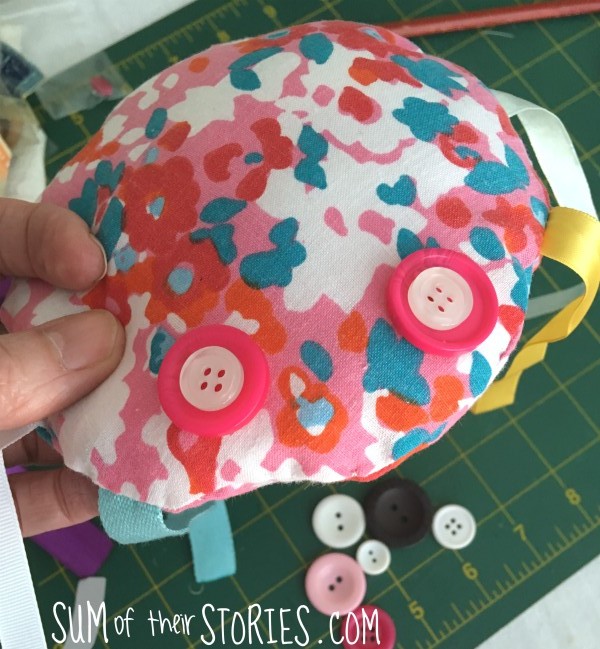
Now you need to add some eyes. You can use buttons if the spider is not for a baby or young child. I tried a few button ideas .....

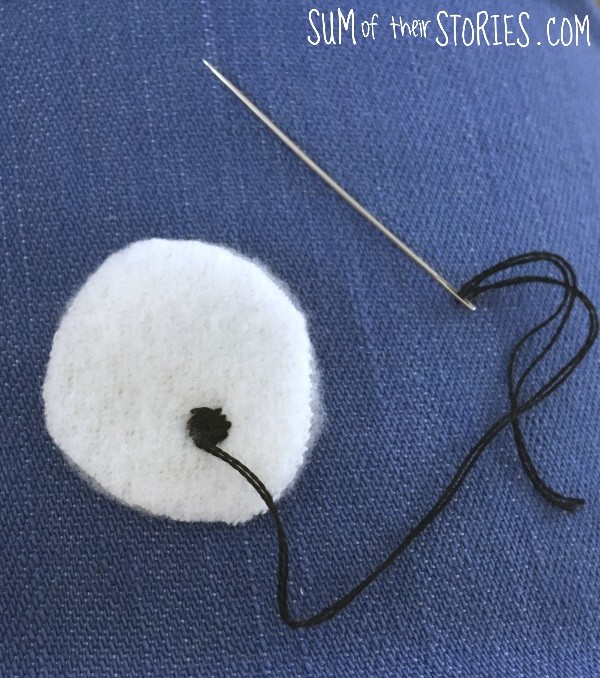
...... but ended up choosing to make fabric eyes.
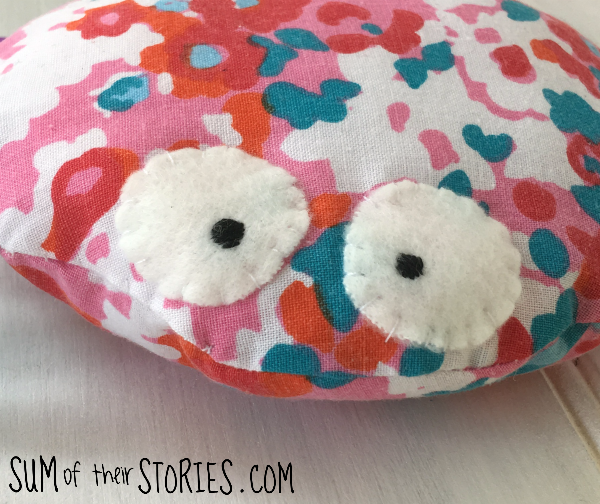
I used a little scrap of fleece fabric that I had to hand but felt would work well too.
Draw round something small, I used a cotton reel, and cut out 2 circles. Mine are about an inch (2.5cm) across.
Embroidery a few black stitches on each circle to make pupils. I did little pupils sightly off centre.
Then I played around with the eyes, trying them in different positions until I was happy.
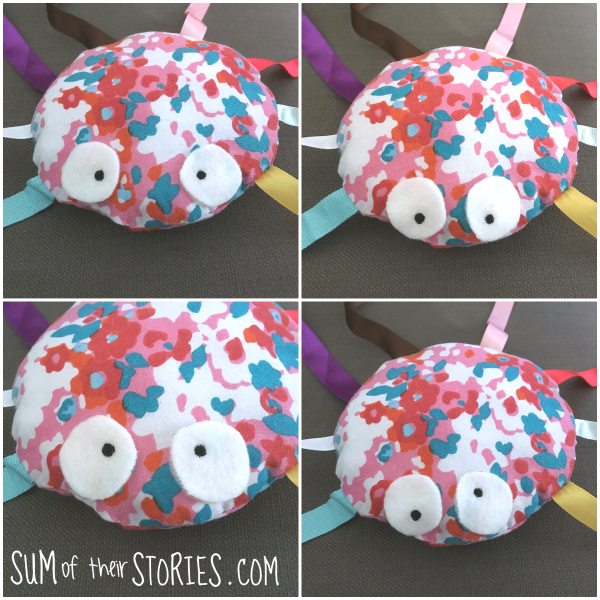
My son happened to be around at this point and suggested a slightly cross eyed look so that's what I went for. Once you are happy, sew the eyes in place. You could stick them with fabric glue if you prefer, especially if this is not for a baby or very young child.
That's it, your spider softie is finished. You could embroider a mouth too if you want to, it's your spider, so it's up to you!
Whilst I was finishing this little Incy Wincy Spider off the other day, my daughter disappeared upstairs and came down with her spider ....... she still had it! This spider must be 16 or 17 years old now, she's a bit grubby but doing ok considering her age! You can see this OG spider softie was made a little bit differently. The legs are strips of fabric, hemmed and stitched. Those fabric legs are considerably longer too and positioned in 2 sets of 4 on each side of the body. That might be something you want to do on your spider.
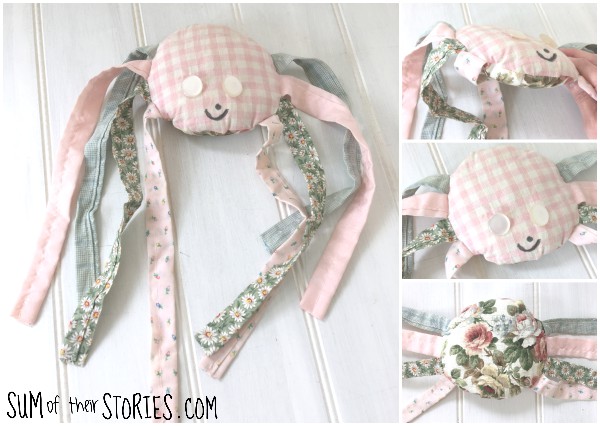
You can see this OG spider has button eyes and has had a mouth and nose drawn on with a sharpie. I think my daughter must have drawn that on herself back then as I have no recollection of doing it at all!

So there you have it, a 'simple to make' toy spider that's not even a tiny bit scary. Choosing a different fabric or colour scheme would make a completely different spider, let your imagination go wild!

Here are the other projects in this years Sew a Softie Month


