

Bejewelled Vase and Plant Pot
/
The Super Glue used for this project was provided for me by Gorilla Glue

I have fairly eclectic taste; My favourite is bight coloured quirky things but I also like antique or vintage things, I like a bit of farmhouse shabby chic and I like some super classy modern minimalist things.
Today I’ve got a couple of DIY projects that are best described as over the top decadent style so that won’t be to everyone’s taste but I am loving how they turned out so here they are!
This is a great way to use broken jewellery as well as left over bits in your craft stash. Buttons, gems, beads, sequins, embellishments you’ve saved from old Birthday cards - all perfect for these projects.
I collect a lot of little craft bits and pieces that I feel may come in perfectly for something one day. I’m that person collecting gems from place settings at the end of a wedding because otherwise they are going in the rubbish bin! Some people (my husband) consider this something of an affliction but I think it is just good sense! When I’m making a birthday card I know that in my stash somewhere I will have just the right little bow or embellishment. When I want to add a ribbon or twine to a jar to use it as a vase; my stash can help with that too - see, just good sense! However even I can see that this kind of recycling/upcycling only works if a) it’s not allowed to get out of control and b) if I actually use these little bits and pieces.
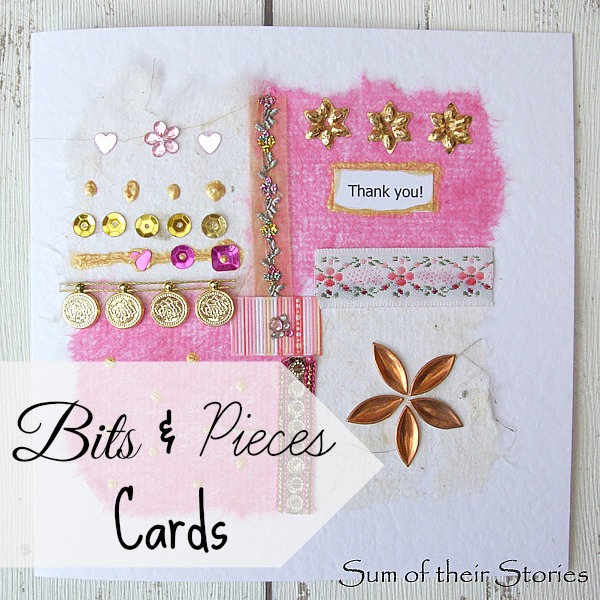
In the past I’ve shared a couple of projects that have used items from my bits and pieces stash:

This time I’ve made a couple of items that have really made a dent in my stash (or at least allowed me to close the lids on the tins that I keep it all in, yay!)
First up:
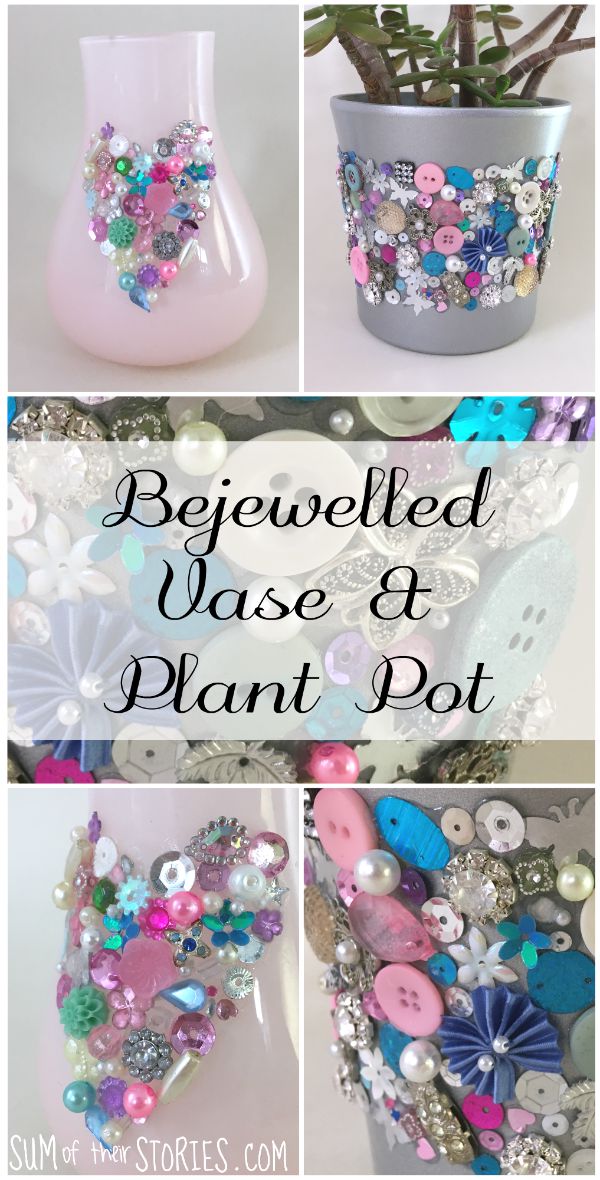
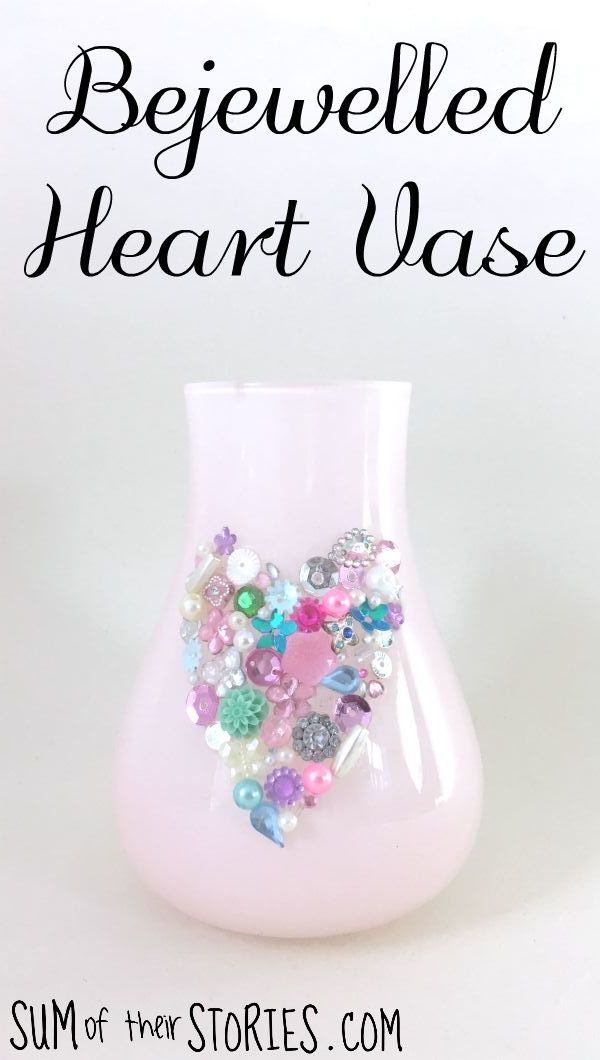
Bejewelled Heart Vase
To make a bejewelled heart vase you will need:
An old plain vase
A selection of craft bits and pieces
Strong adhesive - I used Super Glue Gel from Gorilla Glue
Tweezers
A pencil
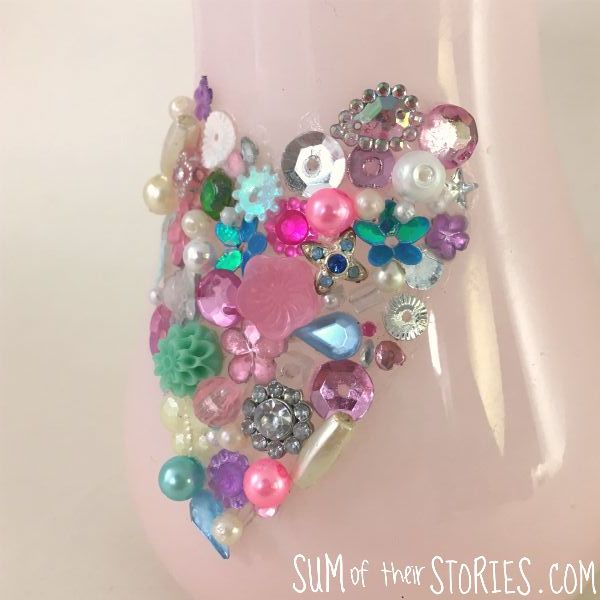
This bedazzling heart vase took me about an hour to make.
First make sure your vase is clean and dry.
Draw a heart shape just a little bit smaller than you want the heart to be. You could freestyle it and not draw a shape first but I don’t trust myself not to end up with a sad lopsided heart!
Using the strong glue start sticking your items within the heart. I liked the Gorilla Glue as it was a gel formula so it stayed where I put it with no running on the smooth curved surface of the vase. The tweezers really help with placing the small items.
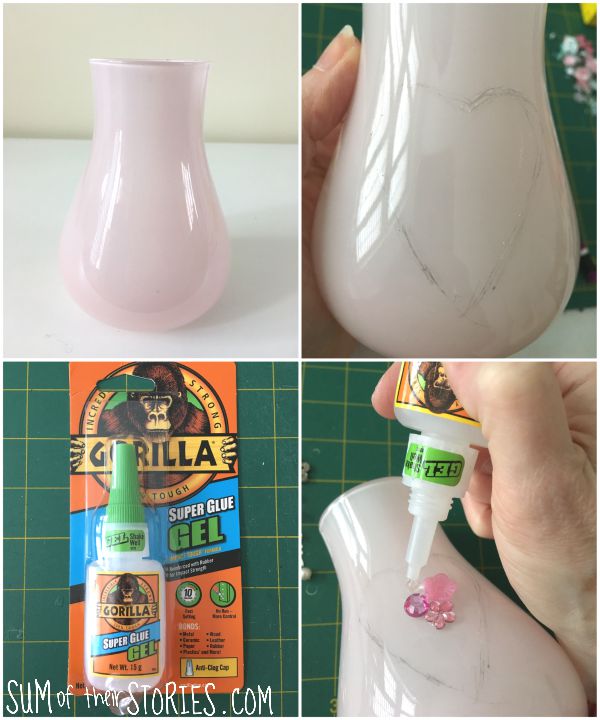
Start by putting a tiny blob of glue then attaching an item. I found it easiest to start in the middle. The glue dried very quickly so you don’t want to apply too much. Once I got going however I was able to pop 3 or 4 blobs of glue then apply 3 or 4 items quickly enough which sped up the process.
When you get to the edge of the pencilled heart just make sure the items you fix on cover the pencil line, I couldn’t find any easy way to remove it so covering it up worked best for me.
Ta Dah!
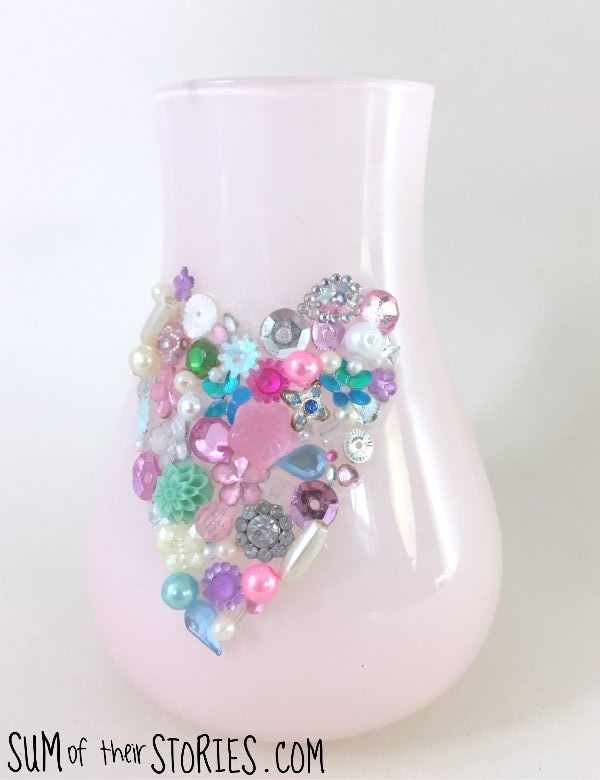
What do you think? Pretty without being completely over the top? That’s what I’m going with anyway!
The next idea is a little less reserved and a little more over the top though!
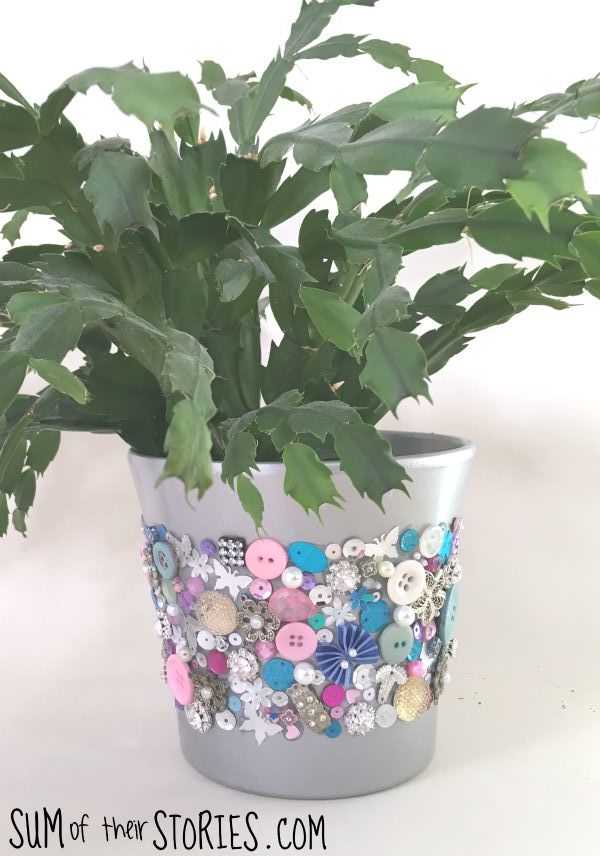
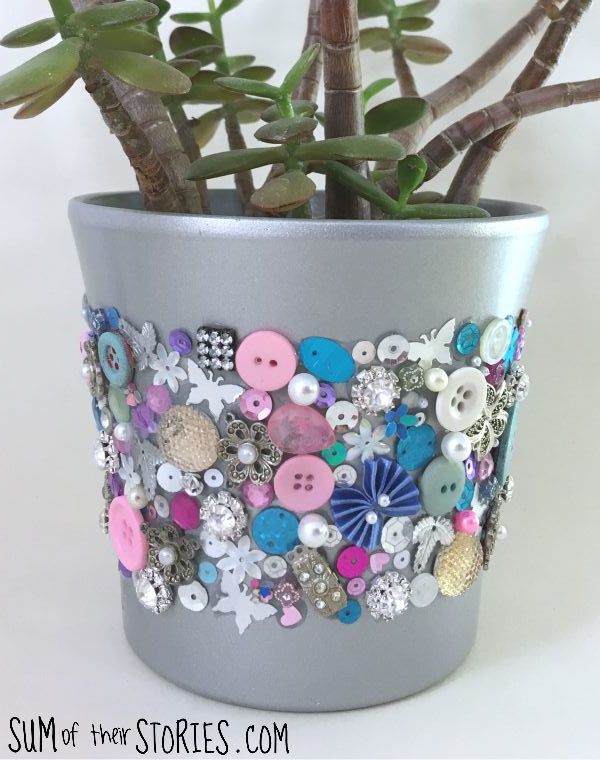
Bejewelled Plant Pot
To make a bejewelled plant pot you will need:
An old indoor plant pot
A large selection of craft bits and pieces
A strong glue - once again I used Super Glue Gel from Gorilla Glue
Tweezers
Pencil

Word to the wise - this is not a quick project! This took MUCH longer than I expected, it was however loads of fun.
Make sure the plant pot is clean and then mark two pencil lines all around the pot. One about bout 1.5” (4cm) from the top and one about the same from the bottom.
Then start glueing your buttons, beads, bits of old jewellery etc in the gap between the lines using the Super Glue Gel as before.
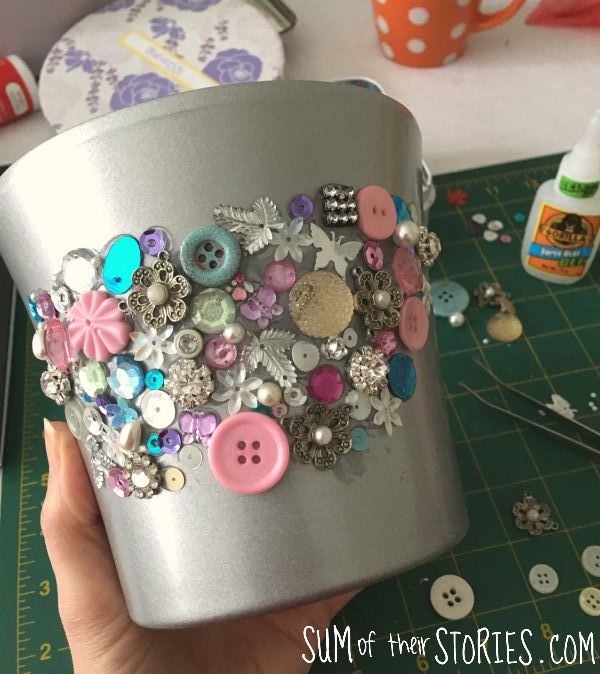
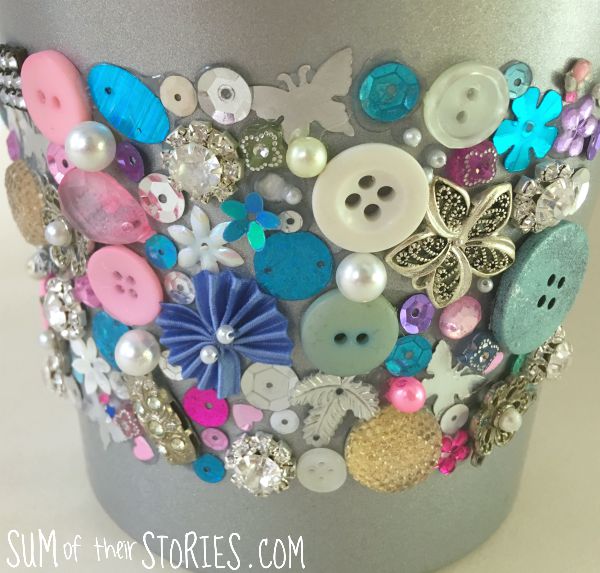
Position the bits and pieces so they go just over the pencil line so it is covered completely. Continue right around the pot. I found it easiest to add 3 or 4 bigger items and then fill in the gaps with litter bits. Sequins were brilliant for filling in little gaps, the tweezers really do make it much easier to pop things where you want them.
You could add your embellishments right up to the top and bottom if you prefer, so the pot is completely covered. As my pot was silver already I felt the band around the centre was enough bedazzling.
Pretty huh?!
I love the plant pot even though it’s really not my normal style - just goes to show eh? You never know what you are going to love! I don’t think I’ll ever stop collecting pretty little bits and pieces that I think will come in for something but at least for now I’ve made a dent in my stash.

I’ll be sharing this idea at these link ups


