

DIY Punched Tin Lantern Upcycle
/
It’s really easy to make a pretty lantern or luminary from an old food tin.


Today I’m joining the Sustainable Pinterest Challenge with this simple upcycling idea. The Sustainable Pinterest Challenge is a group of creative bloggers who get together once a month and have a good old rummage through their Pinterest boards to find a project to try. It might already be a sustainable and environmentally idea that we put our own spin on or it might be a craft idea that we can give a recycling/upcycling twist. I saw these food tins turned into lanterns and thought they looked really pretty. The theme for this month’s challenge is Winter so I decided to give my upcycled tin luminary a wintery snowflake design.
Upcycling an empty tin can into a punched luminary
To make a DIY punched tin lantern you will need:
An empty clean dry food tin
A nail and hammer
Paint

I started with an empty Golden Syrup tin. I love the retro design on these Lyle’s Golden Syrup tins. I don’t think golden syrup is something you can buy all over the world. I’m so sorry, it’s delicious! Not very healthy though! It’s a very sweet syrup, a very light treacle, that you’d use in cooking mostly. You’d put a few spoonfuls in the bottom of a dish, topped with cake sponge to make a simple treacle sponge dessert. It’s used in a lot of cookie recipes here too and things like gingerbread. You can buy a slightly runnier version that is a wonderful ice cream topping too. I gather it’s similar to the corn syrup that you have in the US but sweeter. It doesn’t have a strong flavour like honey or maple syrup, it really just tastes like sweetness!
I digress, that’s actually not important for this upcycled lantern craft! You can use whatever food tin you have, as long as it’s thin metal it’s going to work. I just happened to have just finished up this tin of golden syrup.
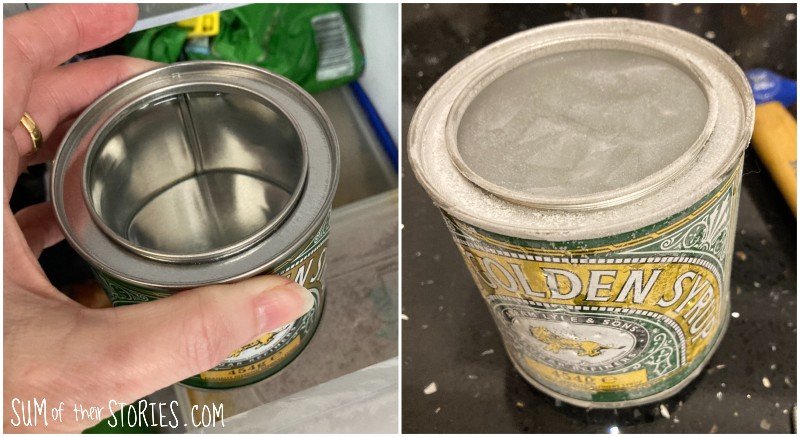
The first thing to do is to fill your tin with water and freeze it.

As you can see this process pushed out the bottom of my tin a little. I’d not put the lid on so I’d thought any expansion would just have gone up and out the top but apparently not. It’s ok, it still worked just fine, we’ll get to that in a minute.
Punching a design in the tin
Take the hammer and nail and simple punch out your design. I just freestyled it as my design plan was so simple but you could draw it on with a sharpie first if you’d like to.

It’s a good idea to rest the frozen tin on a few tea towels or rags just to save your worktop. I thought of this afterwards!
The tin will be VERY cold and so it’s a good idea to have a cloth to protect your hands too - or maybe even wear gloves! I didn’t and I’m not gonna lie, my hands were absolutely freezing.
The food tin was really easy to puncture with the nail and hammer, just a few taps for each hole. I didn’t have any issue with it slipping on the tin’s surface either. Do take care though, if your tin is thicker I can imagine it might be a little tougher and you really don’t want to be puncturing yourself instead of the tin.
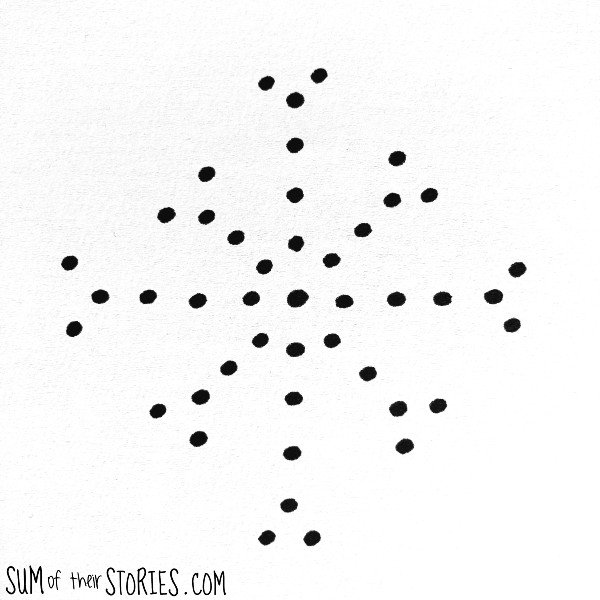
Simple Snowflake Design
This is my VERY simple snowflake design, which you are welcome to copy. Or have fun creating your own design, I’d recommend keeping it simple though, no need to make life any more difficult that it needs to be.
Once the design is complete, pop the tin in the sink and leave it for the ice to melt and then for the tin to dry completely.

You can use a cloth to dry the tin inside but once again DO BE VERY CAREFUL! The inside of the tin will now be rough and the punched edges are sharp. See how I suffer for my art! Blood, sweat and tears - actually that’s a slight exaggeration, no sweat or tears were involved!
Much safer to just leave it to dry naturally.

I was able to sort out the pushed out base on my tin at this point too. I just whacked it back into shape with a few blows from my hammer.
Painting your tin can luminary

Once the tin is dry you can give it a coat or 2 of paint. I used a spray primer paint, it’s what I had already and I really like the matt look it gives. 2 coats was enough to completely cover it. A couple of coats of an acrylic or even latex/emulsion paint would work fine too, use what you have.

Once I popped a tealight inside I realised I had punched my simple snowflake design just a little low on the tin. There is a bigger gap at the top than the bottom. I’m going to call it and say that marking your design first is probably a really good idea!
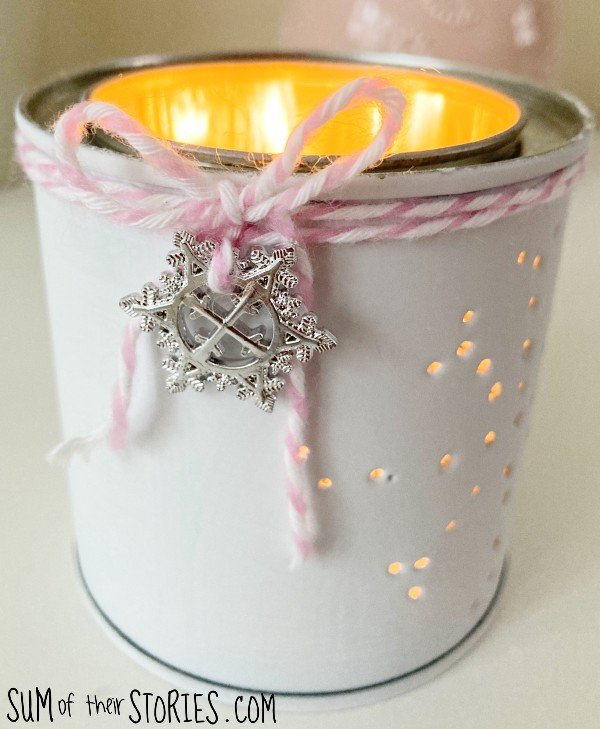
To disguise this tiny error I added some pretty pink and white yarn and a little plastic snowflake I found in my Christmas decorations.

Now my lantern was ready to use. If you use a real tealight please remember that you must never leave a lit candle unattended. You could use a battery operated tealight instead or even bundle in a string of battery fairy lights.
I love how it glows all orange on the inside, the syrup tin I used is very smooth and shiny on the inside which makes it super reflective.

Now it’s time to check out the other Sustainable Pinterest Challenge projects:

Julie | Sum of their Stories | DIY Punched Tin Lantern Upcycle - that’s the tutorial you’ve just read!
Niki | Life as a LEO Wife | Printable Thank You Basket Idea for Christmas Delivery Drivers
Allyson | Southern Sunflowers | Cardboard Ornament Craft
Mel | Decor Craft Design | Upcycled Christmas Vase
Gail | Purple Hues and Me | Natural Woven Tree with Berries
T’onna | Sew Crafty Crochet | Upcycled Plaid Scarf Wreath
Julie | Treasures Made From Yarn | Snowman


