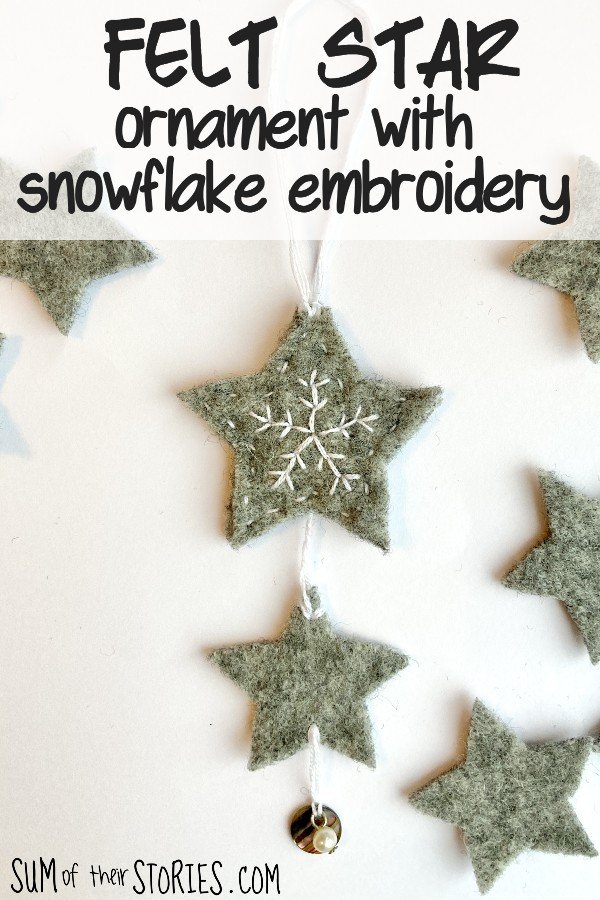
How to make a Felt Star Ornament with Snowflake Embroidery
/
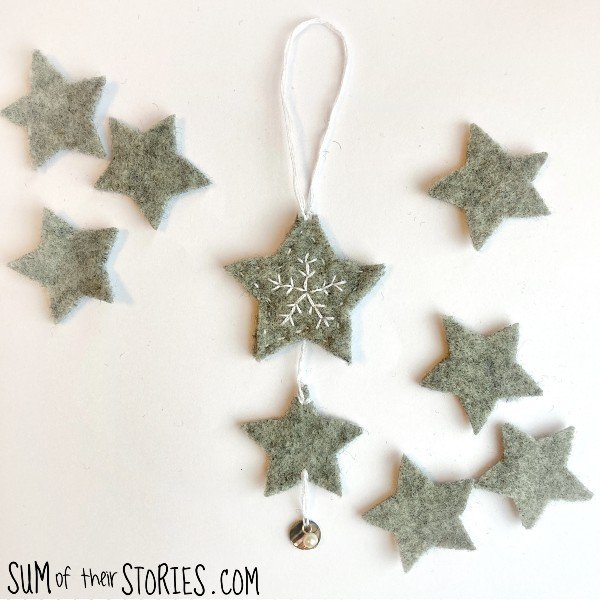
How to make a felt star ornament with simple snowflake embroidery
A few weeks ago on my friend’s birthday I wanted to make a little something to go with the pretty jug that I’d bought as a gift. I had pieces of an old grey jumper that I’d felted a while ago and used them to make a little felt star ornament.

It’s time for the Winter Crafts and Decor Blog Hop so this is my contribution, stay tuned at the end of this tutorial to see lots more Winter craft ideas.
Niki | Life as a LEO Wife
Marci | Stone Cottage Adventures
Gail | Purple Hues and Me
Michele | Coastal Bohemian
Julie | Sum of their Stories
T’onna | Sew Crafty Crochet
Allyson | Southern Sunflowers
It was a really simple and quick make so let me show you how so you can make your own.

Materials you will need:
Felt - I used a piece of felted jumper/sweater
White embroidery thread
A sharp embroidery needle
Sharp Scissors - good scissors with a nice sharp point will make it much easier to cut out the small felt stars
A bead - I used a flat bead and a pearl from an old earring that had lost it’s buddy!
Creating a star template
Before we get on to making the ornament let’s just talk about the star templates for a second.
I’ve created this star template sheet that you can print out with lots of star sizes so you can make this ornament any size you like. I’ve marked the size I used for my decoration as “small” and “large” on the sheet.
I made my friend’s ornament starting with a star shape that I’d actually just cut from an old Christmas card. After Christmas each year when I take our cards down I remove any bows, gems, embellishments etc that I can reuse in my Christmas crafting. I also make gift tags ready for next year. The backs of the cards are most often turned into hexagons for my English Paper Patchwork so luckily not much gets thrown away.
If you have a star shape that you love and want to upsize it rather than using my template sheet then that is really simple to do. I’ve shared this trick as a video as well on my Insta which you can check out for more details.
Upsizing a star template

All you need is:
the original template
a scrap of card
a thin even strip of card
a pencil
a tiny bit of blue tack
scissors
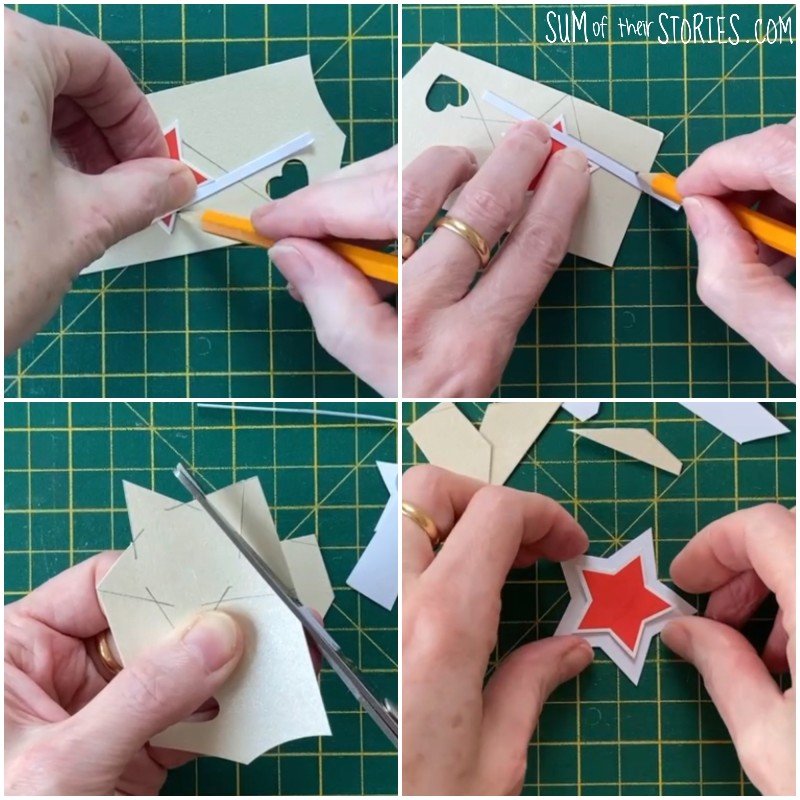
Secure the template onto your scrap card with the blue tack. Place the thin strip of card right up against one edge of the star template and draw along the edge. Repeat all the way around the star. Cut out. Job done!
Right now let’s get back to making the snowflake ornament!
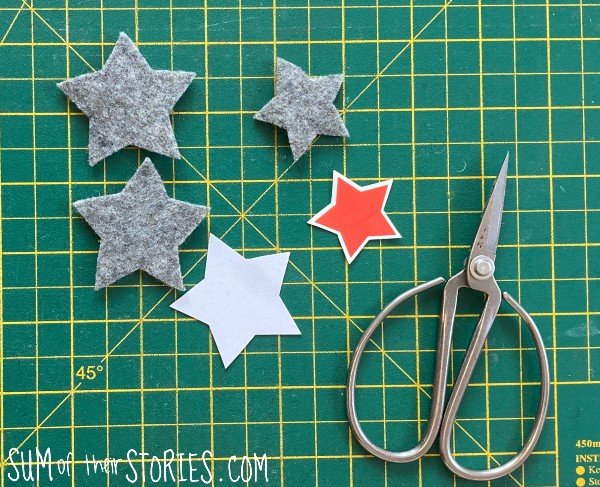
Start by cutting out 2 large and 1 small star from the felt.
Take a long length of embroidery thread and separate just 1 strand. Fold it in half and thread the needle. I do this so I can avoid a knot on the end of the thread - you go through the loop to secure the first stitch. There are photos to explain this on this guide to basic embroidery stitches.
You are going to embroider a really simple snowflake onto one of the larger stars. This is really easy, perfect for embroidery beginners.
Embroider a simple snowflake
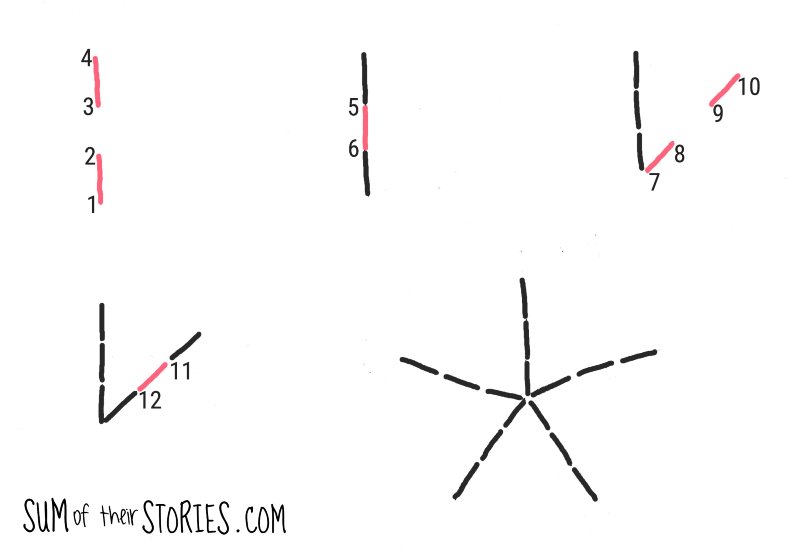
Find the centre of the star and stitch 3 running stitches from the centre of the star towards one of the points.
Repeat for each of the stars 5 points.
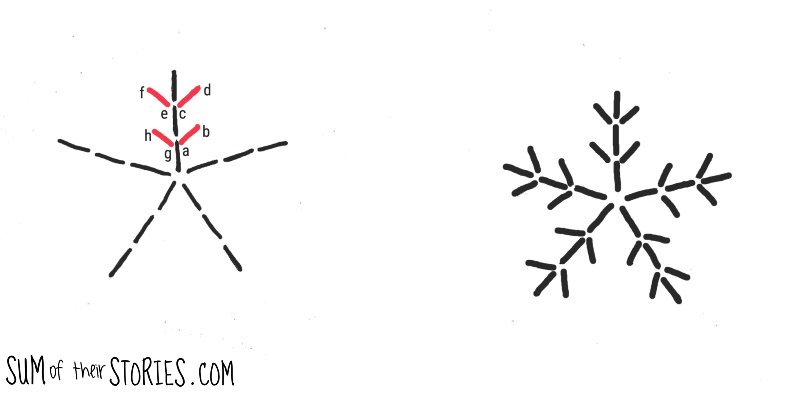
Bring the needle up where the stitches meet on one of your snowflake spikes and work a small straight stitch coming out at a 45 degree-ish angle, repeat where the next stitches meet, then work the same stitches on the other side of the spike.
Repeat for each of the spikes.
I’ve got a little video of this process on my Insta too if you want to check that out.
If your thread is long enough don’t cast off, leave it attached ready for the next step.

That’s it! I told you it was simple. A sweet effective little snowflake that is super easy to stitch. If it’s a little bit wonky that’s ok, just part of its hand stitched charm.
Assembling your felt star and snowflake ornament
Put your embroidered star on top of the plain star and stitch the 2 together all round the outside using a running stitch. I used the same thread as for the snowflake embroidery, it was long enough and saved casting off and rejoining a new thread.

Stop just before the final star point to add a hanging loop.
Take a length of embroidery thread with all 6 strands, tie a knot and place between the layers of felt so the knot is hidden inside. Finish stitching around the star, securing the hanging loop as you go.
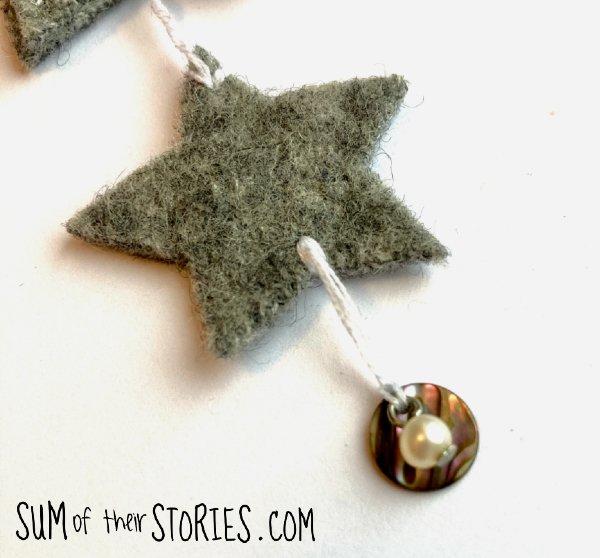
Next add some beads to the smaller star. I used a flat bead and a pearl bead from an old earring. Use 3 strands of embroidery thread, thread the beads to the middle of the thread, secure them with a double knot then stitch them to an inner angle of the smaller star with a couple of tiny stitches allowing them to dangle down a little.
Anyone know if that inner angle bit of a star has a special name? I’m comfortable with what the point of a star is called (the point!) but what is that obtuse inner bit called?
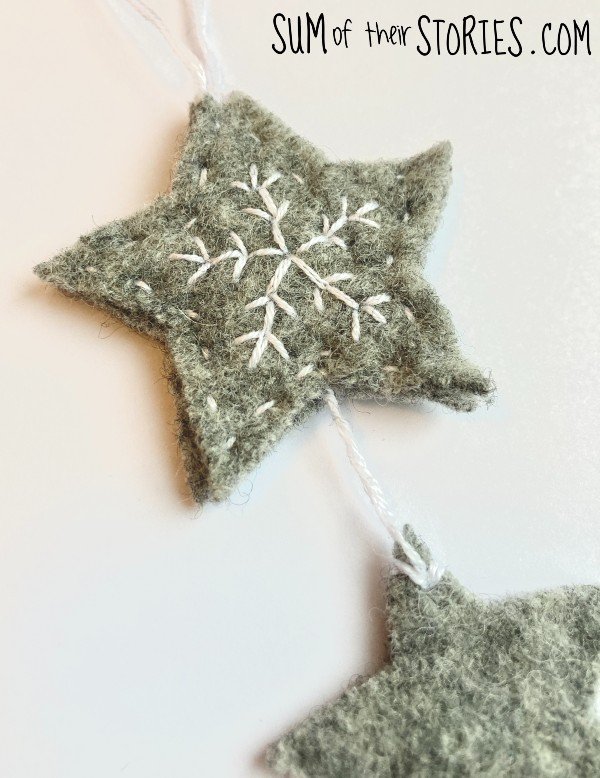
Lastly join the 2 stars together. Use 2 strands of thread doubled up so you can use the loop method (see above) to start off with no visible knot. Work a couple of tiny stitches at the top point of the smaller star then a couple on the bottom inner angle of your double layer larger star. If you work a stitch on each side of the thread it will help the stars hang straight and even. Cast off and then just loose the end of the thread inside the layers of the larger star.
I feel like this description makes it sound much more difficult than it actually is! Use the photos to guide you. I’m fussy about not having knots or thread ends showing, I like everything neat and hidden but if you are not so fussy that’s fine too!

How to use your felt star snowflake ornament
Hang your finished decoration on the Christmas tree, use it as a gift tag, hang it from a kitchen cupboard door handle (that’s what my friend has done with hers) use it as a bag or planner charm, use it as a bookmark - honestly the options are endless!
Ideas to make your felt decoration a little different
I used an old felted jumper to make this decoration so the felt was really thick and nicely textured but you could use ordinary store bought felt in any colour
You could add extra stars to make a longer decoration
A mini bell would be nice on the end instead of the beads
Leave off the embroidery altogether and your decoration will still be cute
Embroidery something completely different or sew a button or embellishment to the centre of the star instead
Now let’s check out the other ideas shared in the Winter themed craft and decor blog hop.
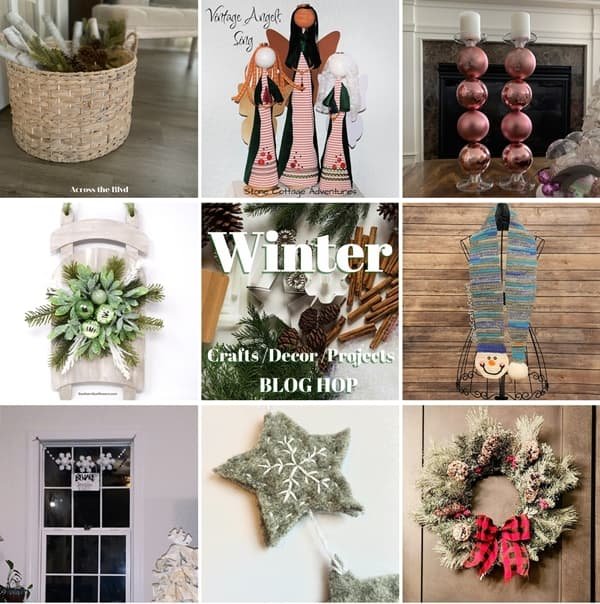
Flocked Pinecone Christmas Wreath
DT Ornament Candle Holders DIY
Dollar Tree Makeover for Winter Decor
Winter Window Swag -Snowball Fight
Felt Snowflake Decoration - that’s this tutorial!
Julie
I’ll be sharing this craft tutorial at these link ups
If you like working with felt then you might like to check out my other felt craft ideas: