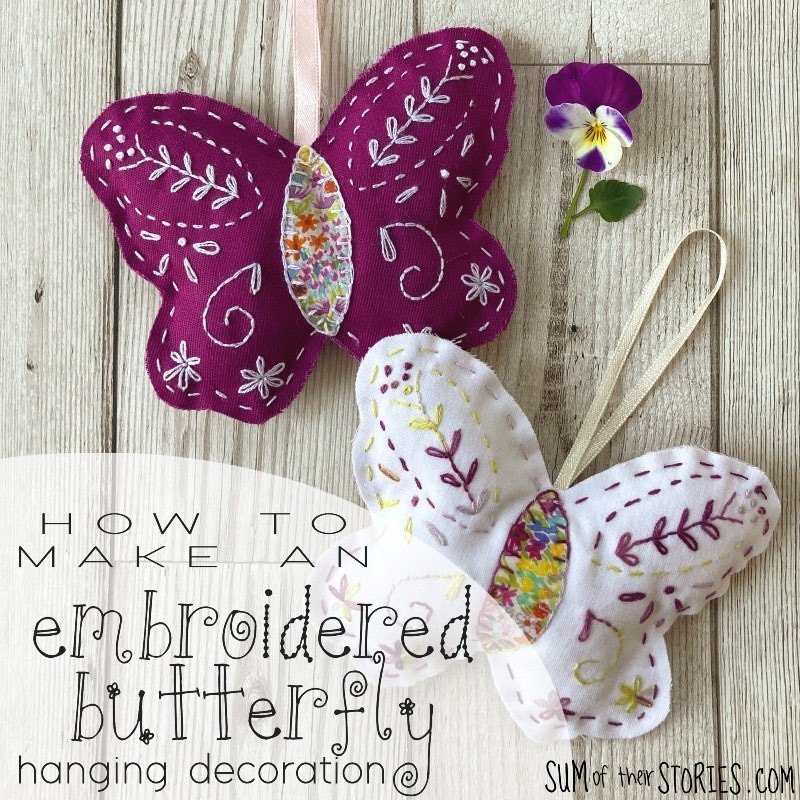
How to make an Embroidered Butterfly Hanging Decoration
/

These embroidered butterfly hanging decorations are easy to make. They use just a couple of simple embroidery stitches, making them ideal for beginners and more experienced embroiderers who want a quick and pretty project.
The water erasable fabric pen used for this project was provided for me by Leonis for my honest review.
To make a hanging butterfly decoration you will need:
scraps of fabric
embroidery thread - I used DMC 4503
a sharp needle
fibre fill, you only need a tiny amount
a 20cm length of ribbon


Print the pattern. You can either download it from the link above which should give a sharper print out, or if you’d like to resize your butterfly just right click on the photo above and save. Then paste it into a word document and resize as you wish. Or just draw your own butterfly design using mine as inspiration.

Transfer the design onto your fabric. To do this I simple tape the design to the window and hold my fabric over it. Then I can trace the design using the erasable fabric pen. I find I can see enough to copy the design on even slightly thicker or darker fabrics this way. If you have a light box you can use that. If you wanted to use a very thick fabric like felt you could try an iron on water soluble paper maybe, or a fabric carbon paper.
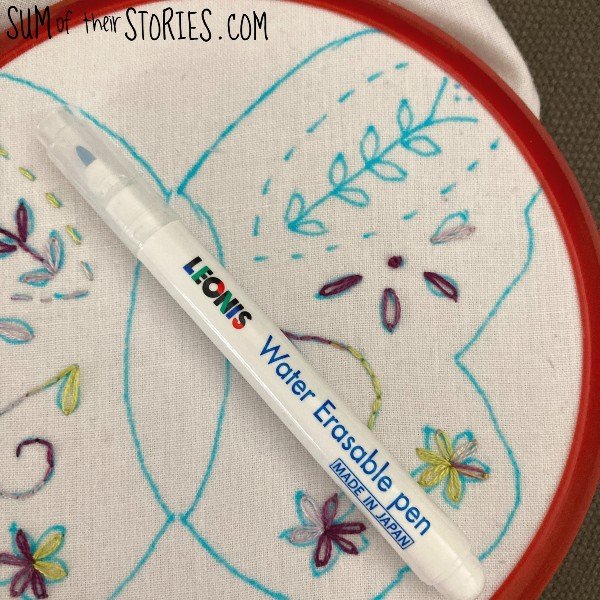
I’ve tried a variety of water and air erasable pens in the past with varying levels of success. I find air erasable pens are great for very quick projects but if something will take more than a few hours to stitch the design can disappear before you are ready. I’ve had some success previously using frixion pens which you iron away afterwards. The main drawback with them is the fact that if your item ever gets really cold the pen marks will reappear. These little water erasable pens from Leonis are new to me and I have to say I’ve got no complaints about them at all. They are small and dinky, ideal for popping in your craft bag for crafts on the move. The nib is sturdy and a good fine point so getting fine lines is easy. I’ve used other erasable pens with this “felt pen” style nib that have splayed out quite quickly making it difficult to draw fine lines. I’ve used a Leonis pen for 3 projects now and the nib is still like new. I’ve no qualms in recommending them to you, they are definitely my new favourite and will be the ones I use from now on.
Once the design is transferred to your fabric place it in the embroidery hoop. I like to use my spring tension hoop for quick embroideries like this. They don’t hold the fabric quite as securely as a traditional wooden hoop but they are quicker and easier to move about so I think they are a good compromise.
Now you are ready to stitch your butterfly.

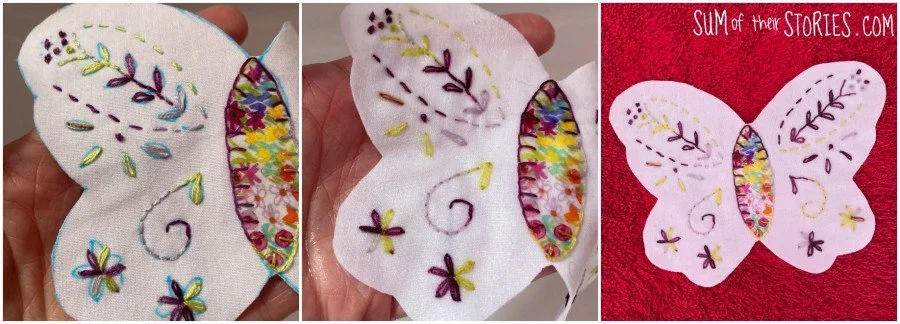
This design uses 5 stitches, running stitch, back stitch, lazy daisy, blanket stitch and french knots.
I’ve got a guide to some basic embroidery stitches which you might find helpful if you’ve not embroidered much before.
I chose a variegated embroidery thread (DMC Coloris 4503) on the white fabric and used 2 of the 6 strands. I like the effect you get with variegated embroidery threads for something like this and you get pretty colours change but you don’t have to worry about stopping and starting with your thread.

Cut a body shape from a small piece of patterned fabric, place it in position on your embroidered butterfly and stitch in place using a blanket stitch.

Once all the embroidery is complete, cut out the butterfly shape.
Cut another butterfly shape from patterned fabric.
You now need to rinse your butterfly in water to remove the erasable pen. If your pen marks are very light you might be able to remove them just by rubbing the fabric with a damp cloth but the most effective method is to just run it under the tap for a second or two. The pen marks disappear quickly, then you can lay your embroidered fabric on a towel to dry. Once dry give your butterfly shapes a press with the iron, press the embroidered one with the embroidery face down on a soft surface like a towel so that your stitches are not crushed.

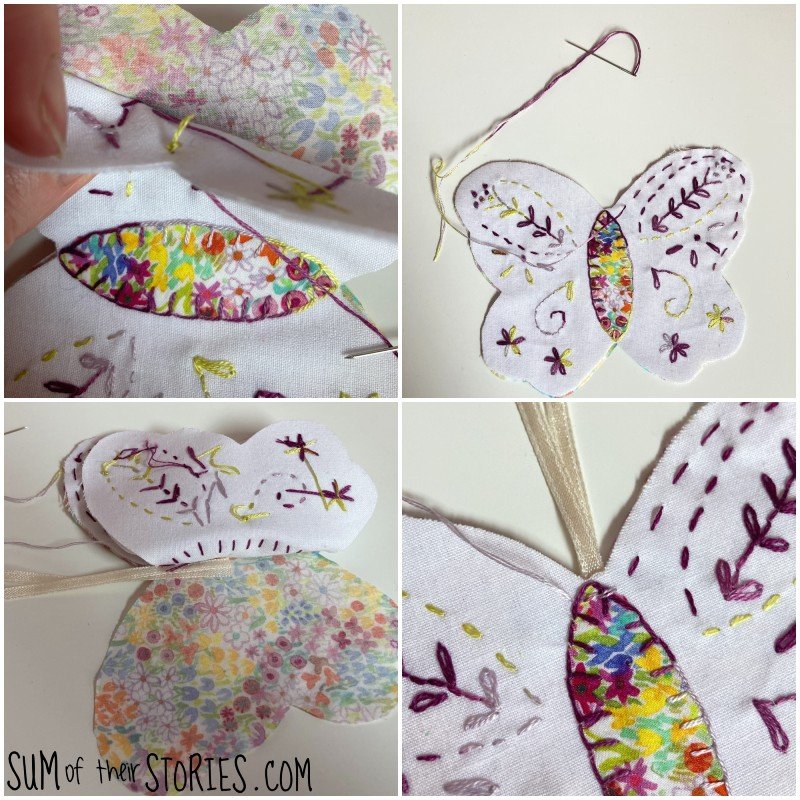
Place the 2 butterfly shapes wrong sides together and start to stitch them together all around the outside using a running stitch. I just knot my thread and hide it in the inside. Just before you get to the top centre, take your ribbon and fold it in half. Lay it between the fabric layers and stitch it in place. Do a few extra stitches over the ribbon to make sure it is secure, then carry on round sewing the front and back butterfly together.

Stop when there is still a small gap and lightly stuff the butterfly with a little fibre fill. then stitch the gap closed.
That’s it! Your butterfly is complete, hang it somewhere to brighten your day.


I made this second butterfly using a purple fabric and a white thread, for a different look. It was made in exactly the same way though. The blue erasable pen showed up on the darker purple fabric just fine.

Perfect for bringing a touch of spring/summer to your home or as a lovely little gift for someone special. You could add a little pot pourri or dried lavender to your butterfly along with the fibre fill if you wanted to turn this into a scented sachet.

Enjoy making your pretty embroidered butterflies! Do tag me on social media if you make these and share them, I LOVE to see your makes. Or even send me an email with a photo if social media is not your thing.
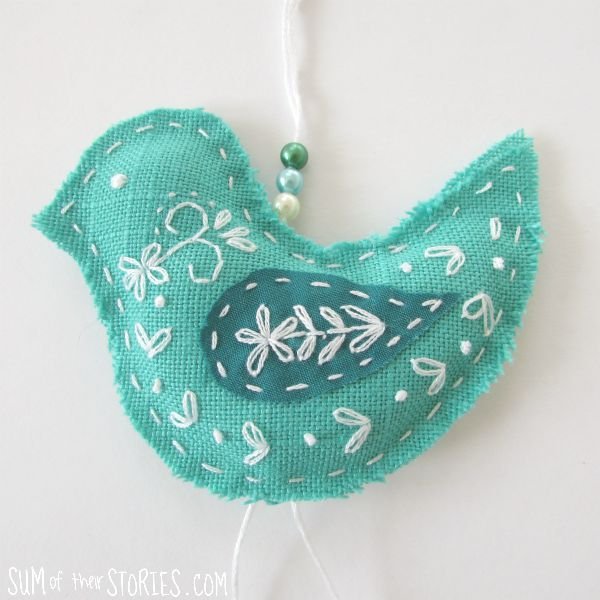
If you like these embroidered butterflies you might also enjoy these simple embroidery projects:


I’ll be sharing this embroidery project at these link ups.
Julie