Wedding Dress Memory Pictures
/Make embroidered art from an old wedding dress.


I want to start by saying that I never intended to write about this craft project originally so I don't have lots of great step by step photos for you this time. I'll do my best to use words to describe the process. Let me explain.
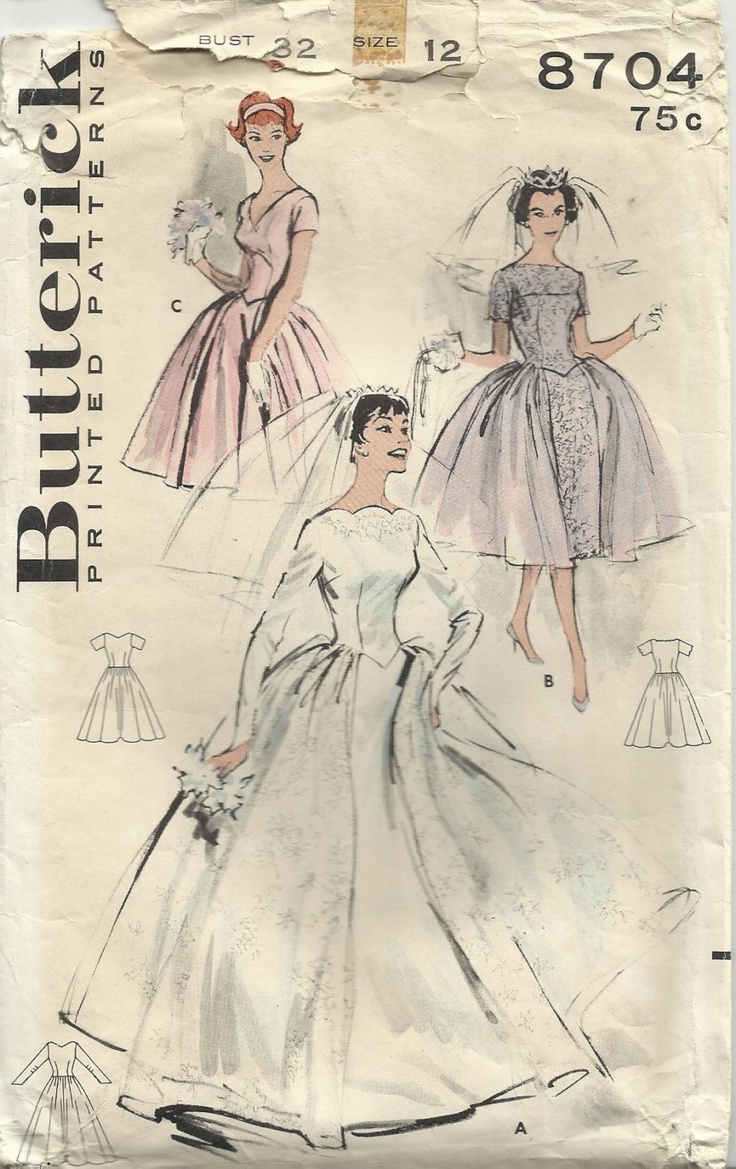
A few months ago a very dear friend of mine lost her mother Beryl and when clearing and sorting her mum's possessions she came across her wedding dress. Beryl had made it herself, she was a very accomplished seamstress, and the dress was a beautiful brocade knee length tea dress with a wide v neck, fitted bodice, invisible side zip, a full pleated skirt and beautiful long sleeves with pointed cuffs and a row of handmade button loops with pearl buttons. I didn't take any photos of the dress because, as I said, I wasn't intending to share any of this. It was a bit like this, option c but with the long sleeves on A:
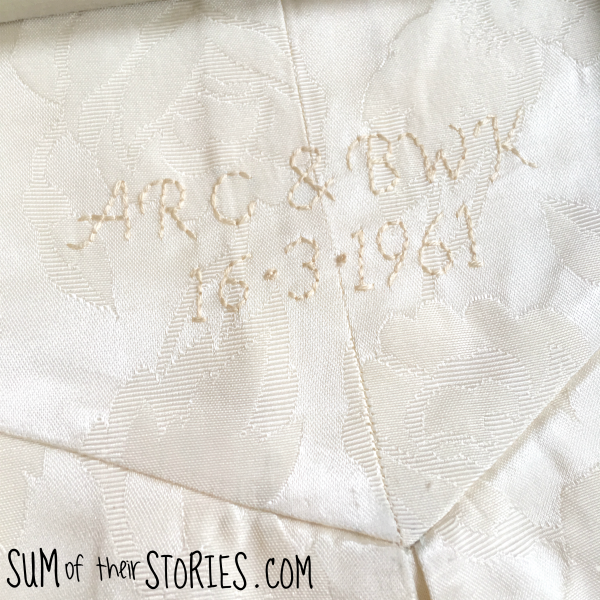
My friend asked if I could turn the dress into 3 pictures, preserving some of the handmade details of the dress, and embroider her Mum and Dad's initials and the date of their wedding on there somewhere too.
When they were finished my friend asked if I was going to share here on the blog how I made them. I explained I hadn't intended to, it seems very personal, but she was keen and thought someone else might be inspired to do the same. I can't write a specific tutorial, every dress will be different but here are some tips and guidelines that might be helpful if you want to make your own wedding dress memory picture.
Let me start by saying that cutting into a beautiful vintage 1960's handmade wedding dress is not an easy thing! This is not for the fainthearted! I had to really psych myself up to make that first cut, it did get easier after that, but I never got to a 'chop happy' point!
I cut a test square of the fabric and tried out a few different stitches, thread colours, style of lettering etc.
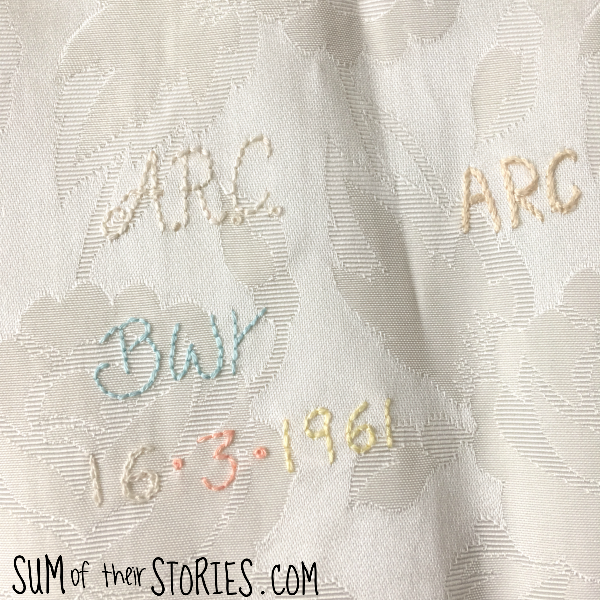
My friend chose a simple backstitch embroidery style in a colour close to but a shade darker than the fabric.
If you are trying this you will need something to mark the fabric. I used a water soluble fabric pen. You will need to test it on a tiny scrap of the fabric - you need to be sure you can remove it without it damaging the fabric. If it's a problem you could try a air soluble one instead (but then you have to work more quickly) or even old fashioned dressmakers chalk.
You need to choose a box frame for this project before you begin. You don't want to be making your piece and then looking for a frame to fit - no, no, no!
Take the back off the frame and use it as a size guide to cut a piece of fabric from a plain part of the dress, make it at least 5cm (2') bigger than the frame on all sides.
Print your initials, date or whatever you want to embroider onto paper. Try a few different fonts and sizes, it's hard to know what will work on the screen, once they are printed you have a much better idea.
I was able to hold the piece of fabric over the printout up to the window and trace the letters using my water soluble fabric pen. Even though the brocade fabric was pretty thick, when held up to glass I could see through easily enough.
I used backstitch and 2 strands of embroidery thread to stitch the initials and date. I did little French knots for the dots on the date.
Then came the fun part.
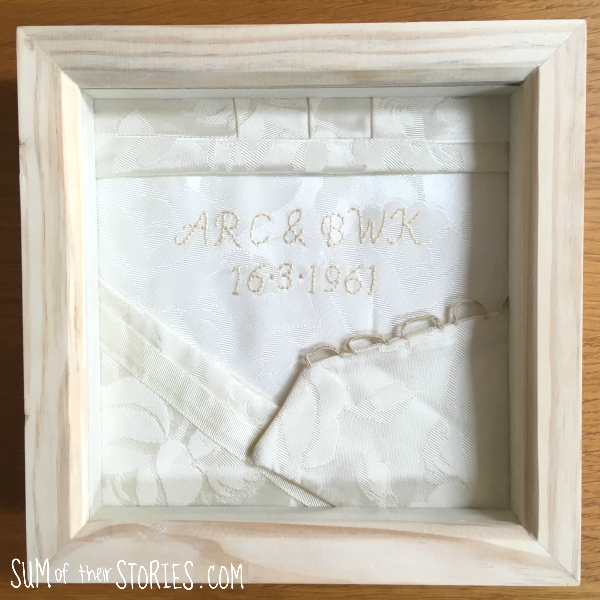
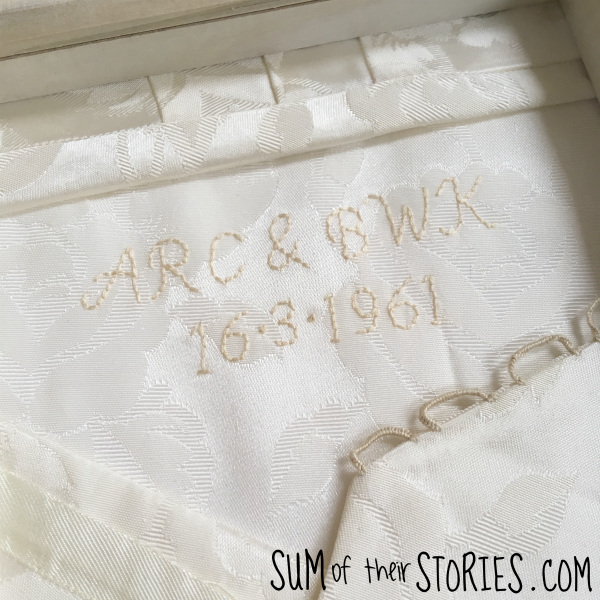
I took pieces of the dress with detail and laid them on the embroidered square, around the embroidery, messing about until I was happy with the look. This picture has the cuff detail from one of the sleeves, and some of the hand stitched hem. i love how you can see Beryl's hand stitches, it makes it so special.
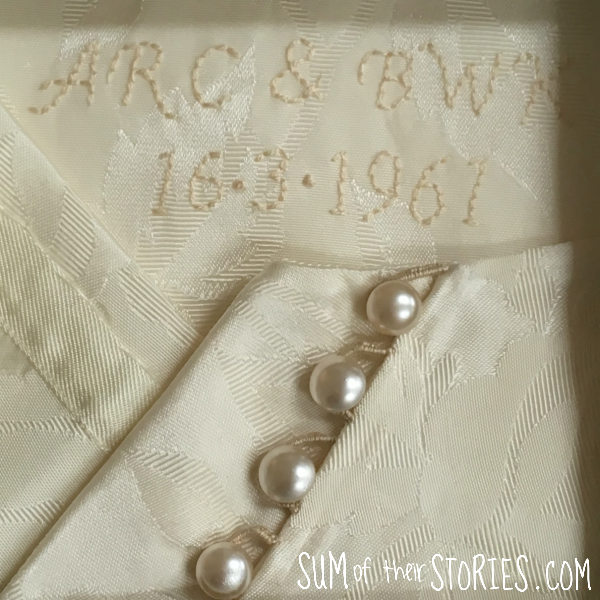
Those button loops are all hand stitched too, aren't they just lovely?
I hand stitched the elements in place and then I hit a problem. This fabric frays like a b****** so I tried to hem everything. My thinking was to keep it all nice and neat so we wouldn't have any fraying from the sides over time. Unfortunately with all the layers this made the piece too thick to fit in the frame.
The solution was Fray Stop. I tested on a scrap of course and thankfully it didn't show through or stain the fabric.
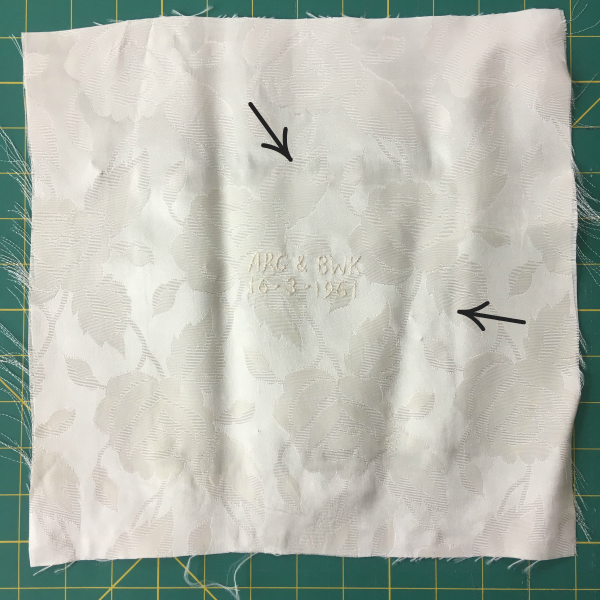
Here you can see the fabric without anything at the top and then with a line of the Fray Stop at the bottom. Much more manageable!

I cut a piece of acid free cardboard to fit the frame (well a couple of mm smaller actually to allow for the fabric) and then used that card to mark EXACTLY where I wanted to cut the layered up piece. I applied a line of fray stop all around and left it to dry. Then I cut on the line. The piece is exactly the right size for the frame and the Fray stop stops any fraying. (as you would hope it would!)
Here you can just about see the embroidery on the main piece of fabric and the line of Fray stop that I added - highlighted by the arrows!
I had to apply a little more fray stop to the edges of the layers that weren't covered yet, and left that to dry too.
Lastly you want to clean the glass in your box frame on both sides. You'll be sealing this in so you really don't want to find a smudge or bit of fluff after it's all sealed up - you really don't - ask me how I know!!
Now you can assemble the picture. I sealed the back with proper framers tape. It's worth it, you don't want any moisture or dust getting in.
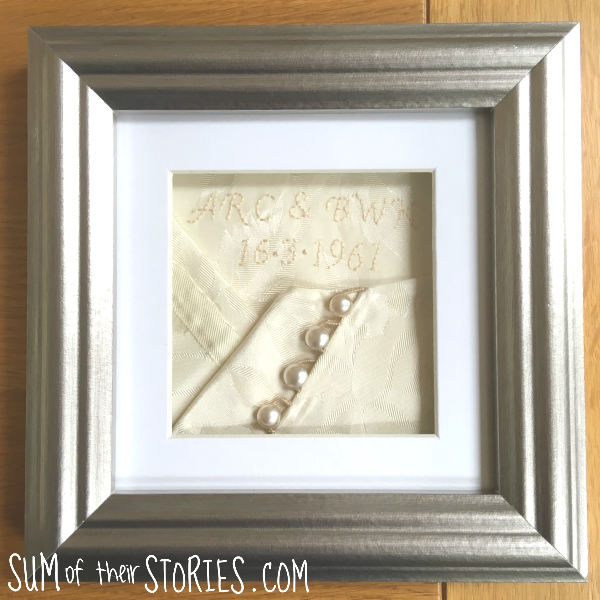
I made 3 of these pictures from the wedding dress. They are all different of course, I had limited materials to work with. The frames are different, they are the ones my friend chose.
This one is made with the other sleeve cuff. The buttons had been removed already - I guess Beryl had wanted them for something else. I added some more of the underside of the hem as I just love the way you can see the hand stitches and I found some dart detail on the inside of the elbow so added that too.
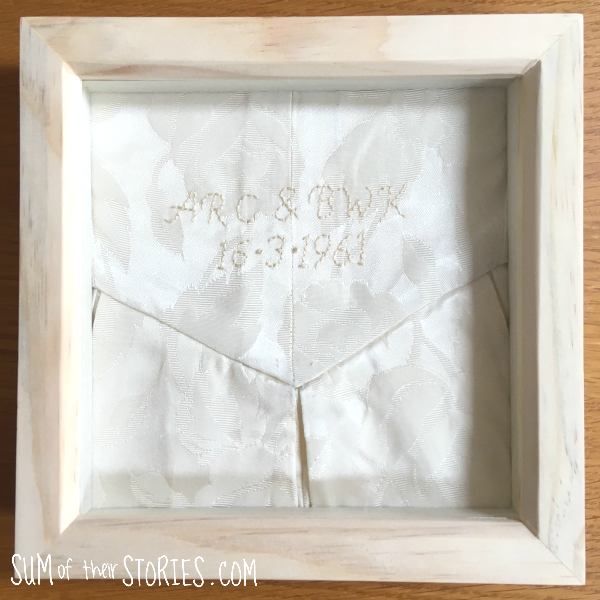
For the last picture I used the centre waist detail from the front of the dress. I was out of sleeves of course and the dress was not overflowing with fancy details. I love the v front on the waist, the pleats are impeccably done so I thought this was an area to showcase.
So there you have it, memory art made from a special vintage wedding dress. It took a little playing around to make it work but in the end they came out ok. My friend and her family are pleased with their art and Beryl's mad seamstress skills are preserved and on display, which is lovely. It actually makes way more sense than keeping a dress that none one is ever going to wear, up in the attic potentially getting damaged.
No blog worthy photography but hopefully enough information to inspire you.
Do you think you could cut up a family heirloom? I'd describe it as 'scary but worth it'