Simple Felt Needle Case
/How to make a simple felt needle case.


This tutorial for a Simple Felt Needle Case first appeared in February 2014 as a guest post at Chic on a Shoestring Decorating and has been updated and republished.
A work friend once confessed to me that she only had one sewing needle in her house. One needle, how is that possible? I must have hundreds! What if she loses it? I was very worried for her so I made her a quick little felt needle case with a few extra needles in it. I feel better knowing she will be ok now in any sewing emergency!
The felt needle case was pretty easy to put together and turned out rather cute. Would you like to have a go at making one for yourself? Let me show you how:
How to make a simple felt needle case
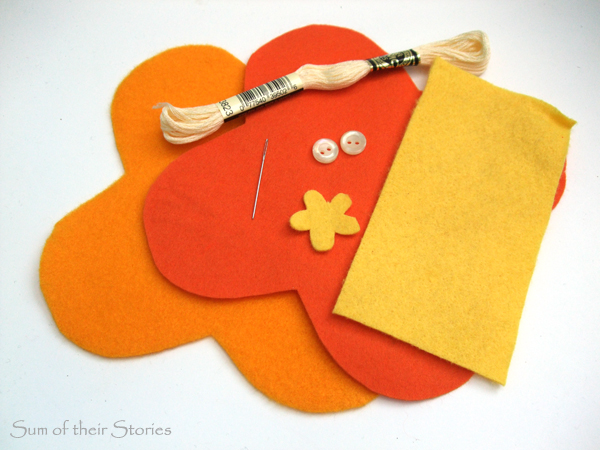
Materials needed to make a simple felt needlecase:
Felt (I used 3 different colours but you can use whatever you like)
2 little buttons, old shirt buttons are ideal
a sharp needle
scissors
Start by printing the pattern then use it to cut out your felt pieces. Cut 2 of the main shaped case pieces, 2 tiny flowers for decoration and 1 rectangle that is 6.5cm x 13cm (2.5” x 5.25”) for the needle case “pages”. Note about the flowers - I’ve included a tiny flower on the pattern just in case you need it but to be perfectly honest you’ll probably find it easier just to cut a small circle, snip around it in 5 places and then trim it a little to form petals.
Choose one of your felt case pieces to be the outside and attach a flower and a button where the red dot indicates on the pattern.

Layer the case pieces together, lining them up carefully and pin in place.

Using 3 of the 6 strands of the embroidery thread, blanket stitch the two layers of felt together.
A nice neat way to finish blanket stitch is to pick up the first stitch again when you get back to the beginning and then do a little oversew stitch to secure.

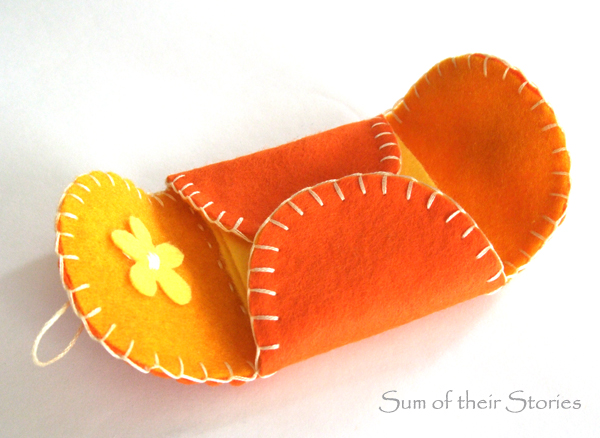
Adding the needle case pages
Fold the rectangle of felt, the page, in half and pin in position on the side of the square marked on the pattern.

Using the 3 strands of embroidery thread again, stitch along the pinned line to hold the "pages" in place.

You are going through 3 layers of felt here so you might find it easier to stab right through to the other side and pull the thread right through for each stitch, that way you get nice even stitches on both sides.
Once the pages are secured carry on stitching around the whole square.

Attach a loop fastening
All your needle case needs now is a loop fastening.
Fold the case up to form a square like the photo below:
sides in
bottom up
top down

Using all 6 strands of the embroidery thread this time, come up from the inside of your case where the green dot is marked on the pattern/shown on the photo below. Don't pull the thread right through, leave a nice long tail. Go round the button with your thread and then back down through the felt just next to where you came up.
Come back up with the thread to the right side and use it to sew the 2nd button into position.This 2nd button is purely decorative, covering where the fastening loop is attached.

On the reverse, tie the ends of embroidery thread in a double knot but don’t trim both of the ends yet. Use one end to sew the 2nd little felt flower on with a few stitches to cover the knot.

Pop a few needles in and your needle case is ready to use or gift.


A straight forward way to make a felt needle case with some simple hand stitching. This needlebook project would be perfect for children or beginner sewists.
More ideas for your felt needle case
Add more pages to your case by using 2 rectangles of felt, attach both at the same time and you’ll have a case with 4 pages instead of 2
Decorate your needlebook in any way you like. Embroidery or extra felt applique would be lovely. Add your embellishments right at the beginning before you sew the 2 main pieces of needle case together so that the reverse of your stitching is all hidden
I used 3 different colours of felt for my needle case but you could use the same for the inside and out if you prefer
Instead of cutting the slightly fiddly felt flowers you could use a couple of ready cut craft flowers like these or these
Julie
I'll be linking up at these link parties