

Recycled Mini Collage with Crochet Flower Tutorial
/
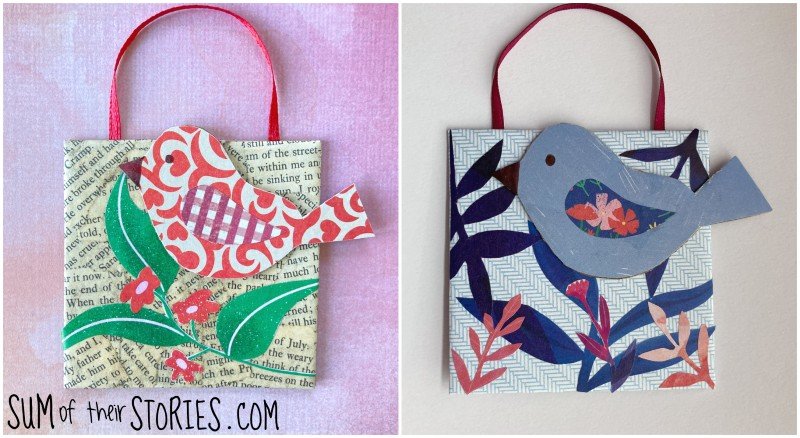
A couple of weeks ago I shared an idea to make mini art collages with birds using cardboard packaging, scraps of pretty paper and old book pages. Since then I’ve become a little bit obsessed with making these little art hangings, they are just so much fun to make.
I updated the original collage tutorial a few days ago when I used the patterned inside of a business envelope as an alternative background.
Now I’ve got another version for you, with a flower theme.
It’s time for the Sustainable Craft Challenge and this month the theme is Flowers. The Sustainable Craft Challenge is a creative challenge where I join a group of my blogging friends and we all create a craft idea to share with you that incorporates a sustainable, or eco friendly element. The aim to explore ways to craft in a more sustainable way, recycling, upcycling and using what we already have. This month our theme is FLOWERS.
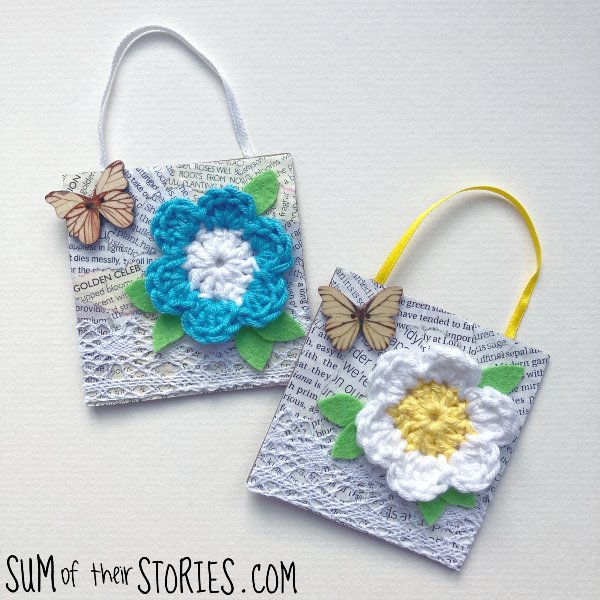
These little mini collages are easy to make and really versatile, you can adapt the idea to suit whatever you have available. They use cardboard packaging and pages from an old magazine to create the base then you can decorate with whatever craft supplies that you have to hand. I used lace, crochet flowers and sweet little butterfly buttons that I had saved from a greeting card I’d been given a while ago.

Supplies needed to make a Crochet Flower Mini Collage
Corrugated Card - an old box or packaging
Pages from an old gardening magazine
A crochet flower - I used my simple mini flower pattern and some left over scraps of cotton yarn
A length of thin ribbon - the ones that come on the shoulders of new clothes are ideal
Scraps of green felt (not photographed, that was a late addition!)
Embellishments - lace, buttons etc
PVA glue or Mod Podge
These mini collages are made in the same way as the bird collage versions I shared 2 weeks ago.
Preparing the collage base
Cut the corrugated card into 3” squares, you’ll need 2 squares per mini artwork.
If you are using PVA glue you’ll need to water it down just a little, Mod Podge you can use straight from the tub.
Rip up a page or two from your gardening magazine, I used the writing but you could use pretty pictures if you prefer. This would work well with old seed catalogues too if you have those to hand.
Cover one of your 3” squares of corrugated card with your glue and then cover with the scraps of magazine. Add more glue to layer up the scraps of paper until the whole square is covered. I tried to make sure a few gardening or flower themed words were on show.

Allow to dry then trim the excess. Last time I made these little collages I folded the excess around the edge and glued it to the back. This time I just trimmed it off. I was just experimenting really, both methods work well.

(This photo is from my previous tutorial so it’s not this version of the mini collages, but I forgot to take photos this time round, ops!)
Apply glue to the back of the collage 1/2” in from each edge and fix the ends of a 16cm 6” length of ribbon to form a hanging loop. I used undiluted PVA for this. These little collages are not heavy so it was plenty strong enough but you could also use a hot glue for this.
Apply more glue all over the back of the collage and then glue on the other 3” square of card, the undecorated one.
Press the little collages under a nice heavy book or 2.
(Confession time - I actually messed up and decorated the fronts of my little floral collages before I added the ribbon and back. BIG MISTAKE! Don’t do that! Do as I say not as I do. It’s really awkward to weight the little collages down to secure the ribbon and backs if the front is decorated!)
Decorate the base
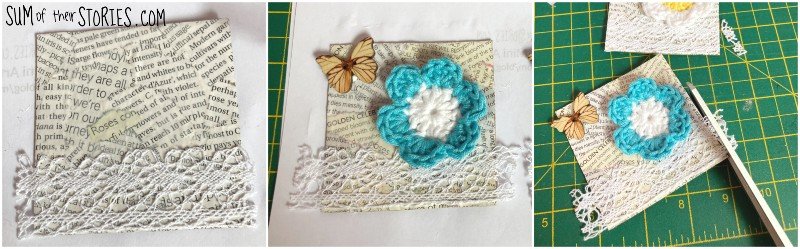
Cover the whole decorated card square in a layer of glue and then apply lace along the bottom. Use undiluted pva glue to apply a crochet flower and any other embellishments you have, like the butterfly buttons I used. Trim the lace once it’s dry.
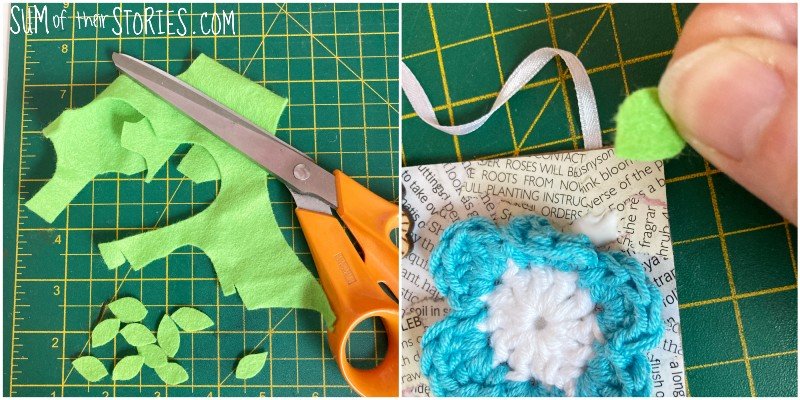
At this point I decided it needed just a little something extra so I cut some little leaves from scraps of green felt and glued them in place.
Play around, experiment with what you have in your craft stash, have fun.

Ways to use your mini collages
You can write a message on the back and send it to someone special inside of a greeting card or hang them up in a little space that that needs brightening up. They could also be used as a gift tags for a really special gift.
If you leave off the ribbon and glue a magnet to the back instead you could turn your little collage into a fridge magnet. They could even be adapted to make a greeting card.
Julie
I’ll be sharing this craft tutorial at some of these link ups
Now let’s take a look at the other Flower themed craft projects with a sustainable twist from my creative friends:
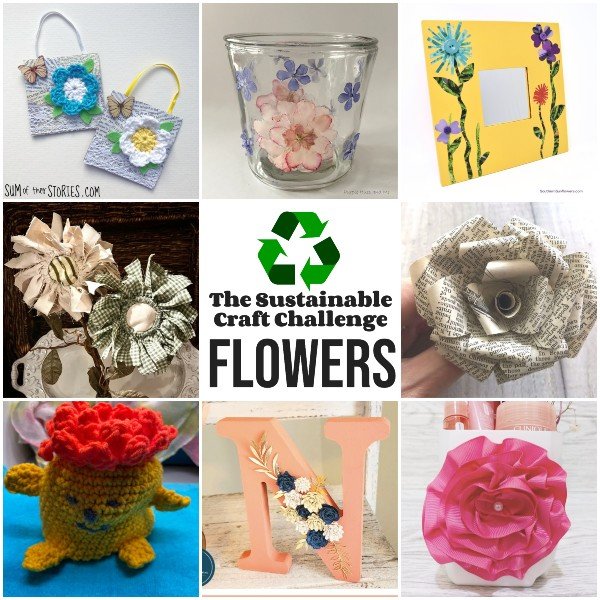
Christine | Christine’s Crafts | Gorgeous Book Page Roses
Gail | Purple Hues and Me | Ironed Pressed Flowers Glass Vessel
Mel | Decor Craft Design | DIY Flower Gift Bucket For Mom
Allyson | Southern Sunflowers | How to Update a Thrift Store Find with Paper Flowers
Niki | Life as a LEO Wife | Floral Wood Letters with Free Rolled Flower Cut Files
Julie | Treasures Made From Yarn | Flora the Reversible Doll
Shelly | Mimi A Great Name for Grandma | Mason Lid Fabric Flowers


