Simple Mini Crochet Flower Pattern
/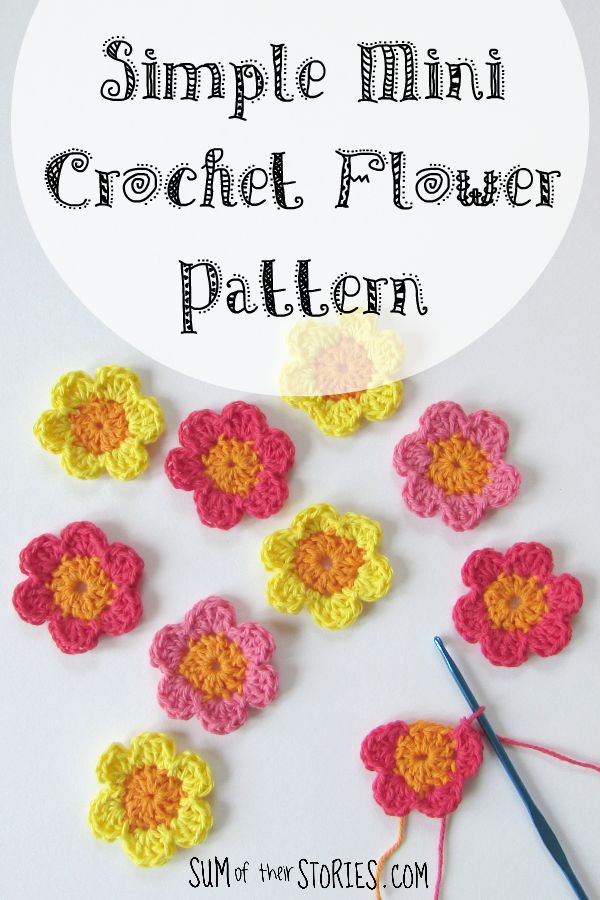
When I learnt to crochet, over 10 years ago, it was because I’d seen crochet flowers and wanted to learn how to make them. Of course I can now crochet other things too but I still have a special place in my heart for a crocheted flower. Over the years I’ve collected dozens of crochet flower patterns and tried all sorts of methods so when I needed little flowers for some card making the other day I just made up these little flowers as I went but made a few notes so I can share them with your here.
This pattern is in UK crochet terms so you’ll need to translate them if you work in US terms. I have got an easy print ad free version available very inexpensively from my Etsy shop here which has both UK and US versions if you prefer it done for you.
The size of your flower ends up will depend on the thickness of your yarn and the size of hook you use.
For these little flowers photographed I used lace weight or 2ply cotton yarn from Tiger and a 2.25mm hook.
They are 3.5cm in diameter.
Simple Mini Crochet Flower Pattern
Crochet Terms: (remember I’ve used UK terms)
Trb - treble
Htrb - half treble
Sl St - slip stitch
Start with a magic circle.
Wrap the yarn around 2 fingers, crossing it.
Poke the hook under the front strand and pick up the back yarn.
Pull it through.
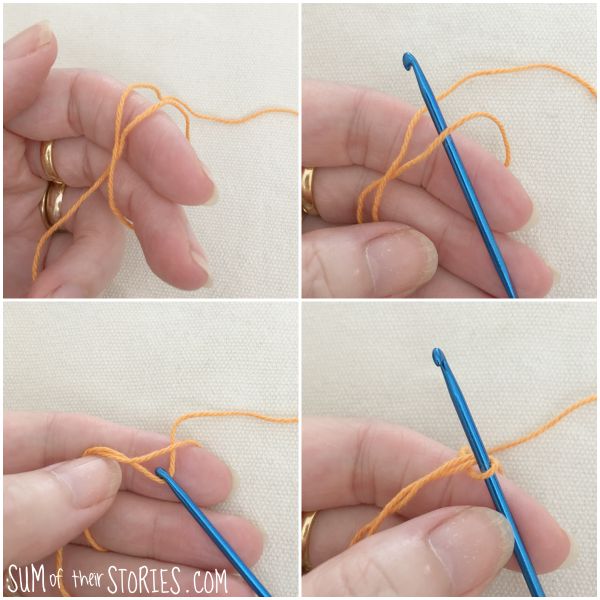
(If you prefer you can start the flower with a ‘4 chain, Sl St into 1st chain to form a loop’ rather than the magic circle)
Round 1:
Chain 3,
Work 11 trbs in the magic circle,
Pull the loose thread from your magic circle to pull the stitches into a circle,
Sl St into the top of the 3 chain to close the circle.
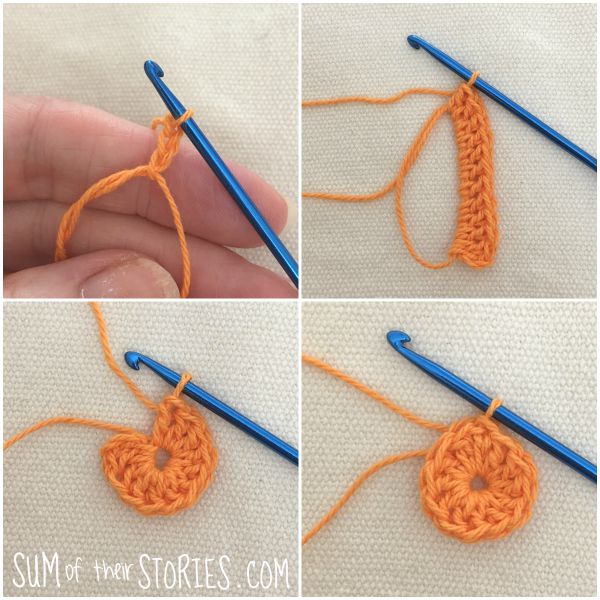
Cast off. It should look like this:
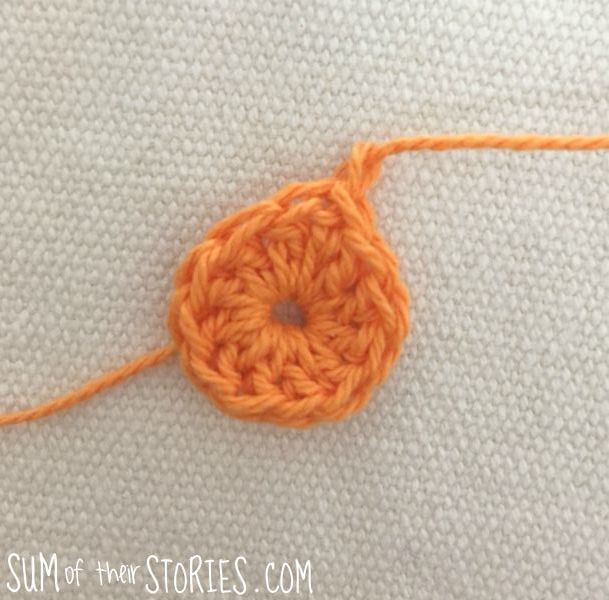
Round 2:
Join your second colour yarn 5 stitches away from your finishing knot from round 1.
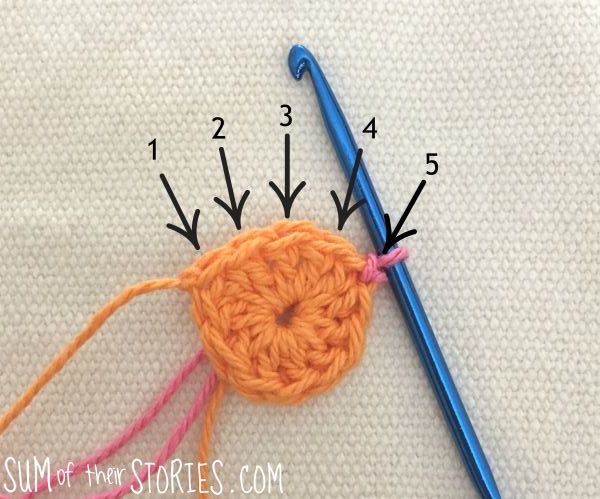
Joining in this stitch is optional, you can actually start anywhere but starting here means you can work the upcoming stitches in stitches 1 – 4 and work over the tail of the yarn you have just started easily – less sewing in of ends!
Also, the stitch labelled in the photo as 1 is always a bit small and tight, this means you want this to be one you Sl St in, it just makes it easier for you.
* In the next stitch work 1 htrb, 3 trb, 1 htrb (all in the same stitch)
Sl St in the next stitch.
repeat from * 5 more times.
The last Sl St will be in the same stitch that you started the round.
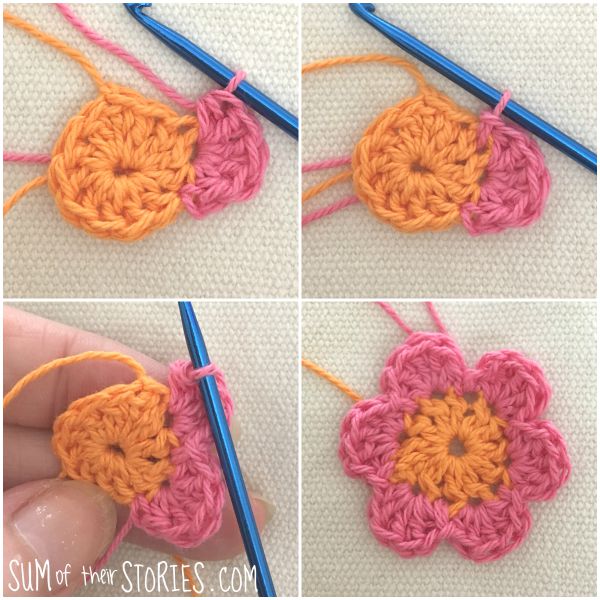
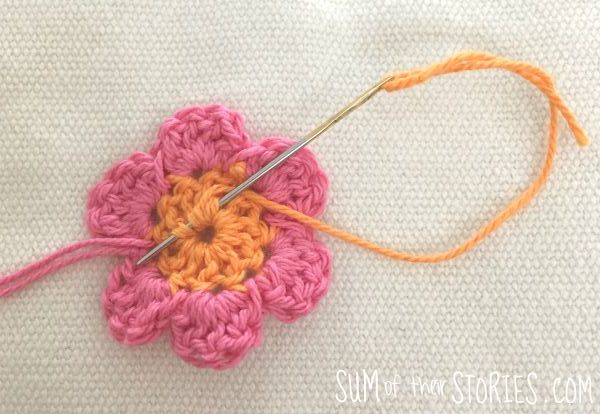
Cast off and then sew in the ends.
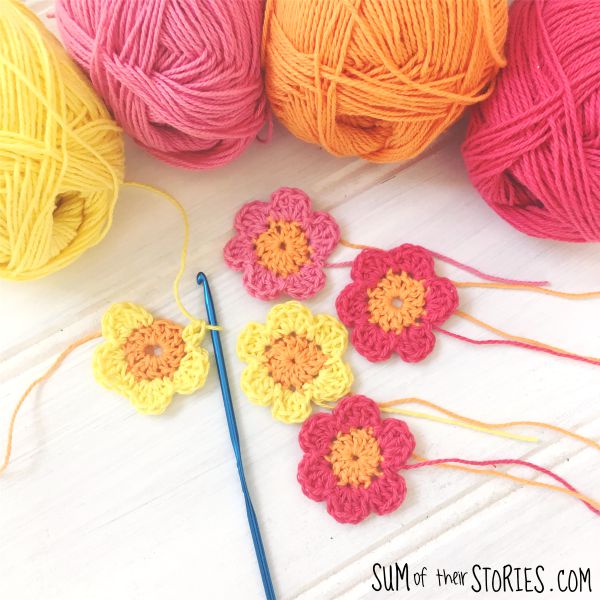
That’s it! Your little crochet flower is done.
Use it as a card topper, on a gift tag, applique it onto something, string loads together as a garland, sew them onto your sun hat, attach them to a hair clip, whatever takes your fancy.
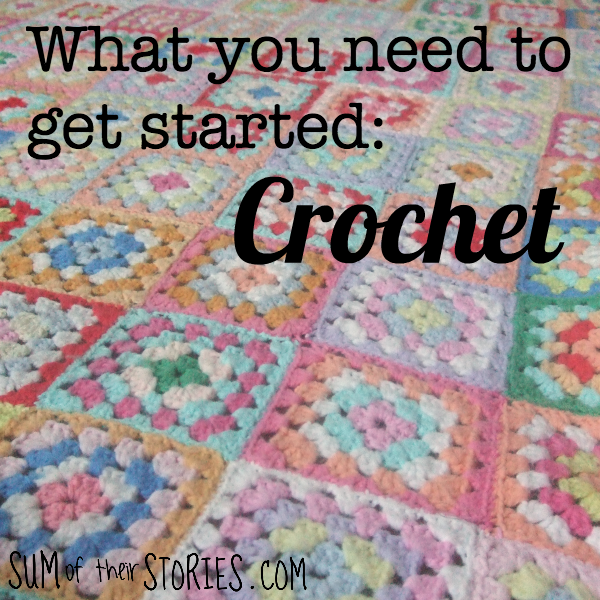
If you’ve never crocheted before and have always wanted to learn how to then you might like to check out my article “What you need to get started Crochet” that lists the essentials that you’ll need to get going.
Cute eh?! And with only 2 rounds they take no time at all!
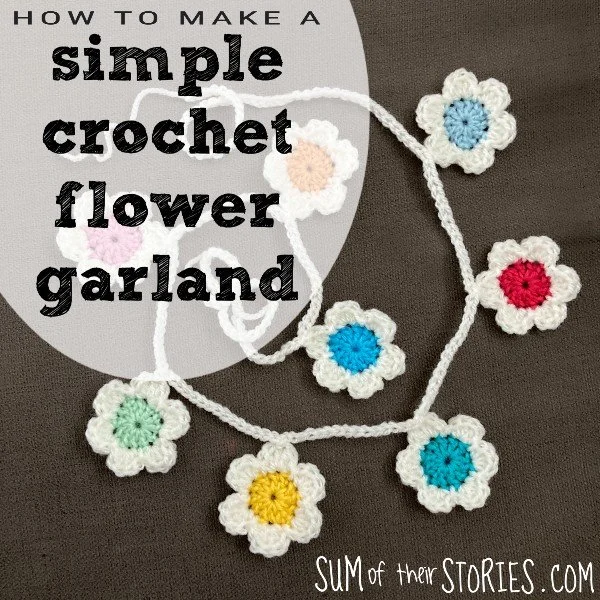
Update: I’ve made this same pattern in DK yarn (light worsted) and a 4mm hook. They come out slightly larger at 5cm (2”) in diameter. I made them into a garland this time, if you want more details on how to do that it’s here: Crochet Flower Garland

If you want to buy the easy printable version of the pattern you can find it here in my Etsy shop.
Julie