

Turn Garment Swing Tags into Gift Tags
/
Don’t throw away those card tags that all new clothes seem to come with. They are easy to upcycle into gift tags in just a few minutes.
It’s time for another Do It Over Designers challenge when I join some of my creative friends to bring you some new ideas to take something old and do it over into something new. Stay tuned at the end of this tutorial to find all the other entries to this month’s challenge.
I make a lot of my own clothes and often buy from charity shops and websites like Vinted so I don’t actually buy that much brand new. I try to reduce my impact on the planet and it’s resources as much as I practically can however I’m not puritanical about this and occasionally, if I see something I really love I will buy new.
New clothes seem to come a whole collection of swing or hang tags these days. Goodness only knows why they need so many! The good news is that you don’t just need to throw them away, they can easily be turned into gift tags. Better to use something twice than just once, right?
All you need are some pretty paper scraps, a few embellishments saved from old greeting cards, scissors, a hole punch and some glue.
Let’s get started:
How to turn clothing swing tags into cute gift tags
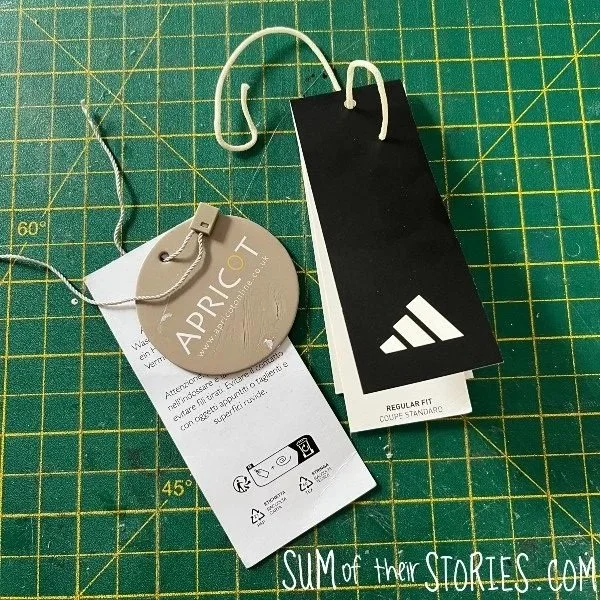
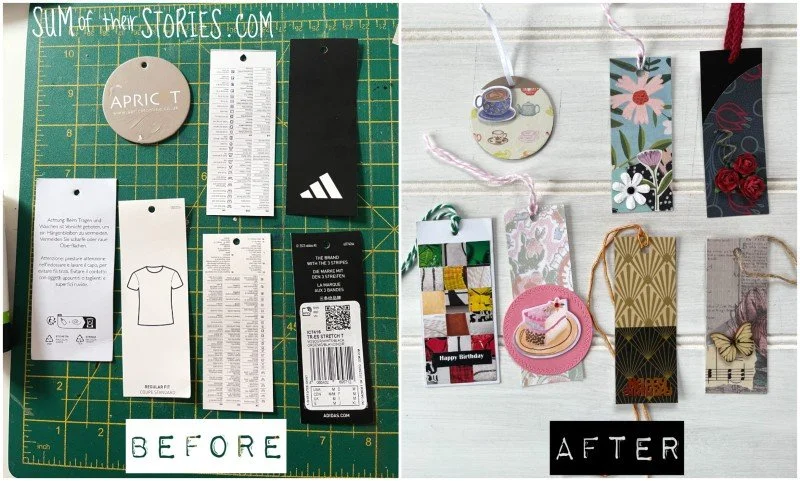
I recently bought myself a jacket and my husband bought a new t shirt for the gym. These 2 purchases gave us all these tags:

Bonkers, right?
2 of the gym top tags were folded too so when I cut them in half I ended up with 7 tags from just 2 garments.
Not too worry, all the better for my gift tag making.
What you need to repurpose garment swing tags into gift tags
a selection of garment swing tags
decorative paper
embellishments
glue - a stick glue for paper and a strong PVA or hot glue for embellishments
scissors
hole punch
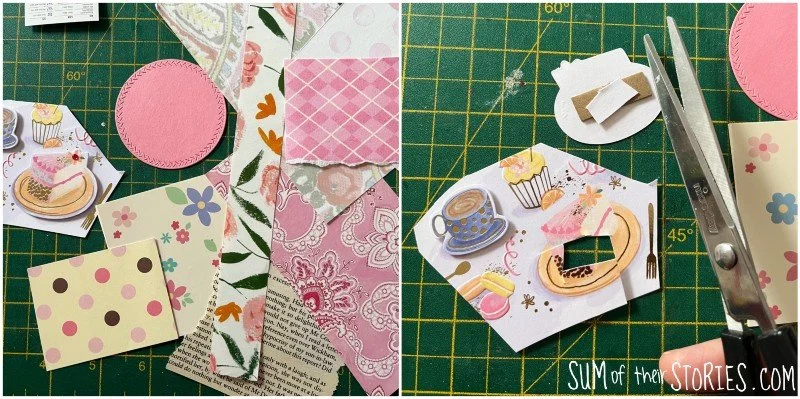
Decorative paper
If like me you have been a paper crafter for any length of time then I assume you will have a sizable paper scraps collection.
I try to limit mine to just one large shoe box. Whenever the lid won’t close it’s time to make some scrappy paper cards or tags.
Part of my problem is that every bit of pretty card or paper has such possibilities so I really don’t like to just throw them away.
If you don’t have a stash of decorative paper scraps you can still turn your garment swing tags into gift tags but you’ll need to be creative when it comes to finding paper to cover them. A quick look around and you are bound to find something:
Advert pages of magazines and junk mail
the pages of a gardening magazine
colourful envelopes that birthday cards came in
the inside of business envelopes with their geometric patterns
old birthday cards
wrapping paper
colourful packaging
Embellishments
You can make your gift tags feel extra special by adding 3d embellishments. Again this is an area where I have a substantial stash. I collect anything I think can be used again so have divided trays of buttons, sequins, fabric flowers, bits of lace, flat backed gems etc.
I pull bits from old birthday cards, collect sequins from the table at weddings (yes, I’m that person and I’m not even a bit sorry!), save broken costume jewellery etc. It really doesn’t take long to acquire a nice hoard of craft supplies for free!
Covering and decorating your swing tags to make gift tags
Exactly how to decorate you tags will depend on what supplies you have to work with but let me show you how I created each of mine to give you some ideas and explain the basic process.
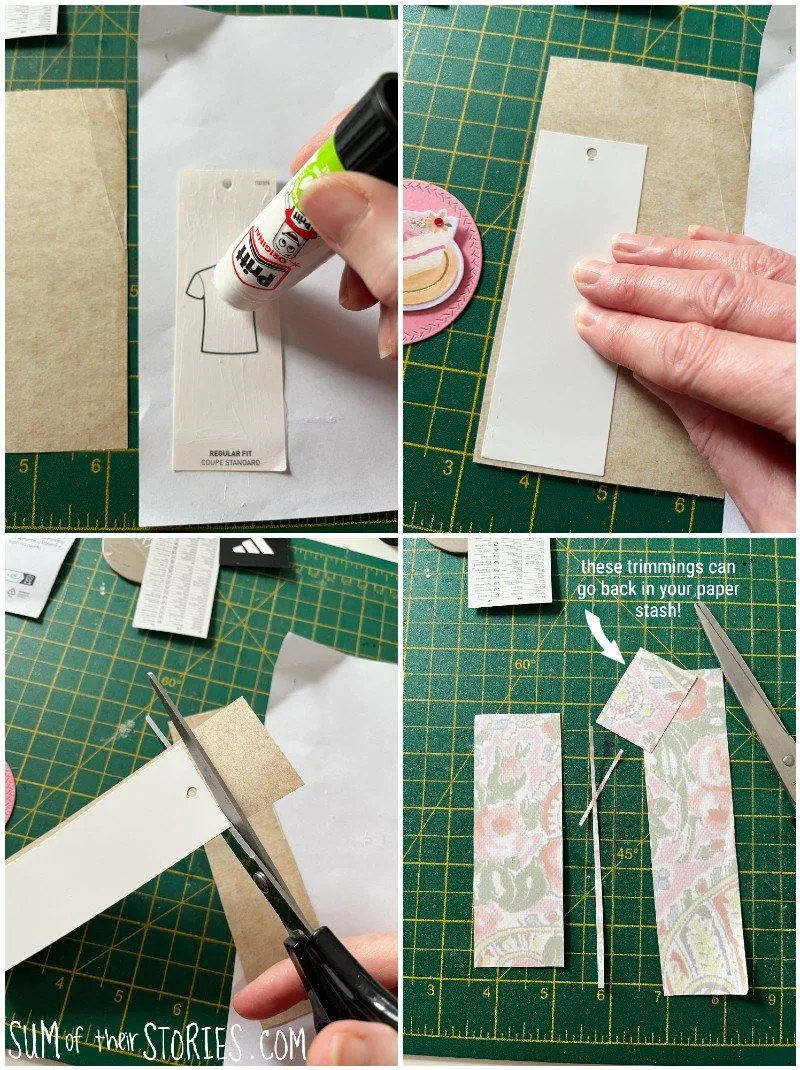
Apply glue to the swing tag and then press it down firmly onto the back of your decorative paper. Once the glue is dry trim the excess paper.

Then add embellishments.
If you covered the hole you’ll need to punch it again.
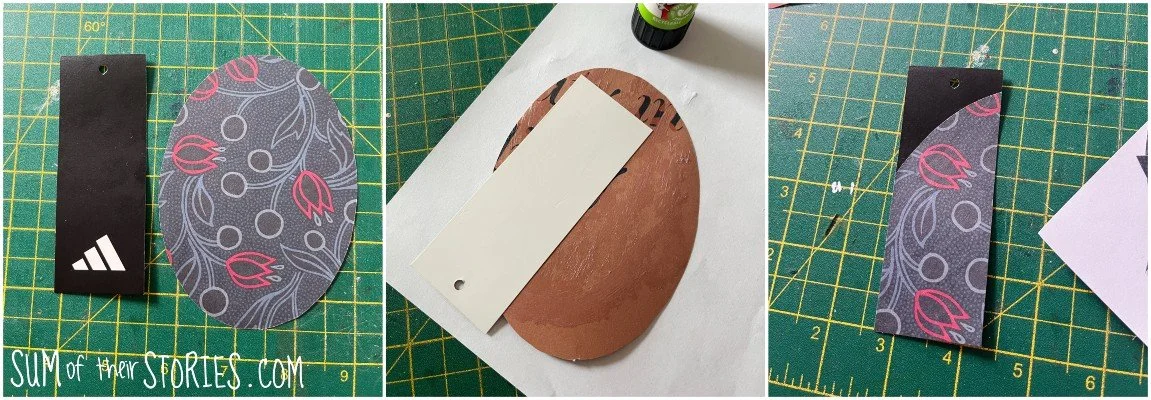
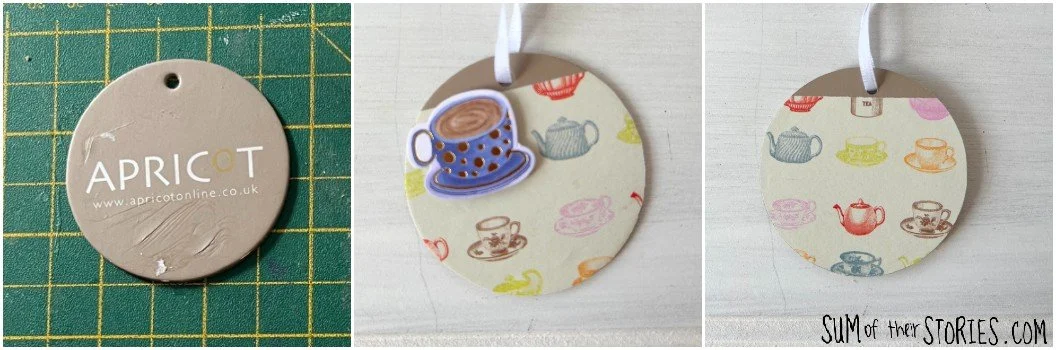
You might not want to cover the whole swing tag in patterned paper, maybe just a section with a logo like this one.
Some swing tags are blank on one side whilst others have print on both sides. Cover whatever you don’t want to see. This tag was actually blank on the reverse but as I had a little of this paper left I added a small amount on the other side too. Then I added a little bunch of paper roses that I saved from some fancy chocolates packaging last Christmas.
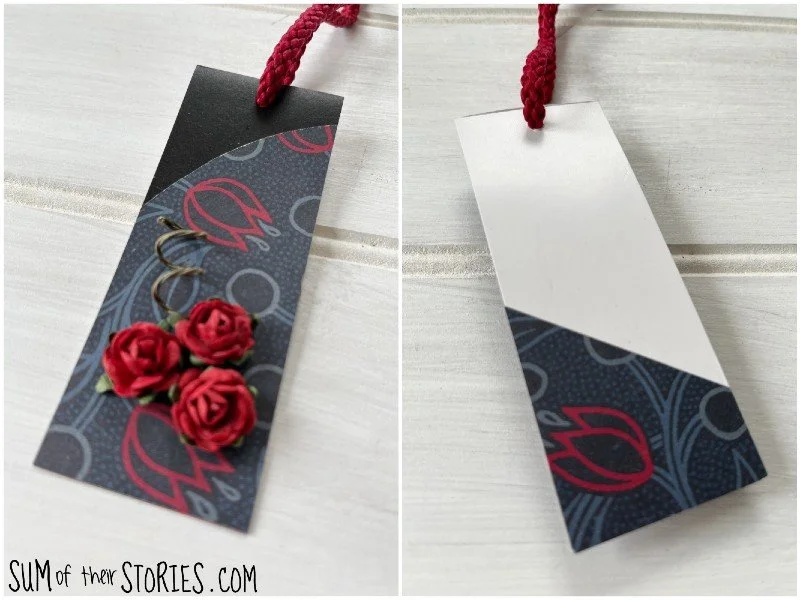
You’ll need a stronger glue for embellishments like these roses, a strong tacky PVA is ideal or a tiny blob of hot glue if that is what you have.
Colourful Junk Mail Collage
Just to show you how you can still upcycle your swing tags into gift tags without a large paper craft stash I tried an idea with junk mail.
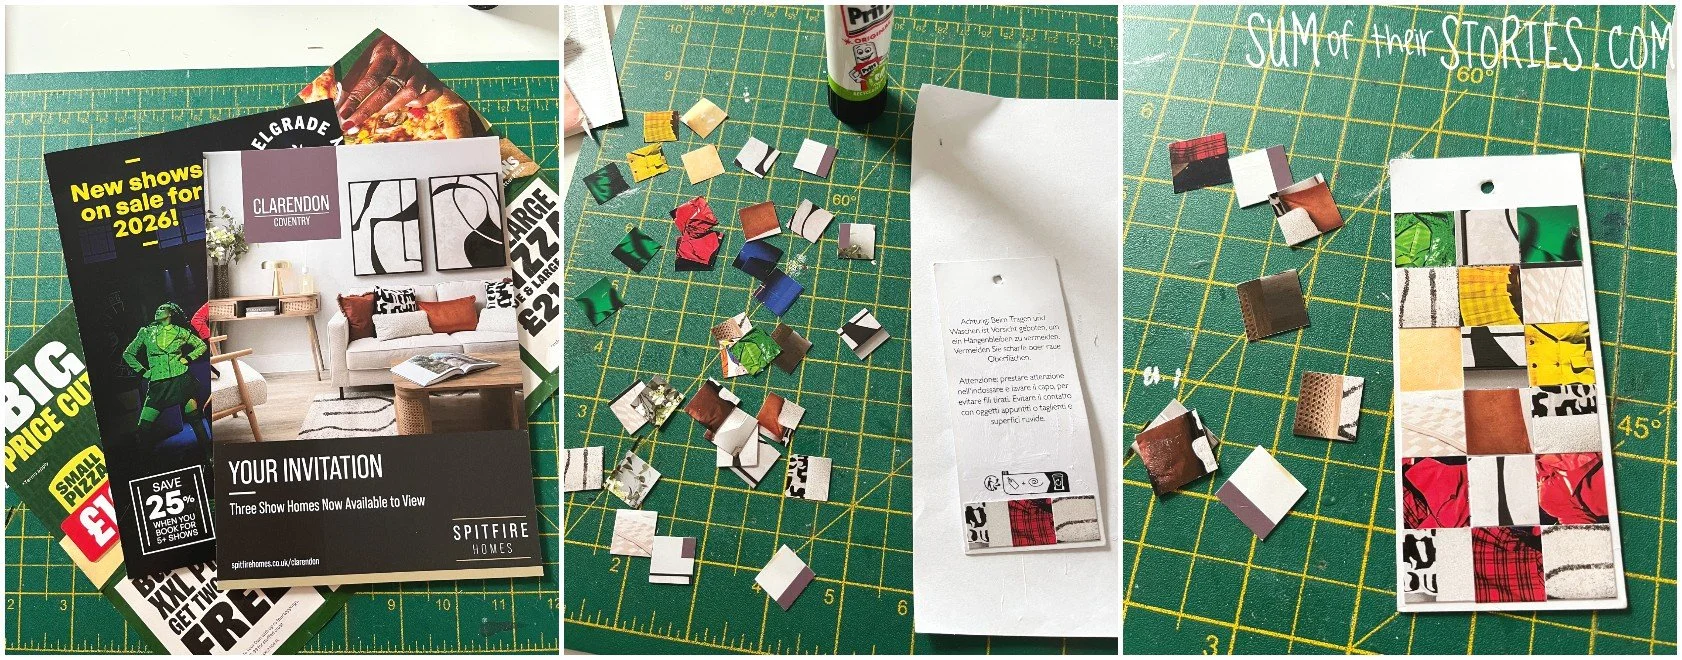
I cut tiny 1cm squares from some colourful parts of the junk mail and then just glued them on to a swing tag.
Easy, effective and free!
You could try paper weaving with strips of junk mail for a similar effect if you prefer. I explain how to paper weave on this greeting card.
More upcycled gift tags examples
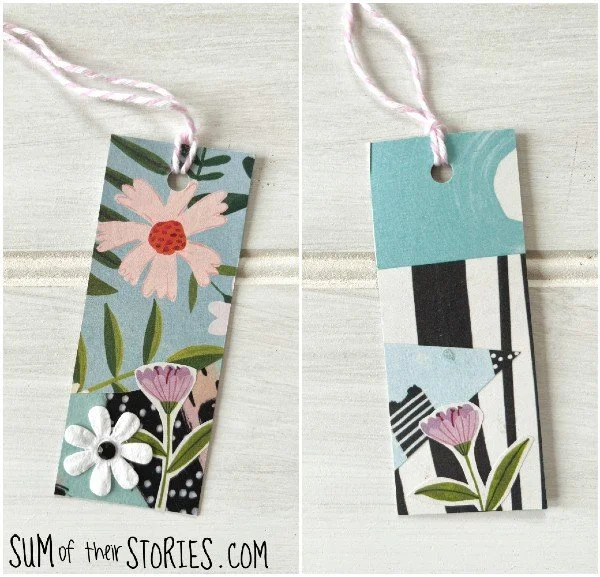
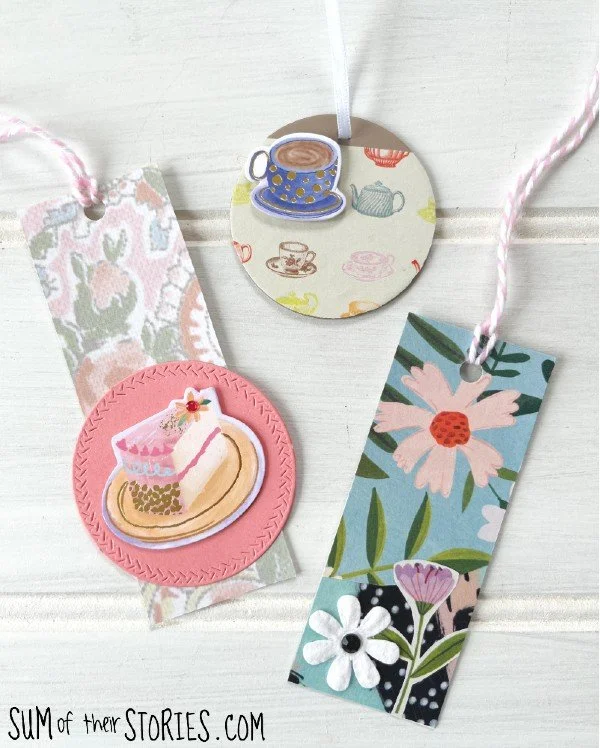
This tag is covered with pretty paper on both sides, with some additional cut outs and a paper daisy saved from an old birthday card.
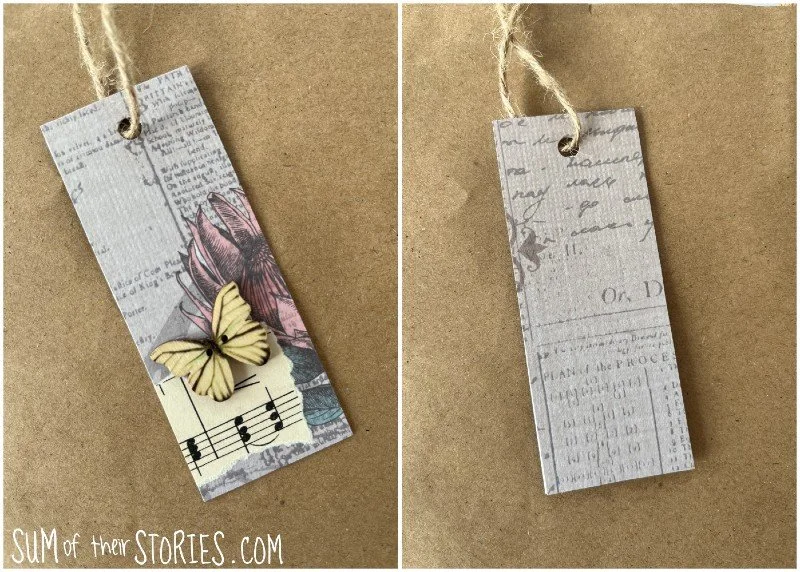
This tag is again covered with pretty paper and then topped with a scrap of old sheet music and a butterfly button - another little treasure I’d saved from an old birthday card.
This round tag has a logo on both sides so I covered it with some cute tea cup paper and used this tea cup that was on that same old birthday card as the slice of cake on the first tag.
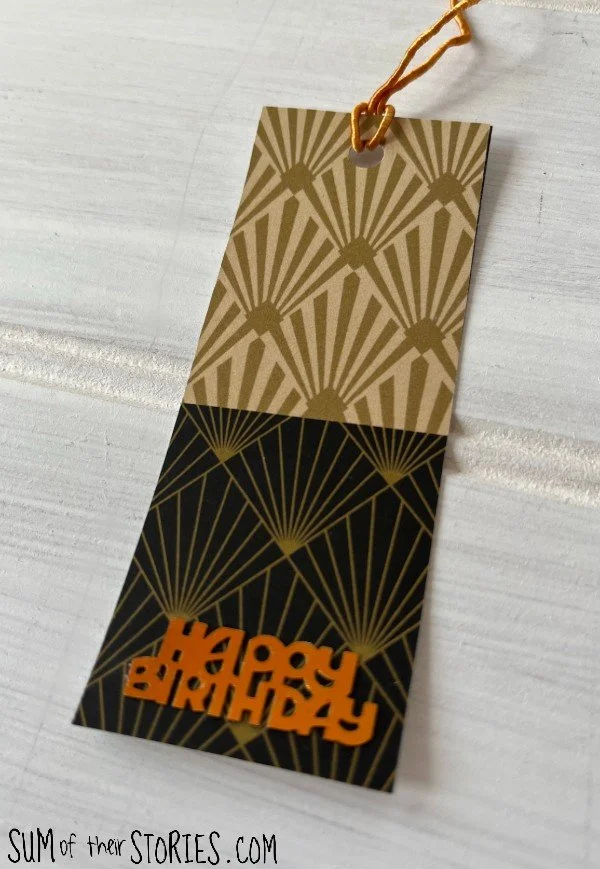
This tag is blank of the other side so all it needed was some art deco black and gold paper and a Happy Birthday sequin/table sprinkle that is actually more gold in real life than it looks in these photos.
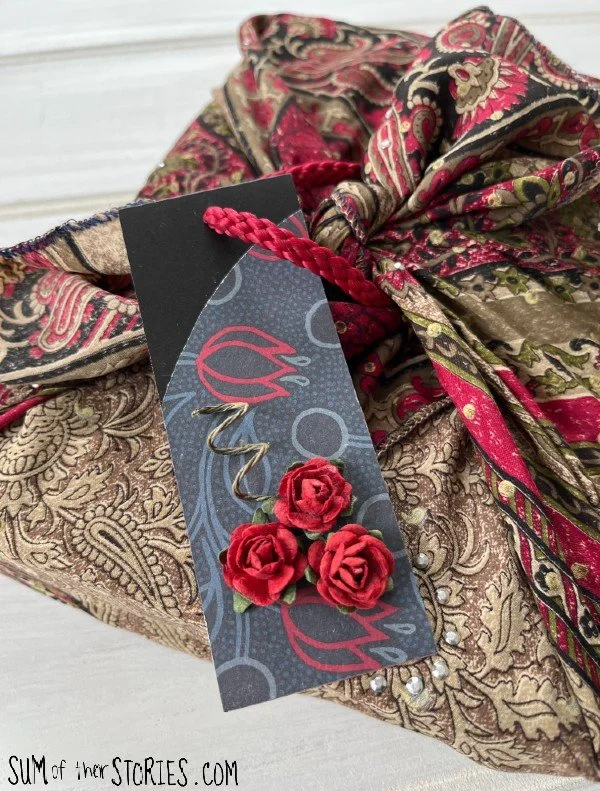
Have you tried wrapping gifts in reusable fabric instead of paper? It’s called furoshiki in Japanese and is something I got interested in last year when I was given a pack of fabric especially for gift wrapping by some friends who had just visited Japan.
It makes perfect sense, because it can be used over and over. I’ve been using scarves that I can pick up in the charity shop for next to nothing, these upcycled gift tags make the perfect accompaniment!

So next time you treat yourself to something new to wear why not keep those swing tags and turn them into useful gift tags. You might make a tiny dent in your craft stash at the same time.

Now let’s check out the other entries in this month’s Do It Over Designers Challenge:
Exquisitely Unremarkable - Easter Bunny Table Runner to Pillow DIY
Little Vintage Cottage - Damaged Nancy Ann Doll Upcycle
Modern on Monticello Grapevine Wreath Maoveover
Pandora’s Box - Recycled Paper Bags
Purple Hues & Me - Soda Can Pansy Wreath
Unique Creations by Anita - Wooden Wind Spinner from Deck Board
Vintage Style Gal - Faux Stained Glass Door Makeover
The Apple Street Cottage - Curtains from a vintage petticoat


