Jewellery Box Makeover
/Take an old jewellery box and give it a pretty, fresh new look with spray chalk paint and some paper napkin decoupage.
The Pinty Plus spray paint used for these projects was provided by Novasol for me to try.

I'm so excited to share this project with you. It's been a LONG time in my brain so it's nice to have actually got it done and ready to show. For years I've been pinning tutorials for old jewellery box makeovers, I love how fresh and new a tired old jewellery box can be made to look with just a little paint and imagination. I bought a couple of jewellery boxes in a charity shop over a year ago and they've sat in the bottom of the wardrobe whilst I researched/procrastinated over what I should do with them.
Then I met the lovely people from Novasol Spray UK who introduced me to Pinty Plus Spray Chalk Paint. They provided me with a couple of cans in exchange for my honest review .... and I can honestly say I am a little bit in love! This stuff is VERY cool. Obviously that statement is my opinion, not a scientifically proven fact or anything!
So now I had the paint, I picked up some pretty paper napkins/serviettes in the supermarket and finally all the pieces were in place. My dream of updating an old jewellery box was happening. Even better I had 2 to do, I'll go through them one at a time.
To give an old jewellery box a pretty modern makeover you will need:
An old jewellery box (in technical terms this is called stating the obvious!)
A can of Pinty Plus Chalk Spray Paint - mine was in Broken white. (You can buy it on Amazon here)
A paper serviette/napkin
Mod Podge and a brush
Sandpaper
Mini screwdrivers
Scraps of cardboard and masking tape
Some sort of sealant. There is one available in the Pinty Plus range but I used up some clear matte sealant that I already had, left over from other projects.
Prepping a jewellery box for painting
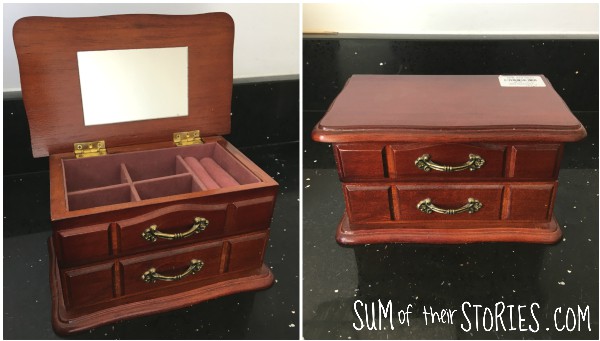
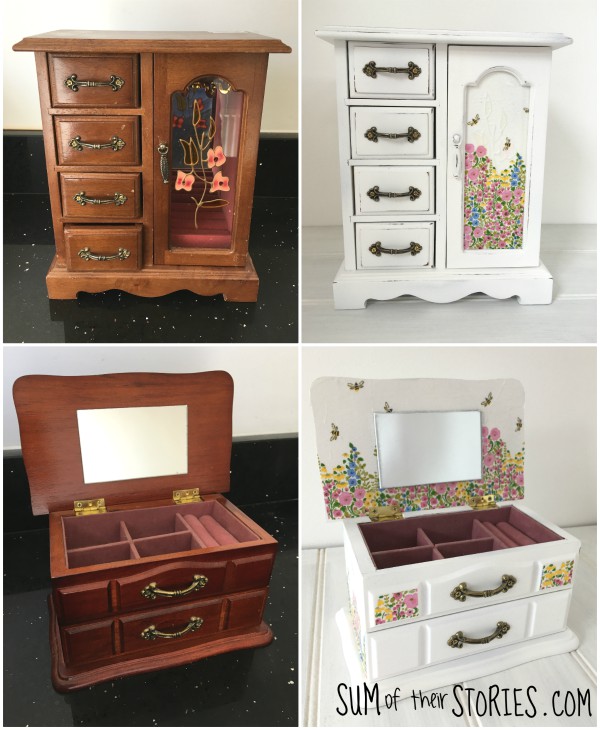
First let's look at this tall 'wardrobe' style jewellery box, a little bit scuffed but otherwise in good condition.
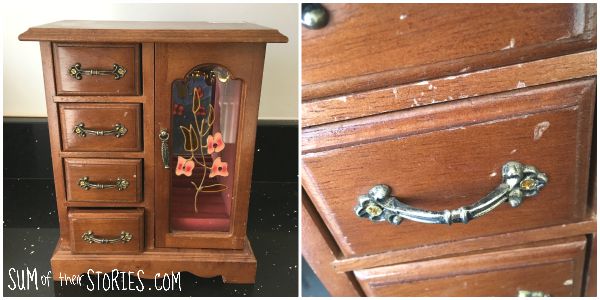
The first thing to do is take it apart as much as possible, remove all the hardware that you can. Keep all those hinges and screws safe in a little pot, you will need them again later.
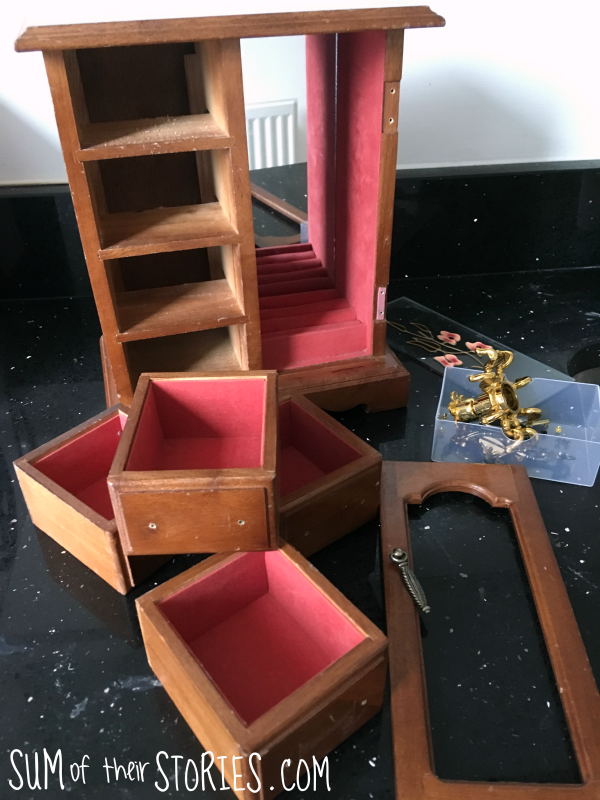
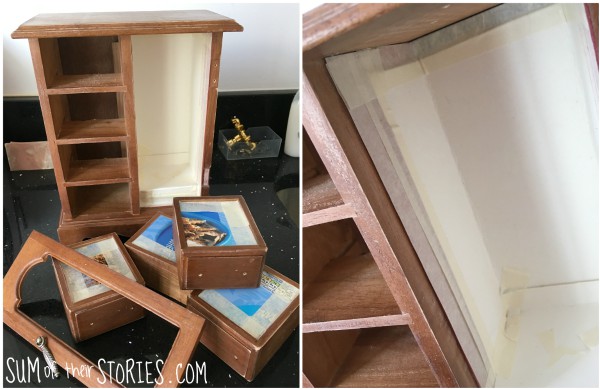
Give the jewellery box a light sanding and then a good clean to remove all the dust. When it's dry, use scraps of cardboard and masking tape to cover any of the interior of the jewellery box that you don't want to spray. If your insides are very marked you might want to spray them too, mine were fine so I covered it all as best I could.
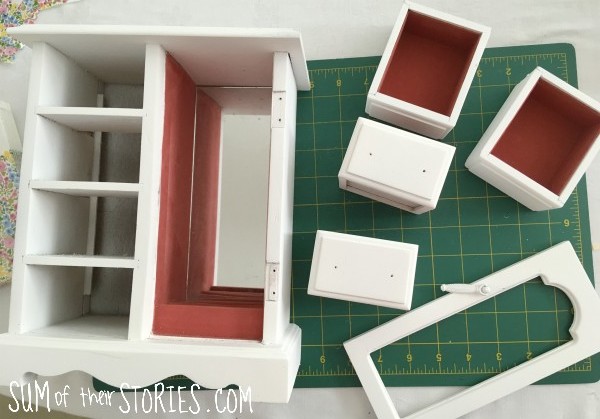
Now get spraying. I have a giant cardboard box that I keep for spray paint projects which just saves the garden from getting painted. I always spray paint outside, I think that's just good practice. This chalk paint is water based and low emissions so I didn't need a mask, it really doesn't smell at all and covered well with 2 coats. I gave it about 2 hours between coats but that was mostly because I was doing other things in between, it would have been ready after an hour.

Once all the painting is done remove all the card and masking tape and admire your handwork.
Applying Paper Napkin Decoupage
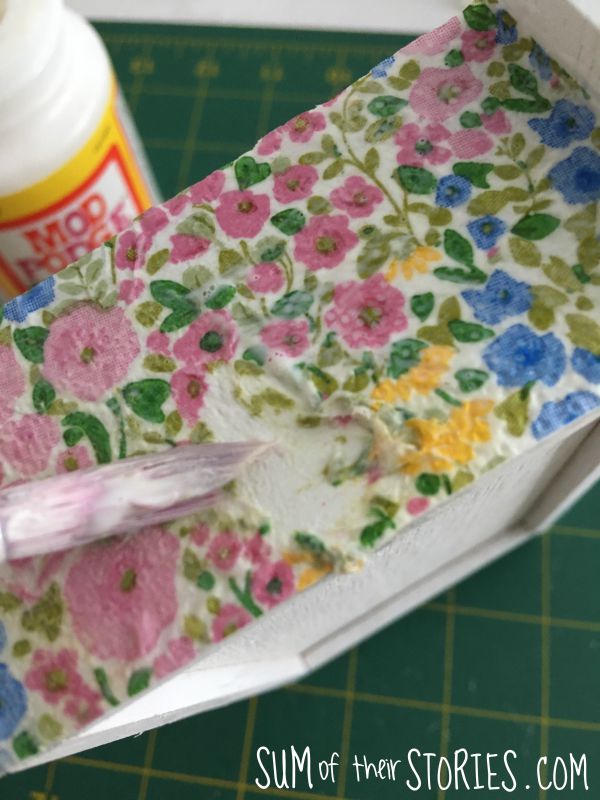
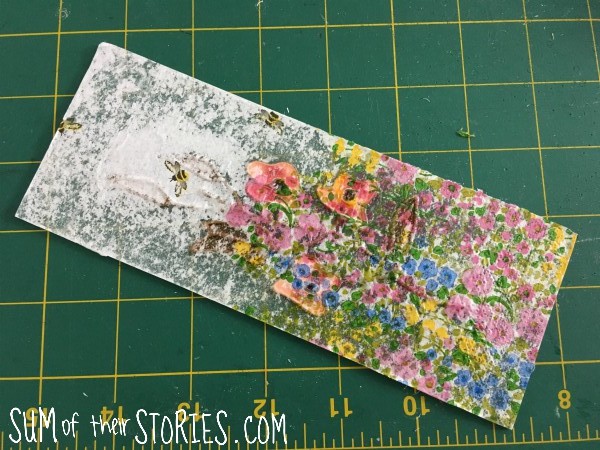
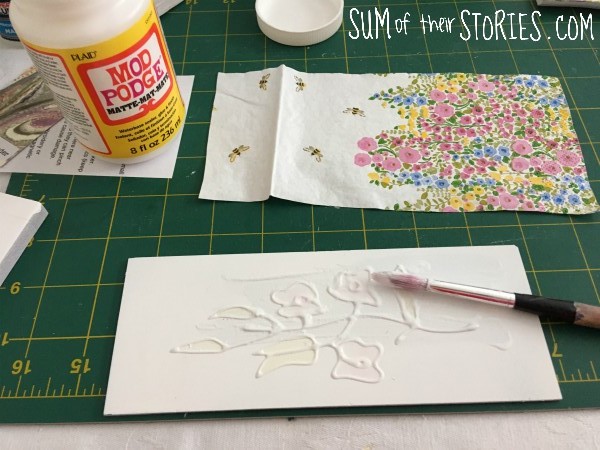
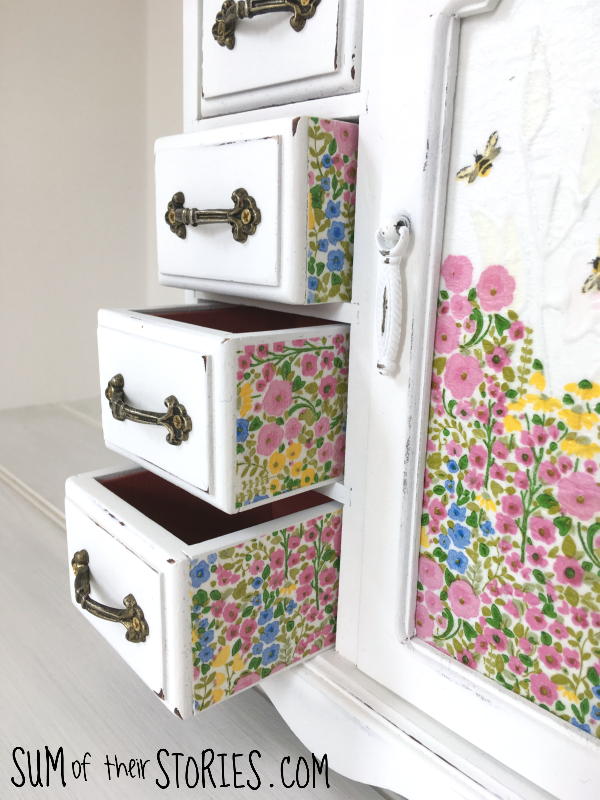
Next was the fun, pretty bit. I'd decided to add some pretty to the sides of the drawers and to the glass in the door. I cut pieces of the paper serviette to size and working on them one at a time I gave the sides of the drawers a coat of Mod Podge then applied the top layer only of the paper serviette.

I painted another layer of Mod Podge over the paper serviette but very gently. If you push too hard with the brush, this will happen.
Ops! If that does happen, don't panic, just peel it off, wipe with a cloth and start again.
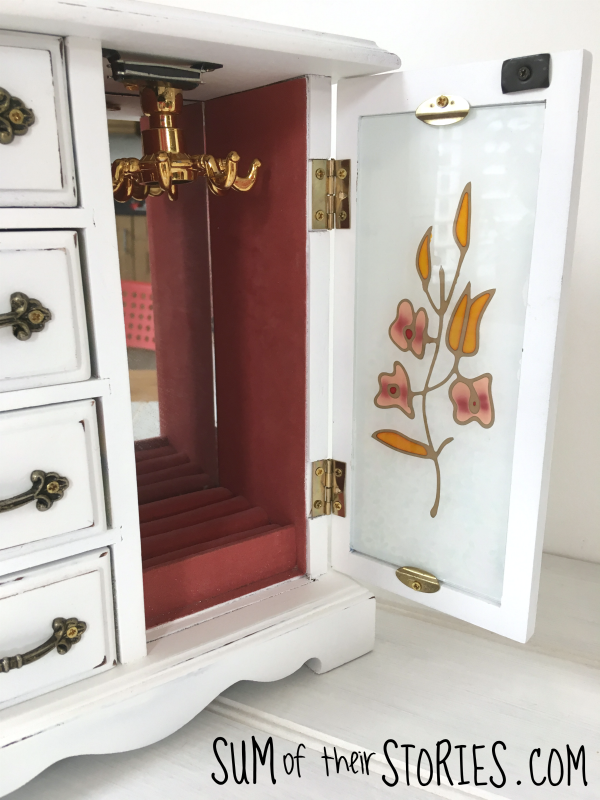
Once the drawers were done, I moved on to the glass.
I've seen jewellery box makeovers similar to this where the glass is swapped for chicken wire or a laser cut trellis type board. I'm all about using what I have to I thought I could just decoupage the paper serviette straight onto the glass. It turns out, NO, that doesn't work!
I thought the paper would go back to opaque after the glue dried but sadly it did not. Luckily it all came off with a little soapy hot water and I was ready to try again.
This time I spray painted the glass first. Much better! I just applied Mod Podge over the paint and applied the serviette top layer as before.
To finish off the jewellery box I did a little bit of light distressing with the sandpaper. Go lightly with this, it's easier to take more off than to put it back on!

To finish I gave all the surfaces of the jewellery box a coat of a clear spray sealant that I had left over from my Laundry Hamper Makeover and my Cath Kidston Bangle.
I don't want to blow my own trumpet or anything but isn't it lovely?!
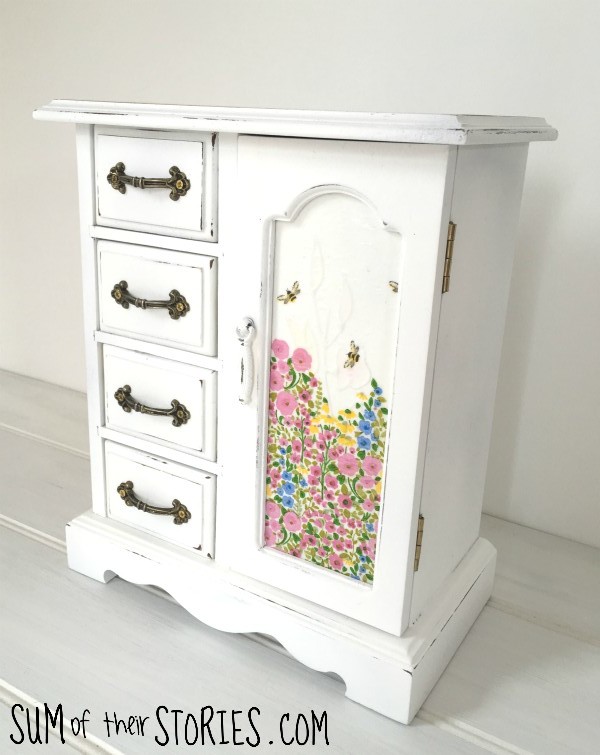
Inside I left glass so the original pattern is still showing. I could have sprayed it with the chalk paint too, or even covered it with more paper serviette but I don't dislike it so for now it stays.
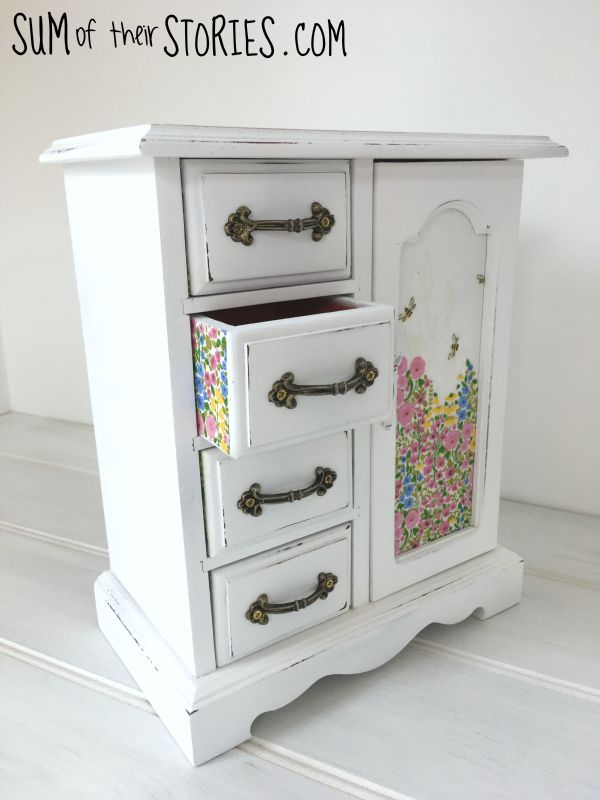
Isn't it just the prettiest jewellery box in all pretty jewellery box land?!
But wait... there's more! The second jewellery box I had fallen over in a charity shop is a little smaller, just one drawer and a lid that lifts up.
The process was the same, first I removed the hardware, lightly sanded and cleaned the jewellery box. Then I covered all the inside areas with scrap card and masking tape. I couldn't remove the mirror, I thought it might break if I prised it too hard so I covered it too.
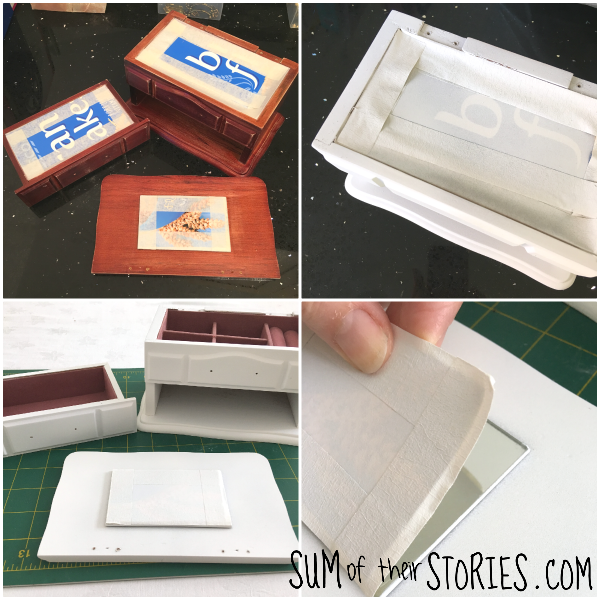
See how you can see me removing the card and tape from the mirror at this point. If you are revamping a jewellery box this way then leave the cover over the mirror for now. I jumped the gun and had to cover it again later. Doh!
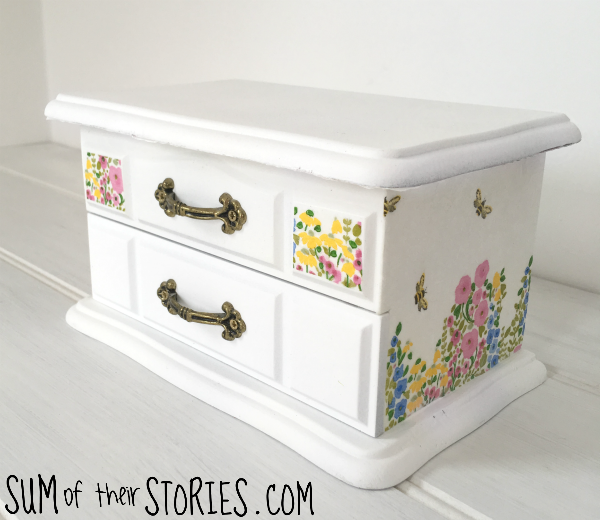
Then I added some paper serviette touches. First the sides of the drawers again (I love that) but this time I thought I'd try something a little different so I covered more areas with the patterned paper serviette. Because my paper serviettes had a sort of border design I added some to the sides of the box, the inside of the lid and two of the little raised square bits on the front of the box.
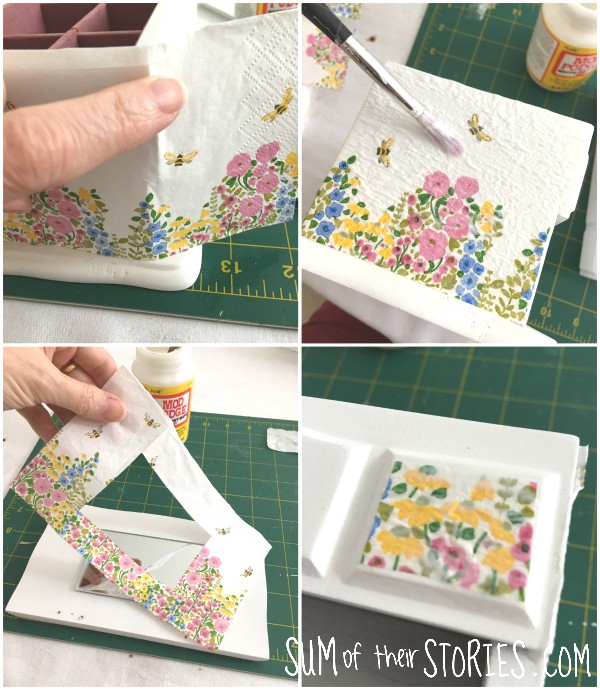
The easiest way I found to cut the serviettes the right size was to cut them approximately then lay the piece over the side of the box when it's dry (ie before you apply the Mod Podge) and smooth it with my finger to form a crease. That way I could cut along the crease and the paper piece was exactly the right size. I did the same to cut round the mirror.
The paper serviette was decoupaged on in exactly the same way as the tall jewellery box.
Once it was all dry I gave it a coat of varnish as before (This was when I had to recover the mirror, silly me!)
I left this one without the distressing, just to see the difference really.

I'm so so pleased with how these jewellery boxes turned out. As good if not better than I had hoped. The spray chalk paint made it quick and easy and the coverage is fantastic. The only draw back I could find is that I didn't have any paint if I'd needed to do a tiny touch up. On this project I didn't need to so it's no issue. I guess you could make a cardboard 'shield' with a small hole in it, or maybe do more masking off of areas if a touch up was needed.
Have you ever heard of spray chalk paint? Would you give it a try? Do you have an old jewellery box lying around that would love a new look?
Julie
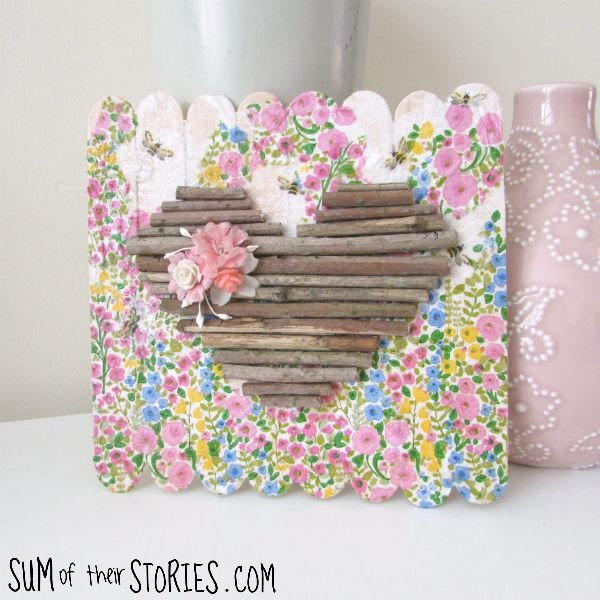
I love the pretty paper napkins I used for these jewellery box makeovers that I used them for this pretty Mini Pallet Heart Art too:
I’ll be sharing this project at these link ups