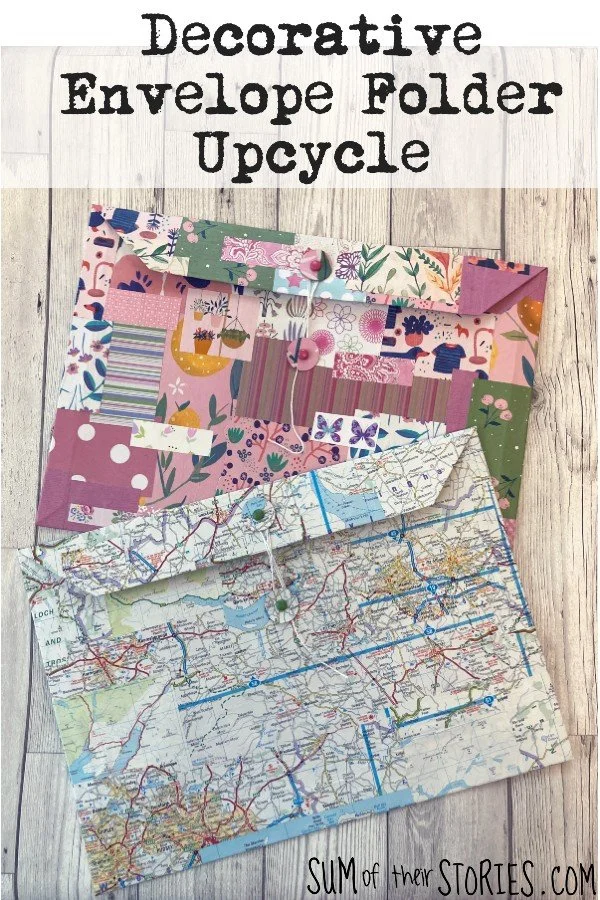
Decorative Envelope Folder Upcycle
/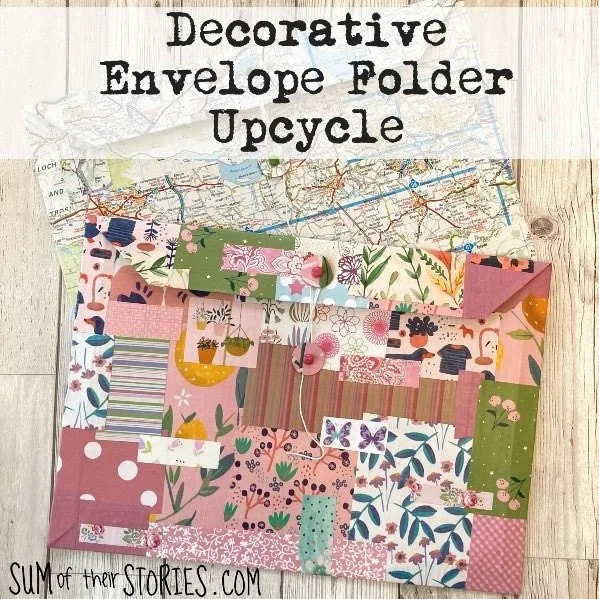

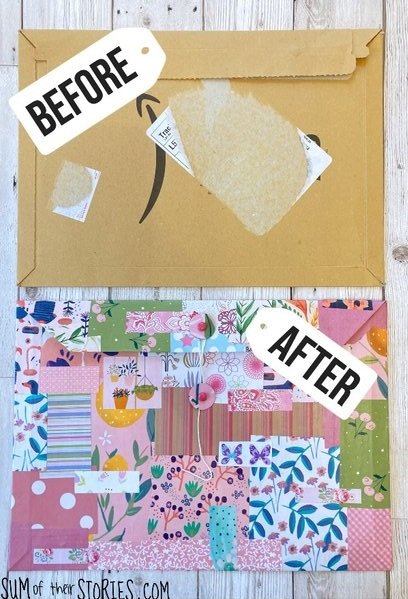
Upcycle your card packaging and turn it into a beautiful and useful decorative envelope folder.
Today I’m joining the “Do It Over” Designers to bring a selection of creative ideas to upcycle, recycle and breathe new life into something old and tired. More details on that at the end of this tutorial.
I spent quite some time trying to decide exactly what this upcycled card packaging should be called. Is this a wallet, a folio, a storage envelope, a pocket, a file folder? If it were made of plastic I’d call it a plastic wallet, but made of card I’m not sure I’d say “card wallet”! I don’t think it’s quite a folio, it would need to be more of an “open right out” kind of thing for that right? Although you could easily adapt the idea into a folio if that is what you wanted.
Whatever you call it, this is such a fun thing to make. It’s easy and very satisfying and is a fantastic way to use your paper stash. I don’t know about you but I have a considerable stash of small scraps of pretty paper that I just hate to throw away. Now and again I make some cards or some other papercraft with scraps but generally this only makes a tiny dent in my stash. This project really is a fabulous stash buster and will really use up some of your paper scraps stash. I can shut the drawer of the unit that I keep my tiny scraps in now - win win!
Decorative Upcycled Card Envelope DIY
To make your own decorative envelope folder you will need:
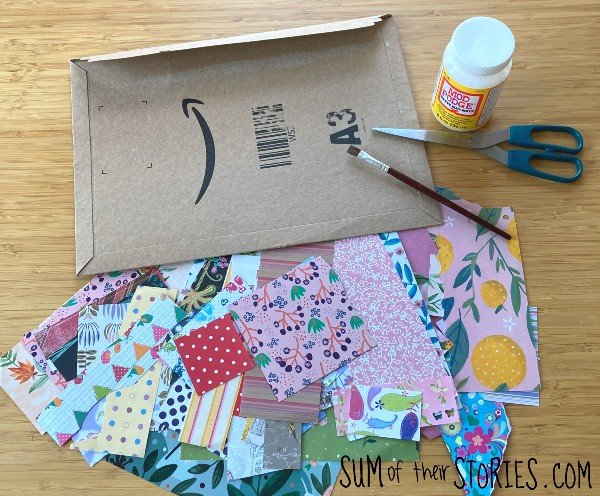
One of those card envelopes that Amazon seem to love putting almost everything in
Scraps of patterned paper - you’ll need quite a lot
A brush and scissors
A 1” circle punch (optional)
A small scrap of card
A length of twine - about 40cm (16”) is about right
My card envelope says A3 on it. This is a bit confusing as A3 is a paper size here in the UK and this is not A3 size! it’s 35cm x 25cm (14” x 10”) I’m guessing it’s different in different parts of the world, but actually size is not important here at all. You can make your decorative folder whatever size your card envelope is.
This is so simple it’s ridiculous. It’s also extremely relaxing and satisfying, but a little time consuming so I suggest you pop on a podcast or some music and get started.
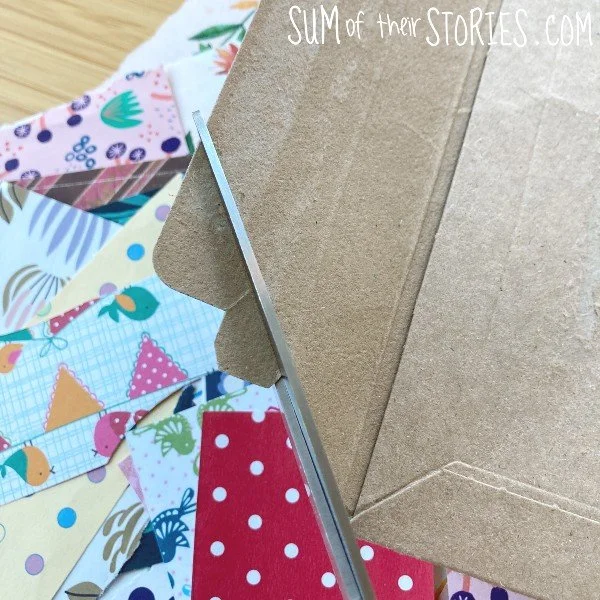
Prepare the card envelope
The first thing to do is to trim off any odd sticking out bits on the flaps of your card envelope, just to make it easier to cover.
Decoupage the card envelope
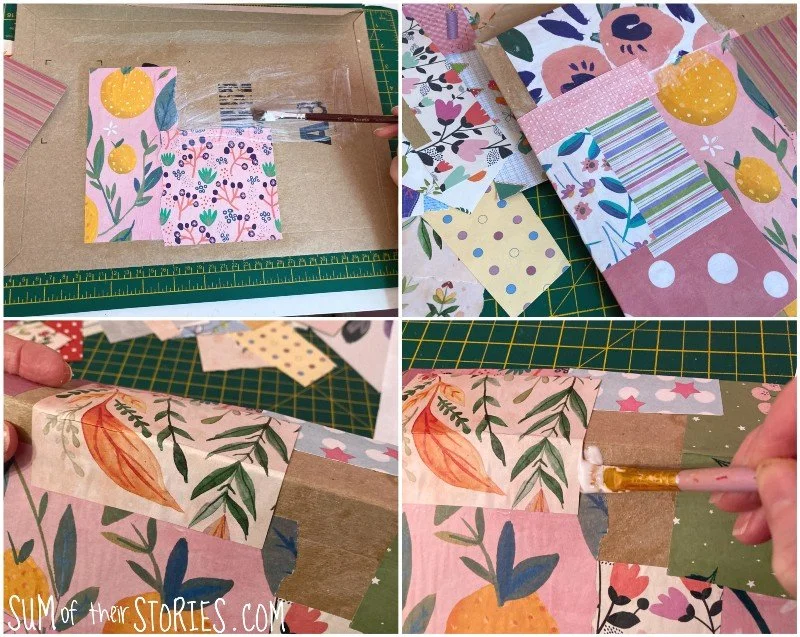
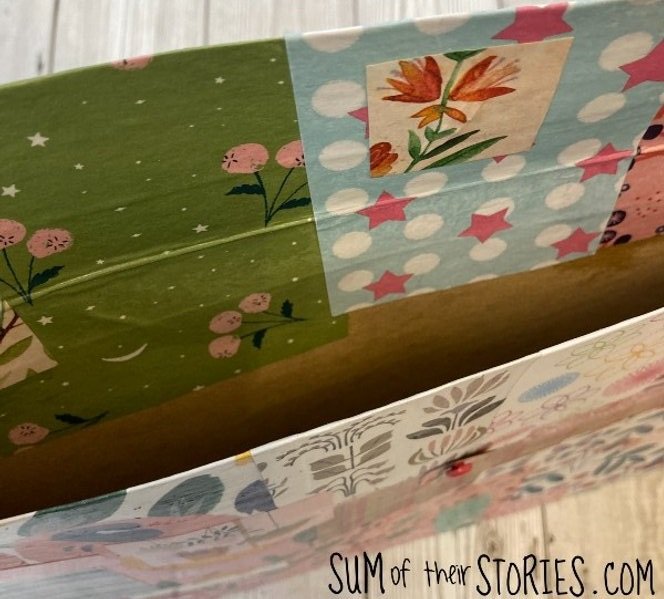
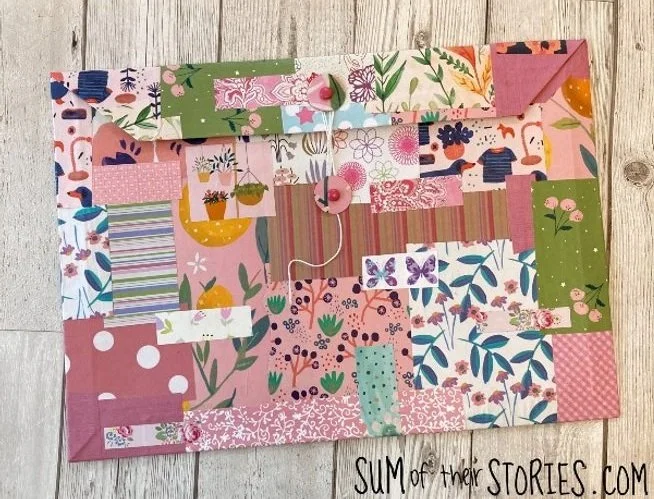
Now just paste scraps of paper all over the envelope. For the middle part of the envelope I found it easier to paste Mod Podge onto the card and then apply pieces of paper onto it. When you get to pieces of paper which will bend round the sides to the back of the envelope or the inside then it’s easier to paste the back of the paper and turn it over and press it down. If you find you missed the edges a little just use the brush to get a little of the glue underneath.
When you are glueing the paper down to the inside of the envelope just make sure you haven’t got too much glue squiging out. Wipe away any excess so that you don’t glue the envelope shut by mistake! Here you can see how far down into the envelope folder I placed the decorative paper. Just far enough so the plain inside doesn’t show when you are using it.
Gluing paper to the fold
When you are gluing paper to the back of the envelope over the place where the flap folds down then you must glue on the paper and then fold the flap down immediately to stretch it. You will get a little ridge of paper when you flatten it back out but if you don’t fold it immediately then the paper will tear once the glue is dry. Ask me how I know! (Actually you don’t even have to ask as I took photos to show you!) If this does happen you can just glue another scrap of paper over the top to cover it.

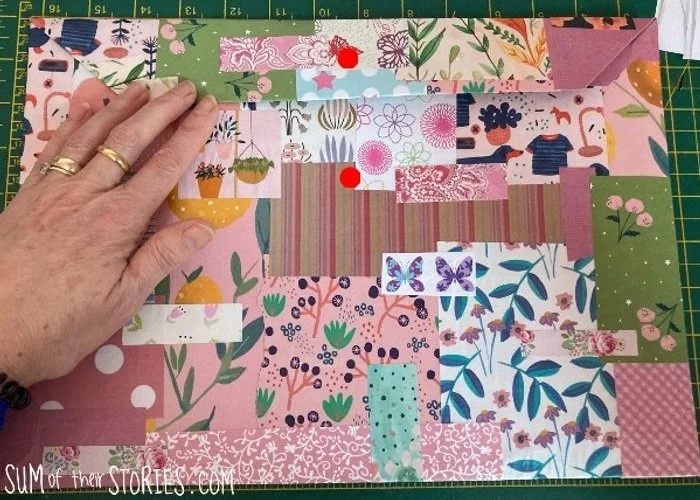
It’s easier to start with your larger scraps of paper and once the envelope is pretty much covered you can add smaller scraps to fill in tiny gaps and add a little extra interest as and where you like.

Once it is all covered and you are happy then leave the whole thing to dry for an hour or so.
Sealing the decoupage envelope
Next check if any edges are lifting and apply a little glue on your brush to seal them down. At this point you can stop or you can give the whole thing a sealing coat of Mod Podge. A couple of the papers I had used were very matte and had a few marks showing on them where I’d not been very careful with excess glue so I chose to add the extra coat of Mod Podge. I think it will be good to protect it from fingermarks and should make it last longer too but if you don’t want to that’s completely fine. If you do seal it with Mod Podge then you will need to give it a few hours, or ideally overnight, to dry properly.
Creating the fastening

Now you are going to make a fastener for your envelope folder. Glue a bit of pretty paper to the separate scrap of card, coat it with Mod Podge and leave it to dry too.
If you have a 1” circle punch then punch out 2 circles of card. If you don’t have a punch you can draw around something roughly 1” across and just cut 2 circles out with scissors.
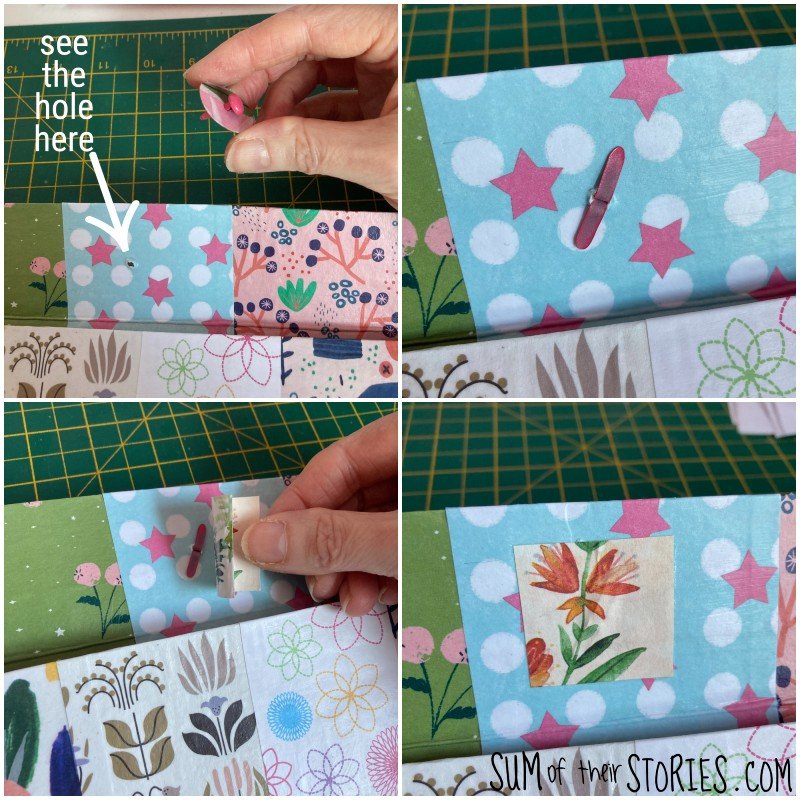
Mark the centre of the circles and make 2 small slots using sharp scissors.
On the envelope mark the centre of the flap and another point about 7cm (just under 3”) below on the front of the envelope - use this photo to guide you, I’ve put big red blobs but you, of course, will just put a small pencil mark!
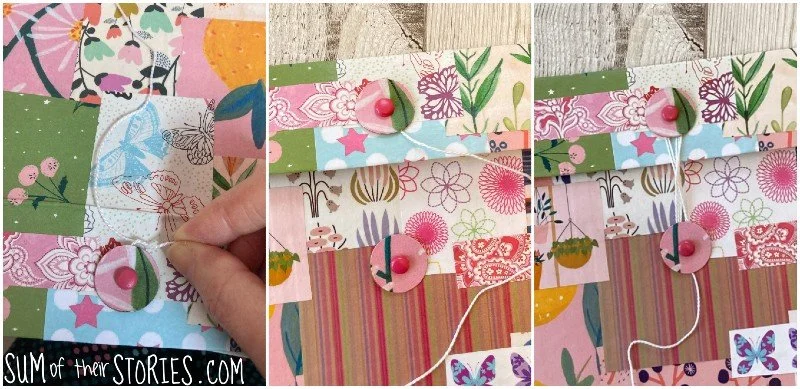
Make holes at these points and then using a split pin attach a card circle to each place you marked. On the envelope flap you can cover the back of the split pin with a little piece of paper.
Tie the twine to the top circle, the one on the flap, and then use it to fasten the envelope closed by wrapping it round the 2 circles in a figure of 8.
That’s it! Isn’t it beautiful? Sorry, you are supposed to say that, not me! It’s just that I’m so pleased with how this turned out, even better than I had hoped it might when I started.

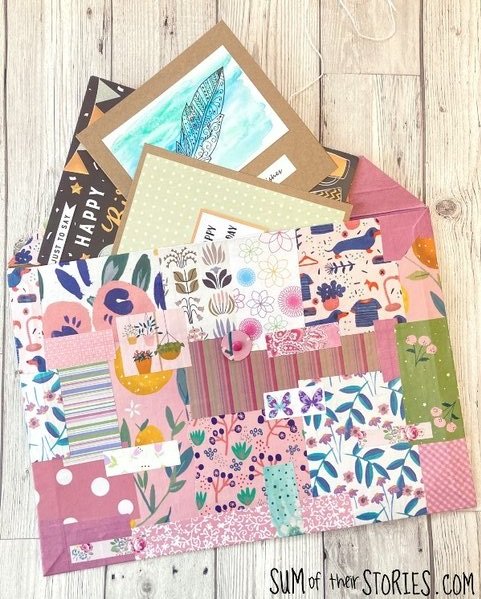
Use your sturdy card envelope folder to store anything you like. It could be perfect for precious letters or cards, to keep your remaining scraps of pretty paper flat and safe, to store school work, or coupons, or stickers, or birthday cards you’ve got ready for the upcoming year, or something else I’ve not even thought of yet! I’m keeping birthday cards in mine.
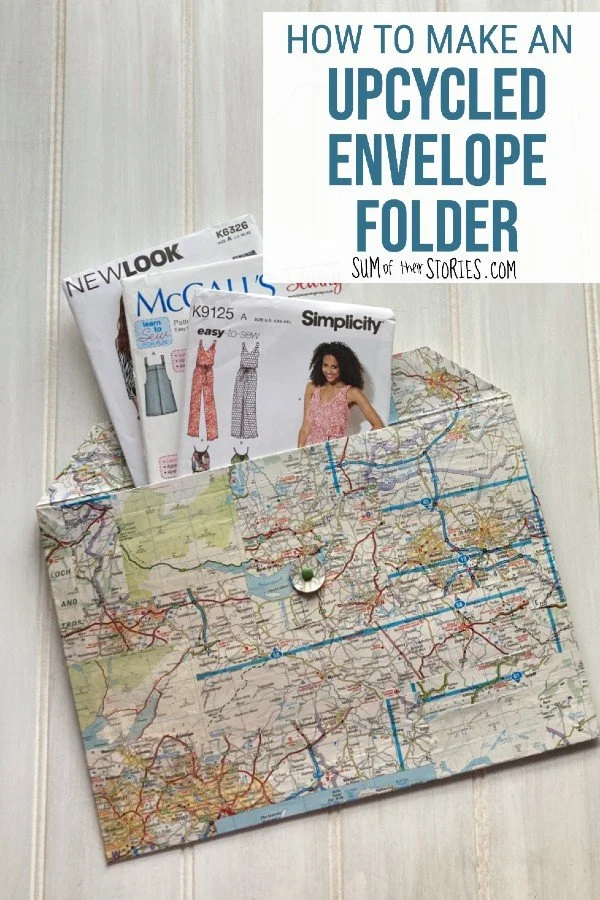
I make a lot of cards in my Etsy business that use pages from old map books so I have a lot of offcuts left over. I’ve made another envelope folder covered with those map book scraps which I’m rather in love with too.
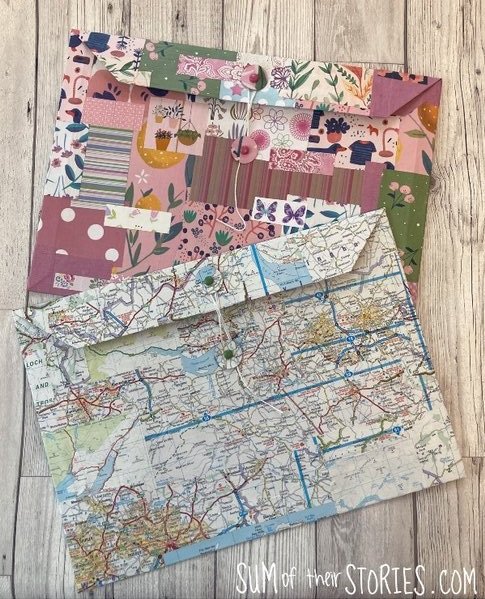
The map version was made in exactly the same way as the pretty one. I’m not sure what I’m going to store in this one yet, but I love all the detail.

Do you have packaging that is desperate to be put to good use? Why not make a useful folder or two (or ten!)
What would you store in a folder like this?
Now let’s check out what my “Do It Over” creative friends have come up with to inspire you.
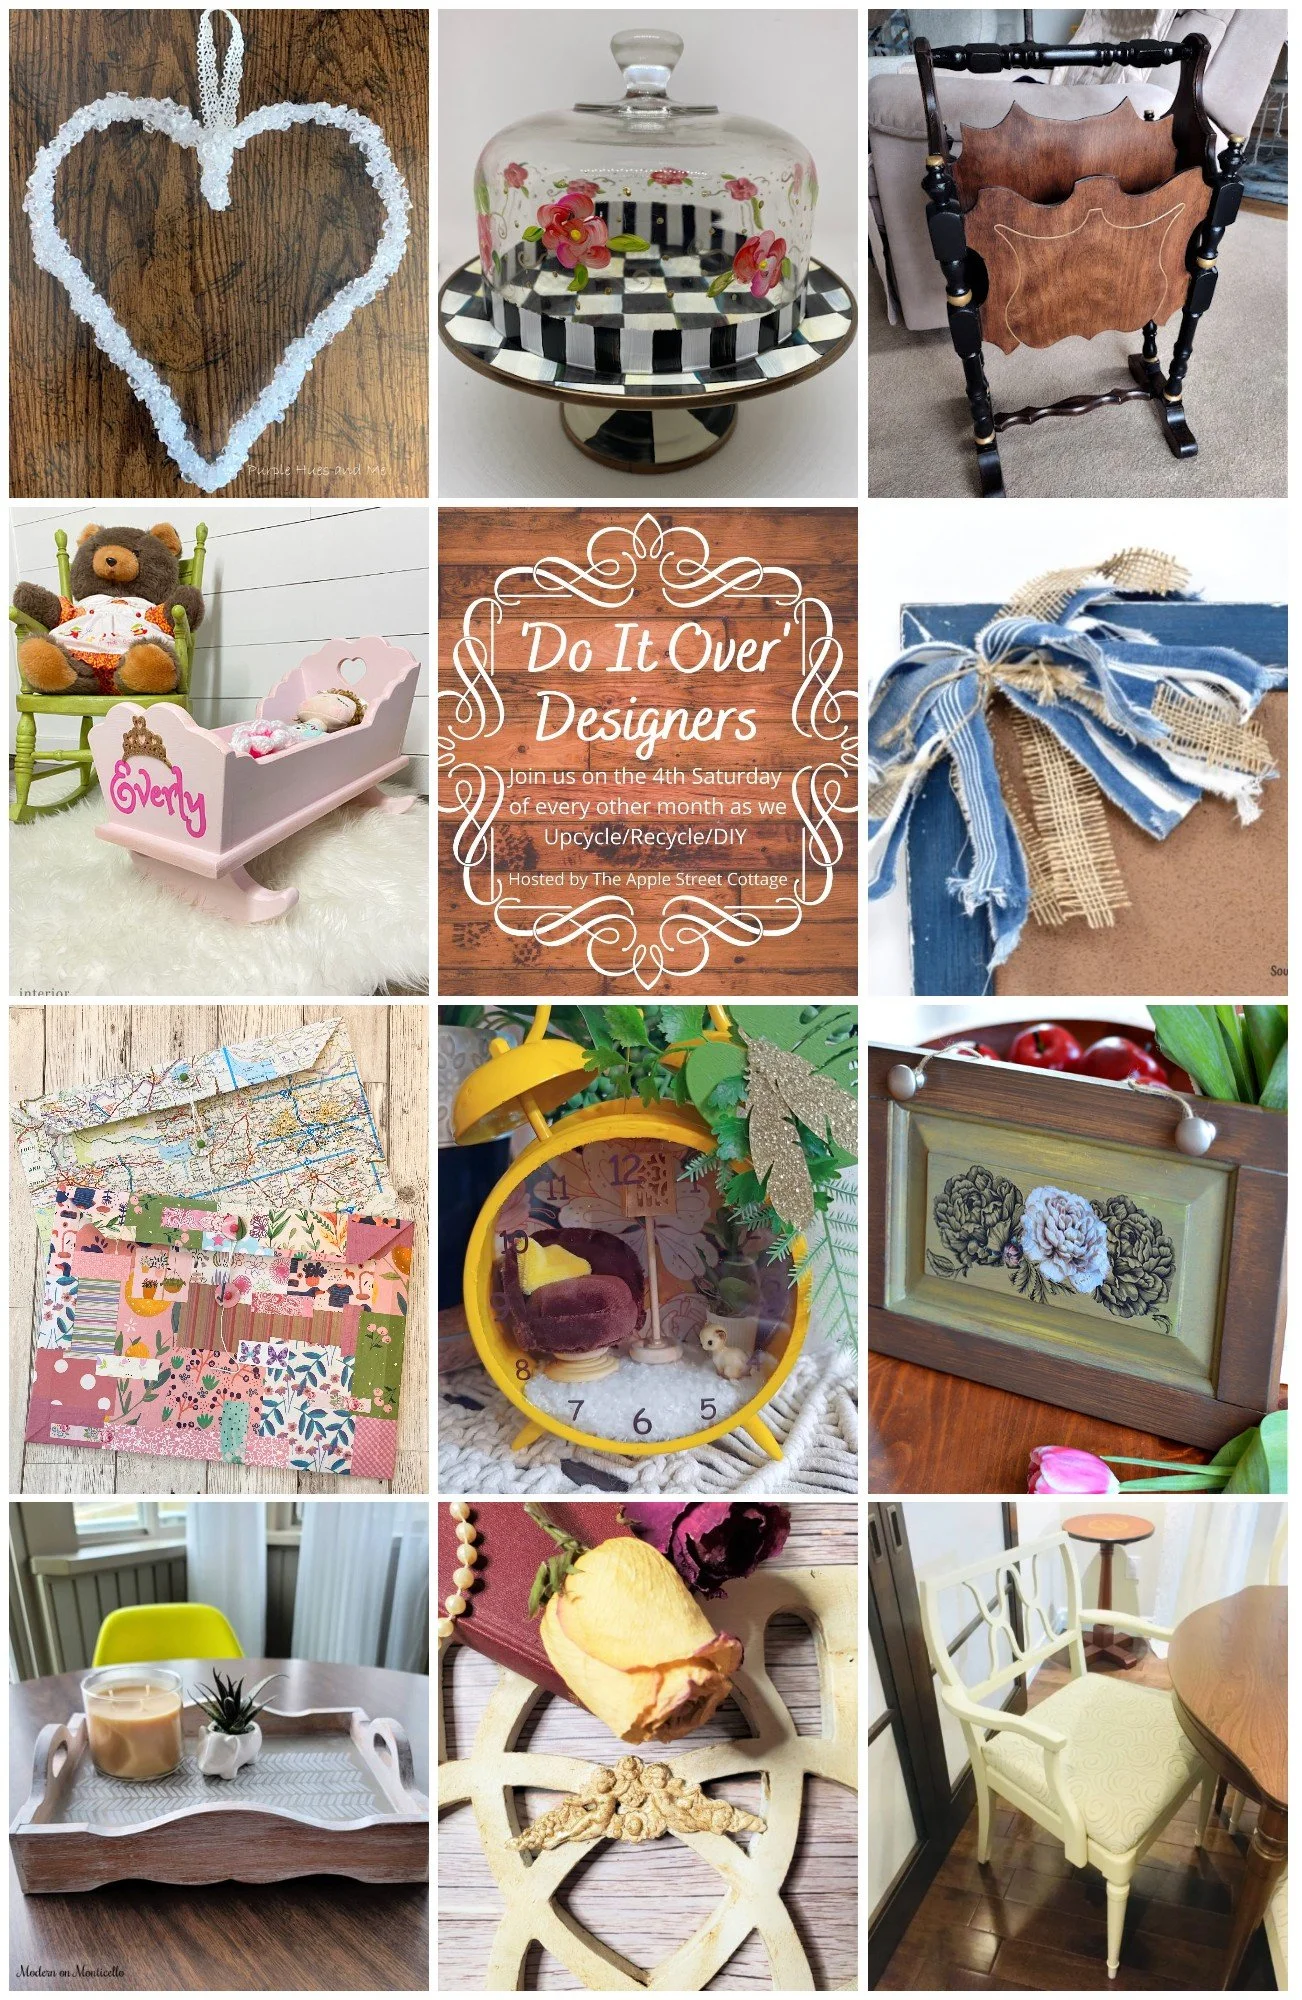
Pandora’s Box - handpainted glass
Purple Hues & Me - beaded heart
Southern Sunflowers - bulletin board
Interior Frugalista - doll cradle makeover
The Apple Street Cottage - vintage magazine rack
Birdz of a Feather - upholstering dining chairs
Cloches & Lavender - how to make old wood pretty
Exquisitely Unremarkable - repurposed cabinet door
Little Vintage Cottage - miniature scene in an alarm clock
Modern on Monticello - tray makeover
Sum of Their Stories - decorated envelope folder
Julie
I’ll be sharing this craft tutorial at some of these link ups