How to make a Recycled Notebook or Art Journal
/How to make a unique notebook or mini art journal from old packaging and recycled paper.


I love a good notebook, I have several on the go at any one time with different ones for to do lists, craft project ideas, birthday gift lists etc. We’ve had a quite a few more parcels delivered during the lockdown than usual and therefore have more packaging to deal with. I’ve always on the lookout for new ways to reuse or repurpose it so I’ve combined my love of upcycling with my love of notebooks to bring this make your own completely recycled notebook idea.
I’m calling these notebooks but they would make fabulous art journals too. They are just SO much fun to make.
Supplies needed to make an upcycled notebook:
Cardboard packaging
Plain Paper - things like envelopes, scrap paper, parcel paper etc
Scraps of patterned paper - scrapbook papers, wrapping paper or pages from magazines are ideal. Most of the papers I used are from old craft magazines
Embroidery thread
A button
Beads
Glue suitable for paper, I used a Pritt Stick
Scissors and a needle
With all our recent online shopping we have ended up with quite a few of these cardboard envelopes, I’m sure you all know where they are from! Perfect for the cover of your notebook.

First thing to do is to decide the size your notebook is going to be. This is actually decided by the size you can make the internal pages rather than the cover. You could make a bigger notebook than I did if you use brand new printer paper or large sheets of packing paper for your pages but I wanted my notebook to be completely recycled and I had a stack of A5 envelopes which I wanted to use so I decided to make a cute small notebook.
Preparing the internal pages for your notebook
I cut one envelope so I had the biggest rectangle I could get from the back - the front has a plastic window which was right in the way so I was just using the back here.

Fold this paper rectangle in half, this page establishes the size of the notebook and you need to cut the cardboard envelope to match, just a little larger, to make the cover.
See from the photo below, just place the folded paper over the edge of the card packet and cut around.

Decorating the cardboard notebook cover
I decided to make the side of the cardboard with print on it the inside.
Cut a strip of patterned paper and glue it over the fold. I glued it when the card was open and then closed it and pressed it well before opening it again. If you don’t do this before the glue properly dries and ‘sets’ the paper could tear when you finally fold the notebook.
Next cover the inside with a patchwork of paper scraps. It’s a fun way to use tiny scraps left over from other card making projects.
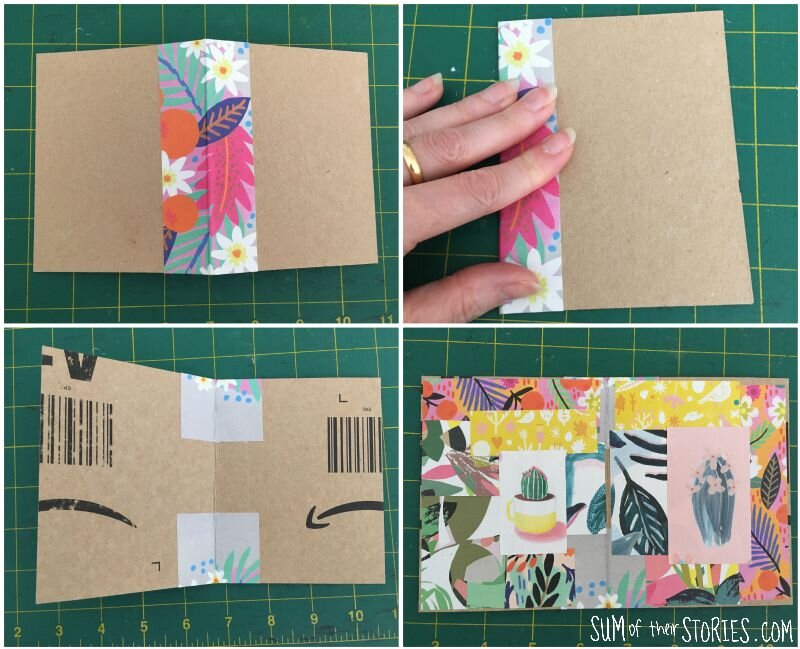
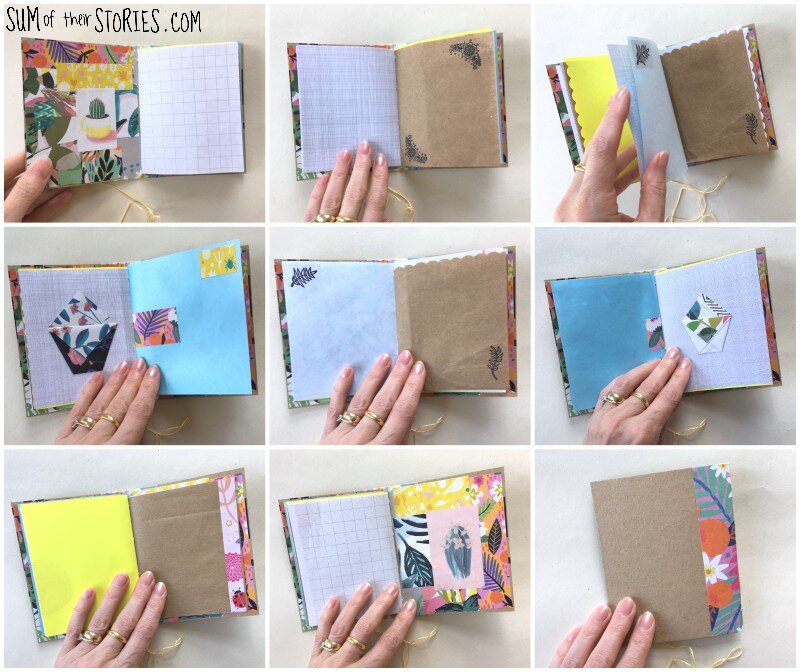
Now you are ready to make all the inside pages. Cut several, all the same size as that first page that you made. You can make as many or as few pages as you like, I did 8.
If there are any marks or writing on the paper then cover them with some decoration. I cut some pages with scalloped scissors along on edge, stamped some with pretty leaf stamps and added little pieces of patterned paper. Just have fun and add as much or as little decoration as you’d like.

I added a couple of tiny little pockets too, made in the same way as the card toppers on these Christmas cards.
Layer up all your pages and fold them in half. Pop them inside the cover and make 4 holes evenly along the fold. A good trick for this is to use the Blue Tack method.

Sewing the notebook together
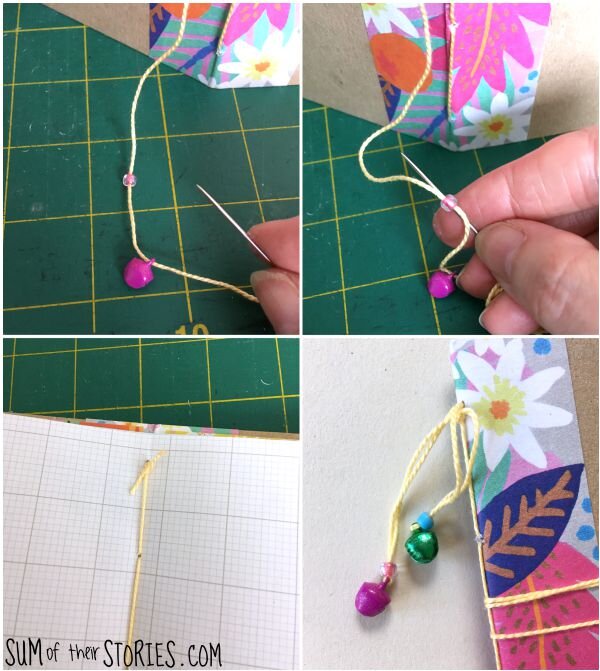
Take a long length of embroidery thread and stitch through the holes. Start from the outside at the top and stitch down to the bottom. It’ll look like this:

Then continue stitching back up to where you started. Use the photos to see what I mean. Finish it with a knot.

Add some beads by threading them onto the end of the thread and then going back through the top hole to the inside of the notebook. Tie the ends in a knot. I found a couple of little bells in my craft stash and used them along with a small bead. You could use whatever you have.
Finish your recycled paper notebook by creating a button fastening.
Sew a button onto the front of the cover using a nice long thread. Make as few holes as possible.
Tie a knot to secure and then cover it with a little scrap of paper or washi tape.
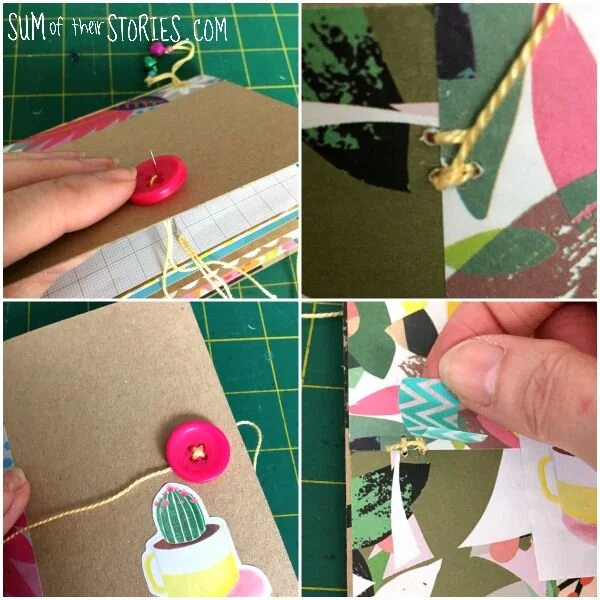
Use the long thread to secure the notebook. Wrap it round the notebook a couple of times and then around the button just once. Don’t wrap the thread around the button too many times or you could get in a tangle - ask me how I know!!
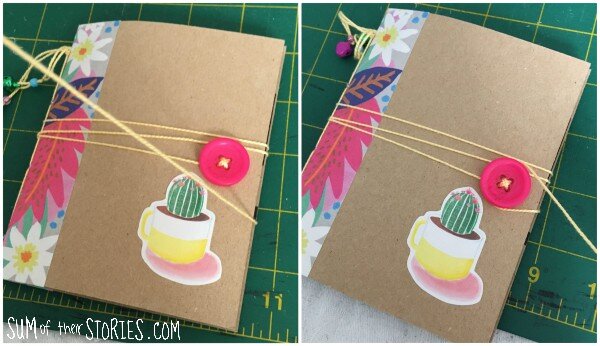
Here’s how my little upcycled notebook turned out:

Why not rummage through the waste paper basket and pull out some paper and card to make a cute notebook or 2 right now!
Julie
I’ll be sharing this project at these link ups
Update: I’ve tweaked this idea slightly and created a note book/junk journal idea that is even easier to make. It uses a stapler rather than sewing the journal binding making it ideal for a group craft project. If you’d like to check out the simplified version then you can find it here : Simplified Junk Journal