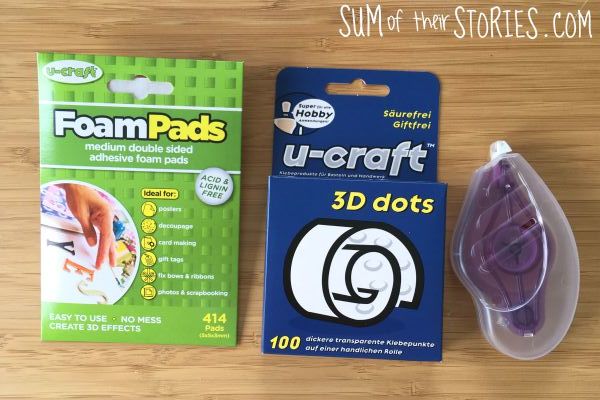
Foam pads or 3D Glue Dots?
/

The glue products I’ve used in the project were provided for me to try by All Things Sticky
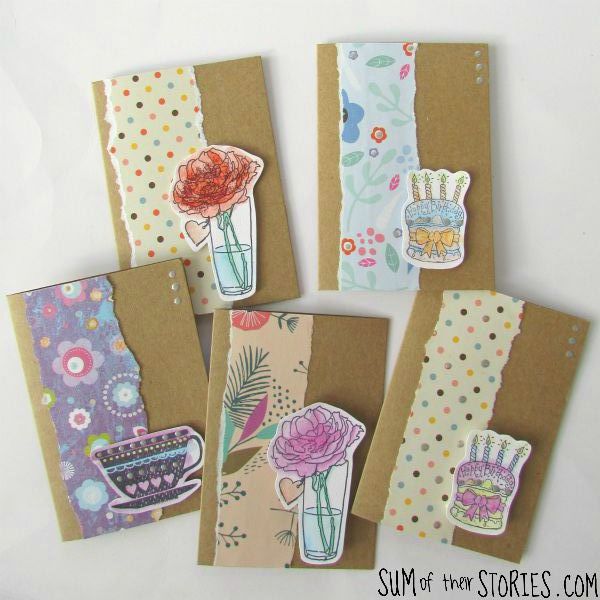
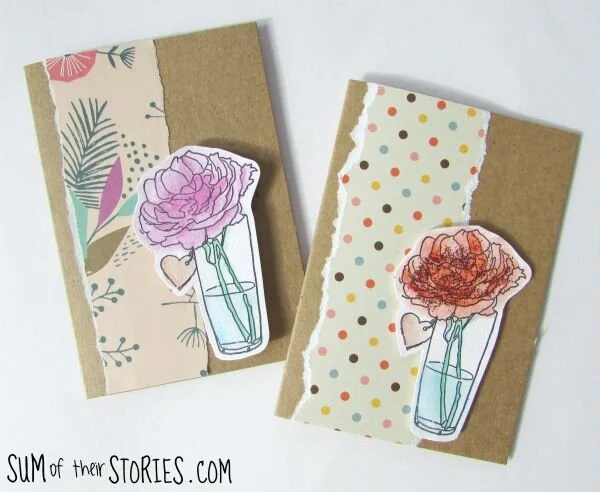
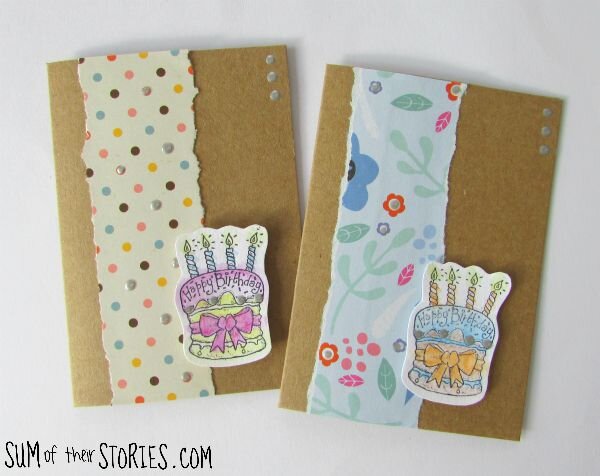
Today I’ve made some easy little mini greeting cards to compare the effect you can get with foam pads or 3D glue dots when papercrafting.
To make simple little mini cards like these you will need:
Card Blanks - mine were little 3” x 2” kraft card blanks
Scraps of pretty paper
Scraps of white card
Pretty stamps
Small Paint brush and water

You’ll also need:
Glue for paper - I tried out this Handy Roller from All Things Sticky
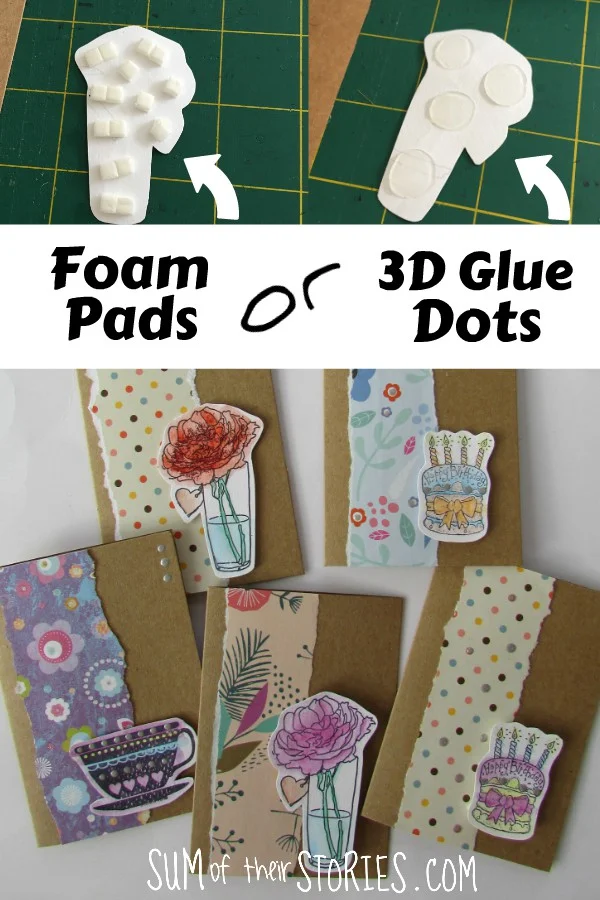
Foam Pads or 3D Glue Dots
Start by preparing your stamped card toppers:
Stamp your pretty stamps onto the scrap of white card with the permanent ink. If you are going to colour them with watercolour pencils the ink must be permanent,
Colour them with the water soluble colouring pencils and then dampen the brush with a little water and turn the colouring into watercolor paint.

Leave them to dry and then cut them out and set them to one side.
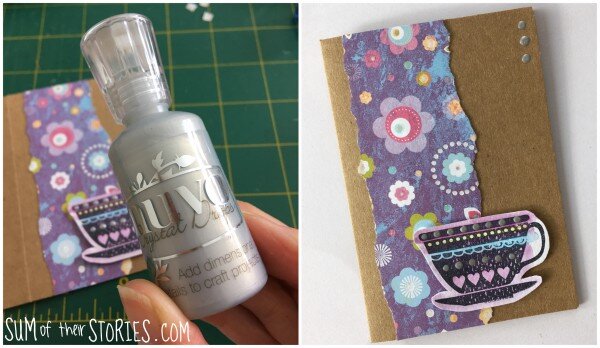
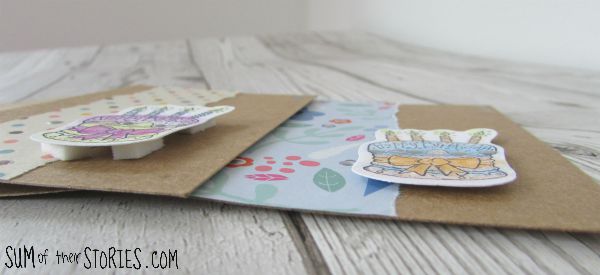
Next tear a little strip of pretty paper the length of the card, and fix it to the card blank.

Now it’s time to compare using foam pads with 3D glue dots.
The foam pads I had were tiny ones, great for small thin detailed toppers. I used them in pairs for the larger pieces. If you’ve not used them before foam pads are easy to use. Little squares of foam that are sticky on both sides. You peel them from their backing paper and pop them on your card topper, then peel off the little squares of shiny paper from the top of the pads and stick them into your card. Peeling off the little squares of shiny paper can be a bit fiddly, tweezers can help.
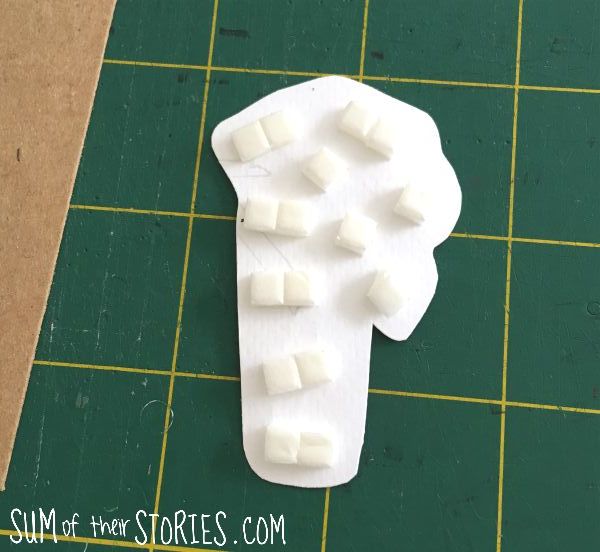
Foam pads lift the card topper up quite a bit.
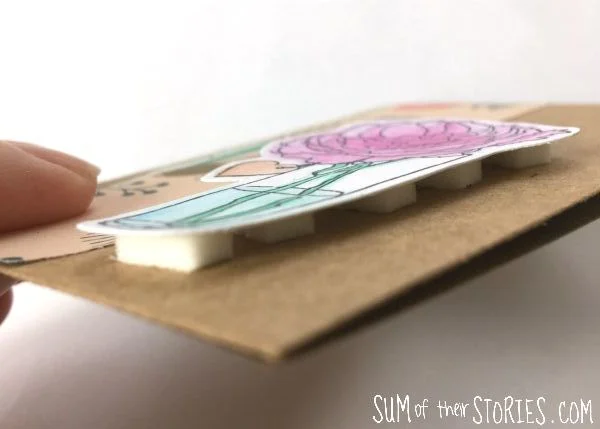
The 3D glue dots come on a sheet or roll, you press them, dot down, onto your topper and then gently pull the backing paper away to leave the dots in place.


When the glue dots are used the topper is not lifted as much. Less than half the height of the foam pads but still a slight lift.
When my cards were made I felt they needed just a little something more so I applied some little pearl drops with Tonic’s nuvo crystal drops. You need to allow plenty of time for these little dots to dry if you use them so they don’t get squashed. This product is an easy and inexpensive way to get a little shiny dot on your paper without having to use a jewel or pearl.
That’s it, simple little cards that were super quick to make. I like to keep a few little cards like this in my stash, I used one as a wedding acceptance and one for a thank you so far.
So which do you prefer, the foam pads or the 3D glue dots? Foam pads on the left and glue dots on the right in this photo, you can see the difference in the shadow.
For tiny little cards like this I think I prefer the glue dots, the slight lift is perfect in this mini size. I think I’ll continue to use foam pads for larger cards most of the time.
I also think I’ll choose glue dots in future when I’m making cards with multiple layers. With foam pads the card can get pretty thick if you add several layers and that can affect the cost of postage here in the UK. We get up to 5mm total thickness on an envelope for a regular stamp cost but any thicker than that are the stamp price goes up to large letter.
Have you tried foam pads or 3D glue dots in your paper crafting? Which do you prefer? Or does it depend what you are making? I conclude there is a place for both in your papercraft supply stash, but as someone who has used foam pads for years, I liked the subtle lift that the 3D glue dots gave more than I thought I would. They were also less fiddly to apply which is another plus for me.

I’ll be sharing this project at these link ups