

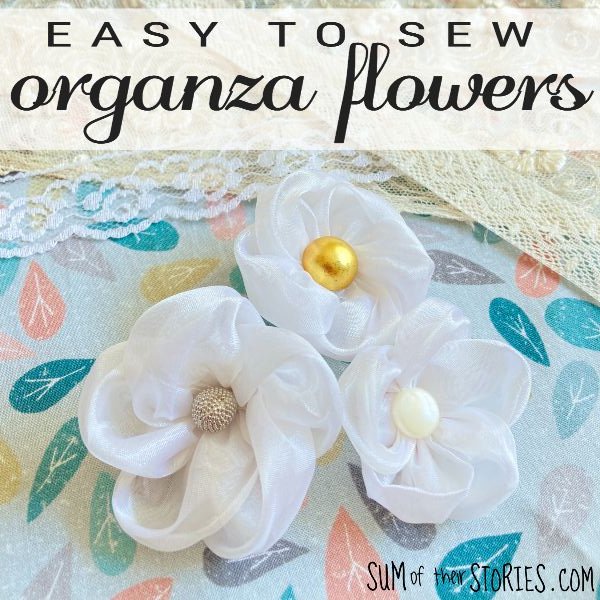
How to make Organza Flowers
/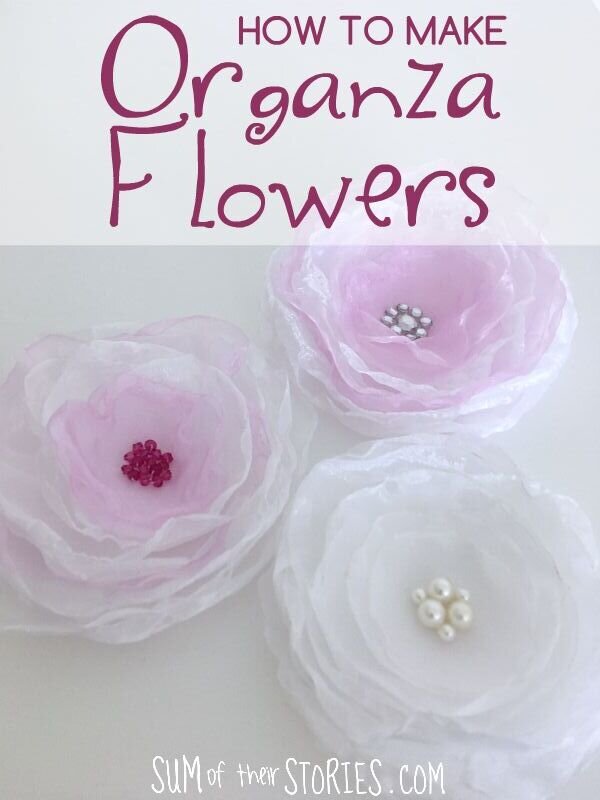
Have you seen beautiful, floaty organza flowers and wondered how to make them? It’s actually really easy and loads of fun. Let me show you how!
It’s Pinterest Challenge time! Whoop whoop! I love the Pinterest Challenge. It’s when I join a group of fellow creative bloggers, we all have a rummage through our pinterest boards and pull out an idea and then give it a go. I’ve pinned a couple of tutorials to make organza flowers over the years here, here and here - time to give it a try and make my own pretty flowers.
I experimented a little with the fabric I had, some worked better than others.
The first thing you need to know is that your fabric needs to be synthetic. I tested some organza, satin, sari fabric and lining fabric. The organza was, by a mile, easier to work with and the most successful for me.
How to make pretty flowers with synthetic organza
Materials needed to make organza flowers
Synthetic organza
A tealight
Beads, pearls, buttons or flat backed gems
Needle and thread
Scissors
Prepare organza petals
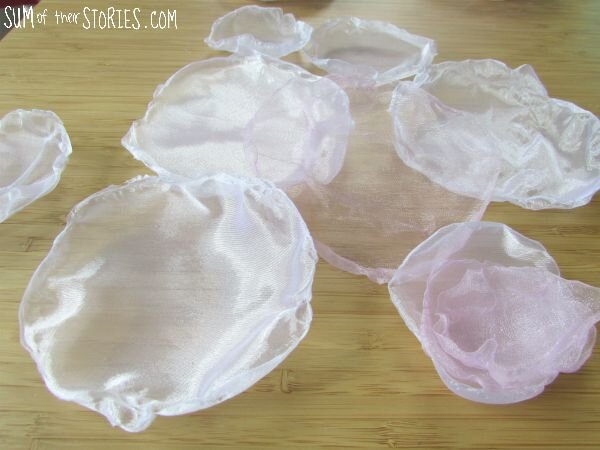
Start by cutting a big pile of “circles” from the organza. I’ve put the word circles in quotes because they don’t have to be accurate circles at all. You can just wing it and cut them by eye. The biggest can be whatever size you like but remember they do shrink a little in the process so make them about 2cm (1/2”) bigger in diameter than you want your finished flower. I wasn’t that precise, I just cut a big pile of circles of all different sizes varying from 5” to 1.5” in diameter.
A good tip to speed things up is to layer up the fabric, so you are cutting multiple circles at a time.

It’s hard to see here but there is a mix of white and a pale purply pink organza, The blue circles are from my sari fabric experiments but that didn’t really work. The fabric was too floppy so nothing held its shape..
Now the fun bit, melting the edges.
You are using a highly flammable fabric and a naked flame so it stands to reason that YOU NEED TO BE VERY CAREFUL when making these organza flowers. Have plenty of space around you, don’t drop the fabric into the tealight, don’t lean over the flame, don’t hold the fabric over the flame in one place for too long, generally - just be careful. I also had a window open, I don’t know if synthetic fabrics give off any fumes but there’s no point taking a chances so do this in a well ventilated place.
Light the tealight and then hold the edge of a circle of organza between 2 and 3 inches above the flame.

The edge will melt and curl. How long that takes will depend on the type of fabric but organza like this will be VERY quick, just a few seconds. Watch it carefully and move it along as soon as it start to ‘go’ . You can always move an area back over the flame if it hasn’t melted enough.
Keep the fabric up, away from the flame … don’t let it drop. If it touches the flame it WILL catch fire (don’t ask how I know!) Just practice and you’ll soon get the hang of it, it’s really easy.
When it’s finished it will look a bit like this:

Now just make loads! You’ll need about 10 for each flower.
Putting together DIY organza flowers
Once I had a big heap of petals I just stacked them up from big to small. I didn’t follow a plan or strict numbers. I just piled them up until they looked nice. I ended up with one white stack and 2 that were a mix of pink and white.

Now take a length of white thread, I doubled mine up for strength and threaded my needle with the end of the thread with the 2 loose ends. Pinch the stack firmly and then stitch right through all the layers. With a doubled up thread you can avoid a big bulky knot by going back through the loop on the wrong side. Work 2 or 3 stitched just to hold all the layers together securely.

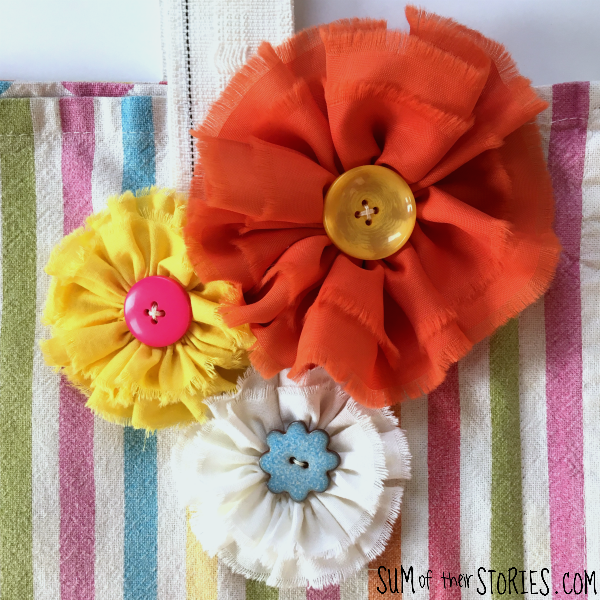
Now you are ready to add a pretty centre.
You can add some pretty pearl beads.

Or try some coloured beads, clear beads or maybe a button. If you have it, a bit of broken jewellery, like a brooch that’s lost its pin would be lovely.

If you’d rather you could hot glue the layers together but I think you’d need to be really careful as i can imagine the heat of the glue going through the fine fabric and burning your fingers really easily. I prefer to stitch things when I can but I know it’s not for everyone! I tried one flower with flat backed gems from my papercraft stash for the centre, attaching them with hot glue. This was a fiddle but the results are pretty cute.

So in total I did one organza flower with pearl beads, one with tiny pink beads and one with the flat backed gems.

You can make these any size and with as many layers as you like. I think next I’ll try making some smaller ones to add to hair clips. Mine feel just a little too big for hair accessories, they measure about 4.5” across.
They would be great as a corsage, just glue or sew a brooch pin on the back.
I’ve used one as pretty gift wrap for a wedding gift.


I’m sure I’ll find some uses for the others, they are so pretty :-)
Have I tempted you to try making some organza flowers for yourself?

Update: I tried making some flowers with a synthetic satin and I have to say I’m loving this one too. I might try a mix of satin and organza next.

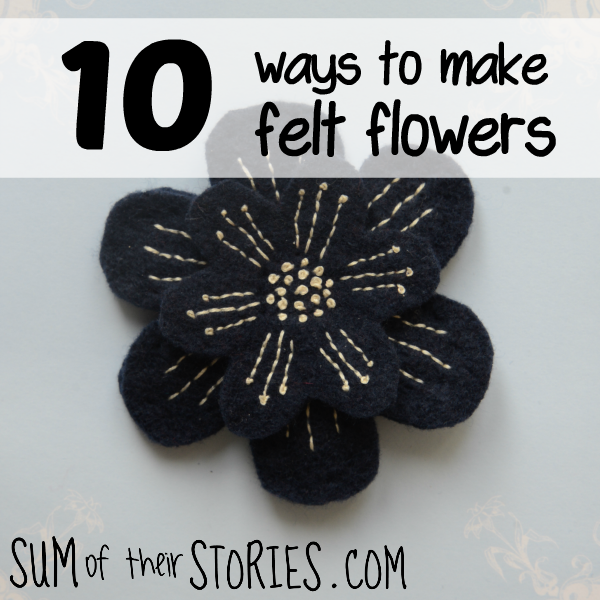
If you enjoy making flowers then you might like some of these other flower making ideas using a variety of techniques:
If you do ever make something using one of my tutorials please do tag me if you share photos on social media, or email a pic or two. I LOVE seeing your makes. Facebook people can share on my Share it Saturday comment thread on the Sum of their Stories Facebook page too.
Julie
I’ll be sharing this idea at these link ups.
For more Pinterest inspired projects from this month’s Pinterest Challenge hosts, check out the links below:

This Autoimmune Life | Quilt as you go Halloween Quilt
Simple Crafty Life | Wooden Ghost Halloween Blocks
Eye Love Knots | La Vie en Rose Wrap pattern review
Decorate and more with Tip | DIY Pumpkin filled Lantern
Purple Hues and Me | Mackenzie Child inspired Pumpkin
Mom Home Guide | Simple Chair Cushion Covers
Across the Blvd | DIY Wooden Witches Hat for Decor
Domestic Deadline | Emergency Cocktail Party Gift Idea
Sew Crafty Crochet | Popcorn Fingerless Gloves
Oh My Sander | Repurposed Thrift Store Tray
Intelligent Domestications | Make your own Mason Jar Ring Pumpkin with Washi Tape
Life Beyond the Kitchen | Stash Busting Crochet Cat Toys
Teadoodles | Recycled Light Bulbs
My Pinventures | Korean Popcorn Chicken
A Good Life | Halloween Pumpkin Light


