Sew a Tote Bag with Denim Scraps
/Denim is such a great material to upcycle. We are often told how dreadful denim production is for the environment. SO much water used, chemicals, dyes etc so once a pair of jeans are no longer wearable it makes sense to use as much of the denim fabric again for your craft projects if possible.
With that in mind I’ve been playing around with an idea to use even small scraps of denim left over from other upcycle projects.
This idea was inspired a little while ago by a very talented sewist I follow on Instagram: Liesl who made the most amazing top from denim squares sewn into net. I didn’t have quite the patience for that just now so I experimented with a “strips of denim instead of squares” idea.
I had a lot of fairly long thin scraps of denim, too thin to be sewn together very easily so I’ve experimented with a similar applique technique to the one Liesl used to make a sturdy tote bag.
This bag uses a piece of old sturdy fabric as a base layer that the denim strips are sewn on to. Because this base layer is not visible in the finished bag it’s a great chance to upcycle dated curtains in a pattern or design than you really don’t like.
It’s hard to say exactly how much denim you’ll need, this is a scrap buster bag tutorial and so a mix of different shades of denim looks best. I estimate I probably used the legs of 2 pairs of jean in total, if it was all added together, but obviously I had scraps from lots more pairs of old jeans.
Denim scrap tote bag tutorial
I’m writing this tutorial all in inches I’m afraid. Normally I do centimetres as well but all these measurements just work together in inches so I’m keeping it simple!
What you need to make a tote bag with denim strips
Scraps of denim, quite a few colours is ideal. Mostly thin strips but you’ll need a few larger pieces too.
2 pieces of upholstery or old curtain fabric 16” x 16”
2 pieces of fabric for the lining 16” x 16” - some sort of cotton or polycotton, I used a piece of old duvet cover.
Sewing thread - a contrast colour is nice but you can use any that you like.
LOTS of pins
A denim needle for your sewing machine might be helpful but I managed without one and just treated my machine to a new regular needle instead!
Preparing the denim pieces
You’ll need lots of thin denim pieces and a few larger pieces so you’ll probably want to cut the larger pieces to size first and then cut the leftovers into the thinner smaller strips.
You’ll need 2 pieces of plain denim for the bottom of the bag that are 4” x 16” so put those aside now.
Make the handles
It makes sense to make the handles first, once they are made you can use the rest of your denim scraps for the main body of the bag.
For the handles you’ll need a selection of strips that are 2” wide.
Join these strips by overlapping them and stitching across to create one great big long strip that’s 108” long.
Cut the long strip into 4 equal pieces each 27” long. Place 2 together, wrong sides together and stitch down each side. Repeat for the other 2 strips. This gives you 2 handles, each 27” x 2” with raw edges.
Cut your remaining denim scraps into strips 1” wide.
Create your denim strip applique fabric
Make 2:
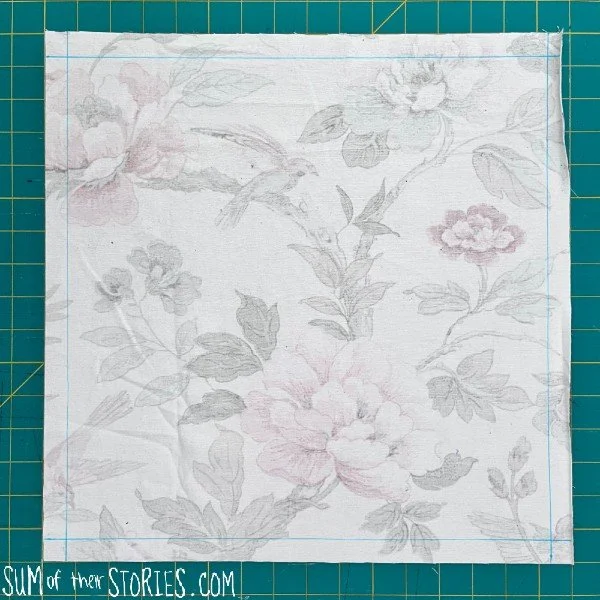
Mark a 5/8” seam allowance all around the edge on the back of your 16” square of old curtain fabric, this is your base fabric.
Start pinning your 1” denim strips onto the base fabric in rows leaving the marked seam allowance plain. Butt them right up to each other but not overlapping. Use lots of pins to secure them.
When you get to the bottom place the larger piece of denim you cut out right at the beginning instead of the last 3 thin strips.
This is just to make the bottom of the bag sturdier.
Repeat on the other piece of curtain fabric for the other side of the bag.
Stitch the denim strips in place using 2 rows of stitching on each row.
Trim away any overhanging denim to square the bag pieces up nicely again.
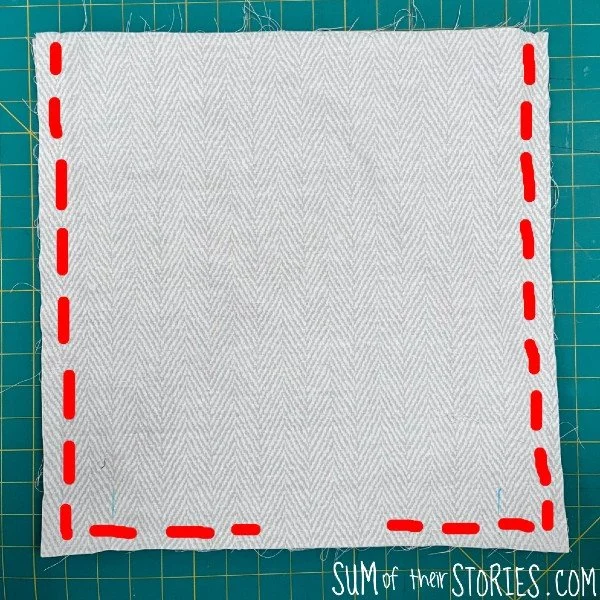
Place the 2 bag pieces right sides together, line up the strips of denim as best you can. Pin in place and then stitch around 3 sides leaving the top open. Use a 5/8” seam allowance so you’re stitching right up to the denim edges but not over them.
Repeat for the bag lining but leave a 4 inch gap in the bottom edge of the lining for turning.
Box the bottom corners of the bag outer and lining by flattening the corners and stitching across 1.5” from the point.
I go into more details of how to box corners in this bag tutorial if you don’t already know how to do that.
Turn the bag outer right sides out and pin the bag handles in place 2.5” from the side seam. Use 3 pins to hold each handle and position them about an inch from the top edge. That way your handles will stay secure and not slip about as you stitch the next step and the pins won’t be in the way.
Pop the outer bag inside the bag lining, lining up the side seams carefully. Pin and then stitch all around the top edge.
Turn the whole thing out through the gap you left in the lining. Be careful, remember that the pins you used to secure the handles are still in there!
Stitch the gap in the lining closed then push the lining into the bag. Press the top edge then top stitch. I used a light thread in my bottom bobbin and the purple thread I’d been using throughout in the top of my machine, that way the top stitching matches inside and out. That’s just a personal preference though, you don’t have to do that! The topstitching is worth doing though, it neatens everything up and makes the bag handles stronger too.
More ideas for your denim striped bag
If you want to add an internal pocket sew it to the lining before you assemble the bag.
You could make regular bag handles that are denim on one side and the lining fabric on the other with the edges enclosed if you prefer. I just went for the raw edge look to tie in with the raw denim edges on the main body of the bag.
If you are going to be huffting lots of heavy stuff around in your denim bag you might want to stitch a second row of top stitching to give the handles extra strength.
You could even attach the handles to the bag after it’s been constructed, have the ends of them on the outside and stitch a square with a cross in the middle to secure them.
Pre made leather handles would look great on this denim applique bag too.
I chose to have the denim strips end at the seam allowance on the base fabric. This was to make it easier for my regular domestic sewing machine to cope with the thickness of the fabric layers. This does mean that you can see tiny peeps of the backing curtain fabric in a few places. I quite like that but if you don’t and think your machine can cope with it you could have your denim strips going right to the edge of the backing fabric.
If your sewing machine does decorative stitches it could be really fun to use different stitches to applique the 1” denim strips. They could be all different colours too if you like - what a great way to use up left over thread spools.
Do you have any denim scraps that you could use to create a sturdy tote bag? Do you like the raw slightly fraying denim edges or do you prefer everything to be neat and enclosed?
Julie
I’ll be sharing this sewing tutorial at some of these link ups
You might also be interested in:


