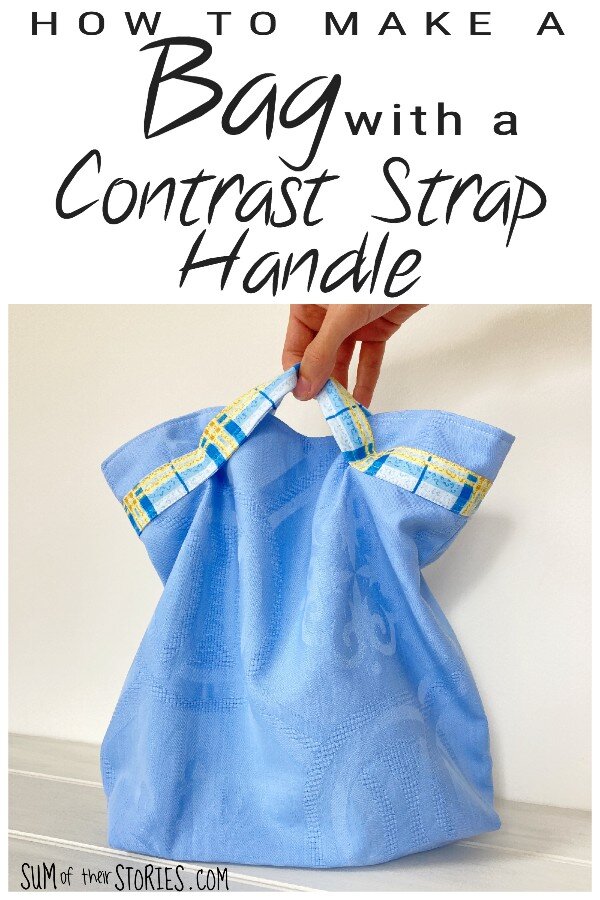
Easy Bag Free Pattern with Contrast Strap Handle
/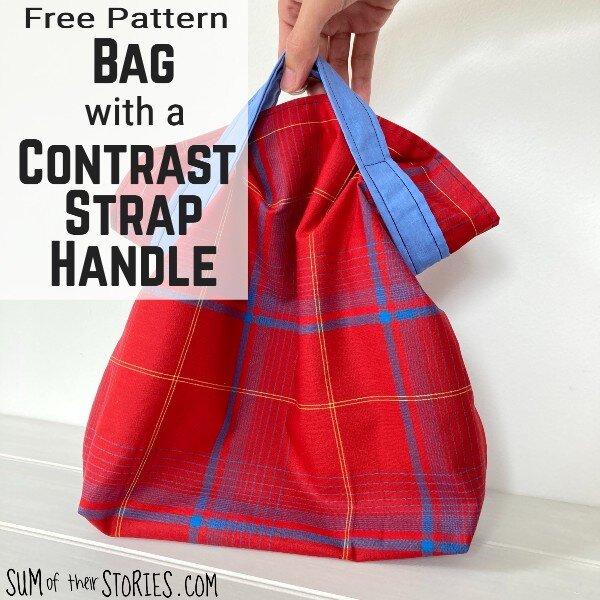
This is such an easy bag pattern. It’s a full lined bag with a built in contrast strap that becomes the handle. This pattern is ideal for someone who is an advanced beginner. Maybe not ideal as a first ever project but great for someone who hasn’t sewn much but who wants to learn a few new techniques. The bag involves boxing corners and top stitching as well as making a bag with a lining. If you are a complete beginner sewer you might find this article What you need to get started Sewing contains some helpful info.
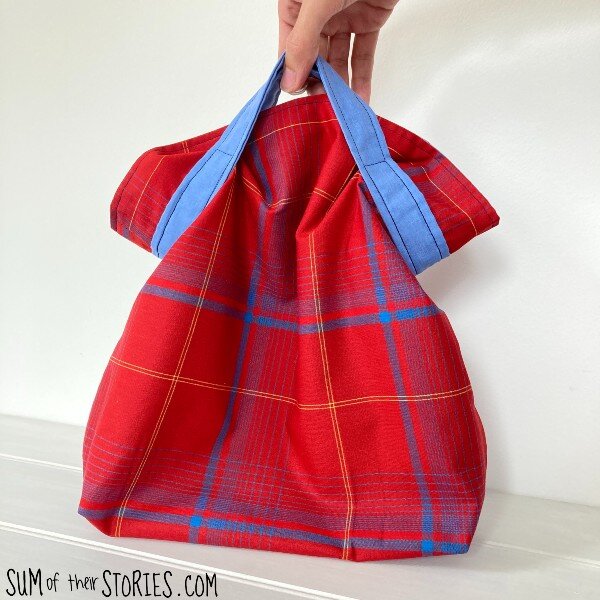
You can size the bag up or down to make it the size you want. The ones I’ve made here turn out 36cm x 31cm (14"x 12") which makes them a great size for lots of uses. I like them as craft project bags, they are great for carrying about a half made knitting, crochet or patchwork project. But of course you could use them for any number of other things!
You can make this bag from pretty much any fabric, but I would stay away from anything too thick or with too much body. A light upholstery fabric will work, a cotton poplin, an old tablecloth, that sort of weight. If your fabric choice is too stiff the bag won’t hang down when you use the handle as it should. Also if your handle fabric is too thick the side seams are going to get pretty tough to sew through.
I would also recommend a patterned main fabric and plain contrast for the lining and handle or the other way round. I can’t imagine 2 patterns working as well together, though if you find the perfect combo you could always give it a go.
Easy Bag Tutorial with Contrast Handle
To make a bag with a contrast strap handle you will need:
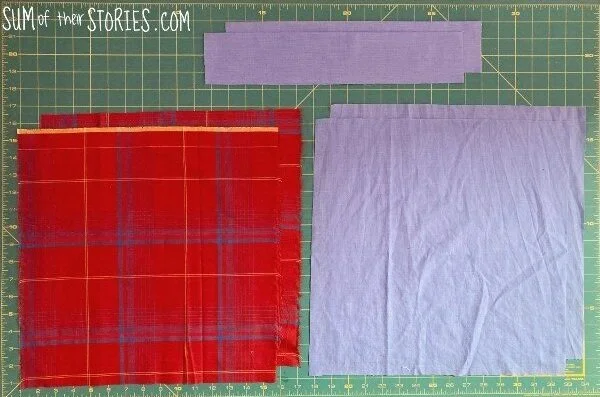
2 pieces of main fabric 38cm x 38cm (15” x 15” )
2 pieces of lining fabric 38cm x 38cm (15” x 15” )
2 handles in contrast fabric 38cm x 8cm (15” x 3”)
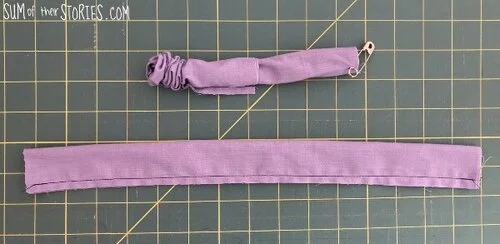
Make the handles
First make the handles. Take one handle pieces and fold it in half longways, right sides together. Stitch along the long edge and then turn the strap out. Press and top stitch both long edges. Repeat for the other handle.
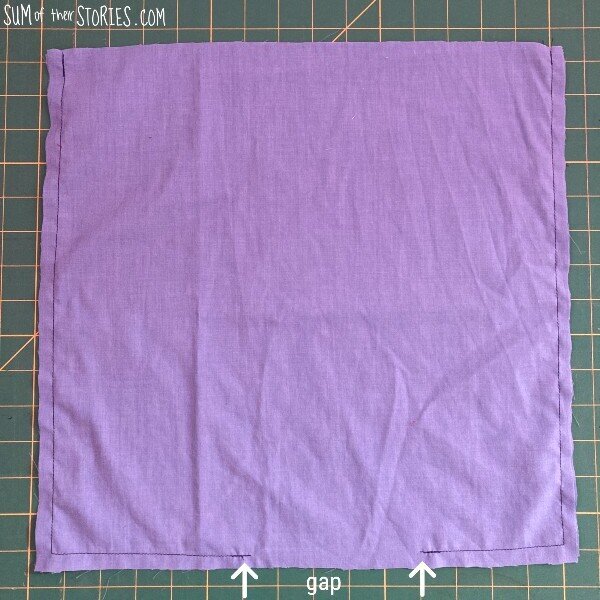
Sew the lining
Place the lining pieces right sides together and, leaving the top edge open, stitch around three sides, leaving a 4” gap in the middle of the bottom edge.
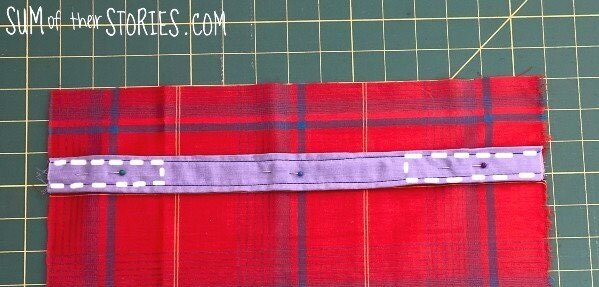
Attach the handles
Take a main piece, right side up and position one handle across the top, 2” (5cm) from the top edge. Pin carefully in place, making sure it is straight and then stitch a rectangle, 4” (10cm) long on the strap at each end to secure it. The diagram shows it more clearly. Try and stitch directly over your top stitching so you are not making loads of lines of stitching.
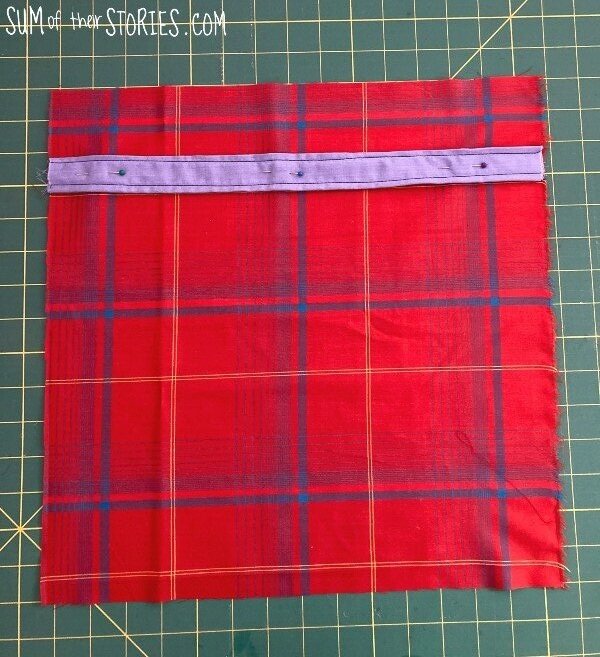

Repeat on the other main piece.
Measure the handles carefully so that they line up nicely when you assemble the bag, it’s worth taking time to make sure it’s accurate.
Assemble the bag
Once the handles are attached, place the 2 main pieces right sides together, making sure those handles line up nicely. Stitch around 3 sides, leaving the top open.
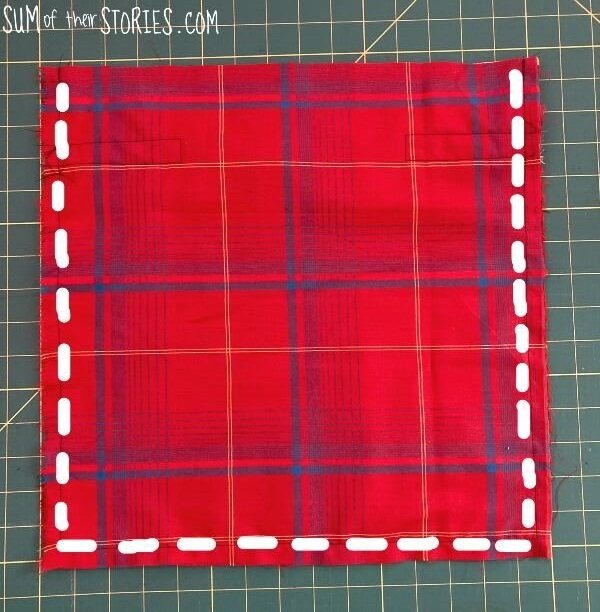
Box the corners
The next step is to box the corners at the bottom. If you don’t want to do this step you can go ahead and miss it out and zoom straight on to the last bit. Your bag will be flat instead of having any width to it.
To box the corners take the lining, push your hand into one of the corners and then flatten the corner, lining up the seams. Measure and then stitch across 2” (5cm) from the point. Trim off the corner.

Repeat this process on both corners of the lining and the main bag piece.
If your not boxing the corners this is the point where you pick us up again.
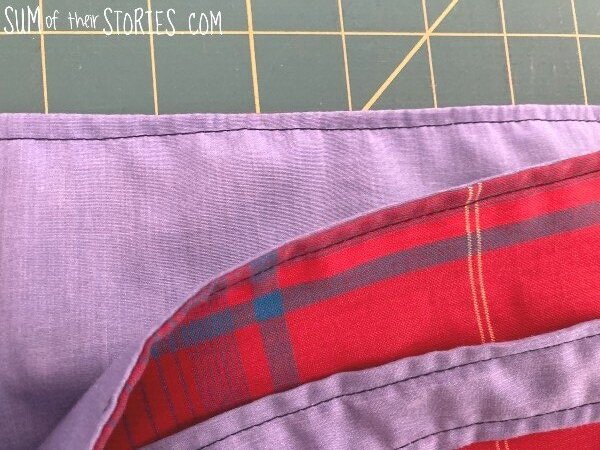
Turn the main bag piece right sides out and the place it inside the lining, carefully lining up the top edge and the side seams.
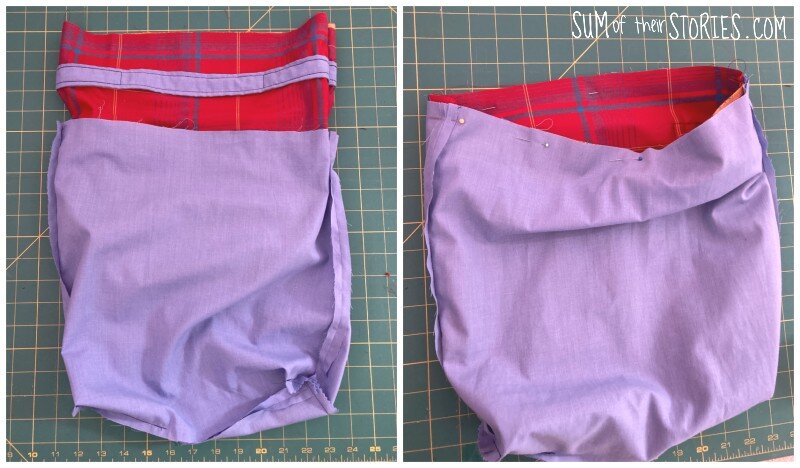
Pin and then stitch all around the top of the bag.
Turn the bag out through the gap you left in the lining and then stitch that gap closed.
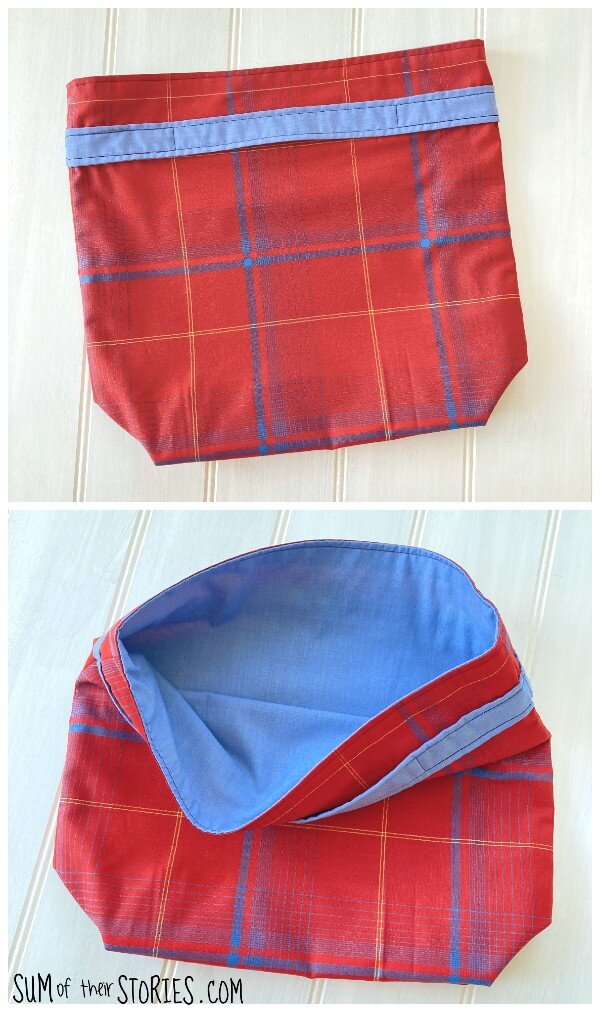
Push the bag lining into the main bag and press so that the top edge is nice and level. Top stitch around the top edge if you like.
That’s it, your bag is finished.
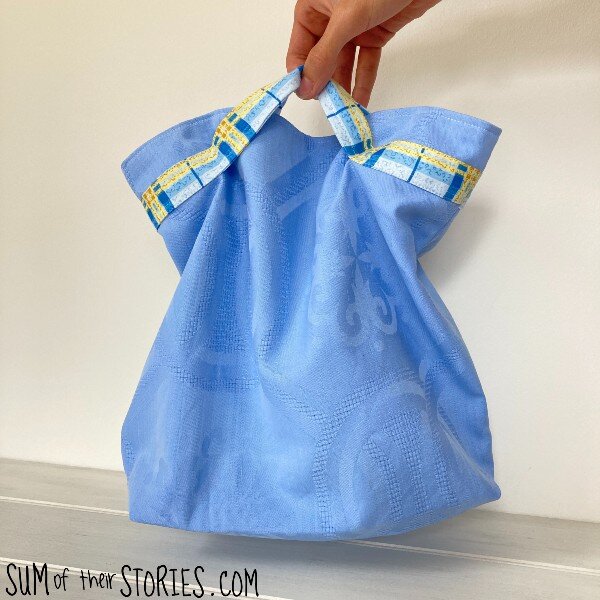
The blue looks a completely different colour here in the daylight! My “as you go” photos were all taken in artificial light.
Different fabric combinations for the contrast handle bag
This blue and check version of the bag is made from an old tablecloth. I really like the patterned handle on the plain colour bag. The top stitching on the handle is less obvious when the handle is the patterned bit, which is helpful if your top stitching is not especially neat so that’s worth considering too.
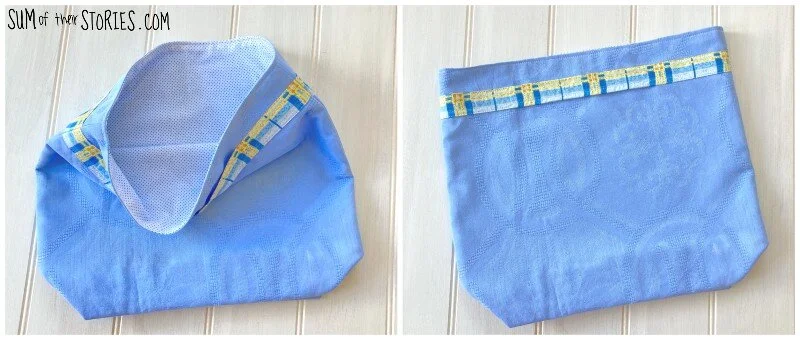
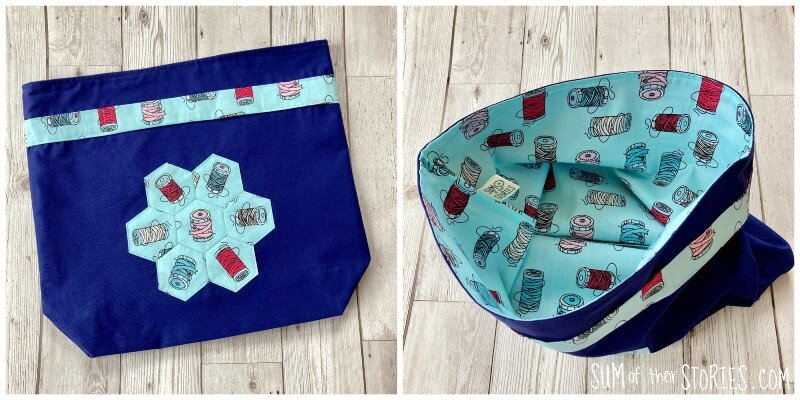
For this blue bag I didn’t use the check handle fabric as the lining. It is curtain fabric and would be too thick with the main blue table cloth fabric. I used a lightweight dotty cotton I had in my stash to line it instead.
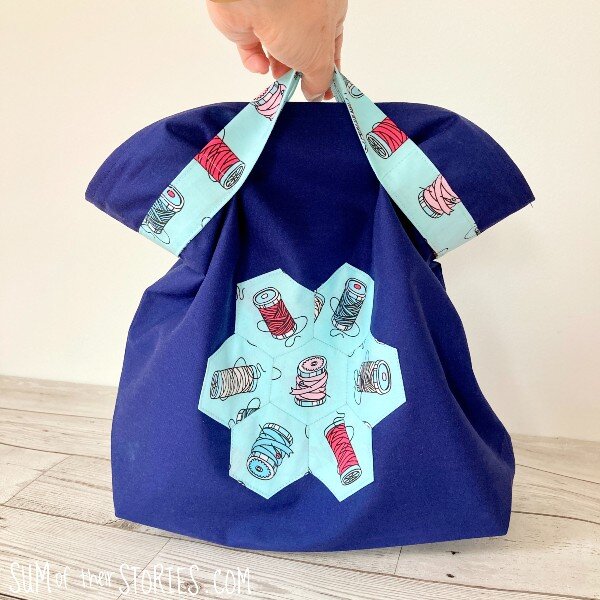
Another idea for this bag is to add some embellishment to the outside. Here I added a “flower” of EPP patchwork hexagons to the front of the bag before I assembled it. This gorgeous cotton reel print fabric is from Minerva and has made a lovely little sewing project bag. I’ve written a guide of how to sew an EPP patchwork hexagon motif like this, if it’s new to you.

I’ve a few of these bags listed in my Etsy shop if you don’t want to make your own. If you do make one do tag me on Insta or Facebook if you share a photo, I love to see them.
Julie
I’ll be sharing this post at some of these link ups