

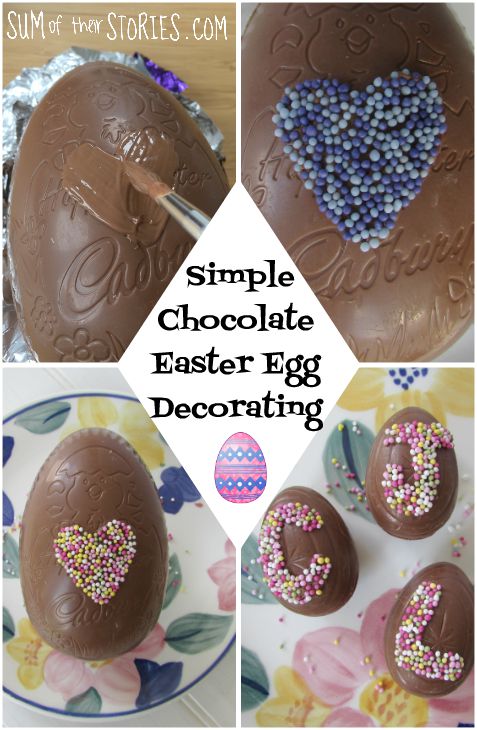
Simple DIY Chocolate Easter Egg Decorating
/Here’s a super simple, quick and easy way to decorate and personalise a shop bought chocolate Easter egg.


You can personalise plain shop bought chocolate eggs to gift this Easter, it’s easy and lots of fun.
With this idea I’ve found yet another one of those “does this word work in other countries” situations. To decorate these chocolate eggs I used what we call “hundreds and thousands” here in the UK, also known as “sprinkles”. I believe the posh name for them is nonpareils, although when I googled nonpareils I got a lot of photos of chocolate buttons covered in hundreds and thousands. Here those sweets are called “jazzies” (at least they are in the midlands, the part of the UK I’m from) so now I’m not too sure. What a confusing world we live in!
Anyway, whatever you call them, the photos will help you know what I mean.
DIY Chocolate Easter Egg Decorating ideas
I tried out a few ideas to decorate my chocolate eggs. I had varying degrees of success but I’ll share them all here so you can see what works and what doesn’t.
To decorate chocolate Easter eggs you will need:
Chocolate Easter eggs - mine were from the local supermarket but are similar to these
A bar of regular chocolate
a clean paint brush - I’d recommend getting a new one!
Hundreds and Thousands / Sprinkles / Nonpareils
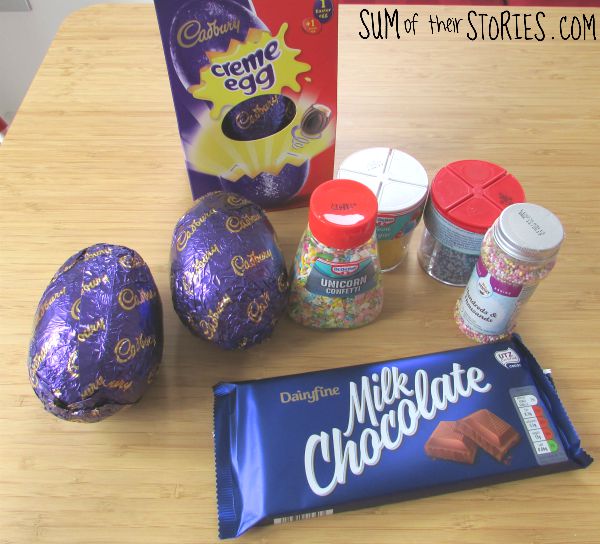
The boxes of Cadburys creme eggs that I bought had one large hollow egg and one small creme egg in them. I ended up decorating both sizes. I also got all my full collection of sprinkles out for the photo but didn’t end up using them all.
Prepare Chocolate Eggs for decorating
Remove any foil on your chocolate egg. My larger chocolate eggs had more pattern on them than I was expecting, including a Happy Easter message from Cadbury - that’s nice isn’t it? I think a smooth egg would have been more sophisticated but I just carried on with what I had and it turned out ok. Unless you buy an egg that’s unwrapped though it’s hard to know what it’s like under that foil wrapping.
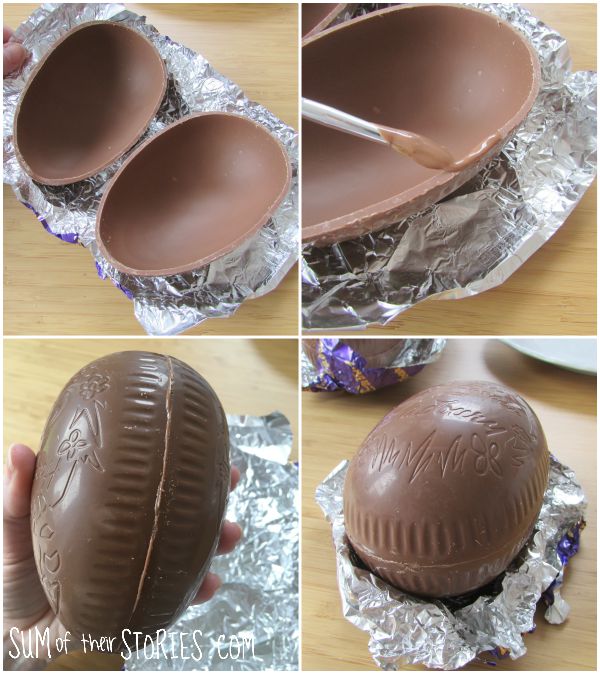
My eggs were also in 2 halves. It’s really easy to stick them together.
Take a few squares of your bar of chocolate and melt it, either in a bowl over a saucepan of hot water or VERY GENTLY in the microwave.
Paint the melted chocolate round the edge of one chocolate egg half and then place the 2 halves gently together. Hold for a few seconds and then place the egg in a supportive nest that you can fashion from the foil wrapping.
Give it a few minutes for that “adhesive” chocolate to set.
Decorating Chocolate Eggs
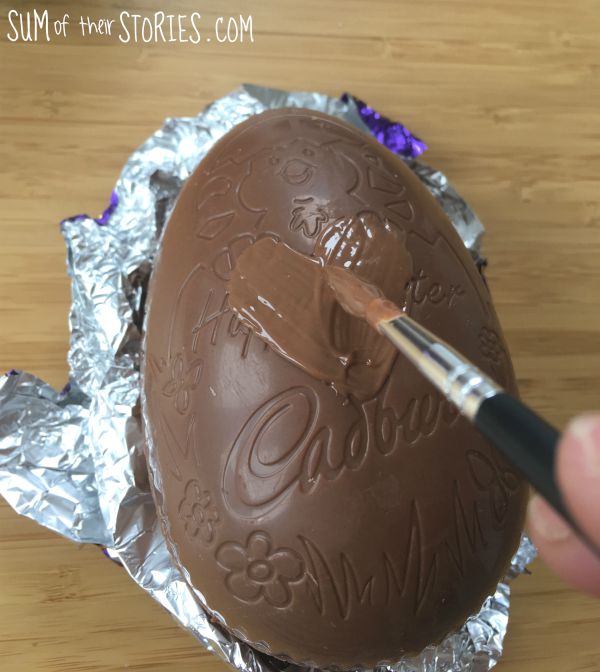
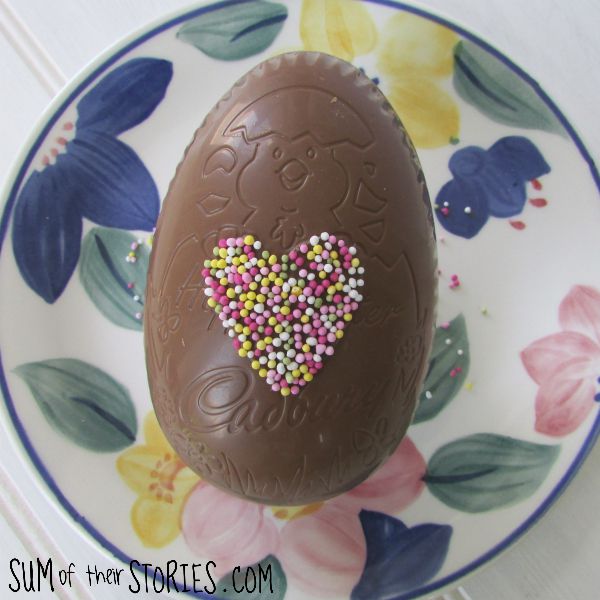
Now take more of the melted chocolate and paint a heart shape in the middle of the egg. Paint it on quite thick, if the chocolate is too thin the sprinkles will all fall off!
Quickly sprinkle all over with your hundreds and thousands. Put a plate underneath to catch the excess but be warned, these little blighters are surprisingly bouncy and will go EVERYWHERE!
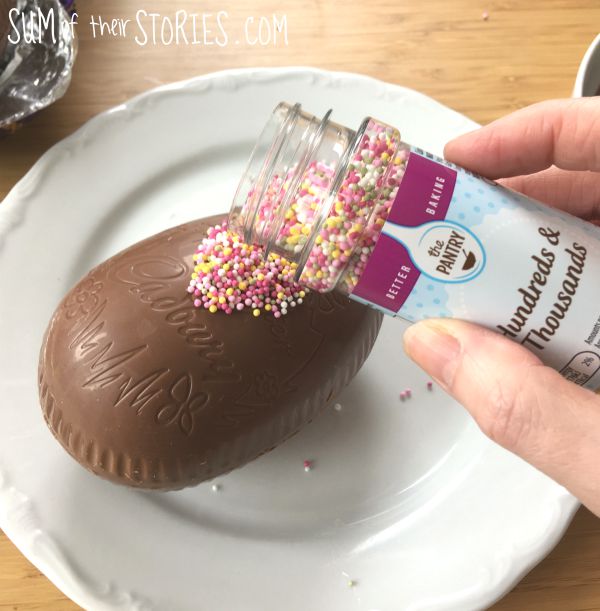
Give the egg a shake upside down over the plate and then leave to set for a few minutes. You can return it to that foil nest if you’ve not thrown it away.
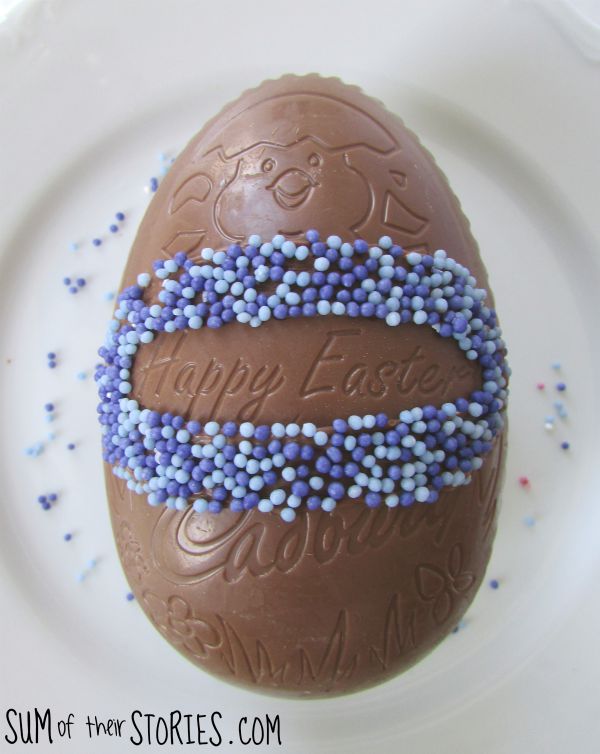
You can use different colours of sprinkles to get a different look. For this blue heart I painted the chocolate heart just a little bit bigger which I think I prefer.

As the eggs I had bought had the Easter message and design already on them I played around and tried to highlight the Happy Easter message by circling it with chocolate and sprinkles. I feel this is a bit less successful but I’ve included it here in case you love it!
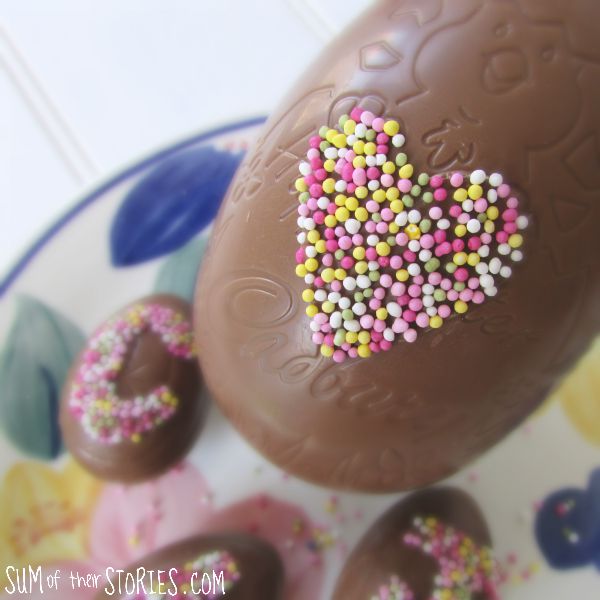
Personalised Creme Eggs
As my Easter egg boxes came with small sized creme eggs I decided to have a go at decorating them as well, this time with a little personalisation.
The method is exactly the same, we are using melted chocolate as an edible glue to stick sprinkles where we want them.
Paint an initial onto the small chocolate egg with the melted chocolate and then sprinkle quickly with your sprinkles before the chocolate sets. I found it helpful to just tidy the letters up before the chocolate set by pushing the sprinkles in gently with the end of the paintbrush. You could use the handle of a tea spoon to do this too.

These turned out quite nicely, if I do say so myself!

A simple and inexpensive way to create a personalised chocolate Easter egg.

This Easter egg decorating idea was originally shared as part of a Pinterest Challenge:
Julie
I’ll be sharing this Easter idea at some of these link ups
You might enjoy checking out some more of my creative Easter projects:


