Upcycled Jar Spring Terrarium
/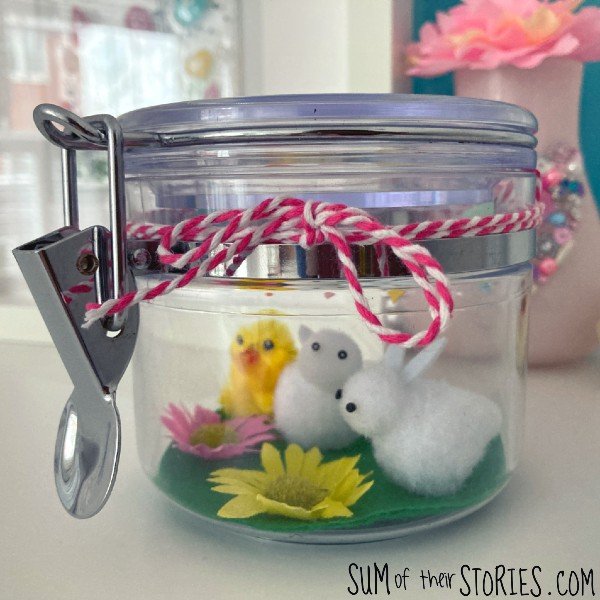
Create a pretty spring scene in a jar with just a few simple and inexpensive items you might already have at home.
Do you ever have a craft project idea and then just have the most fun putting it together? That is what happened here for me. I think I smiled the whole way through making this little spring terrarium!

Today I’m joining the Upcycle Challenge Blog Hop. If you visit Sum of their Stories regularly you will know how much I love bringing an upcycled element to my crafting so this challenge is right up my street! Stay tuned at the end of this tutorial to see the other upcycled ideas in the challenge.


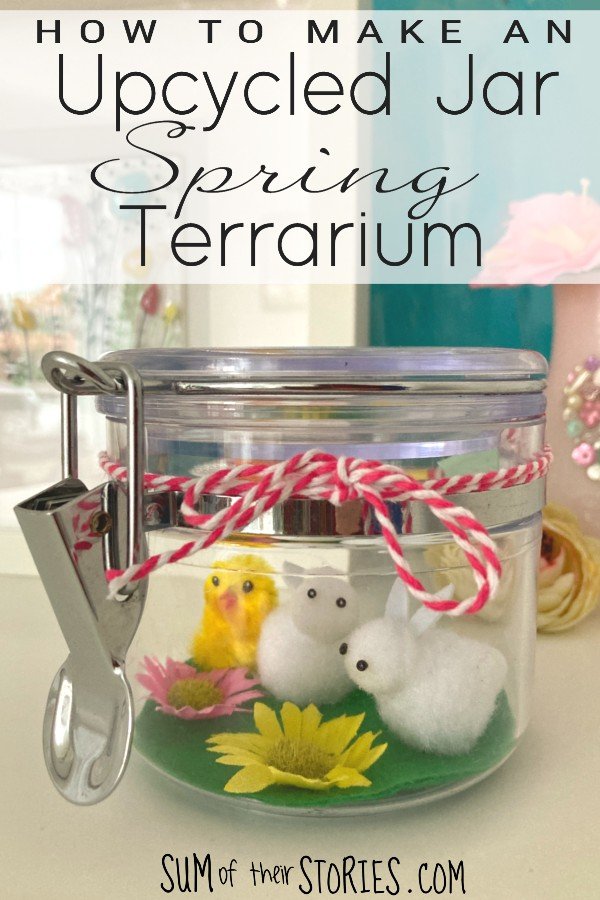
I started this project when I came across these super cute little bunnies in a local £1 shop. They are meant to be used on cakes of course and were on the shelf along side the normal little fluffy chicks that have been around for so many years. I love the traditional little chicks, my mum always made a chocolate cake at Easter and made a little Shredded Wheat chocolate nest to go on top and be filled with fluffy chicks. She would wipe off any chocolate and reuse the chicks year after year, until they got really tatty and their eyes and beak would move and give them strange expressions!
Anyway, let’s get back to making this jar spring terrarium. Exactly what you use for your spring decoration will depend on what you already have or can find easily. I’ll show you what I used but of course you can scour your house and see what little bits and pieces you have that will work.
Supplies needed for a Spring Terrarium
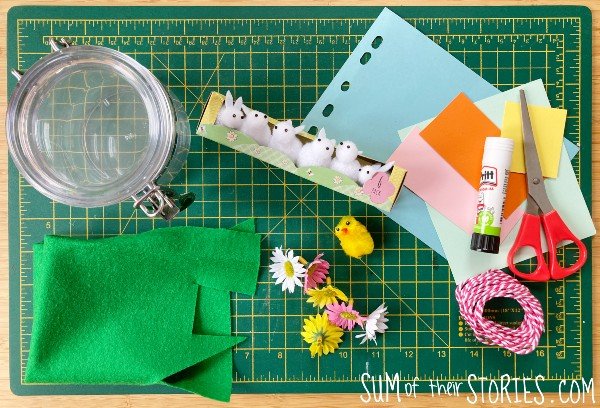
an old glass or clear plastic jar
Easter cake decorations, like my bunnies and chicks
Scraps of colourful card
Glue for fabric - I used Hi Tack but something like a Aleene’s tacky Glue or hot glue would work too. Ignore the Pritt Stick glue in the photo, I didn’t end up using that after all!
Scissors

The jar I’m upcycling here to make this terrarium is plastic. I think it originally came with chocolates or sweets in it and as it was very cute, of course I kept it! We kept sugar in it for several years. It did have a squishy, rubbery ring around the lid to make it airtight but a few months ago that split and fell off meaning this jar isn’t really suitable for keeping food in any more.
I actually think a slightly taller jar might have worked better for my spring decoration but upcycling is all about using what you have isn’t it?
How to make a simple Spring Terrarium Scene

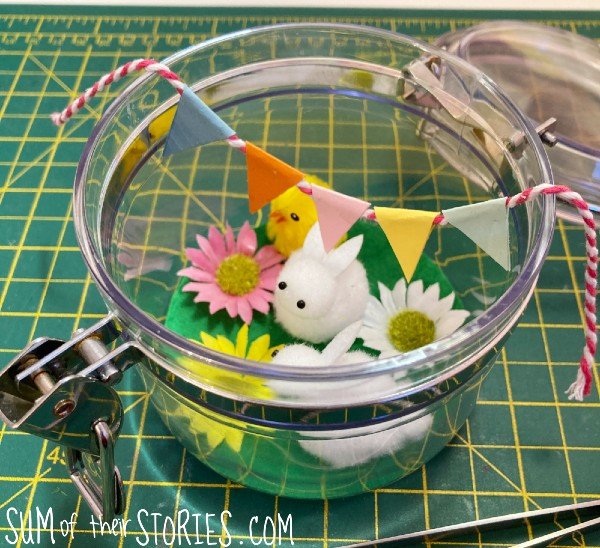
First draw around your jar onto the green felt and cut out a circle. Pop it into your jar. No need to glue it down unless you are sure you won’t want to swap out the decoration at some point in the future.
The flowers I had in my stash had stems on the back which meant the flowers wouldn’t sit flat on the felt.

If yours are the same then just take them apart and snip off the stems.

Apply blobs of glue to the felt and then stick down the bunnies, chick, flowers etc
Making the bunting

Fold the pieces of bright card and snip tiny triangle shapes. Cut the triangles so that the top edge is the fold of the card so they are doubled up.
Cut a length of bakers twine and then glue the triangles over the twine.
My bunting has 5 flags but obviously how many you need will depend on how big you make them and how big your jar is.
Add finishing touches to your spring terrarium
Lay the garland of bunting across the jar and close the lid.
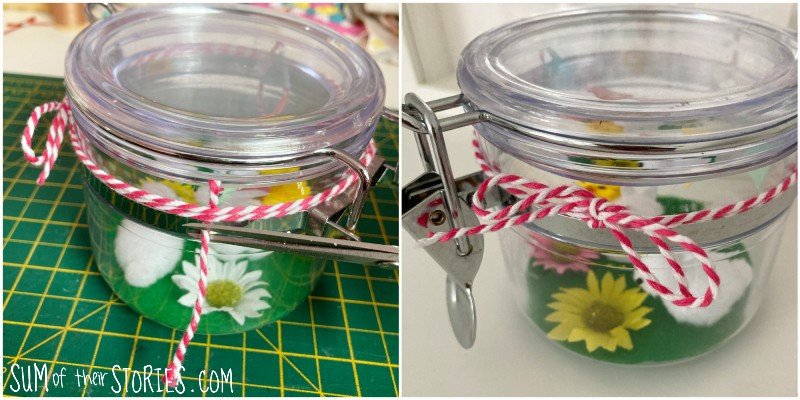
You could glue the bunting in place. I’m not doing that as I think I’ll be redoing this terrarium jar idea for other holidays and seasons now I know how much fun they are to put together.
To secure my bunting I wrapped more bakers twine around the jar going over the bunting ends and then tied it with a bow. I snipped off the excess.


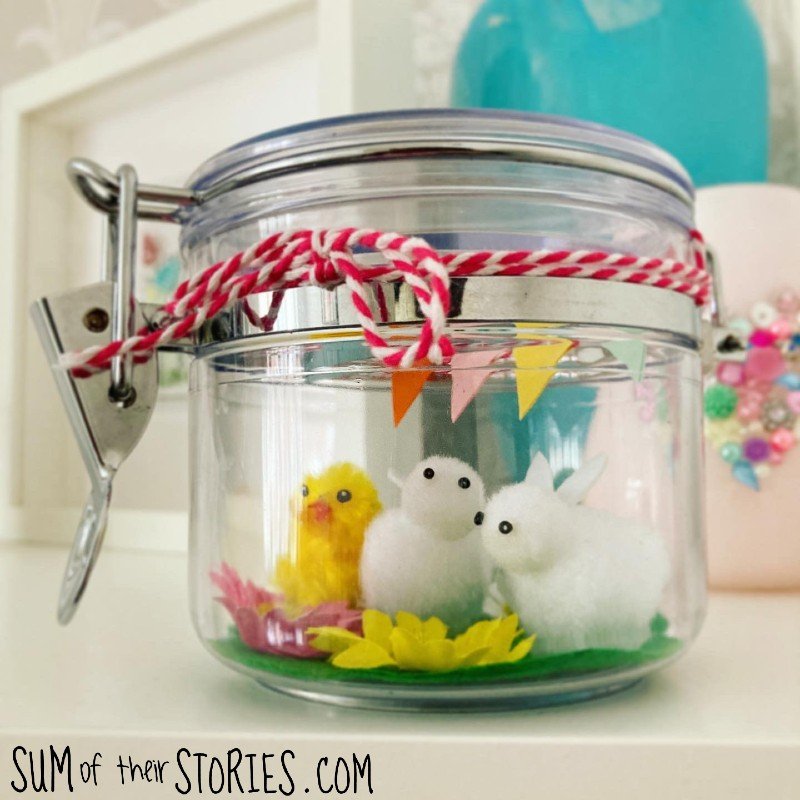
That’s it, a spring terrarium! Isn’t it cute? And no plants to worry about getting too wet or too dry like you get with a regular terrarium!
You could make little spring scenes in a jar like this using any see through jar, it doesn’t have to be a one with a fancy catch like mine. The kids could make them and add in tiny toys, Polly Pocket would love to visit a little terrarium like this wouldn’t she? Or if you have any Sylvanian Family toys, or dolls house bits and pieces… the options are endless! And because nothing is glued in permanently you could easily switch the scene to fit the season or your mood.
I think I’ll be adding this little terrarium to a tray with some flowers and other bits and pieces as an Easter table centrepiece but for now it’s just sitting on the windowsill beside me looking cuter than cute!
Now let’s take a look at the other projects shared in the Upcycle Challenge Blog Hop.
Purple Hues and Me | Milk Jug Vase Knockoff
Life as a LEO Wife | Farmhouse Bunny Sign with Family Names
Stone Cottage Adventures | DIY Double Duty Door Hanger
Sum of their Stories | Upcycled Jar Spring Terrarium (that’s this tutorial)