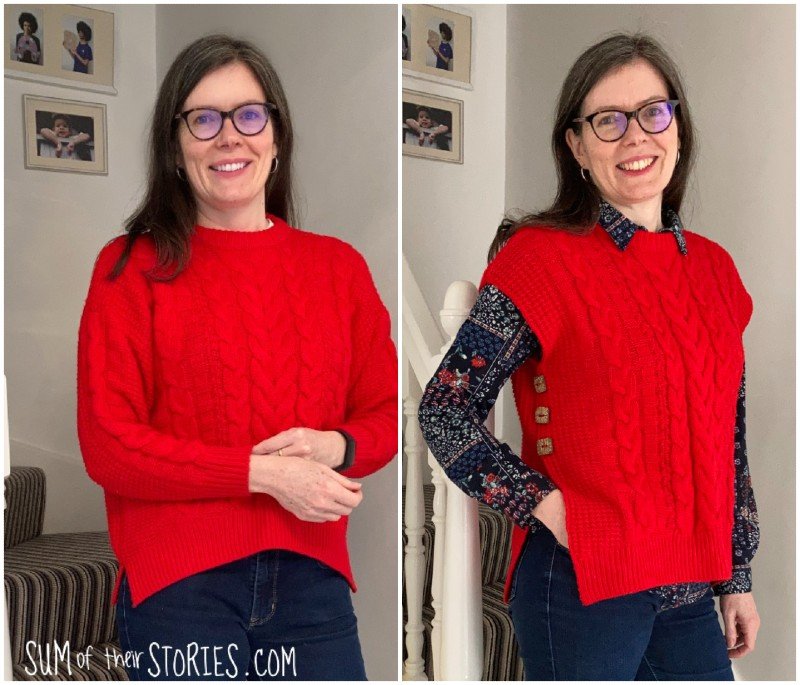
Sweater to Sweater Vest Refashion
/How to refashion an old sweater into a sweater vest with partly open side seams and feature buttons.
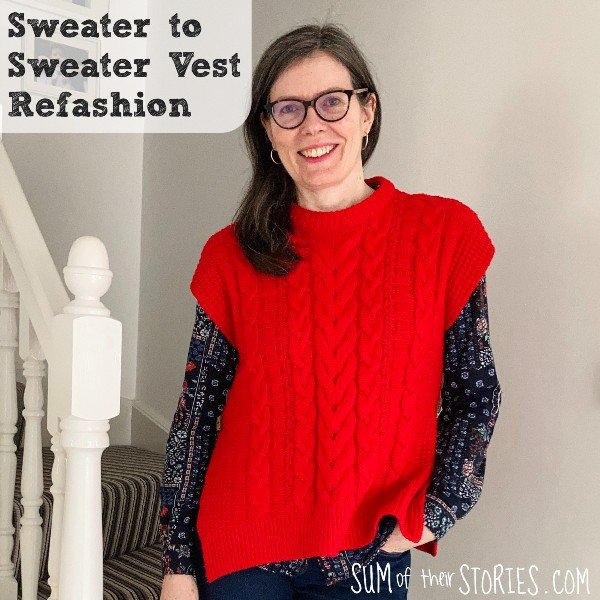
Sweater vests are back in fashion! Have they ever really gone out of style? To be perfectly honest I have no idea! I like them, I’ve worn them on and off over the years. They are really useful for that inbetween weather we get so often here.
I’m joining the Do it Over Designer Challenge today and I’ve “done over” an old sweater and turned it into a sweater vest.

Apologies for this poor and rather badly over exposed photo. I took this quickly and then didn’t check it was ok before I started my makeover project so it’s all I’ve got to show you of the “before”! I’ve had this sweater for a while, it is 100% acrylic but very warm and snuggly. I love the vibrant tomato red colour too, it’s very me! It wasn’t an amazing fit on me though, it was a little too wide although that’s not a big issue for cuddly knitwear. The main problem was the sleeves were just a bit too short.
I’ve been seeing a lot of rather lovely sweater vests online and in the shops, especially chunky ones with open sides. I’d actually call them tank tops, I’m not sure if that’s a bit dated or if that’s what the young people still call them over here in the UK, I may be showing my age! Whatever we call them, I thought maybe I could transform my bright red sweater into a sweater vest.
This was quite a trial and error project, I wasn’t entirely sure where I was going with it but I’m pretty happy with the new garment I have ended up with.
Let me show you how I did it, then you can grab an old sweater of your own and give it a go.
You will need:
An old sweater
Sharp scissors and a seam ripper
A needle with a large eye
Large buttons

This will only work with a sweater with drop shoulder or set in sleeves. If they are dolman, raglan or something like a circular yoke it’s not going to work. If this is like a foreign language to you then this guide from Dora Does might be helpful. Basically what you are looking for is a sweater with a seam across the shoulder.
Removing the sleeves
First thing to do is take off the sleeves. Assuming you are upcycling a shop bought sweater this can vary from really easy to really quite tricky. Often sweaters are sewn together using the exact same yarn that they are made of and so finding the seaming thread to snip, without cutting into the knit fabric can be a challenge.
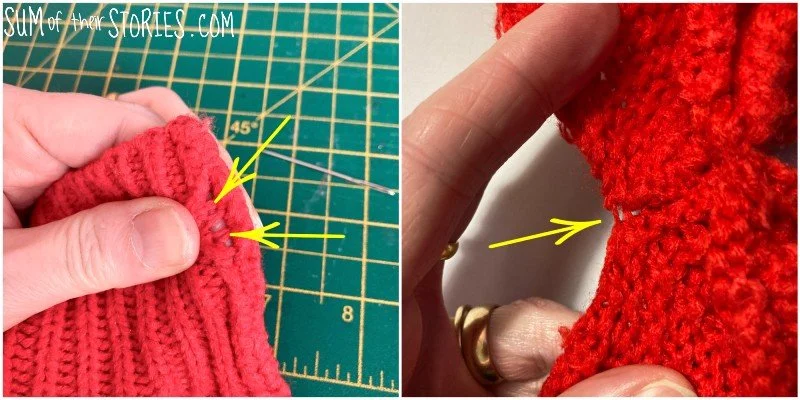
Start by pulling the seam apart, you should be able to see some stitches cross crossing the gap. They are the ones to snip.
The main tip I have is to go carefully and err on the side of caution. Once you get started it becomes easier to see the threads as you pull the edges apart.
If you get really lucky you’ll find a thread you can just pull and the whole seam will just unravel, other times you’ll have to painstakingly pull each stitch through, one at a time. Try to pull each stitch rather than cutting too often. Not only does this reduce the risk of snipping the wrong thread, the long lengths of thread that you are unravelling will come in handy in a minute.
You might find it easier to locate the side seam from the wrong side of the knitted fabric. You can see it pointed out here. It really just depends of the method used to sew your sweater together originally.
For an open sided sweater vest, open the side seams
Once the sleeves were removed I also undid the side seams. I used exactly the same method as before, slow and careful!
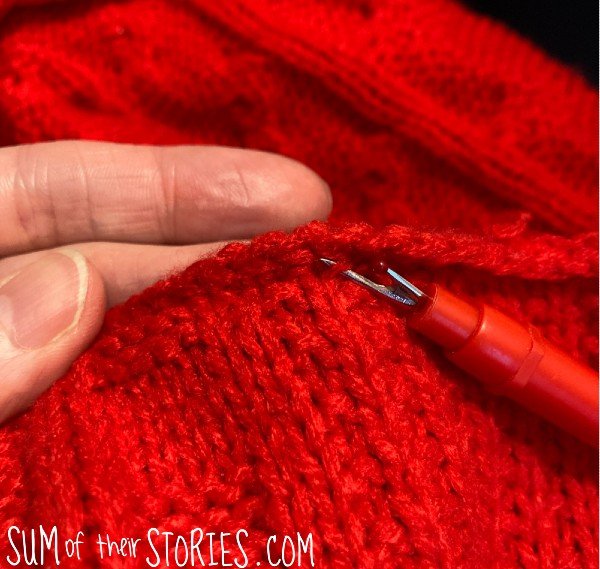
Check and repair
No matter how careful you are you will most likely have at least one point where you caught the knitting and pulled or snipped somewhere that you shouldn’t have. No worries, just sew up any loose threads and unconnected knitted stitches. You can use the lengths of yarn you’ve just unpicked if you managed to save them. Or maybe unravel a little of the removed sleeve to use that yarn so it’s a perfect match.
Reshaping the sides
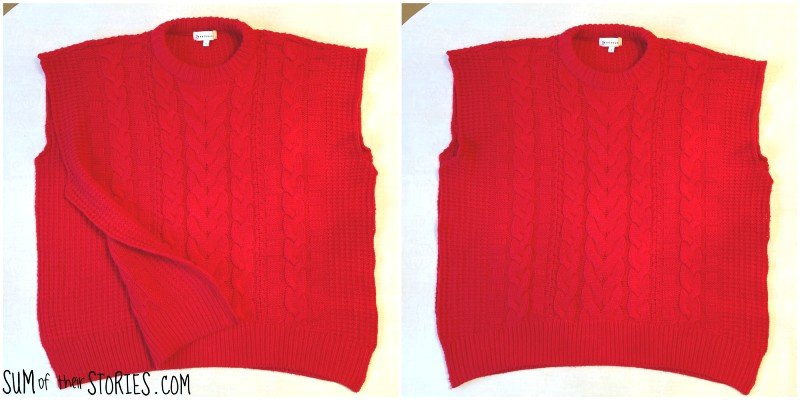
At this point I tried on my deconstructed sweater, it was kind of like a tabard, just a front and back joined at the shoulders.
This is where the trial and error element of this project really started. I wanted to embrace a bit of an open sided look, like the ones I’d seen in the shops and online.
I considered the following ideas:
Only unpicking part of the side seam and leaving a few inches centrally to hold the sweater vest together (I would have had to sew it back up as I’d already completely undone the side seams)
Adding ribbon or crocheted ties to the side seams to hold the side seams together, maybe tied with a bow or perhaps some sort of lacing effect
Adding buttons down the side seam, with button loops maybe or by overlapping the sides
As I mentioned at the beginning, this sweater was a rather baggy fit and felt too wide for most of these ideas so I decided to try idea 3 and bring the sides in a little by overlapping them. Once I was happy with the positioning I used a safety pin to hold them in place as I removed my “tabard”.
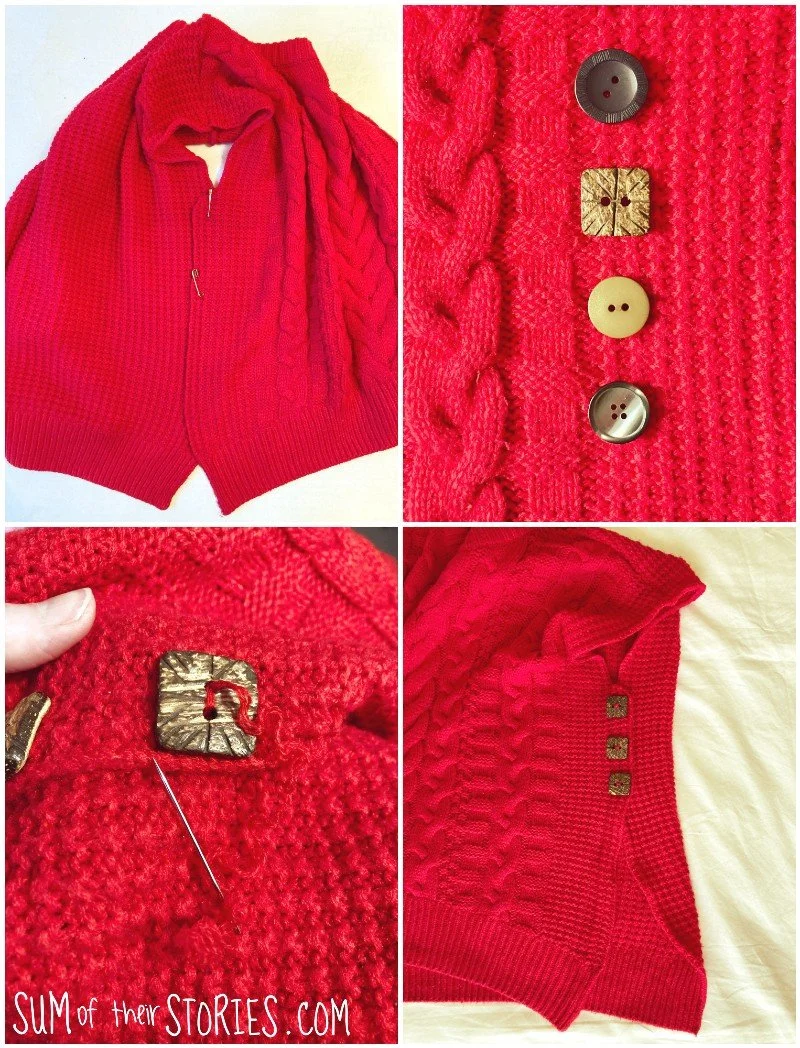
Then I choose some nice buttons from my button tin, and asked on my Instagram stories which people thought were the best. It was unanimous - the square ones that had been rescued from an old man’s cardigan. They were my favourites but sometimes it’s nice to get a second opinion!
Sewing the buttons on was very straightforward, no button holes, they are just decorative and stitched through both layers.
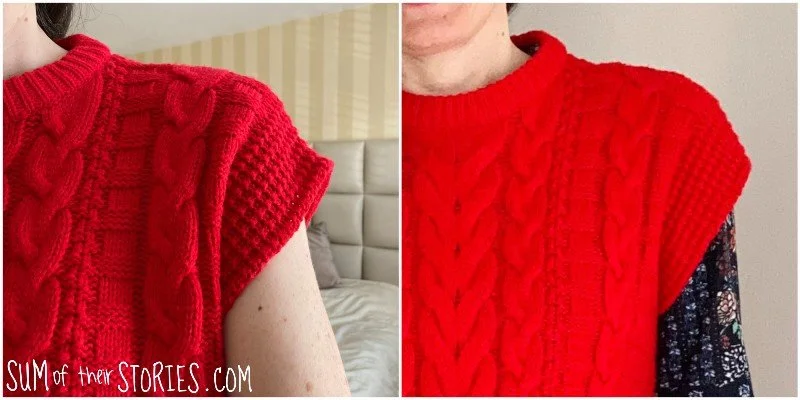
Now I tried my sweater vest on again.
Getting there but not ‘just right’ yet.
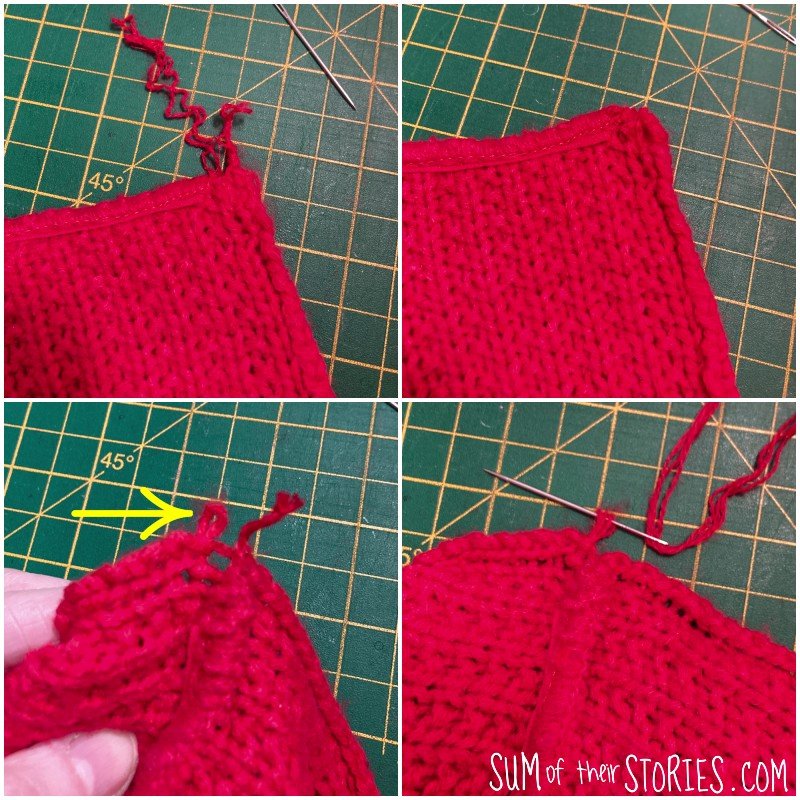
The shoulder seams where jutting out in a slightly weird way.
I took a length of the saved yarn and threaded it onto a needle. Then starting half way up the armhole, I stitched the thread all the way round the top and back down the other side, again to the halfway point. It doesn’t show at all as it’s the same yarn and it’s easy enough to adjust its length, just making it tight enough so it is pulling that top seam down just a fraction. Then I secured it at both ends and sewed the ends in of course. By only adding this “holding” yarn around part of the arm hole it’s still stretchy and doesn’t restrict your arm movements.
The last thing I did was to wash and block my new sweater vest. Blocking is where you lay a knitted or crocheted piece out flat and gently force it to take the shape you want, pinning it into place if necessary, and then allow it to dry.
By pulling my new garment down in the centre front I was able to reduce how much it curved up at the front.
That was it! Ta dah!
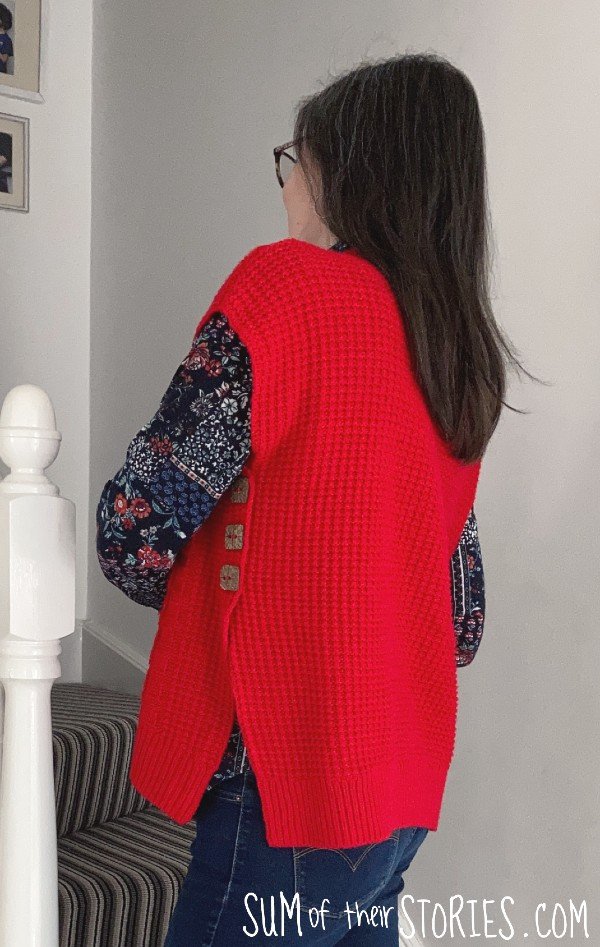
Reality check time - I had a right mare with this photo shoot, trying to get some decent photos whilst the weather is awful and I’m stuck inside. I took a dozen truly dreadful photos trying to show you the side of the sweater vest, all of them super awkward, this is the best of a bad bunch but it gives you an idea at least.
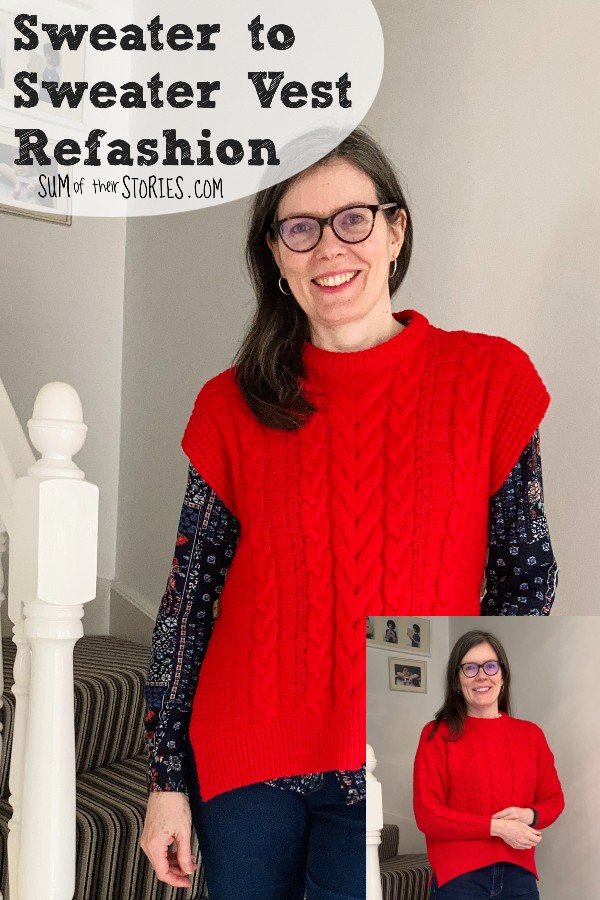
A sweater I really wasn’t wearing very often, turned into a useful sweater vest or tank top. Perfect for spring and autumn weather hopefully. Those transitional days when you just need a little extra warmth.
Here I’ve outlined the adjustments I needed to make on my sweater to sweater vest makeover, what you need to do will depend on what your sweater is like to start with of course but hopefully you are feeling inspired.

Now let’s take a look at what the other creative bloggers have “done over” this month in the Do It Over Designers Challenge:
Birdz of a Feather - Thread Holder
Exquisitely Unremarkable - Frame makeover
Little Vintage Cottage - Knock Off Anthropologie Vase
Modern on Monticello - Easy Wood Board Photo Display
Purple Hues & Me - Retro Candlestick Holder
Southern Sunflowers - Pedestal Bowl Makeover
Sum of Their Stories - Sweater to Sweater Vest Refashion
Tea and Forget-Me-Nots - Cork Bulletin Board
The Apple Street Cottage - The Junior Dress Form
If you enjoyed this garment makeover you might also be interested in these refashion ideas: