How to give a Denim Jacket a fresh new look
/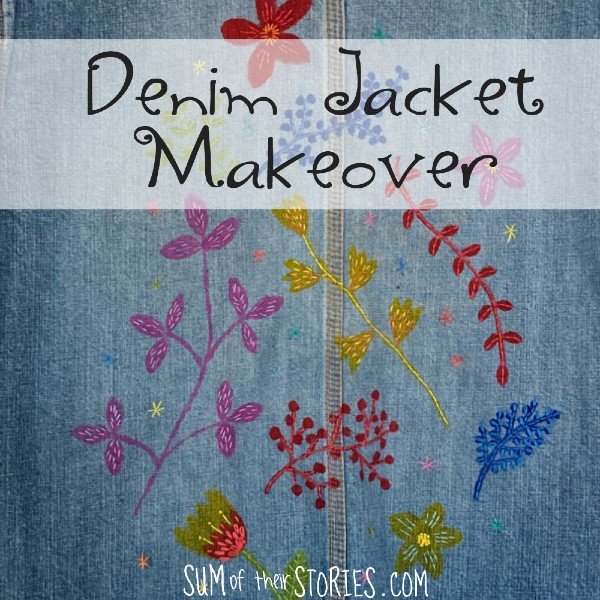
How to give an old denim jacket a fresh new look with fabric paint and some simple embroidery.
Read MoreHow to give an old denim jacket a fresh new look with fabric paint and some simple embroidery.
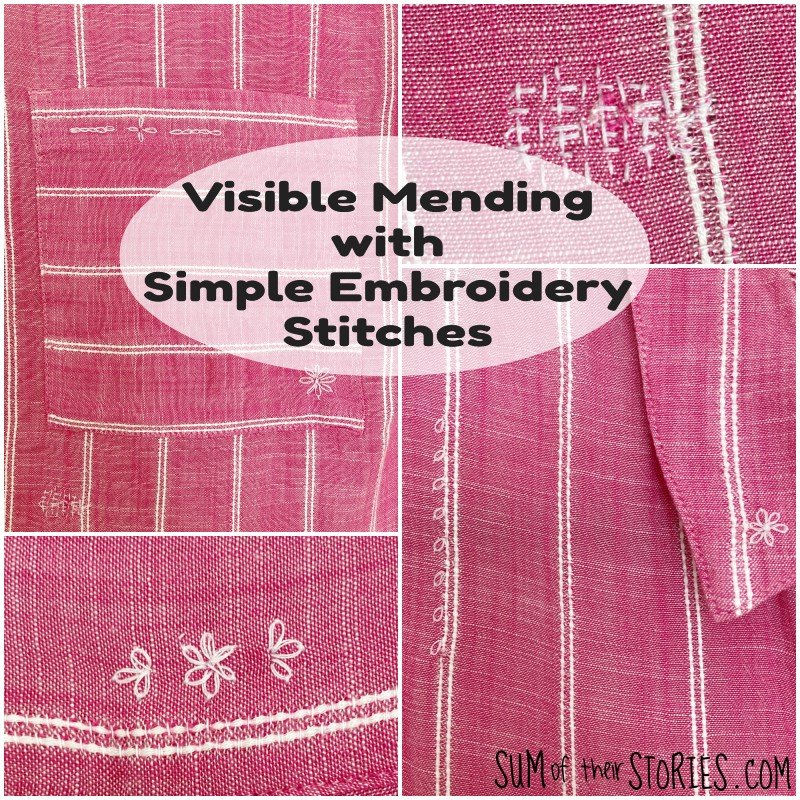
Read MoreHow to fix small holes in old garments using simple embroidery stitches and a visible mending technique
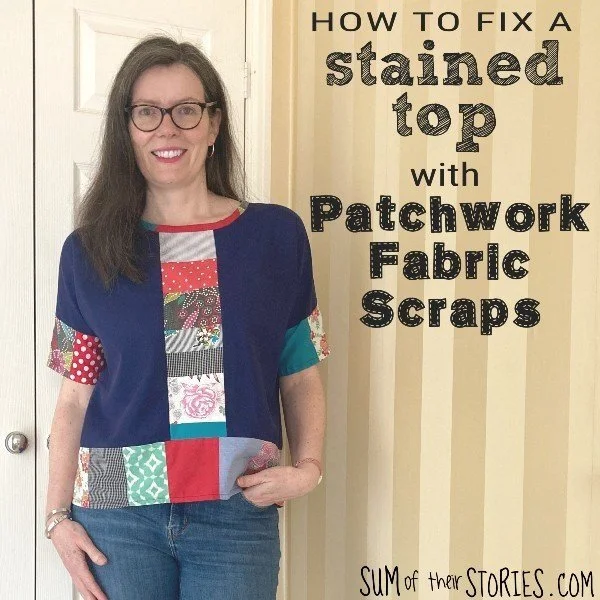
Read MoreHow to repair a stained top using a panel made from patchwork fabric scraps
Read MoreThe simplest of t-shirt refashions, a summery lace heart applique.
Read MoreHow to fix a top that has sleeves that are too tight. A simple sewing refashion idea.
Read MoreHow to give an old denim jacket a new look with scraps of brocade upholstery fabric
Read MoreUpdate an old sweatshirt with an embroidered patchwork heart applique. Great to cover a logo or design you no longer want or to upgrade a plain top.
Read MoreHow to turn a men’s button down shirt into a summer top for a woman. A simple shirt refashion.
Read MoreHow to turn an old men’s shirt into a fitted women’s blouse. A men’s shirt refashion
Read MoreHow to add a little Suisse or Chicken Scratch embroidery to an old gingham top to give it a refashion and a whole new look.
Read MoreEmbroidery embellishment on clothing seems to be everywhere in the shops right now and it's easy to create a little of this look at home.
Read MoreA quick and easy way to brighten up a plain old jumper or sweater, giving it a simple daisy embroidery.
Read MoreA really quick and easy way to give a plain cardigan a new look.
Read MoreTake an old, thin, limp scarf and turn it into a fuller infinity loop scarf in just a few simple steps.
Read MoreI'm Julie, I love making things. This is where I share my ideas and enthusiasm