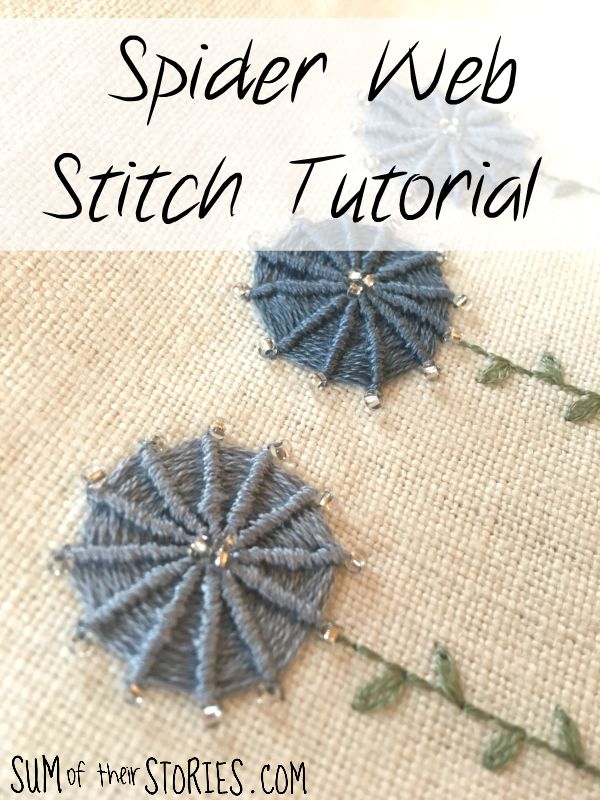
Spider Web Stitch Tutorial - A little tribute to Pearl - 2018
/

30th November was my nan Pearl’s birthday so on this day each year I’ve been sharing something that she made which I still have as a little tribute to her. It’s all to do with the blog name - sum of their stories - and its origin, you can read more about that here.
This year is a little bit different, instead of something she made I’m going to share something she taught me to do; Spider Web stitch.
Apparently this embroidery stitch is also called Ribbed Spider Web, Ribbed Wheel, Whipped Spider Web and I’m sure lots of other names too. My nan called it spider web stitch so that’s good enough for me.
My nan taught me so many craft techniques over the years, but for some reason I have a very distinct memory of my spider web stitch lesson. It was summer, because we sat outside, and I was about 8 or 9. Sadly I can’t sit on a bench in the sunshine with you and show you how to do this stitch in the same way my nan did for me but I’ve taken lots of photos and made lots of notes which is the next best thing!
To embroider a spider web stitch you need:
Embroidery thread - I always use DMC thread
Fabric - pretty much any will work
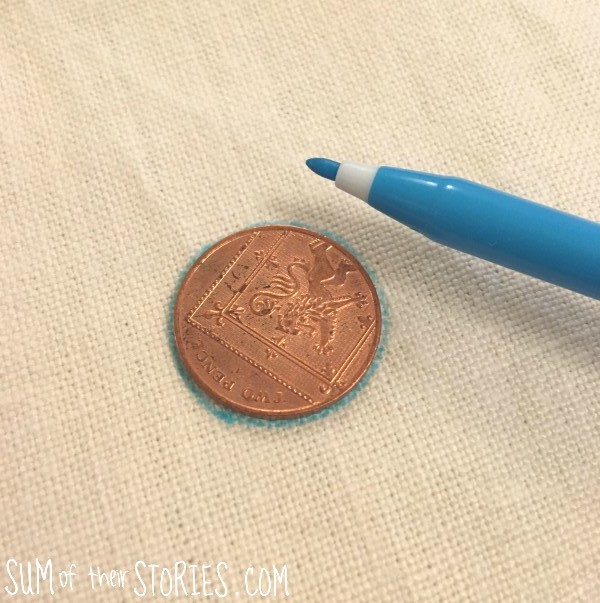
A coin - I used a 2p which is about 2.5cm or 1” in diameter
Water or air soluble pen (back in my nan’s day she used tailors chalk) mine is this one
Start by drawing round the coin with the soluble pen.
Thread your needle with a length of embroidery thread, use 2 of the 6 strands. Use a knot at one end to secure it.
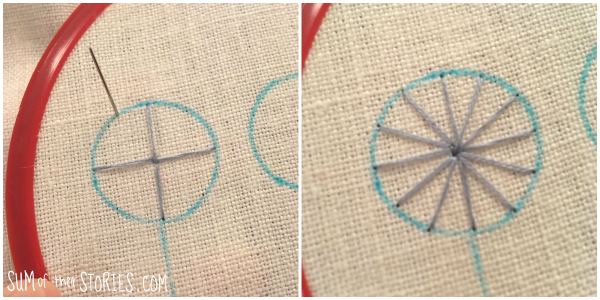
Starting in the middle, stitch spokes evenly round your circle. I put 12 spokes but you can put any number, you do need at least 6 though really.
It’s easy to space the spokes if you start with four quarters and then it’s simple to divide each 1/4 into 2 evenly by eye.
Cast this thread off securely and then rethread your needle with a length of thread with 3 or 4 strands.
Knot the end and then from the back, bring the needle up near centre of your spokes.
From this point on you’ll only work on the top of your fabric, the needle only goes through to the back if you need to cast off and start a new thread.
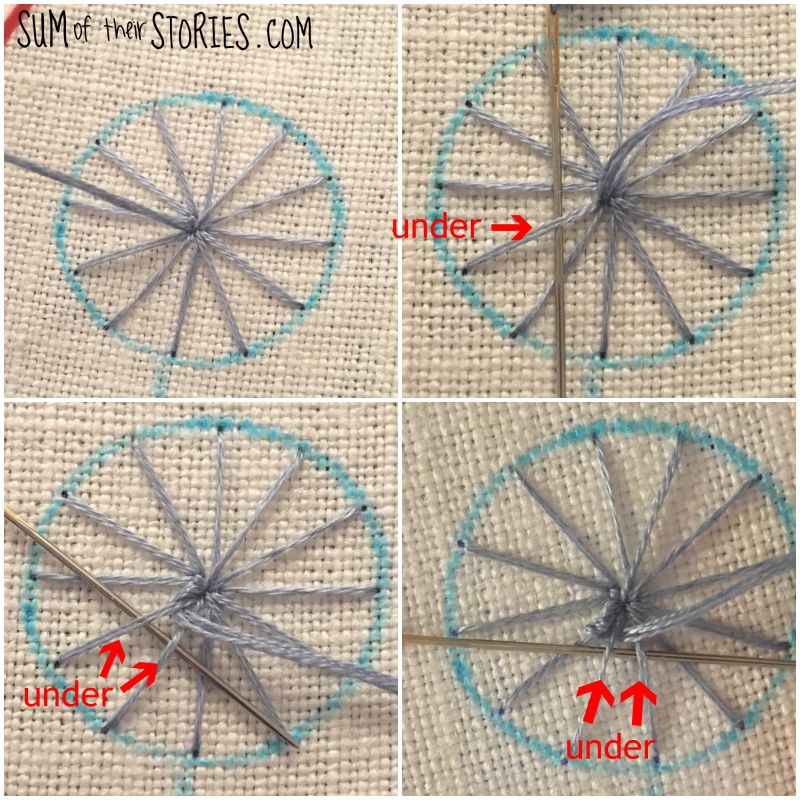
step 1: Slip your needle under the nearest spoke to the left, from right to left, pull up taut but not to tight.
step 2: Now slip the needle under that same spoke and the next to the left. This wraps the thread around the 1st spoke.
That’s it, just repeat step 2 over and over, round and round.

At some point you’ll need to finish one thread and start another, there’s no way you can work with a length long enough to work a whole spider web stitch in one go, you’d get in a right old tangle!. Just take the needle and thread through to the back close to a spoke and cast it off securely. Then start a new thread, with a knot, come back up in the same place and carry on as before.
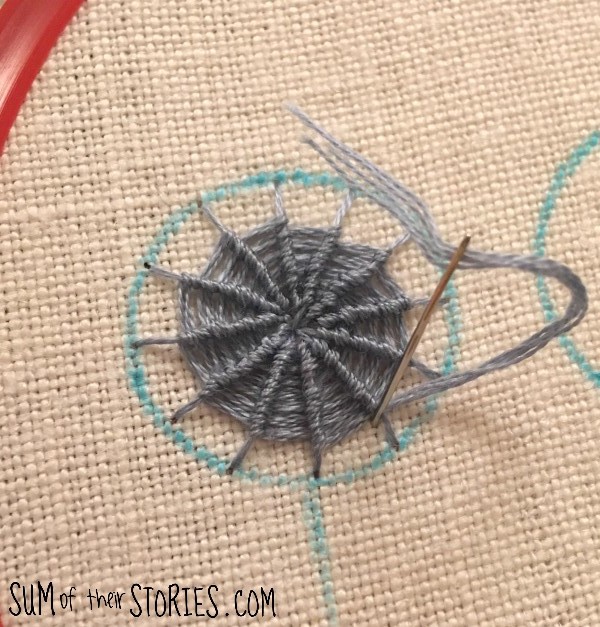
When you get to the end of the spokes just cast off on the back again and you’re done. Yay!
I turned this spider web into a flower by adding a simple stem and leaves.
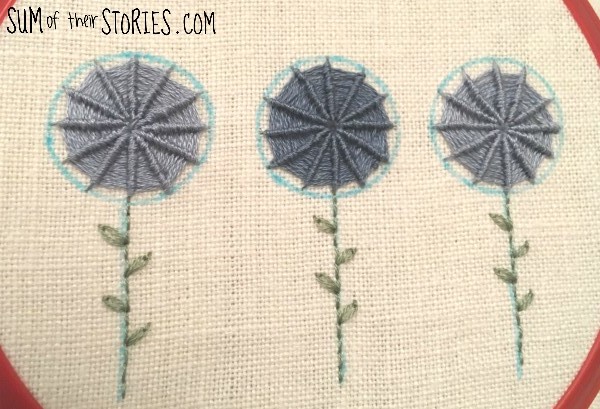
The blue fabric pen I used just washes away.
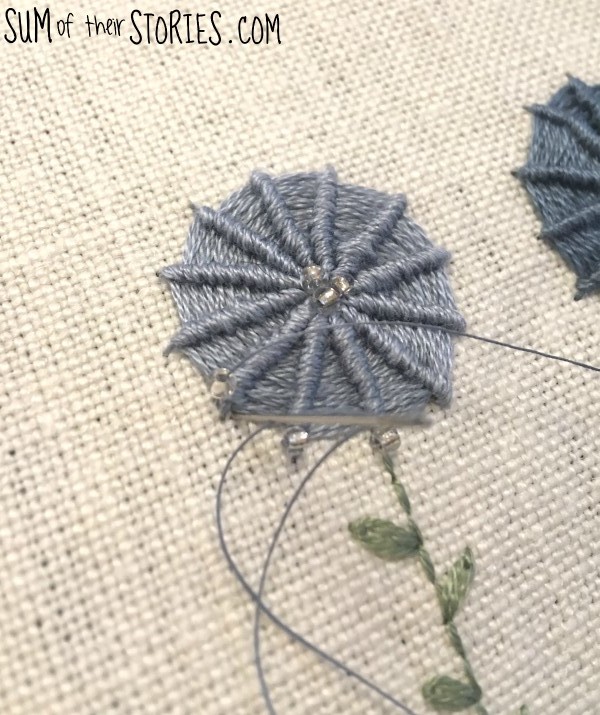
I added a few beads too, just little seed beads I had in my stash. I stitched them on with regular sewing thread, 3 in the centre and one at the end of each spoke.
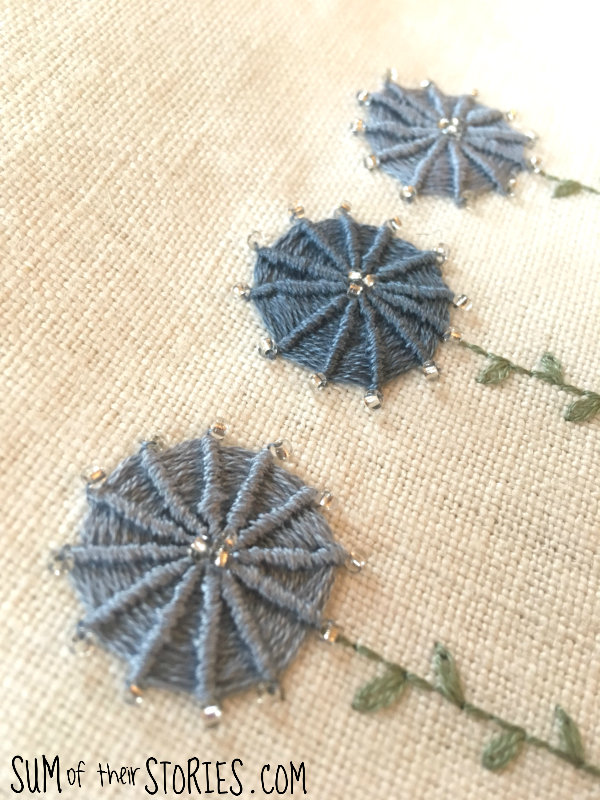
These spider web flowers can be used to decorate all sorts of things, anywhere that you’d like a round motif. They look great in embroideries of bunches of flowers when mixed up with other flower stitches like lazy daisy and woven wheel stitch. They add great texture.
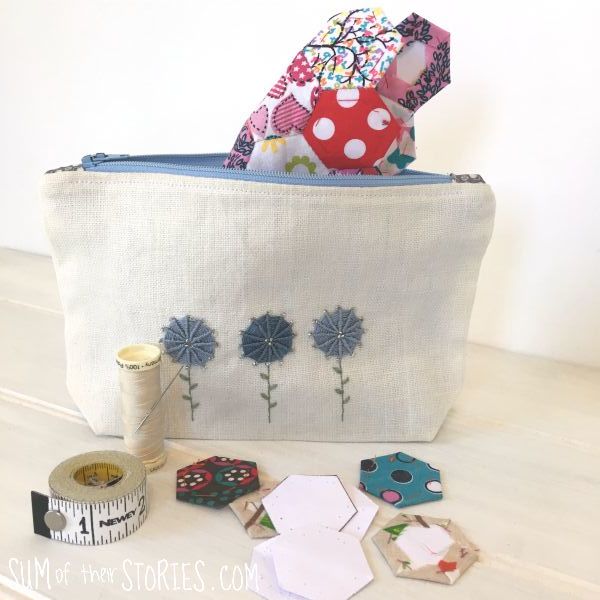
I’ll share what I make with my spider web stitch flowers another day, at the moment it’s still just a piece of embroidered fabric! I’m thinking a zip up pouch, drawstring bag or clasp frame purse.
Update: I made a zip up pouch:
So today I’m remembering my nan, Pearl and thinking how happy she would be to know a) I can remember what she taught me and b) I’m passing it on to you.

I’ll be sharing this tutorial over at some of these link ups