How to use striped fabric to make a woven effect patchwork
/Well, this must be the snappiest title I’ve ever given a blog post! How to use striped fabric to make a woven effect patchwork, I guess it says what it is and you definitely can’t accuse me of being cryptic!
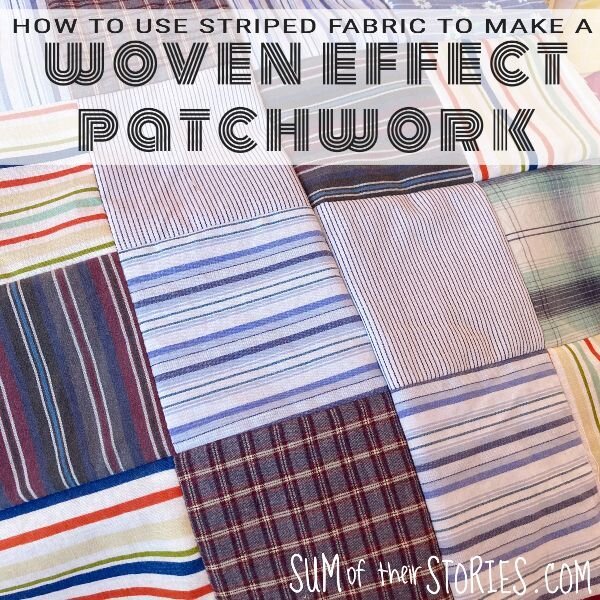

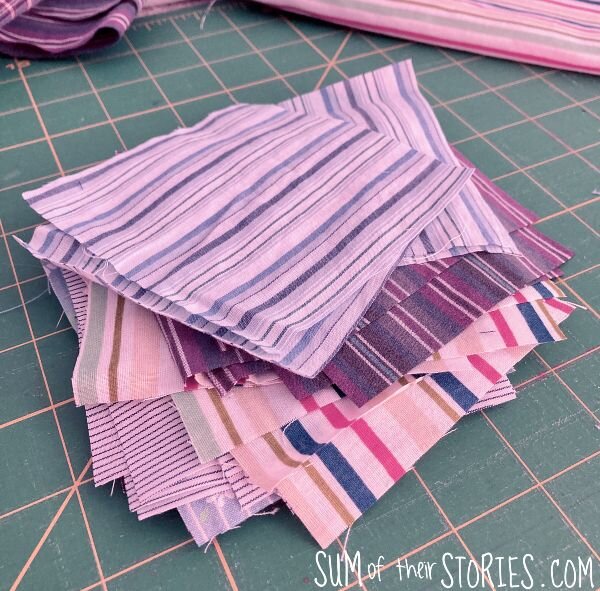
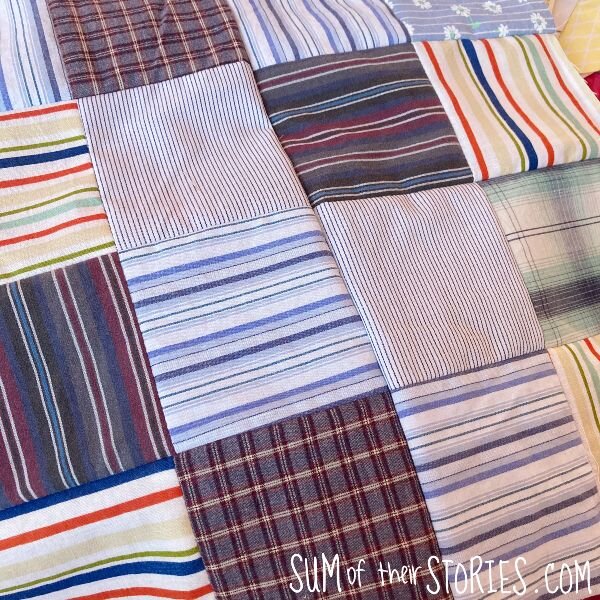
I had a pile of striped fabric pieces in my stash, mostly from old men’s shirt and pajamas and wanted to use the stripes in a fun way. I’ve scoured the internet to find out what this design is called but to no avail. I even asked on Instagram but no one has a name they use. I know I’ve not made this up of course, I’ve found some similar versions called mock basket weave or directional stripes. In the absence of a definitive answer I’m calling it woven effect, because it sort of is.
I learnt a lot making pieces of useable fabric from my stripy fabric stash and thought it was worth passing on some tips in case you’d like the idea and want to make something similar.
I love the finished look of this so much and it was an easy way to upcycle some old striped shirts. It’s a simple patchwork design, just squares but you do need to keep your wits about you, my seam ripper got quite a bit of action whilst I was doing this. I found if I let my attention slip for even a second I would stitch 2 squares together with the stripes lined up instead of at right angles!
It’s a really versatile design, you can make this with any size of square. I cut mine to 4” squares, but you could go bigger or smaller.
The colour balance shifts a bit on these photos, I’m sorry. I’ve adjusted them as best as I can but some are much pinker than others. When the sun shines in the window in the afternoons and messes up my photos but as it’s so nice to see a bit of sun I’m not complaining!
To make woven effect patchwork with striped fabric you will need:
Scraps of striped fabric; I used upcycled fabric, mostly from shirts and pajamas
Sewing thread and sewing machine
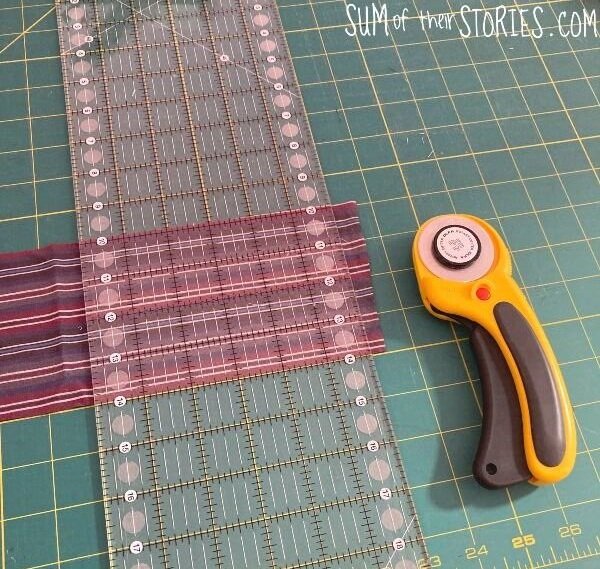
Ideally a rotary cutter, quilting ruler and cutting board, but you can cut your squares with dressmaking scissors if you don’t have those things
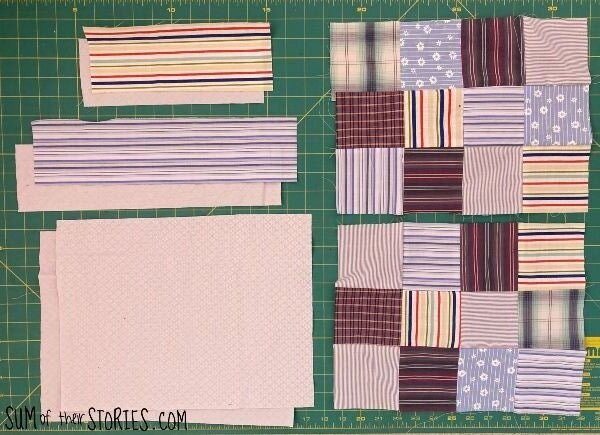
I started by cutting a big pile of 4” squares. I’d recommend cutting more than you think you’ll need, give yourself options if you can.
The more accurate you cut and sew your squares the neater your patchwork will be. Using a rotary cutter, a quilting ruler and a cutting board makes it much easier to get nice accurate squares, and much quicker too. If you don’t have them don’t be put off though, you can still cut perfectly acceptable squares with scissors, just be as accurate as you can. If you are thinking of buying a rotary cutter I have to recommend an Olfa one, I’ve had a couple over the years and this one is by far the best I’ve ever used.
Now you are ready to join your squares. I used a 3/8” (1cm) seam allowance throughout. I chose this as it’s the width of my walking foot which happened to be on my sewing machine at the time! Any seam allowance is fine as long as you keep it consistent throughout.
I would highly recommend laying your squares out first. Play around with the colours and find an arrangement that you like. You are placing the stripy squares alternating vertical and horizontal to get the ‘woven’ effect.
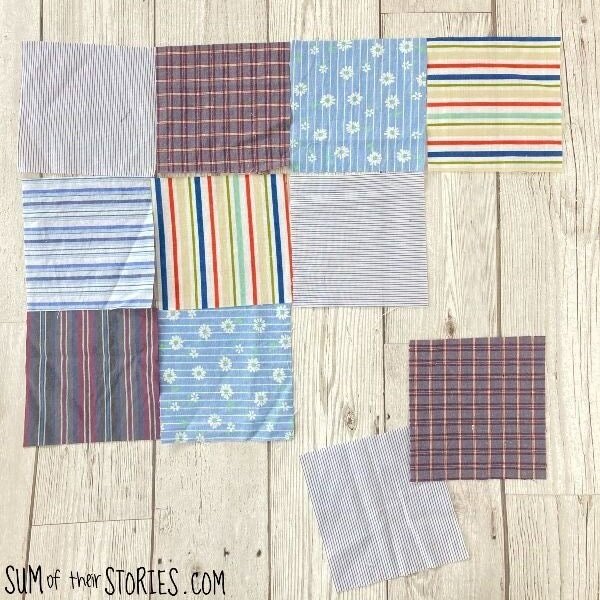
If, like me, you throw in a few check fabrics too then place them whichever way round you think looks best. I tried to look at the check patterns and choose the way I felt was more dominant. That is the beauty of laying the pieces out first, you can see what looks best.
At first I thought I could just join squares by picking any 2 at random and sewing them together one with the stripes vertical and one horizontal. Then I would join the pairs into 4’s and so on. The problem with a random method is that you don’t always end up with pairs of joined squares that are the right way round or that go well along one another. On reflection you are much better to do a little advance planning, it works out much quicker in the long run.
There are two ways to join your squares:
in rows, then join the rows together
in pairs, then join the pairs together to make a block of 4 then join the blocks of 4 to make blocks of 8 and so on

I found it easier to do the second block method, it seemed easier to keep the seams lined up but either is fine.
Press the seams open each and every time. You can finger press them rather than needing to leave the iron on all the time though. Just use the iron to really smooth the seams when your piece is the size you want.
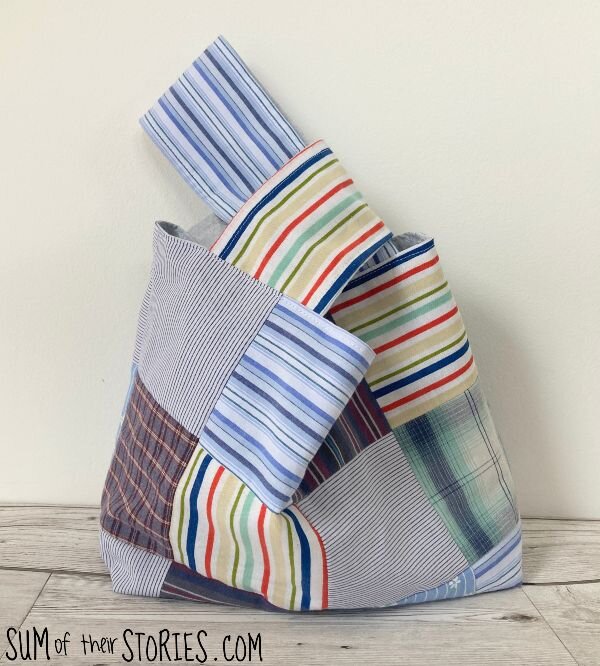
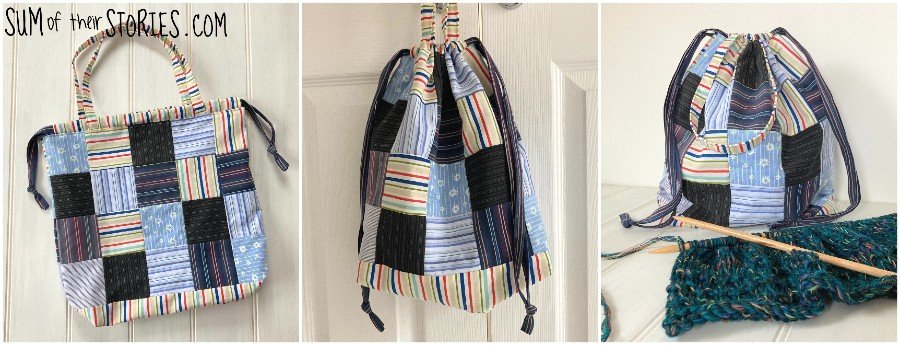
I made 2 pieces of patchwork with the woven effect that were 4 squares by 3 squares and then used it to make a slightly larger than the pattern version of my simplified Knot Bag. I really love these little bags, they are perfect for all sorts of things, but I tend to use them for project bags. They are a great size for a ball of yarn and a crochet hook or a small embroidery hoop.
Here is the pattern and instruction for this knot bag, it’s a really simple one to make.
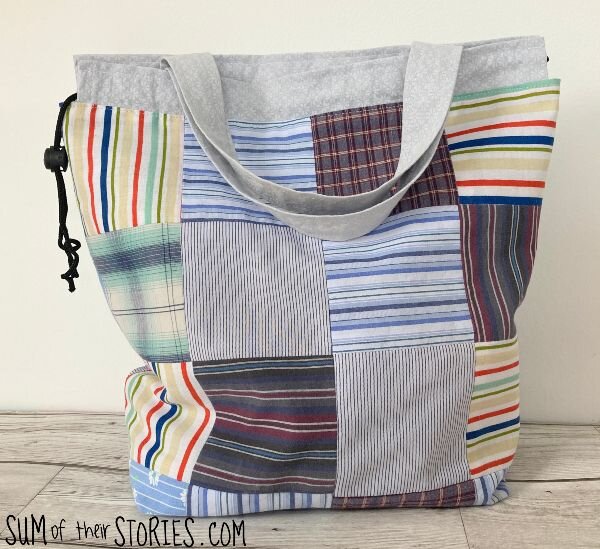
I also made a tote bag with a drawstring top with this woven effect patchwork too. This was more experimental and if I make any more I’ll write up some instructions and a pattern. I now have the pattern for this kind of bag, a drawstring but also with handles for easy carrying, written up and shared here: Sew a project bag with drawstring and handles
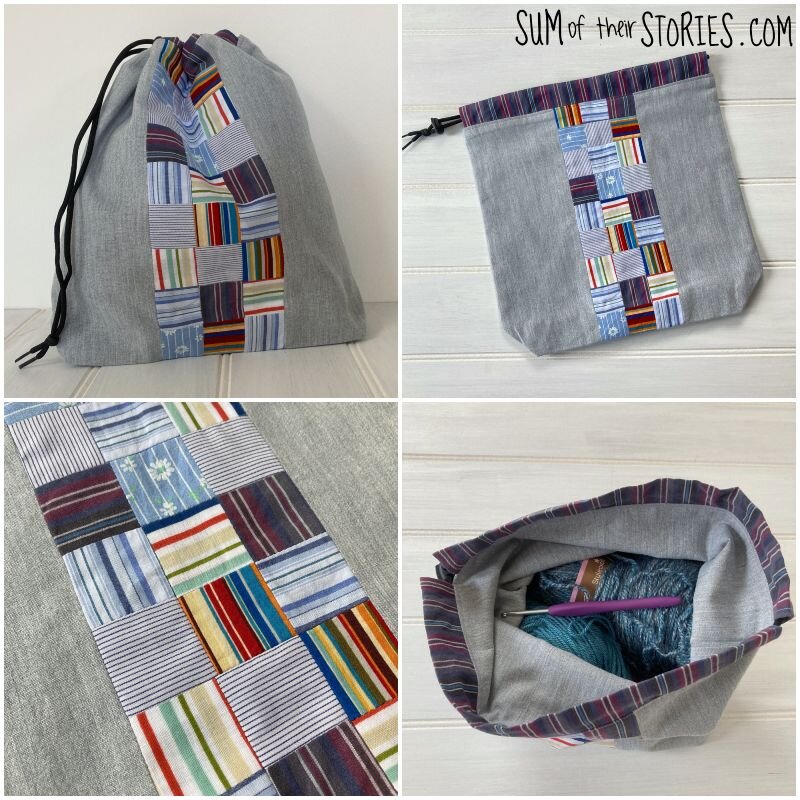
And here’s another example of the same versatile project bag with the patchwork top made with slightly smaller squares and with a plain piece of fabric at the bottom to give a slightly different look. This really is a versatile patchwork which can use all your striped scraps.
That’s it, a really easy and really effective patchwork design. You do need to pay attention a little to make sure you join the pieces the right way round. Even though I was thinking about it I still found I joined some with the stripes going the same way instead of at right angles! So my final top tip would be to check the pieces after you join them every time! If you do make a mistake, just undo it and have another go.
I used the idea to make bags but honestly you could use it for anything. Just make a piece of patchwork fabric whatever size you need and cut your pattern pieces from it.
I’m going to try some more bags with different size squares next so I’ll update here when I can.
Update: I experimented with smaller, 2” squares of striped fabric. These take longer to make into a decent sized piece of cloth of course. I ended up making a piece and adding it to a drawstring bag as a central panel.
Some of the bags I make can be found for sale in my Etsy shop if you don’t have time to make your own.
Julie